注意事項
本稿は後述する参考サイトでやられていることを Angular 6 でやってみた自分用のメモになります。
なので、書かれている方法がセオリーではないとか、色々知識足らずで誤認している場合があるかもしれませんので本稿を参考に学習される際はその点留意の上で、お願いします。
また、何かお気づきの点があったらご教授いただければ嬉しいです。
やりたいこと
- Mean stack の構築
- Angular Cli と npm で構築する(yeoman とか gulp とか grunt とかは使わない。というか本来Java屋なのでこの辺はよく知らない。)
- MongoDB は Docker 上に構築する
バージョン
- MongoDB: v3.6.4
- Express: v4.16.3
- Angular: v6.0.0
- Node.js: v8.11.1
作業の流れ
- Node.js の環境構築
- Angular の環境構築
- Express の環境構築
- Angular と Express の連携
- MongoDB の環境構築
- Express と MongoDB の連携
Node.js の環境構築
以下の流れで進めていきます。
- nodebrew のインストール
- Node.js のインストール
nodebrew のインストール
以下は Homebrew がすでにインストールされている前提です。
Homebrew のインストールについては公式を参照するのが一番良いと思います。
以下のように Homebrew を使って nodebrew をインストールします。
$ brew install nodebrew
Node.js のインストール
以下のように nodebrew を使って Node.js をインストールします。
(nodebrew の詳細を知りたい方は nodebrew github まで)
$ nodebrew install-binary v8.11.1
※ ちなみに、 nodebrew install を使うとすごく時間がかかりますので、注意。
これで Node.js の準備ができました。
Angular の環境構築
- Angular Cli のインストール
- Angular Application の作成
- Angular Application の動作確認
- ビルド設定の変更およびビルド
Angular Cli のインストール
以下のように npm を使って Angular Cli をインストールします。
(今回はグローバルにインストールします)
$ npm install -g @angular/cli
Angular Application の作成
以下のように Angular Cli を使って Angular Application の雛形を作成します。
(以下では、雛形作成時にルーティング用の設定ファイルの生成も同時に行うように指定しています。)
$ ng new sample-mean --routing=true
Angular Application の動作確認
ng new で作成した雛形はそのままで完全に動作します。
以下のコマンドで一旦動作することを確認します。
( --open をつけることでアプリケーション起動後に自動でブラウザでページが開きます)
$ cd sample-mean
$ ng serve --open
何も問題なければ、以下のようなページが表示されます。
 |
|---|
ビルド設定の変更およびビルド
ビルドされたファイルはデフォルトの設定だと dist/sample-mean に出力されます。
後述するバックエンドについても dist に置くため、出力先を以下のように変更します。
"outputPath": "dist/client"
設定変更後、一度以下のコマンドでビルドをしておきます。
$ ng build --prod
Express の環境構築
- Express のインストール
- バックエンドの実装
- トランスパイルと起動
Express のインストール
npm install で express と body-parser をインストールします。
インストールは ng new で生成されたルートフォルダ( sample-mean ディレクトリ直下)で行います。
ちなみに、 body-parser は request body のパースを行うためのミドルウェアです。
また、 --saveオプションをつけることで package.json の dependencies にインストールしたパッケージが自動で追加されます。
( @types/~ は Typescript用の型定義になります。)
$ npm install --save express @types/express body-parser @types/body-parser @types/compression
バックエンドの実装
ng new で作成した Angular プロジェクトに Express を使ったバックエンド部分を作り足していきます。
npm install express-generator によってインストールされる express コマンドを使うとng new みたいな感じでアプリケーションスケルトンが作成できますが、その場合フロントエンド部分も同時に作成されるようです。
今回は Express をあくまでバックエンドとして使いたいだけですので1つ1つ実装していきます。
まず以下のような構成でフォルダ、ファイルを作成します。
sample-mean/
 └ server/
    ├ bin/
    │  └ www.ts
    ├ routes/
    │  └ users.ts
    ├ app.ts
    ├ config.ts
    └ tsconfig.json
次に作成した各ファイルに実装を記述していきます。
{
  "compileOnSave": false,
  "compilerOptions": {
    "target": "es5",
    "lib": [
      "es2017",
      "dom"
    ],
    "declaration": false,
    "sourceMap": true,
    "outDir": "../dist/server",
    "moduleResolution": "node",
    "typeRoots": [
      "../node_modules/@types"
    ],
    "emitDecoratorMetadata": true,
    "experimentalDecorators": true
  }
}
import * as http from 'http';
import { app } from '../app';
import { serverPort } from '../config';

const port = process.env.PORT || serverPort;
app.set('port', port);

const server = http.createServer(app);

server.listen(port);
export const serverPort = 4300;
import * as express from 'express';
import * as path from 'path';
import { json, urlencoded } from 'body-parser';
import * as compression from 'compression';

import { userRouter } from './routes/users';

const app: express.Application = express();
app.disable('x-powered-by');

app.use(json());
app.use(compression());
app.use(urlencoded({ extended: true}));

app.use(express.static(path.join(__dirname, '../client')));

app.use('/api/users', userRouter);

app.get('/', (req, res) => {
  res.sendFile(path.join(__dirname, '../client/index.html'));
});

export { app };
import { Request, Response, Router } from 'express';

const userRouter: Router = Router();

const users = {
  users: [
    {
      id: 0,
      name: 'user0'
    },
    {
      id: 1,
      name: 'user1'
    }
  ]
};

userRouter.get('/', (req: Request, res: Response) => {
  res.json(users);
});

export { userRouter };
トランスパイルと起動
以下のコマンドで、トランスパイルを行います。
ちなみに、npx コマンドを使うとローカルのパッケージを実行できます。
$ npx tsc -p ./server
node コマンドでトランスパイルされたエンドポイントを指定するとサーバが起動します。
$ node dist/server/bin/www.js
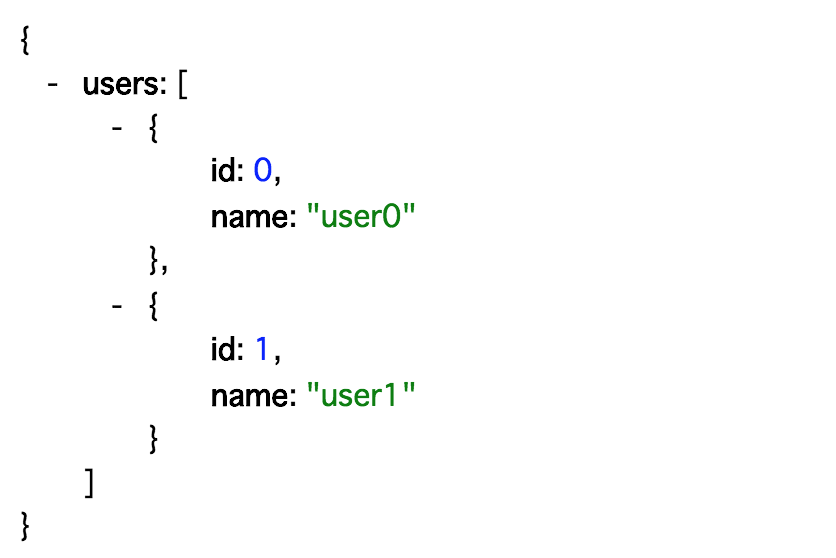
http://localhost:4300/api/users にアクセスすると以下のようにレスポンスが返されるはずです。
 |
|---|
Angular と Express の連携
- service の作成
- component の作成
- proxyの設定
- ルーティングの設定
- HttpClient モジュールの設定
- 動作確認
- scriptsの設定
service の作成
service は以下のようなディレクトリ構成になるように作成していきます。
(特に同じ構成にする必要はありません。)
sample-mean/
 └ src/
    └ app/
       └ services/
          └ apis/
             ├ users-api.service.ts
             └ users-api.service.spec.ts
まずはディレクトリを作成していきます。
以下はカレントディレクトリが app である前提となります。
$ mkdir -p services/apis
次に Angular Cli で service のスケルトンを作成します。
$ ng g service usersApi
今回は Mean stack を構築することが目的なので、usersを取得する単純なメソッドのみを作成していきます。
import { Injectable } from '@angular/core';
import { HttpClient } from '@angular/common/http';

@Injectable()
export class UsersApiService {

  constructor(
    private http: HttpClient
  ) { }

  getUsers() {
    return this.http.get('api/users');
  }
}
component の作成
Angular と Express の連携自体には不要ですが、
連携結果をビューとして確認するために Component を作成します。
component は以下のようなディレクトリ構成になるように作成していきます。
(特に同じ構成にする必要はありません。)
sample-mean/
 └ src/
    └ app/
       └ component/
          └ users/
             ├ users.component.ts
             ├ users.component.spec.ts
             ├ users.component.css
             └ users.component.html
まずはディレクトリを作成していきます。
以下はカレントディレクトリが app である前提となります。
$ mkdir components
次に Angular Cli で component のスケルトンを作成します。
$ ng g component users
先に作成した service を使って users を取得・表示するように実装していきます。
import { Component, OnInit } from '@angular/core';
import { UsersApiService } from '../../services/apis/users-api.service';

@Component({
  selector: 'app-users',
  templateUrl: './users.component.html',
  styleUrls: ['./users.component.css'],
  providers: [ UsersApiService ]
})

export class UsersComponent implements OnInit {
  users: any;

  constructor(
    private usersApiService: UsersApiService
  ) { }

  ngOnInit() {
    this.usersApiService.getUsers().subscribe(res => {
      this.users = res['users'];
    });
  }
}
<table border="1px">
  <tr>
    <th>id</th>
    <th>name</th>
  </tr>
  <tr *ngFor="let user of users">
    <td>{{user.id}}</td>
    <td>{{user.name}}</td>
  </tr>
</table>
<header>
  <h1 class="logo"><a href="/">MEAN</a></h1>
  <nav>
    <ul>
      <li><a routerLink="/users">Users</a></li>
    </ul>
  </nav>
</header>
<router-outlet></router-outlet>
proxyの設定
Angular 側からExpress 側にアクセスするために proxyの設定が必要になります。
プロジェクトのルートディレクトリに proxy.conf.json を作成し、以下のように設定を記述します。
このproxy設定を利用するには ng serve コマンドで実行する際に --proxy-config オプションで proxy.conf.json を渡してやります。
{
  "/api": {
    "target": "http://localhost:4300",
    "secure": false,
    "changeOrigin": true
  }
}
$ ng serve --proxy-config proxy.conf.json
ルーティングの設定
import { NgModule } from '@angular/core';
import { Routes, RouterModule } from '@angular/router';

import { UsersComponent } from './components/users/users.component';

const routes: Routes = [
  {
    path: 'users', component: UsersComponent
  },
];

@NgModule({
  imports: [RouterModule.forRoot(routes)],
  exports: [RouterModule]
})
export class AppRoutingModule { }
HttpClient モジュールの設定
作成した service の中で HttpClientModule を使用するので app.module.ts に追加しておきます。
import { BrowserModule } from '@angular/platform-browser';
import { NgModule } from '@angular/core';

import { AppRoutingModule } from './app-routing.module';
import { AppComponent } from './app.component';
import { UsersComponent } from './components/users/users.component';
import { HttpClientModule } from '@angular/common/http';

@NgModule({
  declarations: [
    AppComponent,
    UsersComponent
  ],
  imports: [
    BrowserModule,
    AppRoutingModule,
    HttpClientModule
  ],
  providers: [],
  bootstrap: [AppComponent]
})
export class AppModule { }
動作確認
まず、Express 側を起動しておきます。
$ node dist/server/bin/www.js
次に proxy 設定を読み込ませて Angular 側を起動します。
$ ng serve --proxy-config proxy.conf.json
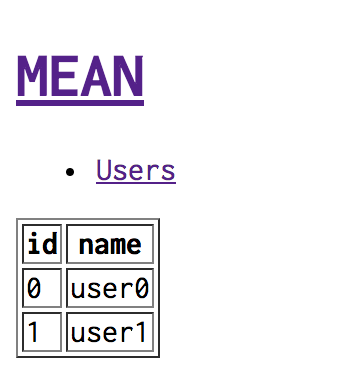
動作に問題なければ、以下のような画面が表示されるはずです。
http:localhost:4200 にアクセスした画面。
 |
|---|
画面上の Users をクリックし、 users の内容が表示された画面。
 |
|---|
scriptsの設定
先程の動作確認では Angular 側と Express 側を個別に起動していました。
また Angular 側では、 proxy 設定を指定する必要がありました。
開発を進めていくにあたって都度この手順を繰り返すのは効率が悪いので、
package.json の scripts を修正して使っていきます。
まず、 nodemon と npm-run-all というパッケージをインストールします。
$ npm install --save-dev npm-run-all nodemon
次に package.json を以下のように書き換えます。
  "scripts": {
    "ng": "ng",
    "tsc": "tsc -p ./server",
    "watch:ng": "ng serve --open --proxy-config proxy.conf.json",
    "watch:tsc": "tsc -w -p ./server",
    "watch:nodemon": "nodemon dist/server/bin/www.js",
    "start:p": "run-p watch:*",
    "start": "run-s tsc start:p",
    "build:ng": "ng build --prod",
    "build": "run-p tsc build:ng",
    "test": "ng test",
    "lint": "ng lint",
    "e2e": "ng e2e"
  },
上記のように scripts を書き換えると以下のコマンドで Angular 側、 Express 側を1つのコマンドで起動できるとともにそれぞれのソースコードに変更があれば変更を反映してくれます。
$ npm start
MongoDB の環境構築
今回は MongoDB をローカル環境にインストールするのではなく、 Docker 上に用意します。
合わせて MongoDB の Web GUI 環境である Express も同時に用意したいので docker-compose を使います。
- docker-compose.yml の作成
- コンテナの起動
- mongodbの下準備
docker-compose.yml の作成
以下のような docker-compose.yml を作成します。
MongoDB の方は Port の 27017 をバインドし、
Express の方は Port の 8081 をバインドする設定です。
また、 Express は Basic 認証の設定をいれてあります。
version: '3.6'

services:
  mongo:
    image: mongo
    restart: always
    volumes:
      - mongodb-data:/data/db
    environment:
      MONGO_INITDB_ROOT_USERNAME: username
      MONGO_INITDB_ROOT_PASSWORD: password
    ports:
      - 27017:27017

  mongo-express:
    image: mongo-express
    restart: always
    ports:
      - 8081:8081
    environment:
      ME_CONFIG_MONGODB_ADMINUSERNAME: username
      ME_CONFIG_MONGODB_ADMINPASSWORD: password
      ME_CONFIG_BASICAUTH_USERNAME: username
      ME_CONFIG_BASICAUTH_PASSWORD: password

volumes:
  mongodb-data:
コンテナの起動
docker-compose.yml があるディレクトリに移動し、以下のコマンドを実行します。
-d はバックグランド実行のためのオプションです。
$ docker-compose up -d
MongoDBの下準備
コンテナが立ち上がったら以下のコマンドで MongoDB のコンテナ内に入ります。
$ docker exec -it mongo_mongo_1 bash
コンテナ内に入ったら MongoDB のシェルを起動します。
$ mongo admin -u username -p password
作成するデータベース用のユーザを追加します。
> use sample_db

> db.createUser({
  ... user: "sample",
  ... pwd: "sample",
  ... roles: [{
  ... role: "readWrite",
  ... db: "sample_db"
  ... }]
  ... })
さらにRDBのテーブルにあたる Collection を作成します。
> db.createCollection("users")
最後にダミーデータを作成しておきます。
> for(let i = 0; i < 20; i++) {
  ... db.users.save({id: i, name: "name" + i})
  ...}
Express と MongoDB の連携
- mongoose のインストール
- Model の作成
- MongoDB との接続設定
- 動作確認
mongoose のインストール
$ npm install --save mongoose @types/mongoose
Model の作成
以下のようなディレクトリ構成になるようにディレクトリを作成し、ファイルを追加します。
sample-mean/
 └ server/
    └ models/
       └ users.model.ts
import * as mongoose from 'mongoose';

const usersModel: mongoose.Model<mongoose.Document> = mongoose.model(
  'users',
  new mongoose.Schema({
      id: {
        type: Number
      },
      name: {
        type: String
      }
    })
);

export { usersModel };
MongoDB との接続設定
export const serverPort = 4300;
export const mongoUrl = 'mongodb://sample:sample@localhost/sample_db';
import * as http from 'http';
import { app } from '../app';
import { serverPort, mongoUrl } from '../config';
import * as mongoose from 'mongoose';

const port = process.env.PORT || serverPort;
app.set('port', port);

const server = http.createServer(app);

server.listen(port, () => {
  mongoose.connect(mongoUrl);
});
import { Request, Response, Router } from 'express';
import { usersModel } from '../models/users.model';

const userRouter: Router = Router();

userRouter.get('/', (req: Request, res: Response) => {
  usersModel.find({}, function(err, users) {
    if (err) { throw err; }
    res.json(users);
  });
});

export { userRouter };
動作確認
動作確認の前に users.component.ts を以下のように修正してください。
import { Component, OnInit } from '@angular/core';
import { UsersApiService } from '../../services/apis/users-api.service';

@Component({
  selector: 'app-users',
  templateUrl: './users.component.html',
  styleUrls: ['./users.component.css'],
  providers: [ UsersApiService ]
})

export class UsersComponent implements OnInit {
  users: any;

  constructor(
    private usersApiService: UsersApiService
  ) { }

  ngOnInit() {
    this.usersApiService.getUsers().subscribe(res => {
      this.users = res;
    });
  }
}
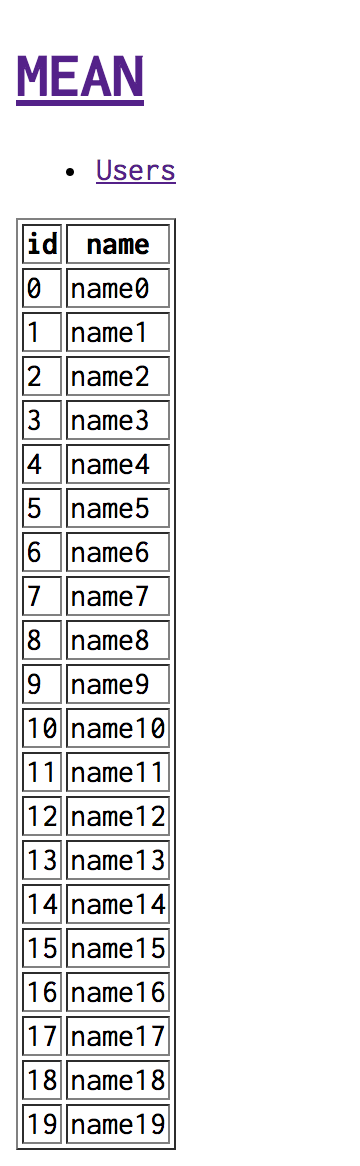
http://localhost:4200/users にアクセスすると、以下のように MongoDB に作成したダミーデータが表示されれば OK です。
 |
|---|