AWS Amplifyで自動デプロイとカスタムドメインの設定を試してみるの続きで、AWS AmplifyでデプロイしているReactアプリケーションに認証機能を実装してみます。
公式の手順ではうまく行かなかったり、Admin UIを使ってみたかったりということで、まとめてみました。
Amplify CLIの設定
まず、Amplify CLIのインストールおよび初期設定を行います。
ローカル環境のReactアプリケーションでも、Amplifyのバックエンド機能を使用するために必要な作業です。
Amplify CLIのインストール
npmコマンドでAmplify CLIをインストールします。
最新版(当時Ver.4.41.2)ではうまく行かないので、問題なく動く過去バージョンを取得
npm install -g @aws-amplify/cli@4.36.2
Amplify CLI Configure
amplify configure
ブラウザが立ち上がるのでサインインします。
Sign in to your AWS administrator account:
https://console.aws.amazon.com/
Press Enter to continue
(node:8116) ExperimentalWarning: The fs.promises API is experimental
AWS Regionはap-northeast-1を選択、usernameはデフォルト(amplify-******)とします。
Specify the AWS Region
? region:  ap-northeast-1
Specify the username of the new IAM user:
? user name:  amplify-eRkjp
上記でエンターを押すと、ブラウザでIAMの画面が開きます。
IAMのコンソールで、上記で指定したユーザーを作成し、AdministratorAccess権限を与えます。


作成されたユーザーのアクセスキーとシークレットアクセスキーを入力します。
Enter the access key of the newly created user:
? accessKeyId:  ********************
? secretAccessKey:  ****************************************
This would update/create the AWS Profile in your local machine
? Profile Name:  default

Successfully set up the new user.
バックエンドの設定
Backend environmentsの初期化
AWS Amplify ConsoleからBackend environmentsの初期化を行います。
Backend environmentsのGet startedから行こうと思いましたが、後述のamplify pullがうまく通らないため、amplify initで初期化を行うことにします。
プロジェクトのルートフォルダでamplify init --appId <アプリケーションID>を実行します。
質問には適切に答えてください。今回はすべてデフォルトで行っています。
amplify init --appId d1rjrcnv3buqsn
Note: It is recommended to run this command from the root of your app directory
? Enter a name for the project amplifyreact
? Enter a name for the environment dev
? Choose your default editor: Visual Studio Code
? Choose the type of app that you're building javascript
Please tell us about your project
? What javascript framework are you using react
? Source Directory Path:  src
? Distribution Directory Path: build
? Build Command:  npm.cmd run-script build
? Start Command: npm.cmd run-script start
Using default provider  awscloudformation
認証機能の設定(バックエンド)
AmplifyのアプリケーションからAdmin UIを開きます。
Backend environmentsに、amplify initで作成されたenvironmentがあるので、そこのOpen admin UIをクリックします。

左側のナビゲーションバーのAuthenticationを選択し、必要な設定を行いSave and deployをクリックします。
ここでGoogleやFacebookとのフェデレーションも行えるのですが、今回はシンプルにメールアドレスの認証だけとします。

画面が切り替わるので、右上のDeploying...が切り替わるまで待ちます。

画面が切り替わると、Amplify CLIで使用するコマンドが表示されますので、コピーします。


プロジェクトのルートフォルダで、先程のコマンドを実行します。
amplify pull --appId d1rjrcnv3buqsn --envName dev
フロントエンドの設定
aws-amplifyと@aws-amplify/ui-reactをインストールします。
npm install aws-amplify @aws-amplify/ui-react
index.jsおよびApp.jsを下記のように修正します。
import React from 'react';
import ReactDOM from 'react-dom';
import './index.css';
import App from './App';
import reportWebVitals from './reportWebVitals';
+ import Amplify from 'aws-amplify';
+ import config from './aws-exports';
+ Amplify.configure(config);

ReactDOM.render(
  <React.StrictMode>
    <App />
  </React.StrictMode>,
  document.getElementById('root')
);

// If you want to start measuring performance in your app, pass a function
// to log results (for example: reportWebVitals(console.log))
// or send to an analytics endpoint. Learn more: https://bit.ly/CRA-vitals
reportWebVitals();
import logo from './logo.svg';
import './App.css';
+ import { withAuthenticator, AmplifySignOut } from '@aws-amplify/ui-react'

function App() {
  return (
    <div className="App">
      <header className="App-header">
        <img src={logo} className="App-logo" alt="logo" />
        <p>
          Hello World!!
        </p>
        <a
          className="App-link"
          href="https://reactjs.org"
          target="_blank"
          rel="noopener noreferrer"
        >
          Learn React
        </a>
      </header>
+       <AmplifySignOut />
    </div>
  );
}

+ export default withAuthenticator(App);
- export default App;
上記でnpm startを行うと、サインイン画面が表示されます。
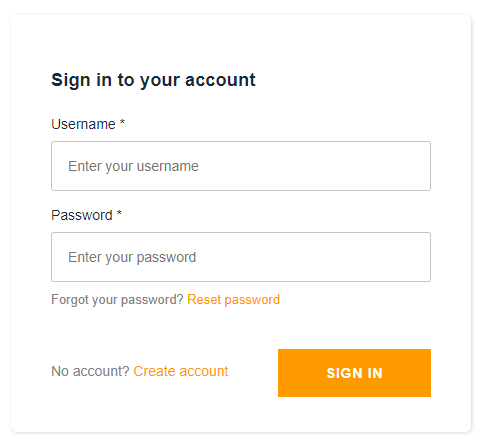
Create accountからユーザー作成を行い、サインインを行うと画面の下部にサインアウトボタンが追加されており、クリックすることでサインイン画面に戻ることが確認できます。

GitHubリポジトリへの適用
これをGitHubリポジトリにpushすることで、Amplifyがホストしているアプリケーションも自動でデプロイされるのですが、デフォルトではなぜかaws-exports.jsがgitignoreで追跡対象外になっているので、コメントアウトしておきます。
index.jsでimportしているため、GitHubにアップロードしないと、ビルドエラーになります。
# amplify
amplify/\#current-cloud-backend
amplify/.config/local-*
amplify/mock-data
amplify/backend/amplify-meta.json
amplify/backend/awscloudformation
build/
dist/
node_modules/
# aws-exports.js <- コメントアウト
awsconfiguration.json
amplifyconfiguration.json
amplify-build-config.json
amplify-gradle-config.json
amplifytools.xcconfig