はじめに
Azure Web AppでもOSがWindouwsServerだとポータルからGUIでできるようなのですが
Linuxはそうではないので書きます
1.「SSLなう!」を使ってLet's Encryptに登録
色々とやりましたが「SSLなう!」が便利です。
画面からポチポチしていきましょう。


「SSLなう!」
https://sslnow.ml/
2.サーバの設定
上記のURLにリダイレクした際に「ファイル内容(1行です)」の内容が返ってくる必要があります。
※URLは「http://ドメイン名/.well-known/acme-challenge/乱数」
ファイル内容は「乱数」
なので、Azureのポータルから対象となるAppを選んだ後、開発ツールにあるSSHからデプロイ先に接続します。
通常であれば/var/www/htmlがデプロイ先なので
下記コマンドでファイルを作成します。
mkdir .well-known
cd .well-known
mkdir acme-challenge
cd acme-challenge
mkdir 乱数
cd 乱数
vi index.php
そしてindex.phpの中に乱数を記載します。
(今回はphpを使いました)
3.証明書発行申請&発行された証明書
再びSSLなう!に戻ってポチポチしていきます。
その際に証明書発行申請できたKeyを貼り付けたsample.keyファイルと
発行された証明書でできたcert.pem(サーバ証明書)の内容を貼り付けたcert.pemファイルを作成しましょう。
4.鍵の変換
Azureにあげるには「.pfx」に変換する必要があるので下記コマンドを実行します。
openssl pkcs12 -export -in cert.pem -inkey Server.key -out sample.pfx
パスワードも設定するように聞かれるので設定しましょう。
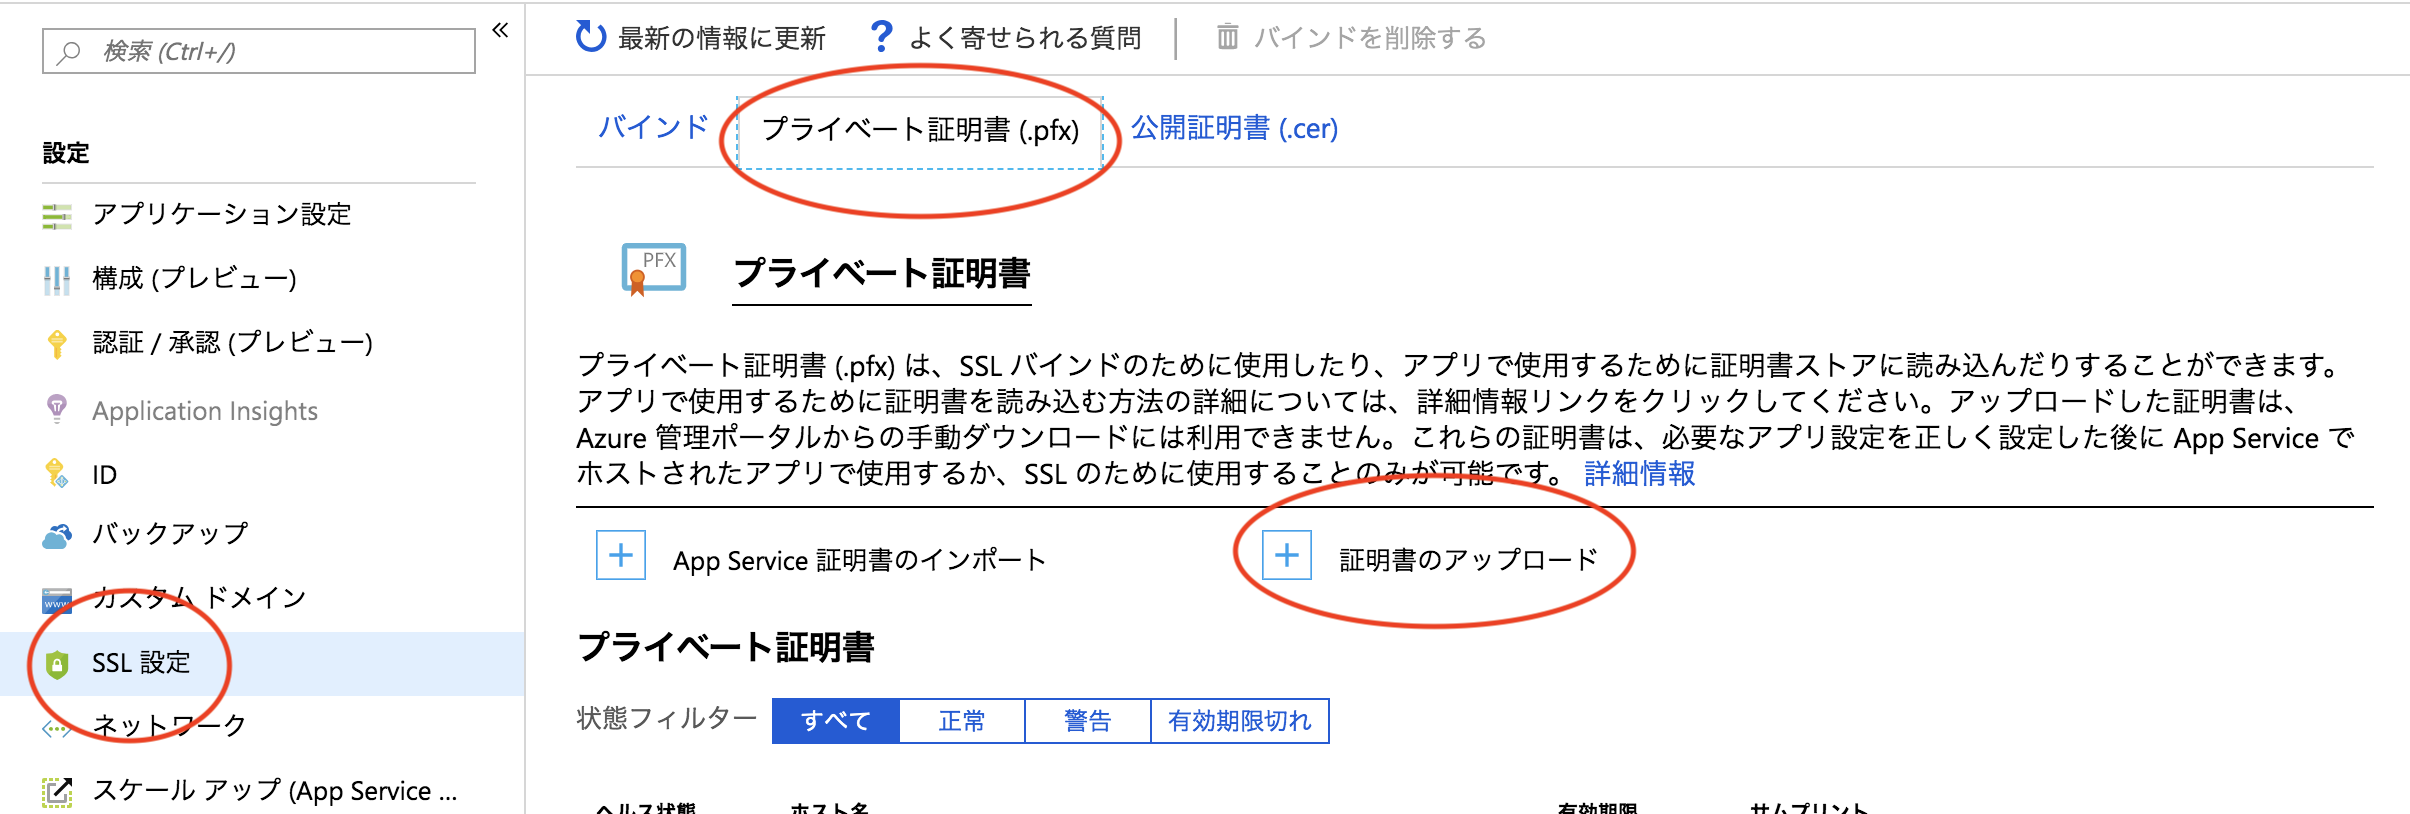
5.Azureにアップロード&バインド
もう完了です。
その後対象のドメインにバインドします。
おわりに
GCPってデフォルトでSSLになるんじゃなかったけ…
