こんにちは。bamboo-houseです。
今回は、CursorとMCPサーバーを接続して、Cursor上で天気について正確に聞けるようになったのでその内容をまとめたいと思います。(誰も欲しくないと思うが)
CursorとMCPサーバーの接続のチュートリアルになっているので、ぜひ参考にしてみて下さい🙌
MCPとは何ですか?
- MCPを使うと、アプリとLLMが情報をやりとりする方法が標準化されます
- 標準化されると、外部のデータやツールを追加するのが簡単になります
- それによってLLMがより便利で強力な処理をできるようになります
- MCPはClaudeの開発企業「Anthropic」によって提唱されました
バージョン
- cursor 0.47.x
- node v18 or later
- npm v9 or later
動作動画
1. MCPサーバーを作成する
早速、天気を正確に調べるMCPサーバーを作成していきましょう。
こちらの公式チュートリアルを元に作成していきます。
https://modelcontextprotocol.io/quickstart/server
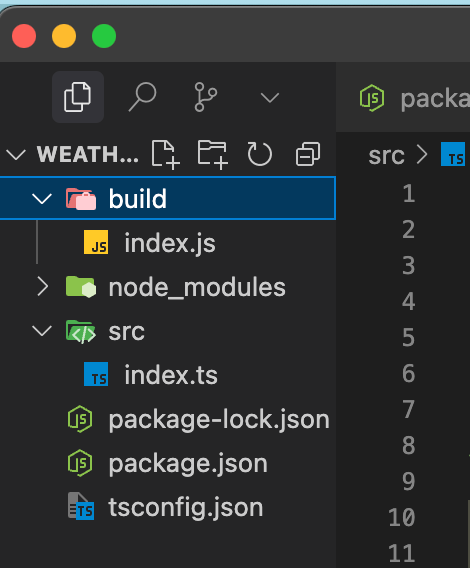
1.まずは、weatherディレクトリを作成してcursorを開き、上のTabからターミナルを開きます。

2.続いて、セットアップをしていきます。ターミナルにコマンドを打ちましょう。
# npmプロジェクトの初期化
npm init -y

# 各種ライブラリをインストール
npm install @modelcontextprotocol/sdk zod
npm install -D @types/node typescript

# メインファイルを作成
mkdir src
touch src/index.ts
3.下記をコピーして、package.jsonを丸ごと書き換えましょう。
{
  "name": "weather",
  "version": "1.0.0",
  "main": "index.js",
  "type": "module",
  "bin": {
    "weather": "./build/index.js"
  },
  "scripts": {
    "build": "tsc && chmod 755 build/index.js"
  },
  "files": [
    "build"
  ],
  "keywords": [],
  "author": "",
  "license": "ISC",
  "description": "",
  "dependencies": {
    "@modelcontextprotocol/sdk": "^1.7.0",
    "zod": "^3.24.2"
  },
  "devDependencies": {
    "@types/node": "^22.13.10",
    "typescript": "^5.8.2"
  }
}
4.package.jsonと同じ配下にtsconfig.jsonを作成しましょう。
{
  "compilerOptions": {
    "target": "ES2022",
    "module": "Node16",
    "moduleResolution": "Node16",
    "outDir": "./build",
    "rootDir": "./src",
    "strict": true,
    "esModuleInterop": true,
    "skipLibCheck": true,
    "forceConsistentCasingInFileNames": true
  },
  "include": ["src/**/*"],
  "exclude": ["node_modules"]
}
5.src/index.tsを書き換えていきます。コピーして丸ごと貼り付けましょう。
// MCPインスタンスを作成します。
import { McpServer } from "@modelcontextprotocol/sdk/server/mcp.js";
import { StdioServerTransport } from "@modelcontextprotocol/sdk/server/stdio.js";
import { z } from "zod";

const NWS_API_BASE = "https://api.weather.gov";
const USER_AGENT = "weather-app/1.0";

// MCPサーバーインスタンスを作成
const server = new McpServer({
  name: "weather",
  version: "1.0.0",
});

// NWS APIリクエストを行うためのヘルパー関数
async function makeNWSRequest<T>(url: string): Promise<T | null> {
  const headers = {
    "User-Agent": USER_AGENT,
    Accept: "application/geo+json",
  };

  try {
    const response = await fetch(url, { headers });
    if (!response.ok) {
      throw new Error(`HTTP error! status: ${response.status}`);
    }
    return (await response.json()) as T;
  } catch (error) {
    console.error("Error making NWS request:", error);
    return null;
  }
}

interface AlertFeature {
  properties: {
    event?: string;
    areaDesc?: string;
    severity?: string;
    status?: string;
    headline?: string;
  };
}

// アラートデータをフォーマット
function formatAlert(feature: AlertFeature): string {
  const props = feature.properties;
  return [
    `Event: ${props.event || "Unknown"}`,
    `Area: ${props.areaDesc || "Unknown"}`,
    `Severity: ${props.severity || "Unknown"}`,
    `Status: ${props.status || "Unknown"}`,
    `Headline: ${props.headline || "No headline"}`,
    "---",
  ].join("\n");
}

interface ForecastPeriod {
  name?: string;
  temperature?: number;
  temperatureUnit?: string;
  windSpeed?: string;
  windDirection?: string;
  shortForecast?: string;
}

interface AlertsResponse {
  features: AlertFeature[];
}

interface PointsResponse {
  properties: {
    forecast?: string;
  };
}

interface ForecastResponse {
  properties: {
    periods: ForecastPeriod[];
  };
}
// 天気ツールを登録
server.tool(
  "get-alerts",
  "Get weather alerts for a state",
  {
    state: z.string().length(2).describe("Two-letter state code (e.g. CA, NY)"),
  },
  async ({ state }) => {
    const stateCode = state.toUpperCase();
    const alertsUrl = `${NWS_API_BASE}/alerts?area=${stateCode}`;
    const alertsData = await makeNWSRequest<AlertsResponse>(alertsUrl);

    if (!alertsData) {
      return {
        content: [
          {
            type: "text",
            text: "Failed to retrieve alerts data",
          },
        ],
      };
    }

    const features = alertsData.features || [];
    if (features.length === 0) {
      return {
        content: [
          {
            type: "text",
            text: `No active alerts for ${stateCode}`,
          },
        ],
      };
    }

    const formattedAlerts = features.map(formatAlert);
    const alertsText = `Active alerts for ${stateCode}:\n\n${formattedAlerts.join("\n")}`;

    return {
      content: [
        {
          type: "text",
          text: alertsText,
        },
      ],
    };
  }
);

server.tool(
  "get-forecast",
  "Get weather forecast for a location",
  {
    latitude: z.number().min(-90).max(90).describe("Latitude of the location"),
    longitude: z.number().min(-180).max(180).describe("Longitude of the location"),
  },
  async ({ latitude, longitude }) => {
    // グリッドポイントデータを取得
    const pointsUrl = `${NWS_API_BASE}/points/${latitude.toFixed(4)},${longitude.toFixed(4)}`;
    const pointsData = await makeNWSRequest<PointsResponse>(pointsUrl);

    if (!pointsData) {
      return {
        content: [
          {
            type: "text",
            text: `Failed to retrieve grid point data for coordinates: ${latitude}, ${longitude}. This location may not be supported by the NWS API (only US locations are supported).`,
          },
        ],
      };
    }

    const forecastUrl = pointsData.properties?.forecast;
    if (!forecastUrl) {
      return {
        content: [
          {
            type: "text",
            text: "Failed to get forecast URL from grid point data",
          },
        ],
      };
    }

    // 予報データを取得
    const forecastData = await makeNWSRequest<ForecastResponse>(forecastUrl);
    if (!forecastData) {
      return {
        content: [
          {
            type: "text",
            text: "Failed to retrieve forecast data",
          },
        ],
      };
    }

    const periods = forecastData.properties?.periods || [];
    if (periods.length === 0) {
      return {
        content: [
          {
            type: "text",
            text: "No forecast periods available",
          },
        ],
      };
    }

    // 予報期間をフォーマット
    const formattedForecast = periods.map((period: ForecastPeriod) =>
      [
        `${period.name || "Unknown"}:`,
        `Temperature: ${period.temperature || "Unknown"}°${period.temperatureUnit || "F"}`,
        `Wind: ${period.windSpeed || "Unknown"} ${period.windDirection || ""}`,
        `${period.shortForecast || "No forecast available"}`,
        "---",
      ].join("\n")
    );

    const forecastText = `Forecast for ${latitude}, ${longitude}:\n\n${formattedForecast.join(
      "\n"
    )}`;

    return {
      content: [
        {
          type: "text",
          text: forecastText,
        },
      ],
    };
  }
);

// メイン処理
async function main() {
  const transport = new StdioServerTransport();
  await server.connect(transport);
  console.error("Weather MCP Server running on stdio");
}

main().catch((error) => {
  console.error("Fatal error in main():", error);
  process.exit(1);
});
6.実行ファイルをビルドします。
npm run build
これにより、ルートディレクトリにbuild/index.jsが作成されます。
ここまででMCPサーバーの構築は完了です。次に、CurosrのMCP設定をしていきましょう。
2. CursorでMCPの設定を行う
-
Cursor>基本設定>Cursor SettingsでMCP設定を開きます。

-
「+ Add new global MCP server」をクリックします。

-
mcp.jsonが作成されるので、記述していきます。
まずは、ターミナルでpwdを実行して、現在の絶対パスを取得しましょう。
# 絶対パスを取得する
pwd

次に、下記のjsonを貼り付けて、argsには取得した絶対パスを書き換えて入れて下さい。
{
  "mcpServers": {
    "weather": {
      "command": "node",
      "args": ["/Users/hoge.pika/Documents/GitHub/weather-mcp/build/index.js"]
    }
  }
}
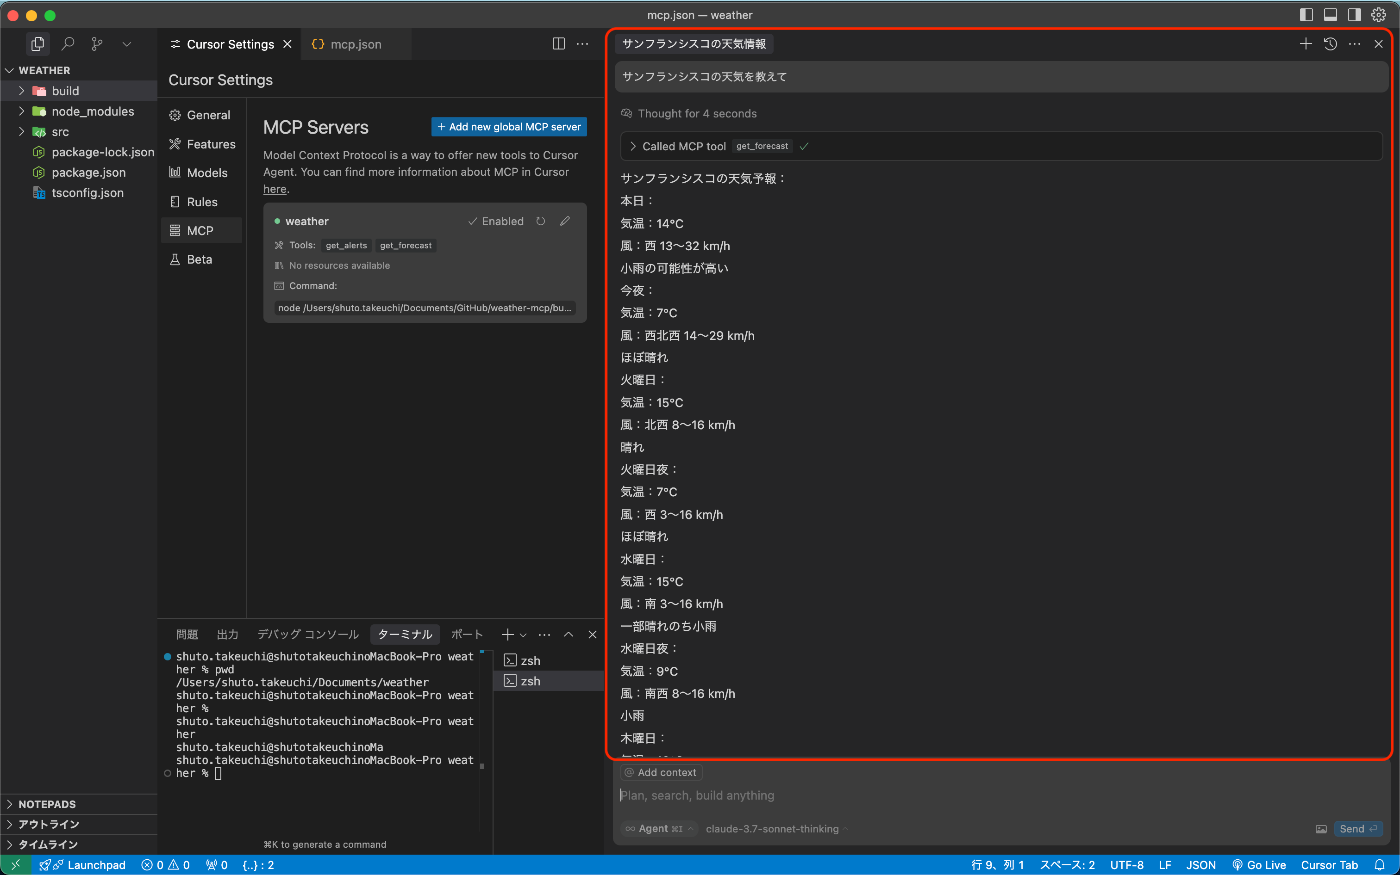
これで準備が完了です。Cursor Settingsを見て、追加したMCPサーバーに緑のぽちが付いて有効になっていることが確認できたらOKです。

3. 実行してみる
実際にcursorのchatを開いて、「サンフランシスコの天気を教えて」と送ってみます。
すると、MCPサーバーが読み込まれ、「Run Tool」をクリックするとサンフランシスコの正確な天気情報が返ってきます。
最後に
以上で、MCPサーバーを作成してCursorと接続することができました。MCPサーバーを使うことで正確な天気の情報を取得できましたね!
MCP自体はまだまだ新しい概念になるので、これからの発展に期待大です。
個人的にはUnity+MCPを作ってみたいところです。
宣伝
私たちのチームではWebXR技術を利用したVRゲーム配信プラットフォーム事業を行なっています。
また、直近ではAIとVRゲームを融合した今までにないゲーム開発も進行中です。
ご興味がありましたら、こちらのお問い合わせフォームからご連絡ください!
参考