Raspberry Pi上でプログラム開発する場合、通常のPCのようにモニター・キーボード・マウスが必要ですが、場合によってはそれらをすべて用意できない場合があります。
本記事では、普段使用しているPCからリモート接続して作業を進める方法について記述します。
環境
[PC]
| モデル | MacBook Pro (Retina, 15-inch, Mid2014) |
| OS | macOS Sierra ver 10.12.6 |
| メモリ | 16GB |
|
[Raspberry Pi] |
| モデル | Raspberry Pi 3 Model B (日本製) |
| SDカード | Transcend 32GB microSDHC Class10 UHS-I |
| キーボード | ELECOM TK-FCM084BK (有線) |
| マウス | ELECOM M-XGL10UB Series EX-G (有線) |
| 電源 | 公式 Raspberry Pi3 アダプタ 5.1V/2.5A |
| ディスプレイ | 公式 7'' Touchscreen Display (element14製) - 電源は本体GPIOピン(5V)より供給。 |
SSH でリモート接続する方法
SSH (SECURE SHELL)
https://www.raspberrypi.org/documentation/remote-access/ssh/README.md
SSHを有効にする
Raspbian OSにはSSHサーバが組み込まれていますが、既定では無効になっています。
これを有効化すればSSHクライアントから接続できるようになります。
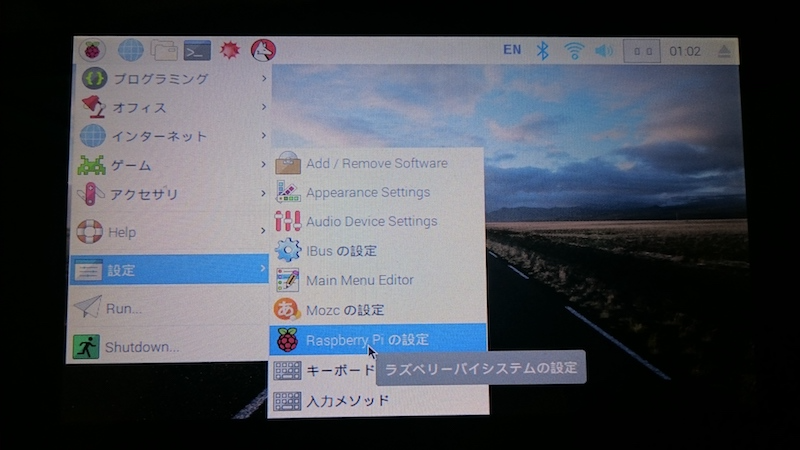
Raspberry Pi を起動してデスクトップ画面が表示されたら、メニューバー左端のラズベリーアイコンをクリックします。
表示されたプルダウンメニューから [設定]-[Raspberry Piの設定]をクリックします。
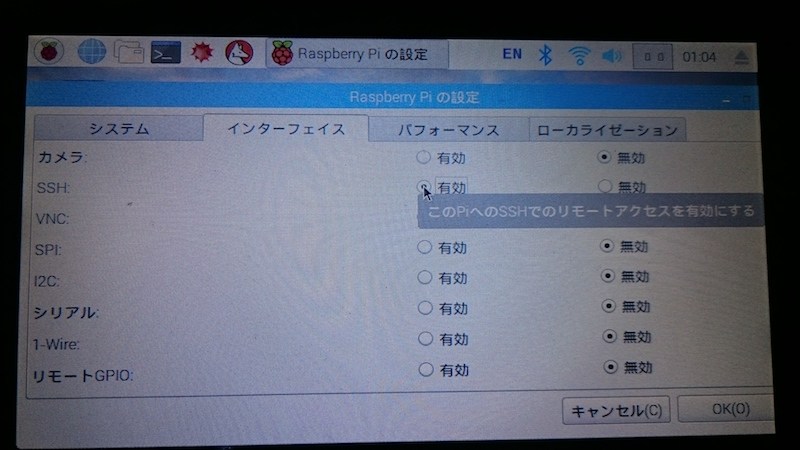
「Raspberry Piの設定」画面で「インタフェース」タブをクリックし、[SSH]の「有効」を選択してから[OK]ボタンをクリックします。
SSHサーバへ接続する
クライアントであるMacの「ターミナル」を起動し、「ssh」コマンドで Raspberry Pi へ接続します。
既定で用意されているユーザ名とパスワードは次の通りです。
ユーザ名: pi
パスワード:raspberry
【書式】
ssh <ユーザ名>@<Raspberry PiのIPアドレス>
$ ssh pi@***.***.***.***
The authenticity of host '***.***.***.*** (***.***.***.***)' can't be established.
ECDSA key fingerprint is SHA256:ERP0mzx77xmv7KXYa+RdTKt2aXm9Ju8WwyJs8nLdlIU.
Are you sure you want to continue connecting (yes/no)? yes
Warning: Permanently added '***.***.***.***' (ECDSA) to the list of known hosts.
pi@***.***.***.***'s password: raspberry

Linux raspberrypi 4.9.59-v7+ #1047 SMP Sun Oct 29 12:19:23 GMT 2017 armv7l

The programs included with the Debian GNU/Linux system are free software;
the exact distribution terms for each program are described in the
individual files in /usr/share/doc/*/copyright.

Debian GNU/Linux comes with ABSOLUTELY NO WARRANTY, to the extent
permitted by applicable law.
Last login: Thu Jan  4 06:12:25 2018

SSH is enabled and the default password for the 'pi' user has not been changed.
This is a security risk - please login as the 'pi' user and type 'passwd' to set a new password.

pi@raspberrypi:~ $
VNC でリモート接続する方法
VNC (VIRTUAL NETWORK COMPUTING)
https://www.raspberrypi.org/documentation/remote-access/vnc/README.md
VNCを有効にする
Raspbian OSにはVNCサーバ(RealVNC)が組み込まれていますが、既定では無効になっています。
これを有効化すればVNCクライアントから接続できるようになります。
Raspberry Pi を起動してデスクトップ画面が表示されたら、メニューバー左端のラズベリーアイコンをクリックします。
表示されたプルダウンメニューから [設定]-[Raspberry Piの設定]をクリックします。
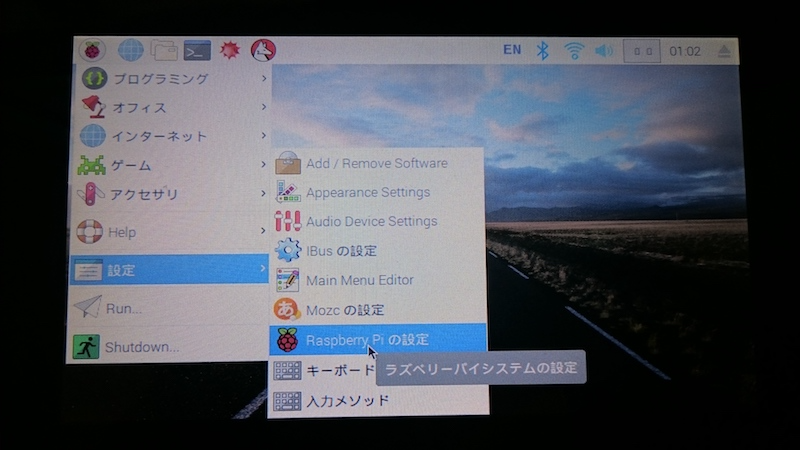
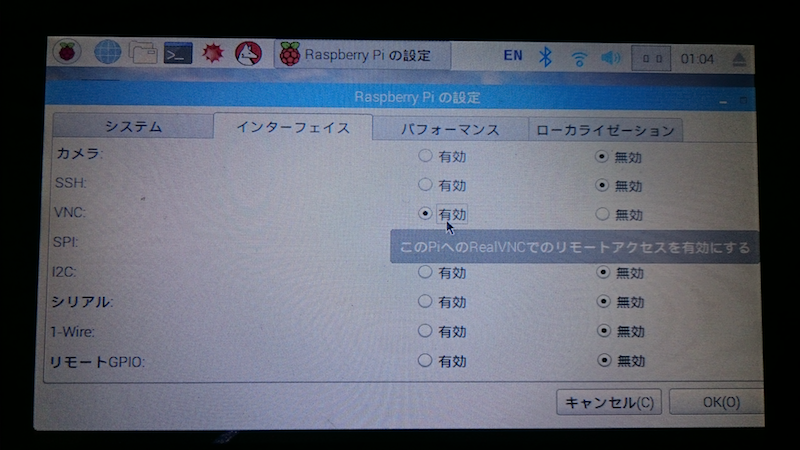
「Raspberry Piの設定」画面で「インタフェース」タブをクリックし、[VNC]の「有効」を選択してから[OK]ボタンをクリックします。
VNCビューアのインストール
RealVNCと互換性のあるVNCクライアントアプリを用意してください。
Download VNC Viewer to the device to control from
https://www.realvnc.com/en/connect/download/viewer/
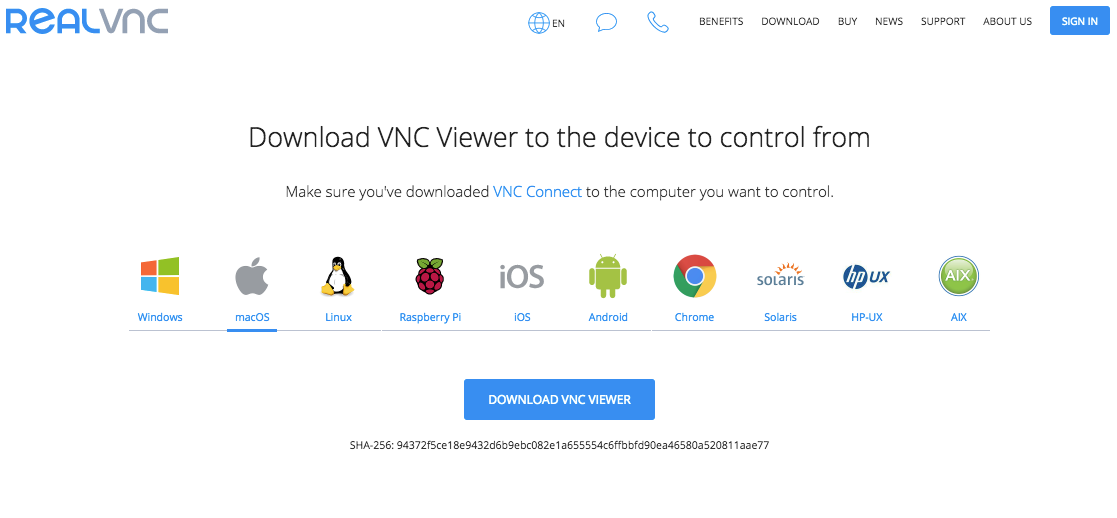
使用しているPCがMacの場合は、上記サイトを開いてから [macOS] アイコンをクリックしてください。
その後、画面中央の [DOWNLOAD VNC VIEWER]をクリックしてインストールイメージ(dmgファイル)をダウンロードします。
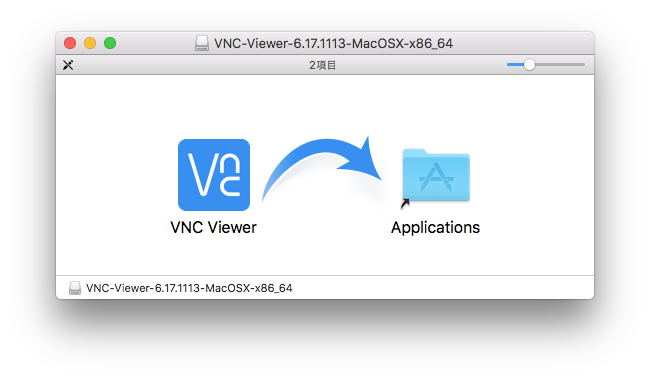
ダウンロードしたインストールイメージ(dmgファイル)をダブルクリックして、VNC Viewerをインストールしてください。
VNCビューアの起動
インストールされた「VNC Viewer」を起動します。
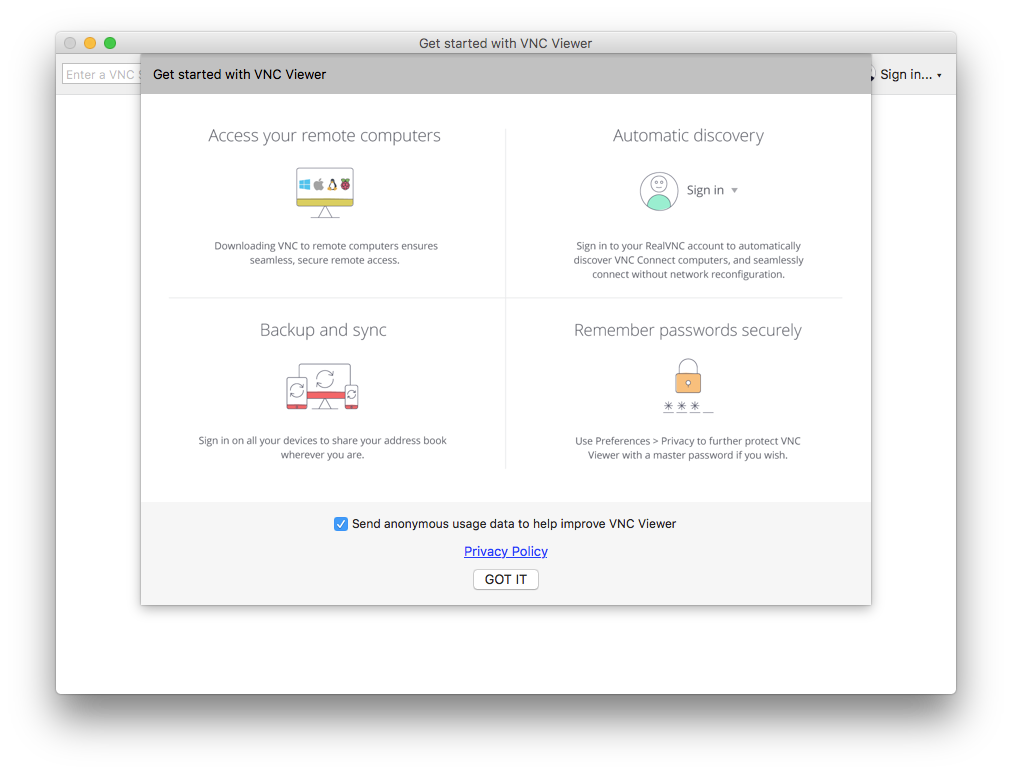
初期起動画面が表示されるので、そのまま[GOT IT]ボタンをクリックします。
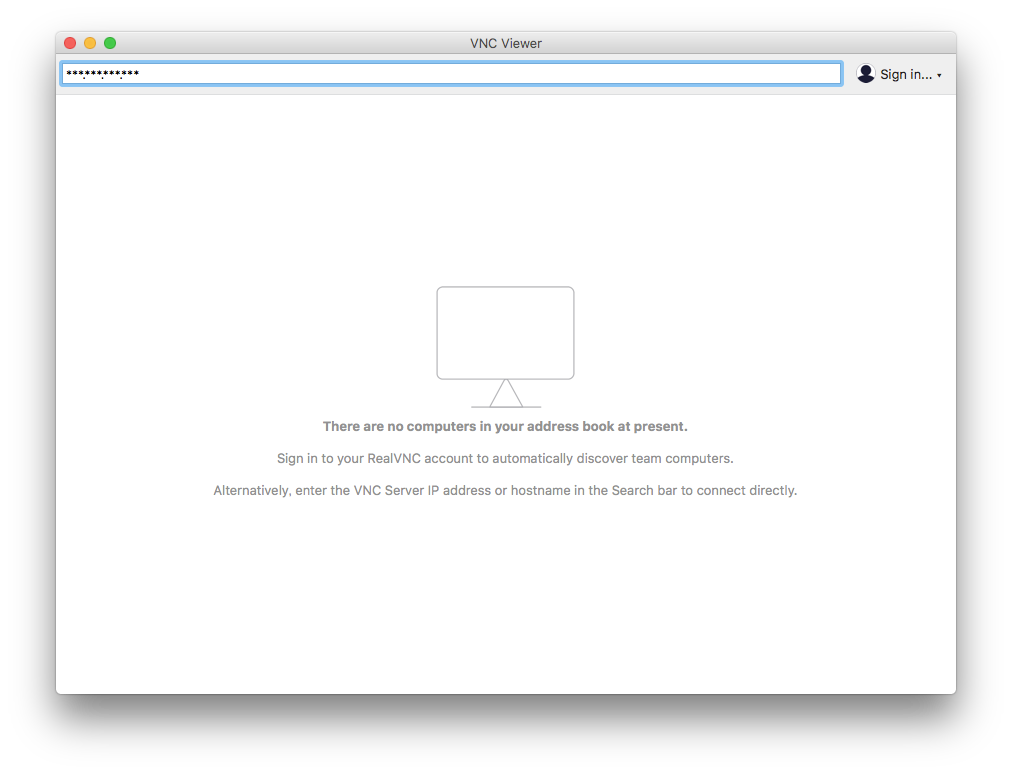
ビューア画面が表示されたら、アドレス入力欄に Raspberry Pi のIPアドレスを入力して [enter]キーを押下します。
ログインユーザ名とパスワードを入力して [OK]ボタンをクリックします。
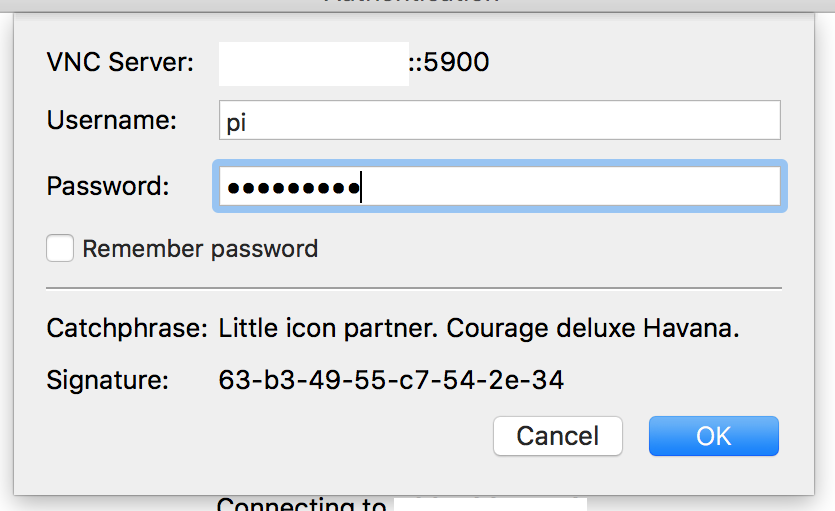
ログインに成功した場合は、Raspberry Pi のデスクトップ画面が VNC Viewer 画面に表示されます。 
