
概要
ChatGPTの出力を、Chrome拡張のObsidian Web Clipperを使って、Obsidianに保存するためのテンプレートです。
ファイル名に日付が自動で入力されるようになっています。
中身
{
	"schemaVersion": "0.1.0",
	"name": "web_clipper_chatgpt_conversation",
	"behavior": "create",
	"noteContentFormat": "<%*\nconst year = tp.date.now(\"YYYY\");\nconst month = tp.date.now(\"MM\");\nconst targetDir = `02_Literature_note/${year}_literature/${year}_${month}_literature`;\nawait tp.file.move(`${targetDir}/${tp.file.title}`);\n%>\n\n{{selectorHtml:article .markdown|join:\"\\n\\n\"|markdown}}",
	"properties": [
		{
			"name": "type",
			"value": "literature",
			"type": "text"
		},
		{
			"name": "medium",
			"value": "chatgpt",
			"type": "text"
		},
		{
			"name": "url",
			"value": "{{url}}",
			"type": "text"
		},
		{
			"name": "created",
			"value": "{{date}}",
			"type": "date"
		},
		{
			"name": "id",
			"value": "{{date|date:\"YYYYMMDDHHmm\"}}",
			"type": "text"
		},
		{
			"name": "tags",
			"value": "ChatGPT, AI, conversation",
			"type": "multitext"
		}
	],
	"triggers": [
		"https://chat.openai.com/",
		"https://chatgpt.com/"
	],
	"noteNameFormat": "{{date|date:\"YYYYMMDDHHmm\"}}_chatgpt",
	"path": "***"
}
最後のpathの***のところには、保存したいObsidianのフォルダ名を入れてください。
使い方
Chromeの拡張機能のObsidian Web Clipperを入れた後、拡張機能のオプションからテンプレートを編集する画面に行くことができます。
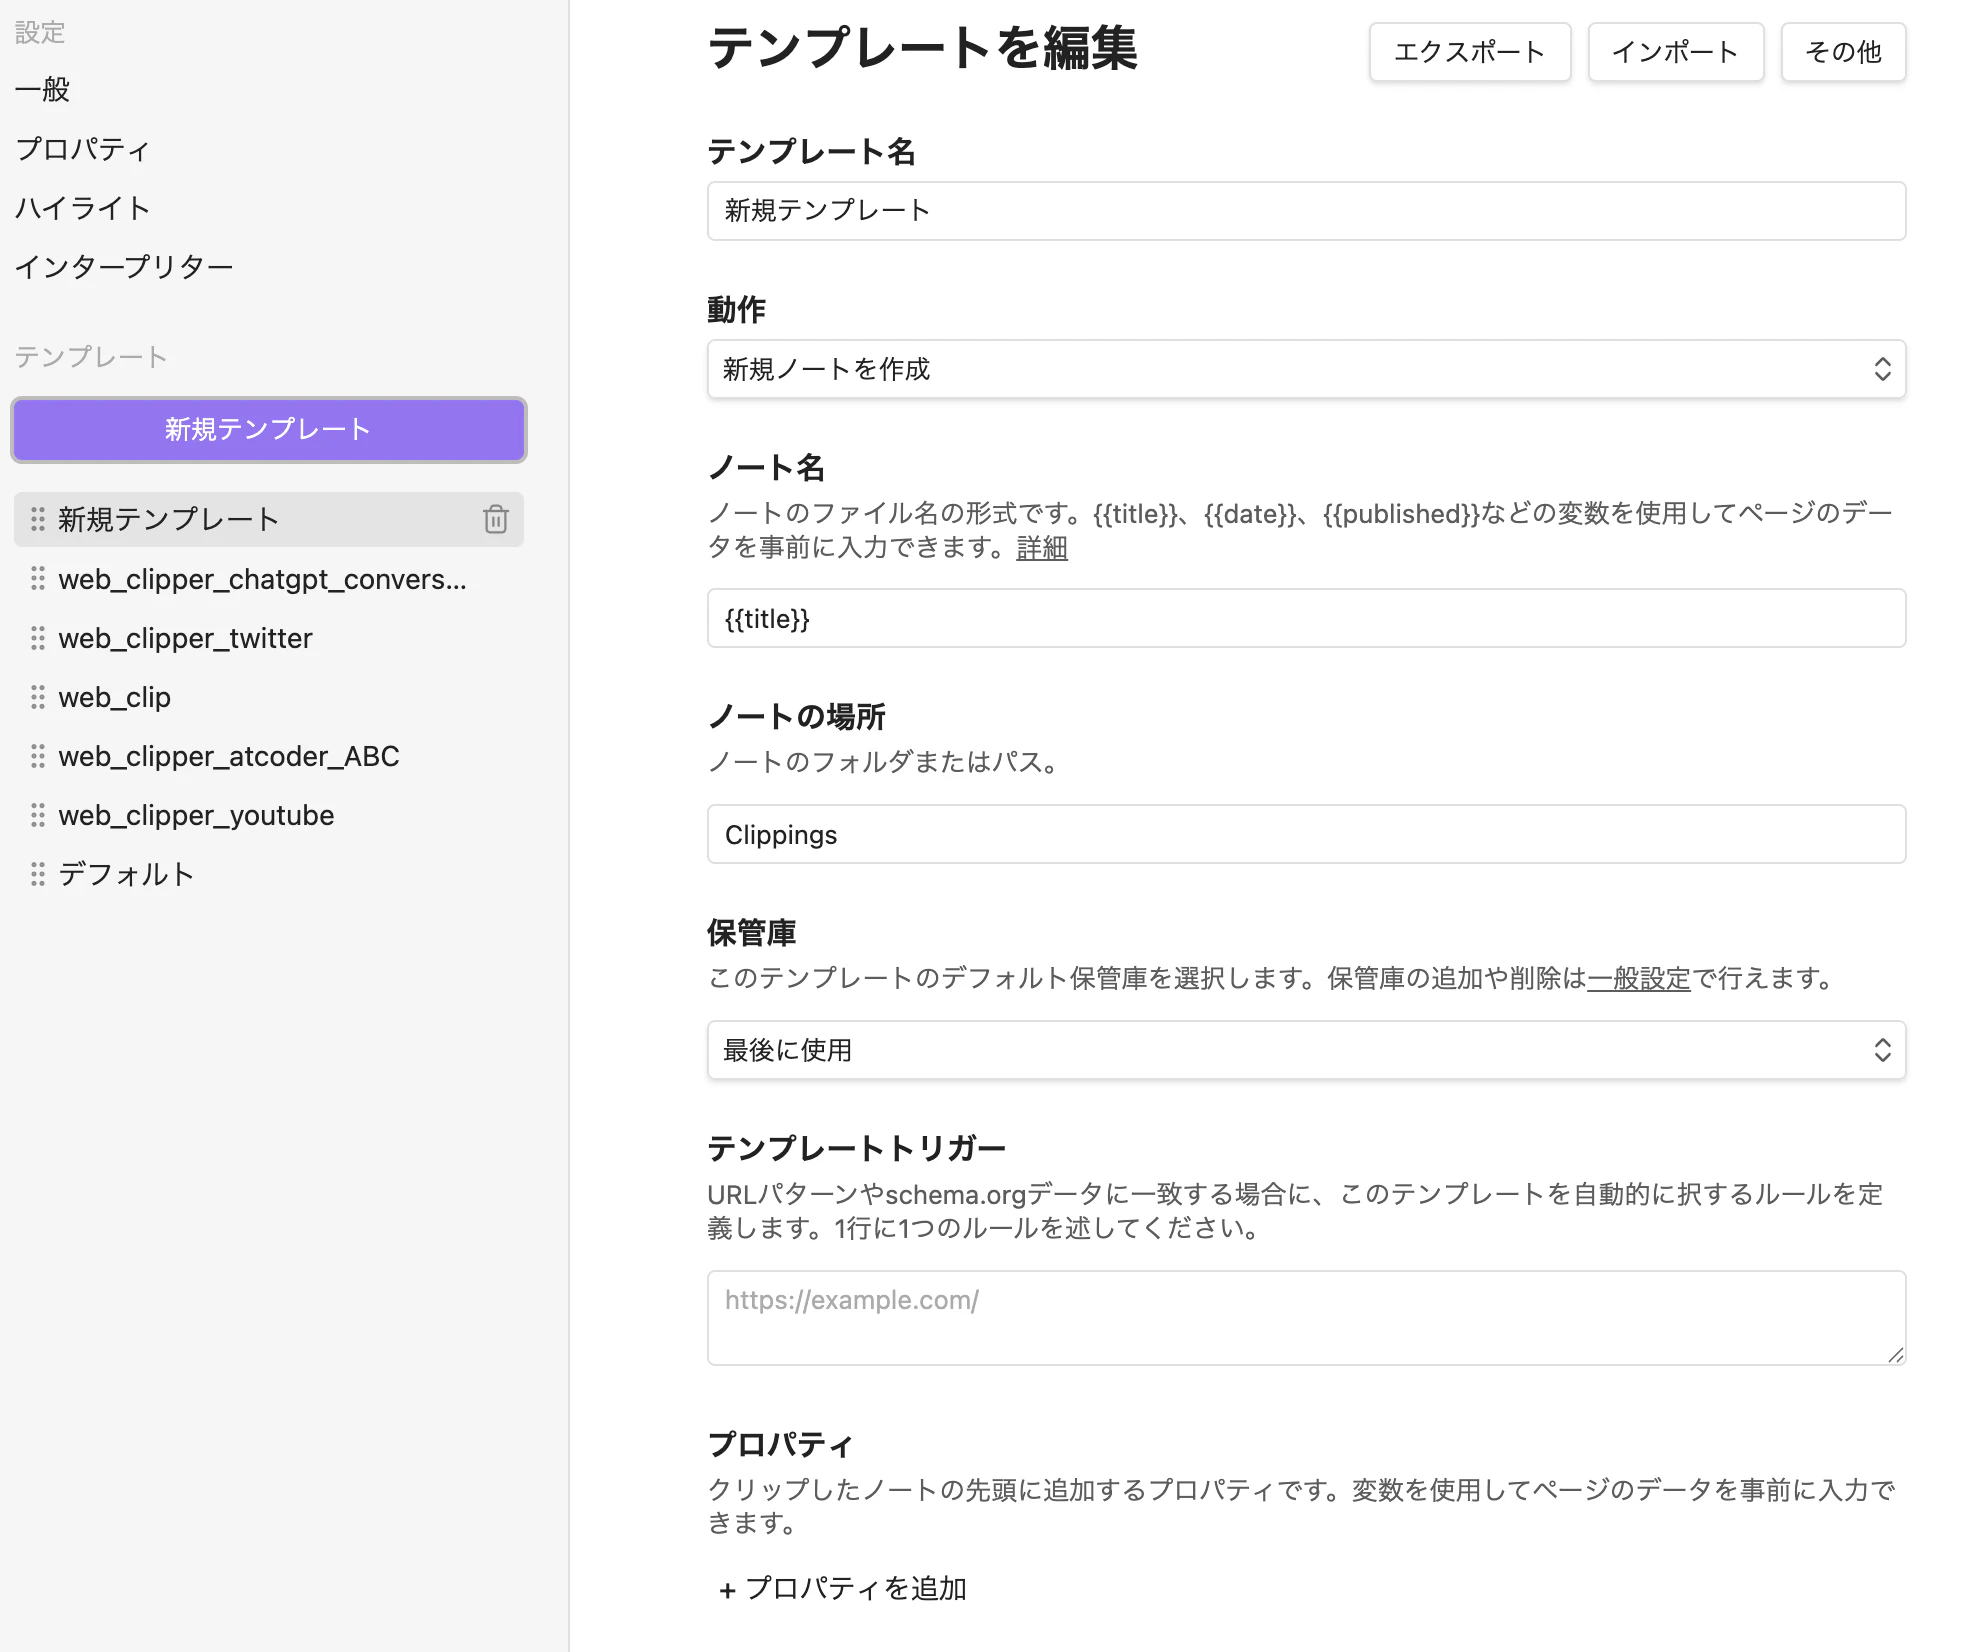
右上のインポートボタンから、上のjsonファイルを貼り付けるとテンプレートに入れることができます。
プロパティやタグなどを調整して使用してください。
おまけ
ChatGPTが有料版であれば、テンプレートのプロパティに以下のいずれかを貼り付けるとモデルを記録することができます。
{{selector:button[data-testid='model-switcher-dropdown-button']}}
{{selector:header button .text-token-text-tertiary|slice:0,1|join:\"\"|trim}}