はじめに
OCI Generative AIはPlaygroundで簡単にチャットを試せますが、
これをそのままコードにしたいと思うことが多いと思います。
本記事では、
- OCI Generative AI Playgroundでチャットする
- その設定をPythonコードにする
- Oracle Linux上で実行する
という最短ルートを紹介します。
■事前準備
・アカウント
OCI Generative AIが利用できるアカウントを準備
(実行可能なOCIアカウント/ポリシーを利用)
・APIキー認証設定
OCI Generative AIにアクセスするためのAPIキーと
APIキー認証設定を準備(~/.oci/config)
※通常はOCI CLIのセットアップ時に自動作成されます。
参考
https://docs.oracle.com/ja-jp/iaas/Content/API/Concepts/apisigningkey.htm
https://docs.oracle.com/ja-jp/iaas/Content/API/SDKDocs/cliinstall.htm
・実行環境
Pythonが利用できる環境を準備
・今回動作確認した環境
OS: Oracle Linux
Python: 3.6.8
SDK: oci Python SDK
リージョン: ap-osaka-1
◆目次
1.Playgroundでチャットを実行
2.Playgroundのサンプルコード実行
3.Pythonで動くコード作成して実行
1. Playgroundでチャットを実行
まずはOCIコンソールのGenerative AI Playgroundで、
特に難しいことはせず、普通にチャットを実行します。
ここで問題なく応答が返ってくることを確認します。
左上メニュー(Ξ)から[アナリティクスとAI] - [生成AI]を選択
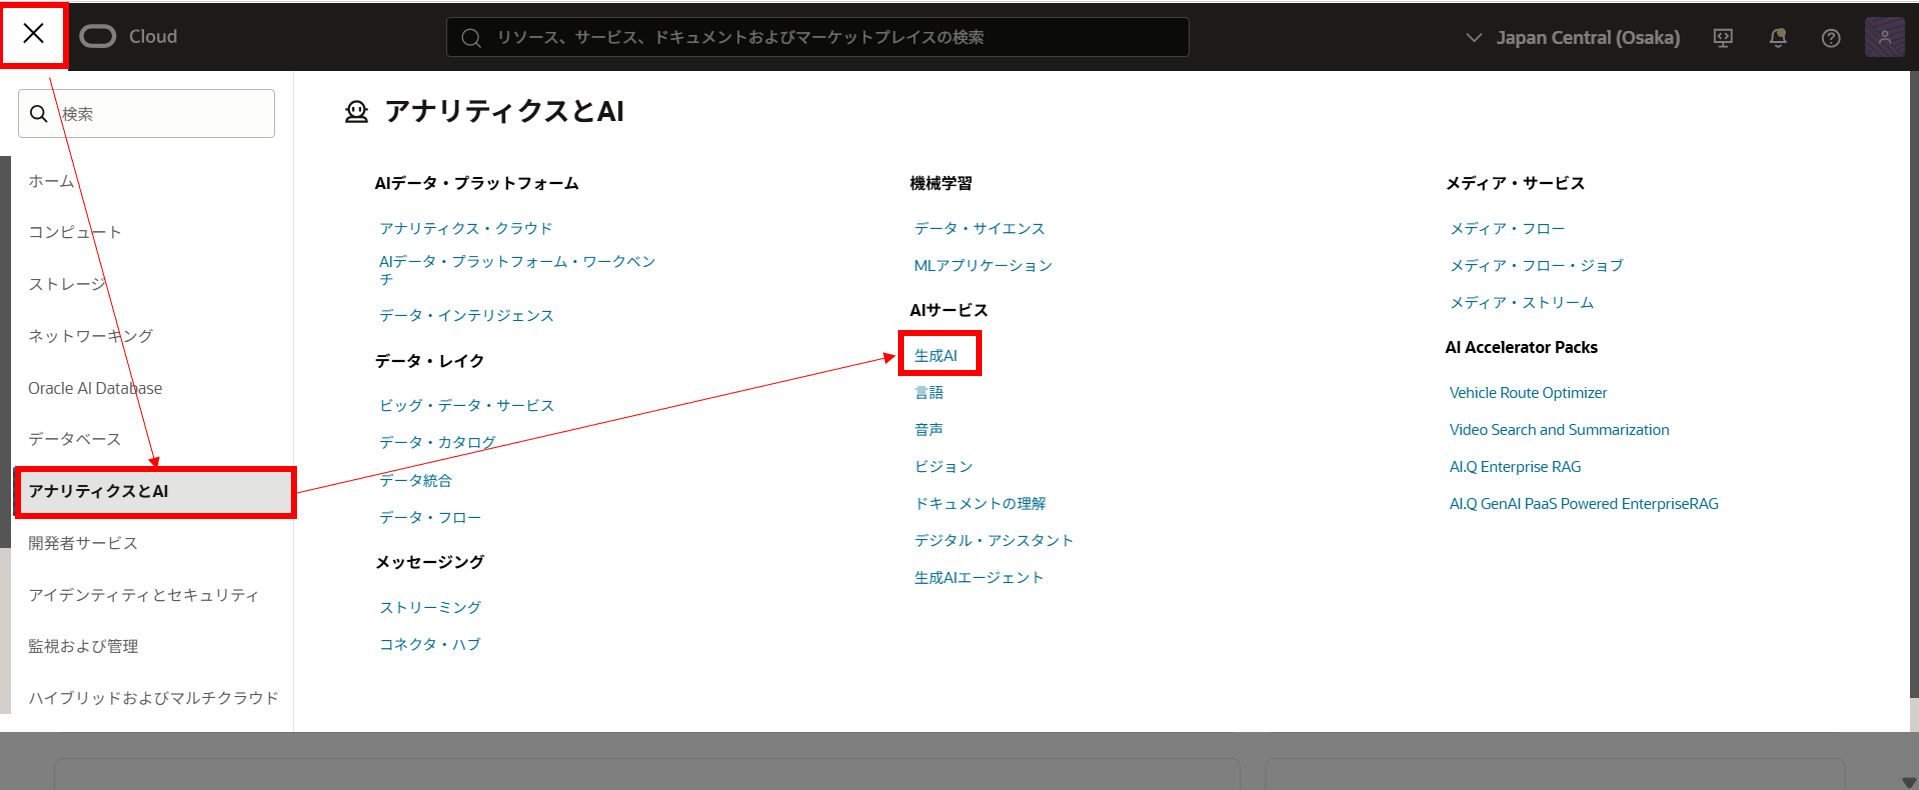
[プレイグラウンド]を選択

生成AIのモデルを選択してメッセージ欄にAIに対して聞きたいことを入れて送信
ここでは「日本一高い山は?」としています。

実行後に生成AIが回答

プレイグラウンド上でのチャットの使い方は以上です。
2.Playgroundのサンプルコード実行
続いてサンプルコードの実行に入ります。
右上のコードの表示を選択

開発ツール(言語)でPythonを選択
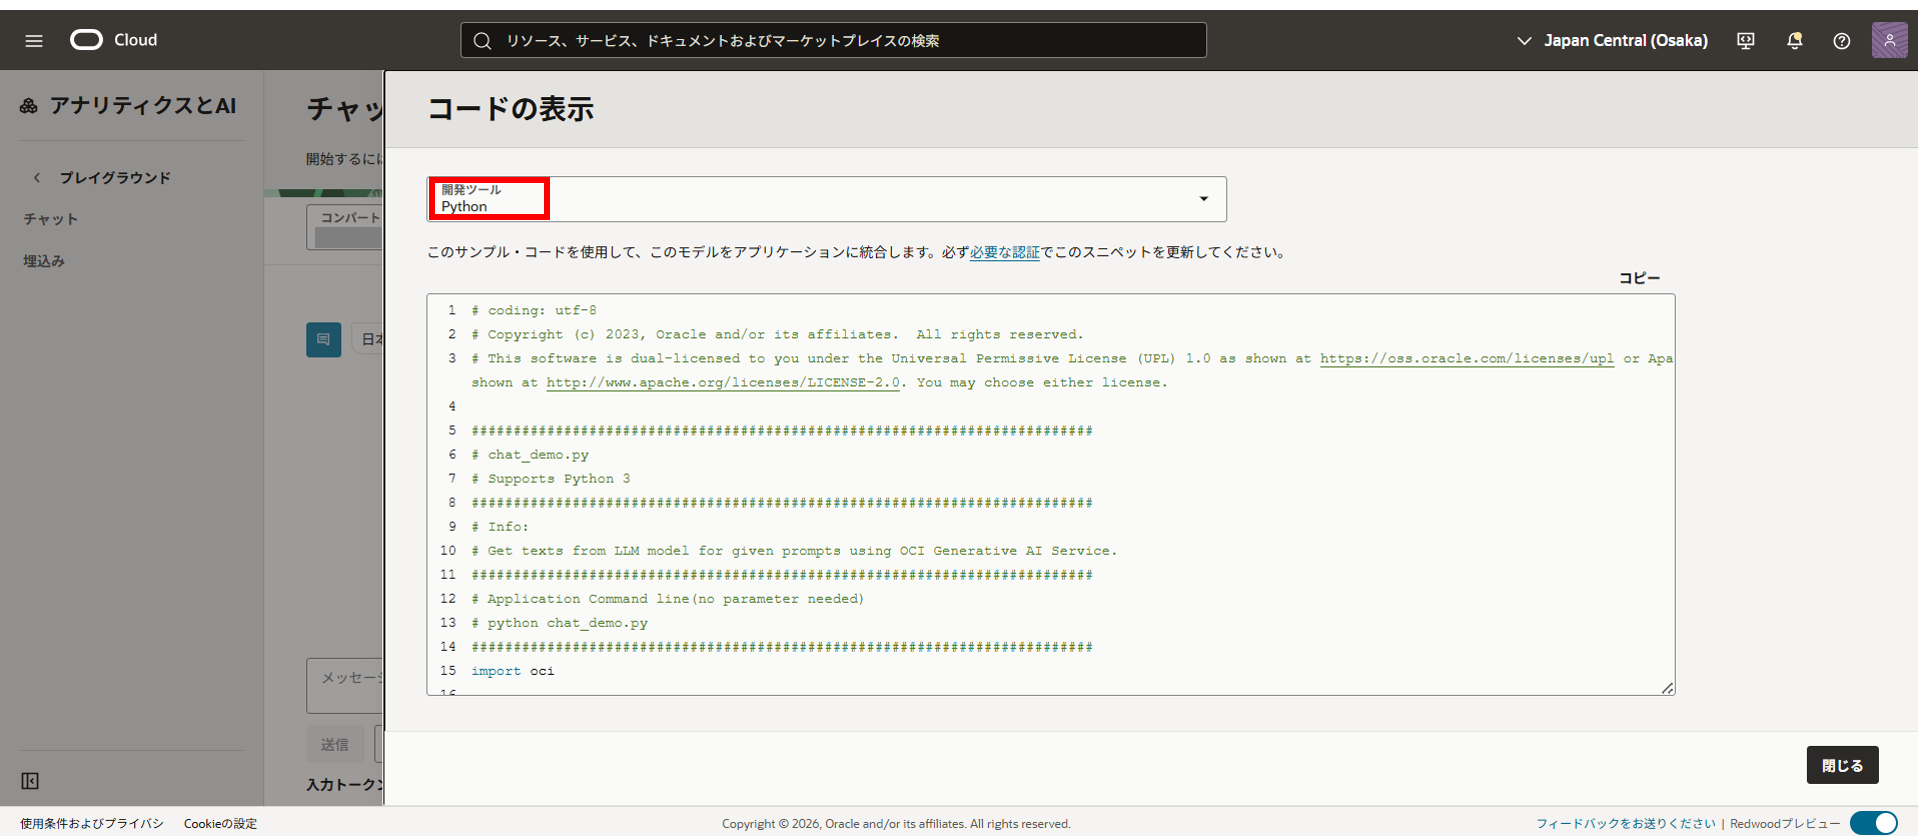
このコードを保存しておきます。
※compartment_idとmodel_idはマスクしています。
# coding: utf-8
# Copyright (c) 2023, Oracle and/or its affiliates.  All rights reserved.
# This software is dual-licensed to you under the Universal Permissive License (UPL) 1.0 as shown at https://oss.oracle.com/licenses/upl or Apache License 2.0 as shown at http://www.apache.org/licenses/LICENSE-2.0. You may choose either license.

##########################################################################
# chat_demo.py
# Supports Python 3
##########################################################################
# Info:
# Get texts from LLM model for given prompts using OCI Generative AI Service.
##########################################################################
# Application Command line(no parameter needed)
# python chat_demo.py
##########################################################################
import oci

# Setup basic variables
# Auth Config
# TODO: Please update config profile name and use the compartmentId that has policies grant permissions for using Generative AI Service
compartment_id = "ocid1.compartment.oc1..aaaaaaaa*******"
CONFIG_PROFILE = "DEFAULT"
config = oci.config.from_file('~/.oci/config', CONFIG_PROFILE)

# Service endpoint
endpoint = "https://inference.generativeai.ap-osaka-1.oci.oraclecloud.com"

generative_ai_inference_client = oci.generative_ai_inference.GenerativeAiInferenceClient(config=config, service_endpoint=endpoint, retry_strategy=oci.retry.NoneRetryStrategy(), timeout=(10,240))
chat_detail = oci.generative_ai_inference.models.ChatDetails()

chat_request = oci.generative_ai_inference.models.CohereChatRequest()
chat_request.message = "{input}"
chat_request.max_tokens = 600
chat_request.temperature = 1
chat_request.frequency_penalty = 0
chat_request.top_p = 0.75
chat_request.top_k = 0

chat_request.safety_mode = "CONTEXTUAL"


chat_detail.serving_mode = oci.generative_ai_inference.models.OnDemandServingMode(model_id="ocid1.generativeaimodel.oc1.ap-osaka-1.*****")
chat_detail.chat_request = chat_request
chat_detail.compartment_id = compartment_id

chat_response = generative_ai_inference_client.chat(chat_detail)

# Print result
print("**************************Chat Result**************************")
print(vars(chat_response))
コードをLinux環境で実行します。
sample.py等の名前で保存して実行
$ python sample.py
**************************Chat Result**************************
{'status': 200, 'headers': {'content-type': 'application/json', 'opc-request-id': '35B9430D*****', 'content-encoding': 'gzip', 'content-length': '400'}, ~~
上記のようにステータス200が返っており、
OCI Generative AIとの通信は正常に行えています。
またレスポンス内のtextにAIの応答内容が含まれています。
サンプルコードの動作確認は以上です。
3.Pythonで動くコード作成して実行
あとは実際にOCI Generative AIに問合せできるコードを書いてみます。
compartment_idとmodel_idをご自身の環境に合わせて保存して実行します。
ここではaitest.pyにしています。
vi aitest.py
# coding: utf-8
import sys
import oci

# Auth Config
compartment_id = "<コンパートメントID>"
CONFIG_PROFILE = "DEFAULT"
config = oci.config.from_file("~/.oci/config", CONFIG_PROFILE)

# Service endpoint
endpoint = "https://inference.generativeai.ap-osaka-1.oci.oraclecloud.com"

client = oci.generative_ai_inference.GenerativeAiInferenceClient(
    config=config,
    service_endpoint=endpoint,
    retry_strategy=oci.retry.NoneRetryStrategy(),
    timeout=(10, 240)
)

# 引数(日本語)をプロンプトにする。無ければデフォルト文。
prompt = " ".join(sys.argv[1:]).strip()
if not prompt:
    prompt = "こんにちは。短い日本語で自己紹介して。"

chat_request = oci.generative_ai_inference.models.CohereChatRequest()
chat_request.message = prompt
chat_request.max_tokens = 300
chat_request.temperature = 0.7
chat_request.frequency_penalty = 0
chat_request.top_p = 0.75
chat_request.top_k = 0
chat_request.safety_mode = "CONTEXTUAL"

chat_detail = oci.generative_ai_inference.models.ChatDetails()
chat_detail.serving_mode = oci.generative_ai_inference.models.OnDemandServingMode(
    model_id="<モデルID>"
)
chat_detail.chat_request = chat_request
chat_detail.compartment_id = compartment_id

resp = client.chat(chat_detail)

print("**************************Chat Result**************************")
print(resp.data.chat_response.text)
実行すると下記のようになります。
$ python aitest.py "日本一高い山は?"
**************************Chat Result**************************
日本一高い山は**富士山**です。富士山の標高は3,776メートルで、日本の最高峰として知られています。また、その美しい姿から「日本の象徴」とも呼ばれています。
Pythonで動くコードの動作検証は以上です。
おわり
以上でPython SDKを使ってOCI Generative AIを簡単に呼び出すことができました。