はじめに
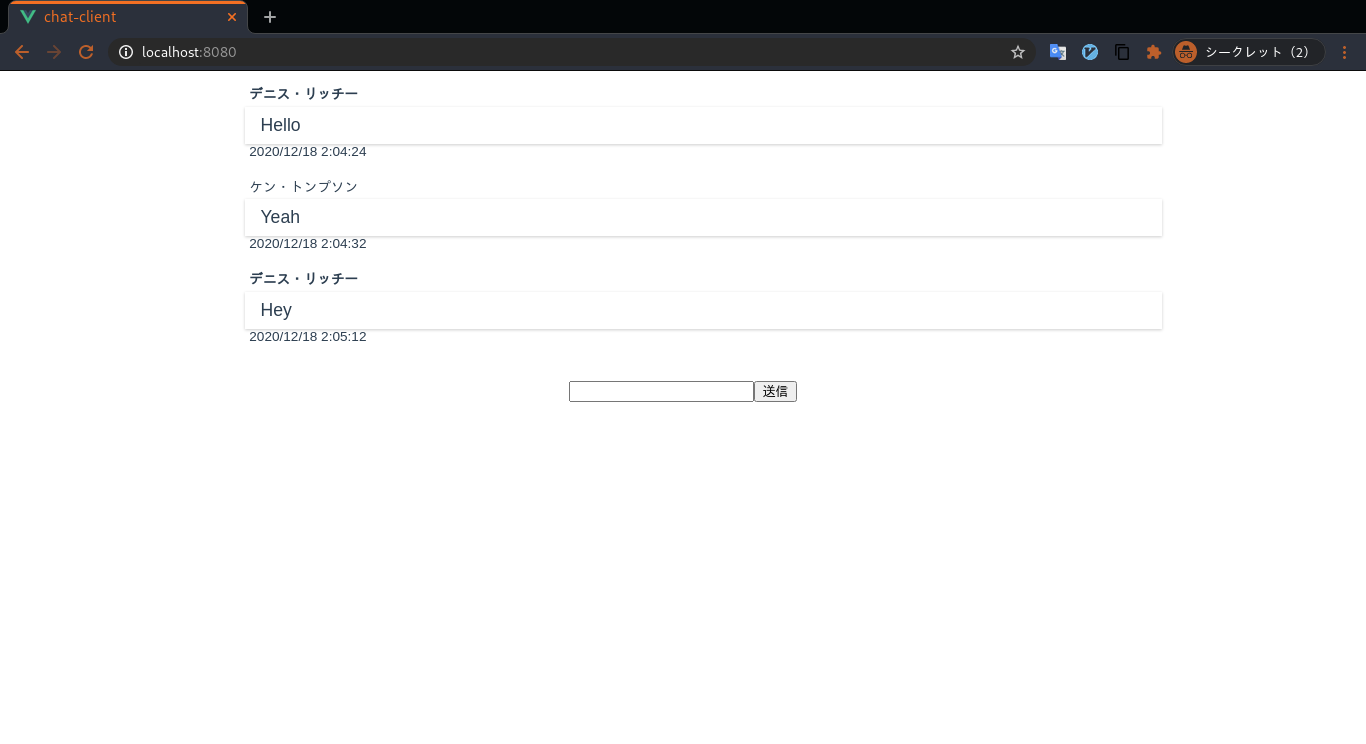
何だか良くわからないけどよく聞くgRPC-Webなるものを触りだけでも理解すべく辛うじてチャット呼べそうなものを作ってみました。
概要
gRPCとは
https://grpc.io/
Protocol BuffersやHTTP2などを利用した環境に依存せず実行できる高パフォーマンスのRPCフレームワーク。
Protocol Buffersとは
https://developers.google.com/protocol-buffers
言語やプラットフォームに依存しない構造データを定義できる。
コンパイルして指定の言語のコードを生成できる。
proto
test.proto
service TestService {
  rpc Login(User) returns (User) {}
}

message User {
  string name = 1;
  string token = 2;
}
Go
protoファイルからコンパイルしてGoのコードを生成。
test.pb.go
func (t *testServiceClient) Login(ctx context.Context, in *User, opts ...grpc.CallOption) (*User, error) {
	out := new(User)
	err := t.cc.Invoke(ctx, "/test.TestService/Login", in, out, opts...)
	if err != nil {
		return nil, err
	}
	return out, nil
}

type User struct {
	state         protoimpl.MessageState
	sizeCache     protoimpl.SizeCache
	unknownFields protoimpl.UnknownFields

	Name  string `protobuf:"bytes,1,opt,name=name,proto3" json:"name,omitempty"`
	Token string `protobuf:"bytes,2,opt,name=token,proto3" json:"token,omitempty"`
}
HTTP2とは
HTTP1からの大まかな変更
- テキストからバイナリに。プログラムで解釈しやすくなった。
- ステートレスからステートフル。ヘッダーなどを毎回送らなくても良くなった。
- 1つのTCPコネクションの中で複数のHTTP Requestと複数のHTTP Response。一気に画像を取得できたり。
gRPCのメリット
JSONではなくProtocol Buffersを利用することによってコンピュータ間でやりとりするデータを厳密に表現できる。
HTTP2によって高速。
gRPC-Webとは
https://github.com/grpc/grpc/blob/master/doc/PROTOCOL-WEB.md
https://grpc.io/docs/platforms/web/basics/
一般的にgRPCはマイクロサービス間で通信を行う際に使われ、クライアントをブラウザにしたい場合はgRPC-Webを利用する。
ブラウザの制限によりネイティブのgRPCとは違う実装。
envoyとは
https://www.envoyproxy.io/docs/envoy/latest/
gRCPとgRCP-Webを接続するためには特別なプロキシが必要でデフォルトがenvoy。
コードの説明
protoファイル定義
ひとまず、APIを仕様を定義します。
syntax = "proto3";
package chat;

option go_package = "server/proto";

// よくあるデータ型は定義してあるので読み込む
import "google/protobuf/empty.proto";
import "google/protobuf/timestamp.proto";

// やりとりを定義
service ChatService {
  rpc Login(User) returns (User) {}
  rpc Logout(User) returns (google.protobuf.Empty) {}
  rpc SendMessage(Message) returns (Message) {}
  // 複数のレスポンスの場合、stream使う。
  // Userを渡して複数のMessageを受け取る。
  rpc GetMessage(User) returns (stream Message) {}
}

// やりとりするデータを定義
message Message {
  // 番号はただの順番
  string content = 1;
  // 自分で定義した型を使える。
  User user = 2;
  google.protobuf.Timestamp created_at = 3;
}

message User {
  string name = 1;
  string token = 2;
}
上記以外にもいろんな書式があって表現力高い。
コンパイルしてコード生成
https://github.com/protocolbuffers/protobuf
からコンパイラをダウンロード。
パッケージマネージャーからインストールもできる。
Arch Linuxなら
$ sudo paman -S protobuf
Goのコードを生成するときは
$ go get -u github.com/golang/protobuf/protoc-gen-go
gRPC-Webのコードを生成するときは
$ npm install -g protoc-gen-grpc-web
言語、出力先をを指定してコンパイル
$ protoc chat.proto \
  --go_out=plugins="grpc:." \
  --js_out=import_style=commonjs:client/src/proto \
  --grpc-web_out=import_style=commonjs,mode=grpcwebtext:client/src/proto
生成したコード
https://github.com/atsuya0/grpc-web-simple-chat/blob/master/server/proto/chat.pb.go
https://github.com/atsuya0/grpc-web-simple-chat/tree/master/client/src/proto
Docker
簡単に試せるようにDockerで環境を構築しています。
Go
FROM golang:latest

WORKDIR /server
COPY . .
RUN go mod download
RUN go build -o app
CMD ./app
JavaScript
FROM  node:lts-slim

WORKDIR /client

COPY . .
RUN npm install
docker-compose.yml
GoのサーバーとJSのサーバーとプロキシサーバーの3つを定義してます。
version: '3'
services:
  envoy:
    image: envoyproxy/envoy:v1.14.1
    command: /usr/local/bin/envoy -c /etc/envoy/envoy.yaml -l debug
    volumes:
      - ./envoy:/etc/envoy
    ports:
      - '10000:10000'
    links:
      - 'server'
    container_name: 'envoy'

  server:
    build:
      context: ./server
      dockerfile: Dockerfile
    command: /server/app
    ports:
      - '50051:50051'
    volumes:
      - ./server:/go/src/server
    container_name: 'server'

  client:
    build:
      context: ./client
      dockerfile: Dockerfile
    command: npm run serve
    ports:
      - '8080:8080'
    volumes:
      - ./client:/client
    links:
      - 'envoy'
    container_name: 'client'
Envoy
動かすにはenvoy.yamlが必要です。
$ docker run --rm -it envoyproxy/envoy:v1.14.1 bash
で/etc/envoy/envoy.yamlをコピーして来てポートなどを書き換えて利用します。
.ymlにするとエラーになり時間が消えてなくなります。
admin:
  access_log_path: /tmp/admin_access.log
  address:
    socket_address: { address: 0.0.0.0, port_value: 9901 }

static_resources:
  listeners:
  - name: listener_0
    address:
      socket_address: { address: 0.0.0.0, port_value: 10000 }
    filter_chains:
    - filters:
      - name: envoy.http_connection_manager
        config:
          codec_type: auto
          stat_prefix: ingress_http
          route_config:
            name: local_route
            virtual_hosts:
            - name: local_service
              domains: ["*"]
              routes:
              - match: { prefix: "/" }
                route:
                  cluster: chat_service
                  max_grpc_timeout: 0s
              cors:
                allow_origin_string_match:
                - prefix: "*"
                allow_methods: GET, PUT, DELETE, POST, OPTIONS
                allow_headers: keep-alive,user-agent,cache-control,content-type,content-transfer-encoding,custom-header-1,x-accept-content-transfer-encoding,x-accept-response-streaming,x-user-agent,x-grpc-web,grpc-timeout
                max_age: "1728000"
                expose_headers: custom-header-1,grpc-status,grpc-message
          http_filters:
          - name: envoy.grpc_web
          - name: envoy.cors
          - name: envoy.router
  clusters:
  - name: chat_service
    connect_timeout: 0.25s
    type: logical_dns
    http2_protocol_options: {}
    lb_policy: round_robin
    # win/mac hosts: Use address: host.docker.internal instead of address: localhost in the line below
    hosts: [{ socket_address: { address: server, port_value: 50051 }}]
Go
Goの実際のコード
https://github.com/atsuya0/grpc-web-simple-chat/blob/master/server/main.go
https://github.com/atsuya0/grpc-web-simple-chat/blob/master/server/server.go
https://github.com/atsuya0/grpc-web-simple-chat/blob/master/server/signal.go
生成されたインターフェイス
type ChatServiceServer interface {
	Login(context.Context, *User) (*User, error)
	Logout(context.Context, *User) (*empty.Empty, error)
	SendMessage(context.Context, *Message) (*Message, error)
  // 複数のレスポンスの場合、戻り値がない。引数にレスポンスのためのコネクション。
	GetMessage(*User, ChatService_GetMessageServer) error
}
コンパイルして生成されたGoのインターフェイスに合わせてメソッドを定義していく。
1つのリクエストで1つのレスポンス
protoファイルで定義したmessageのカラムにはゲッターとセッターが定義されています。
以下のGetName()、GetToken()のような。
func (s *server) Login(ctx context.Context, user *pb.User) (*pb.User, error) {
	log.Println("Try to logged in.")

	clientExists := false
	s.clients.Range(func(_, client interface{}) bool {
		if value, ok := client.(string); ok && value == user.GetName() {
			clientExists = true
			return false
		}
		return true
	})
	if clientExists {
		return &pb.User{}, fmt.Errorf("\"%s\" is already in use.", user.GetName())
	}

	user.Token = genToken()
	s.clients.Store(user.GetToken(), user.GetName())

	log.Printf("%s logged in.\n", user.GetName())
	return user, nil
}
1つのリクエストで複数のレスポンス
func (s *server) GetMessage(user *pb.User, stream pb.ChatService_GetMessageServer) error {
	s.wg.Add(1)
	defer s.wg.Done()
	streamCh := s.createStreamCh(user.GetToken())
	defer s.deleteStreamCh(user.GetToken())

	for {
		select {
		case msg, ok := <-streamCh:
			if !ok {
				return nil
			}
            // ここでレスポンスしてる。メソッドは終了しない。
			if err := stream.Send(msg); err != nil {
				log.Println("Sending error.")
				return err
			}
		case <-s.exitCh:
			log.Printf("%s exit.\n", user.GetName())
			return nil
		}
	}
}
JavaScript
JSの実際のコード
https://github.com/atsuya0/grpc-web-simple-chat/blob/master/client/src/api/client.js
https://github.com/atsuya0/grpc-web-simple-chat/blob/master/client/src/components/Chat.vue
コンパイルして生成したクライアント
import { ChatServiceClient } from '../proto/chat_grpc_web_pb'
export default new ChatServiceClient('http://localhost:10000', null, null)
Vueのscript
// クライアント読み込む
import client from '../api/client.js'
// コンパイルして生成した型を読み込む
import { Message, User } from '../proto/chat_pb'
// googleが定義してる型を読み込む
// import { Empty } from 'google-protobuf/google/protobuf/empty_pb';
import { Timestamp } from 'google-protobuf/google/protobuf/timestamp_pb';

export default {
  name: "Chat",
  data: () => ({
    userName: "",
    userToken: "",
    message: "",
    messages: [],
    stream: null,
  }),
  filters: {
    toLocaleString: (value) => {
      return (new Date(value.getSeconds() * 1000)).toLocaleString()
    }
  },
  methods: {
    login: async function(e) {
      e.preventDefault();
      if (!this.userName) {
        return;
      }
      await client
        .login(this.getUser(), {}, (err, user) => {
          if (err != null) {
            console.log(err);
          } else {
            this.userToken = user.getToken();
            this.stream = this.fetchMessageStream()
          }
        })
    },
    sendMessage: async function(e) {
      e.preventDefault();
      if (!this.message) {
        return;
      }
      // 生成した型に入れてく。
      // セッターが生えてるので利用する。
      const message = new Message();
      message.setContent(this.message);
      message.setUser(this.getUser());
      const timestamp = new Timestamp();
      // ここはどこにも書いてなくて、開発者コンソールで中身を全部読んだ。
      timestamp.fromDate(new Date());
      message.setCreatedAt(timestamp);

      await client
        .sendMessage(message, {}, (err, res) => {
          if (err != null) {
            console.log(err);
          }
          this.message = '';
        })
    },
    fetchMessageStream: function() {
      const stream = client.getMessage(this.getUser());
      // メッセージが来たら発火するイベント
      stream.on('data', message => {
        console.log(message);
        this.messages = [...this.messages, message];
      });
      return stream;
    },
    getUser: function() {
      const user = new User();
      user.setName(this.userName);
      user.setToken(this.userToken);
      return user;
    }
  }
};
参考
GoでgRPC使う際のクイックスタート
https://grpc.io/docs/languages/go/quickstart/
protocol buffersが生成するGoのコードの説明
https://developers.google.com/protocol-buffers/docs/reference/go-generated
gRCPのGo実装
https://github.com/grpc/grpc-go
ブラウザためのgRCPのJavaScript実装
https://github.com/grpc/grpc-web
Goのライブラリのドキュメント
https://godoc.org/google.golang.org/grpc
GCPのドキュメントにある構成例
https://cloud.google.com/endpoints/docs/grpc/grpc-service-config?hl=ja
試す
$ git clone https://github.com/atsuya0/grpc-web-simple-chat.git
$ cd grpc-web-simple-chat
$ docker-compose up -d --build
ブラウザでhttp://localhost:8080
サーバーだけ試す
curlは使えないのでgrpc-cli
パッケージマネージャーからインストール
$ sudo paman -S grpc-cli
$ grpc_cli ls localhost:50051 chat.ChatService -l
$ grpc_cli call localhost:50051 ChatService.Login 'name: "John"'
$ grpc_cli call localhost:50051 ChatService.SendMessage 'content: "Hey"'
最後に
Protocol Buffersで送信・受信するデータをテキストファイルで定義できるのは仕様が分かりやすくてとても良いですね。1つのTCPコネクションの中で複数のHTTP通信ができるのも幅が広がって期待に胸いっぱいです。
