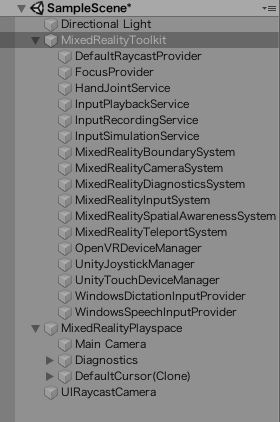
MRTKv2.1はProfileを使用するよ〜
導入手順については過去に説明したものがあるのでそちらを参考してください。
・例)【HoloLens】MRTK2.1を使って実機ビルド
Profileの設定を変更していくことでSpatialMappingを使う設定であったり、Cameraの設定などを変更していきます。
基本的にはDefaultで用意されているものを使用しますが、SaptialMappingが重かったり、DefaultではついてくるCPUパワーを表示する機能などを非表示にしたいときなどがあると思われます。
その際にはクローンして独自にProfileを変更していくことが求められます!
Toolkitを適用する

こちらのボタンを押すことでSceneにMixedRealityToolkitが追加されます。
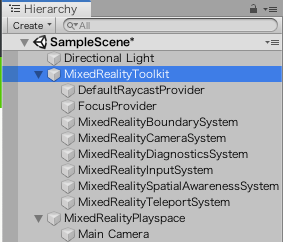
編集方法
先ほどToolkitを画面に追加しましたが、Inspectorを見てみると***MixedRealityToolkit***というScriptがついています。見てわかる通り、cameraの設定、spatialMappingの設定やらなんやら全部ここで設定します。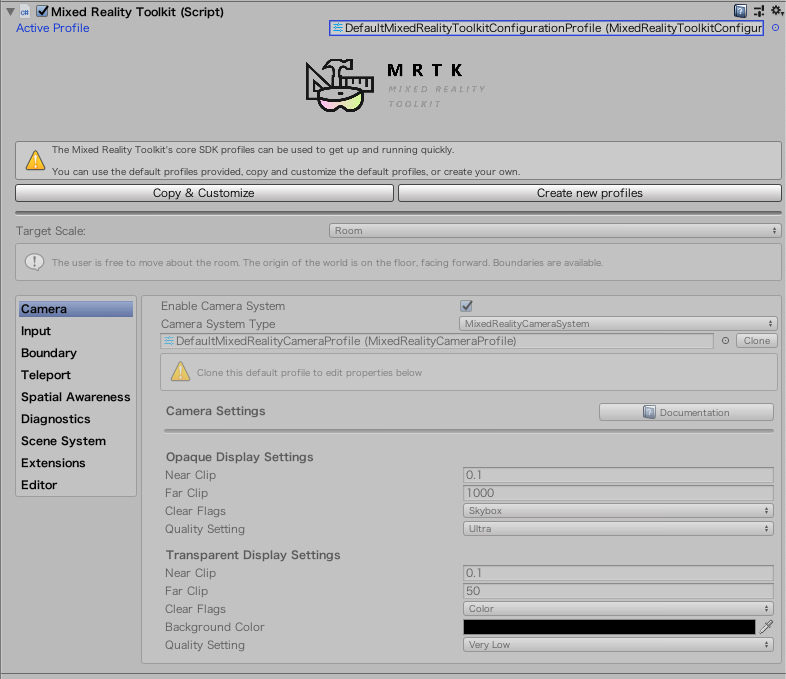
Active Profileという項目で設定するProfileを切り替えます。現在のところDefaultで下記の3Profileが用意されています。
- DefaultMixedRealityToolkitConfiguratioProfile
- DefaultHoloLens1ConfigurationProfile
- DefaultHoloLens2ConfigurationProfile
基本的にDefaultの設定のままでBuilできます。CPUバーなどが邪魔!といったようなことがなければDefaultのままで大丈夫です。
では自分でカスタマイズする際にはどうするのかというと、
The Mixed Reality Toolkit`s core SDK profiles can be used to get up and running quickly
→
Mixed Reality ToolkitのコアSDKプロファイルを使用して、すぐに起動して実行できます
You can use the default profiles provided, copy and customize the default profiles, or create your own
→
提供されているデフォルトのプロファイルを使用するか、デフォルトのプロファイルをコピーしてカスタマイズするか、独自のプロファイルを作成できます
せっかくなので、最初から作っていきたいと思います。
Profileの作成
Create new Plofilesを選択すると新しいProfileのinspectorに移動します。
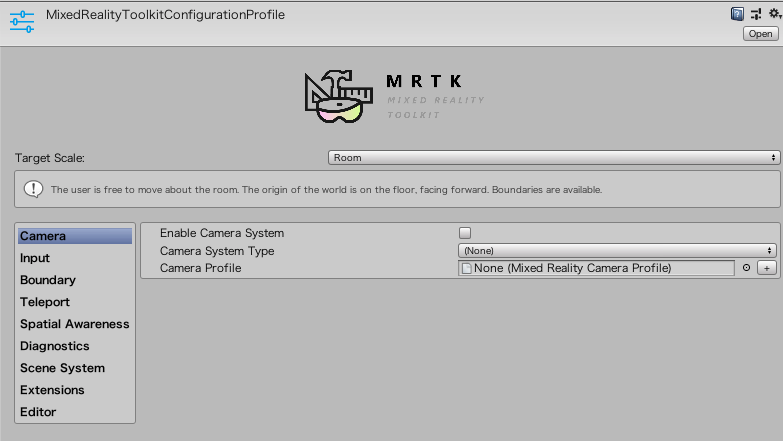
ここでCameraやSpatial Awerenessなどの項目ごとのProfileを作成していきます。
各種項目の設定見てみよう〜
Camera
※記載済
展開
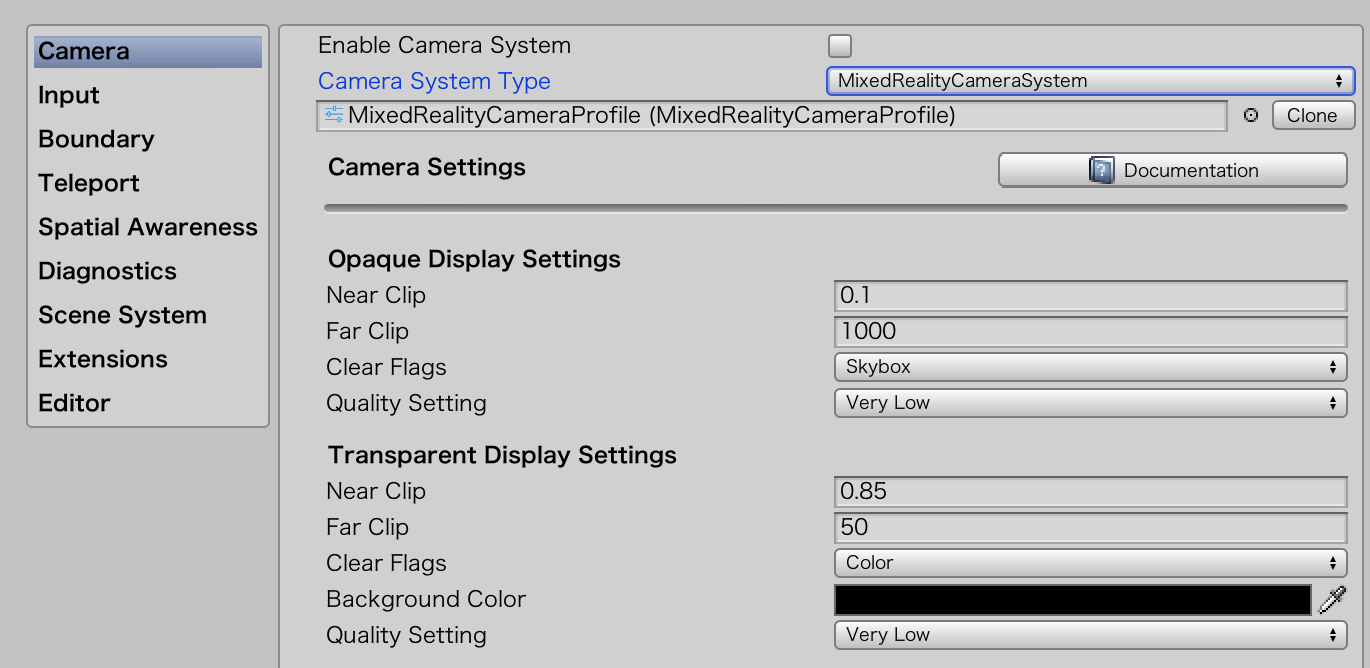 これがdefaultのProfileの設定です。
各項目を詳しく見ていきましょう [参照:Getting started with MRTK](https://microsoft.github.io/MixedRealityToolkit-Unity/Documentation/CameraSystem/CameraSystemOverview.html)
Opaque Display Setting
不透明ディスプレイの設定って直訳ですが、おそらくVRでの設定のことだと思われます。。。あいまいです
TransParent Display Setting
透明デイスプレイの設定なので、HoloLensのような現実に映し出すようなデバイスでの設定です。
Near Clip
実機の際に、近くにあるオブジェクトの描画範囲が指定できます。
近くにいると結局途切れて見えてしまうので、ある程度NearClipは上げてもいいのかなと思います。
Near Clip訳
-
公式原文
The near clip plane is the closest, in meters, that a virtual object can be to the camera and still be rendered. For greatest user comfort, it is recommended to make this value greater than zero. -
Google翻訳
ニアクリッププレーンは、仮想オブジェクトをカメラに近づけてレンダリングできる距離に最も近いメートル単位です。ユーザーの快適性を最大限に高めるには、この値をゼロより大きくすることをお勧めします。
FarClip
遠くのオブジェクトをどこまでレンダリングするかの設定です。
Far Clip訳
-
公式原文
The far clip plane is the furthest, in meters, that a virtual object can be to the camera and still be rendered. For transparent devices, it is recommended that this value be relatively close as not to overly exceed the real world space and break the application's immersive qualities. -
Google翻訳
ファークリッププレーンは、仮想オブジェクトをカメラに近づけてレンダリングすることができる最も遠いメートル単位です。透過的なデバイスの場合、この値は実世界のスペースを過度に超えないように比較的近く、アプリケーションの没入感を損なうことをお勧めします。
Clear Flags
昔カメラで設定をSkyBoxからSolidColorに変更したと思いますが、これです。
実行したらカメラの設定変えたはずなのに!って人はここです!!
Clear Flags訳
-
公式原文
-
The clear flags value indicates how the display is cleared as it is drawn. For virtual reality experiences, this value is most often set to Skybox. For transparent displays, it is recommended to set this to Color.
-
Google翻訳
クリアフラグの値は、描画時に表示がクリアされる方法を示します。バーチャルリアリティエクスペリエンスの場合、この値はほとんどの場合Skyboxに設定されます。透明ディスプレイの場合、これを[色]に設定することをお勧めします
Quaritty Setting
カメラのクオリティ、描画に関する項目ですが、ここの設定は全体の設定が上書きされてしまうようなので特に意識しないでいいと思います。
詳しく知りたい方は、unityの公式をみると詳細が記載されています。
参照 : UnityDocument [Quality (品質)]
Quality Setting訳
-
公式原文
The quality settings value indicates the graphics quality that Unity should use when it renders the scene. The quality level is a project level setting and is not specific to any one camera. For more information, please see the Quality article in Unity's documentation. -
Google翻訳
品質設定値は、Unityがシーンをレンダリングするときに使用するグラフィック品質を示します。品質レベルはプロジェクトレベルの設定であり、どのカメラにも固有のものではありません。詳細については、Unityのドキュメントの品質に関する記事を参照してください。
Background Color
今までカメラにSolidColorと選択して背景色を黒色にしたと思いますが、それです。
HoloLensでは背景を黒が透明?のような意味になってくるので黒にしましょう
Background Color訳
-
公式原文
If the clear flags are not set to Skybox, the background color property will be displayed. -
Google翻訳
クリアフラグがSkyboxに設定されていない場合、背景色のプロパティが表示されます。
skybox以外では背景カラーの選択が必要とのことです。
Input
※更新中
展開
Boundary
※更新中
展開
Teleport
※更新中
展開
Spatial Awareness
※更新中
展開
Diagnostics
※更新中
展開
Scene System
※更新中
展開
更新ログ
- 12/7 Profileの設定方法を記載
- 12/18 Cameraの設定を記載
