はじめに
こちらも既に多くの人が取り組んでいますスタイル変換に取り組んだ際のまとめです。
ポケモンの画像を使い実装しています。
Style変換とは
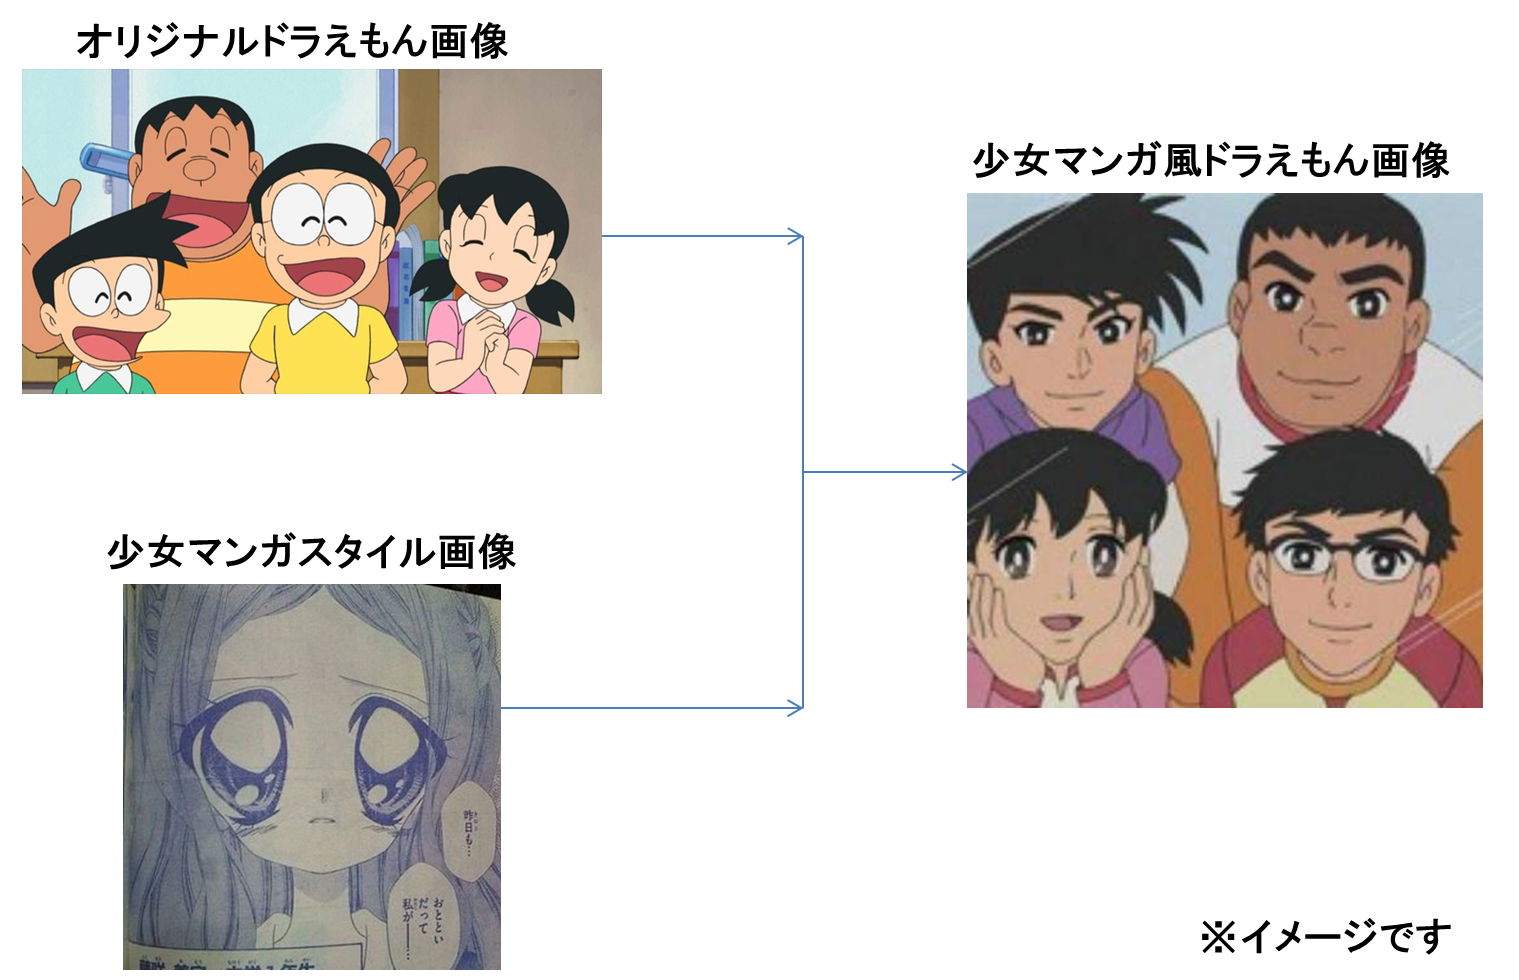
Style変換とは、もともとの画像に対して、スタイル画像を与えることで、画風などをスタイルに適用させる手法です。
イメージ
仕組み
ディープラーニングで画像を処理する際に、特徴量を抽出するためによくCNN(畳み込みニューラルネットワーク)が利用されます。CNNを何層にも重ね合わせることで、画像の特徴をより顕著に取り出します。
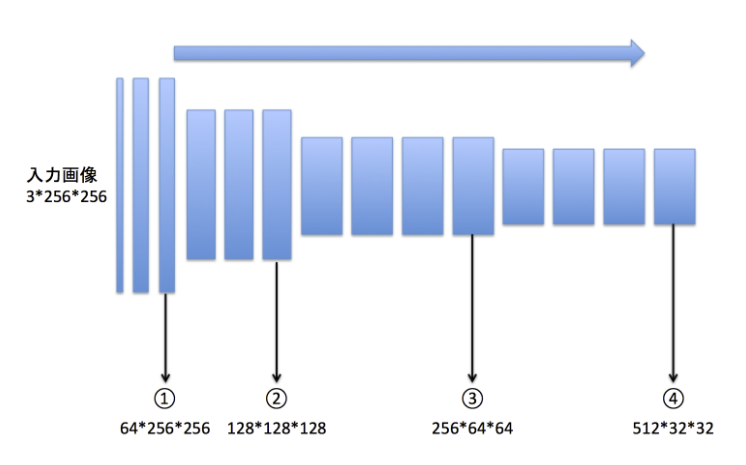
(出展:https://tech.preferred.jp/ja/blog/chainer-gogh/)
上図はCNNを使ったネットワークで有名なVGG16です。①②③④と層が深くなるにつれて画像の特徴を捉えます。
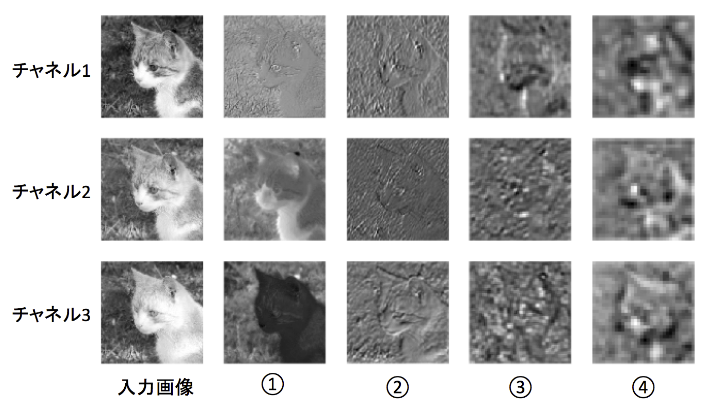
(出展:https://tech.preferred.jp/ja/blog/chainer-gogh/)
上図は①②③④から猫の画像の特徴を抽出したものになります。
①ではまだはっきりと猫とわかりますが、②、③、④となるにつれて、「猫らしさを判別するのに不要な情報」は消えていき、人間の目では猫とかろうじてわかるレベルの粗さになってきます。
スタイル変換では猫らしさを残しつつ、「猫らしさを判別するのに不要な情報」の部分を別のスタイルに置き換えることで、画風を変えるといったものになります。
実装
今回は炎属性のリザードンと水属性のカメックスに対して、スタイル変換を行い無理やり属性を変更します。
コンテンツ画像

スタイル画像
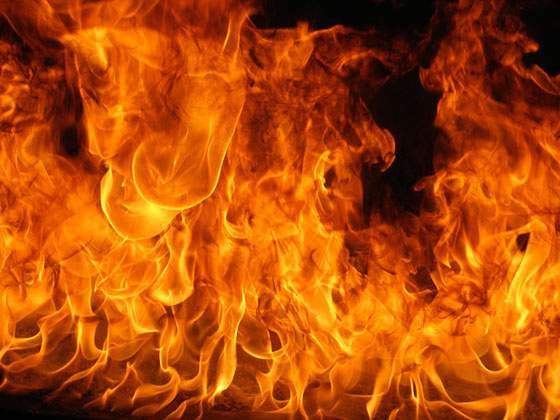
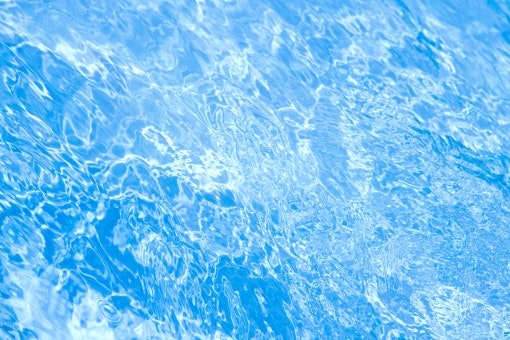
なお、属性を変更するため、以下のフリー素材を使います。
- 炎
- 水
学習のイメージ
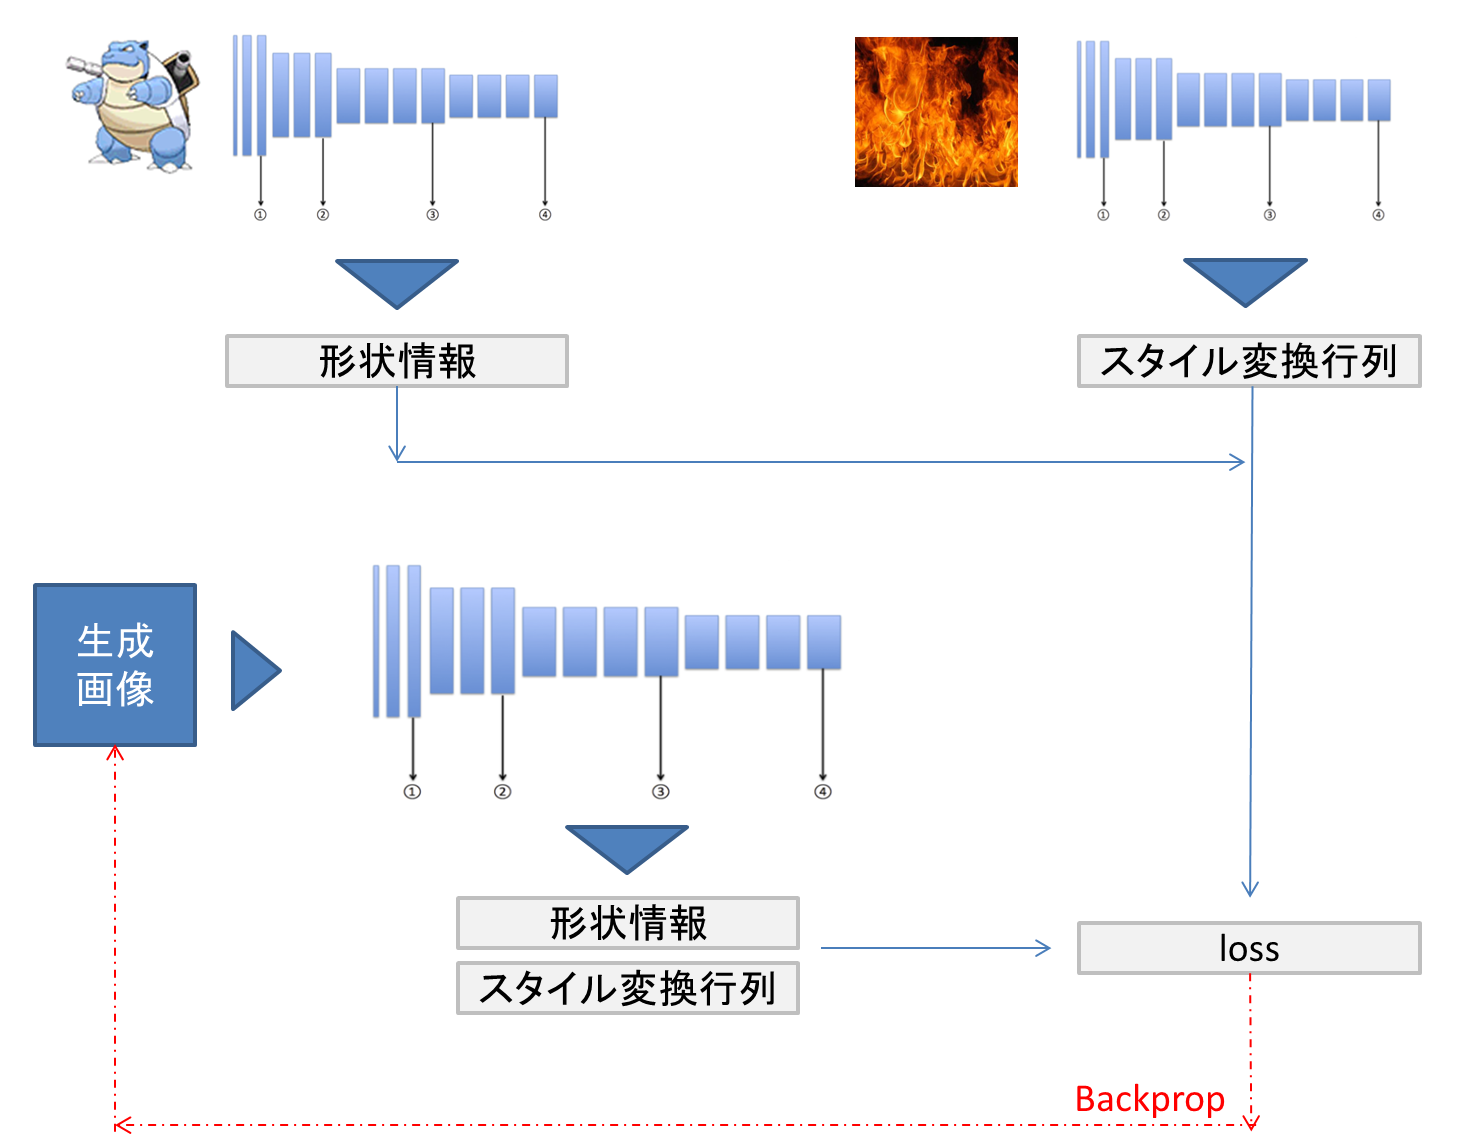
コンテンツとなる画像からはVGGの中間層から形状の情報を取り出します。一方で各層の間で消失している情報からスタイル行列を求めます。これらを基に学習を行い、生成した画像との差異を求め、その差異を学習にフィードバック(backprop)していくことで画像の精度を向上させます。
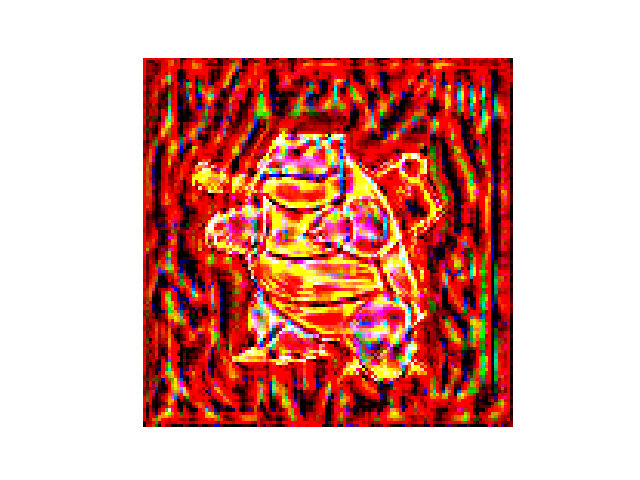
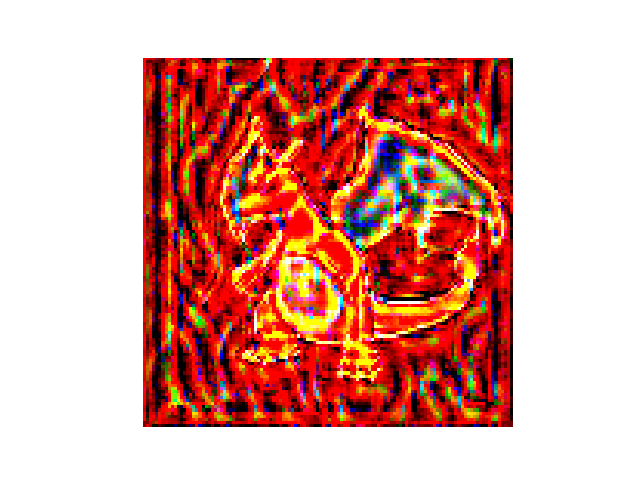
結果
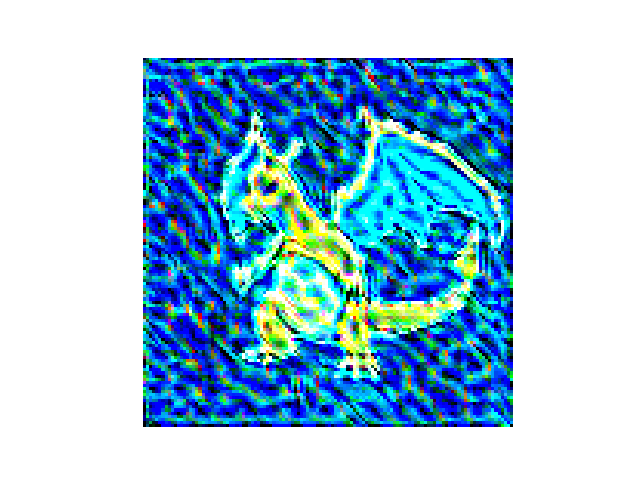
水属性のリザードンと炎属性のカメックスを生成しました。
少し形状が荒くなってしまっています。
なお、そのままの属性のものも作ってみました。
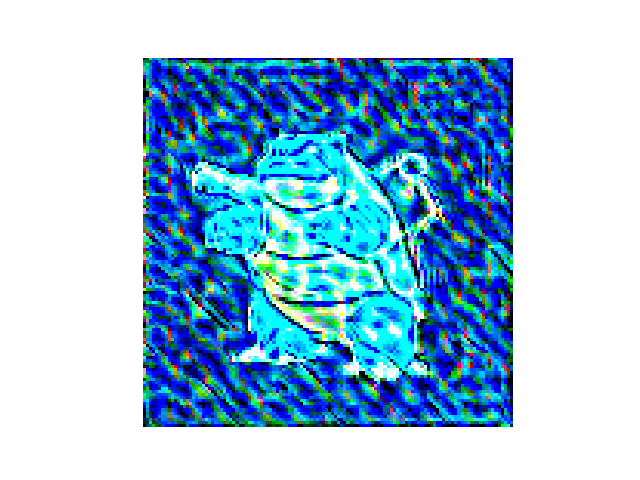
少しスタイルが強すぎて石版みたいになってしまっています。
今回使ったものはStyle変換でも基本的な仕組みなので、最新の論文など確認し
もう少し精度向上できないか試してみようかと思います。
(参考)プログラム
pytorchで実装しています。
以下のサイトを参考にさせていただきました。
https://qiita.com/y-foi/items/8672e066a6009d2cc2b7
import matplotlib.pyplot as plt
import torch
import torch.optim as optim
from torchvision import transforms, models, utils
from PIL import Image
import numpy as np
import os
from datetime import datetime


### param
pict_path='data/blastoise.png'
style_path="style/burn.jpg"
result_path="./result/"

jobid=datetime.now().strftime("%Y/%m/%d%H%M%S").replace("/","")
save_path=result_path+jobid+"/"
os.mkdir(save_path)


vgg = models.vgg19(pretrained=True).features
for param in vgg.parameters():
    param.requires_grad_(False)


device = torch.device('cuda' if torch.cuda.is_available() else 'cpu')
vgg.to(device)

def load_image(img_path):
    max_size=400

    image = Image.open(img_path).convert('RGB')


    if max(image.size) > max_size:
        size = max_size
    else:
        size = max(image.size)

    in_transform = transforms.Compose([
        transforms.Resize(size),
        transforms.ToTensor(),
        transforms.Normalize((0.5, 0.5, 0.5),
                            (0.5, 0.5, 0.5))
    ])

    image = in_transform(image).unsqueeze(0)
    return image


content = load_image(pict_path).to(device)
style = load_image(style_path).to(device)

def im_convert(tensor):
    image = tensor.clone().detach().cpu().numpy()

    # squeeze : Returns a tensor with all the dimensions of input of size 1 removed.
    image = image.squeeze()
    image = image.transpose(1, 2, 0)
    image = image * np.array((0.5, 0.5, 0.5)) + np.array((0.5, 0.5, 0.5))

    image = image.clip(0, 1)
    return image

def get_features(image, model):
    layers = {
        "0" : "conv1_1",
        "5" : "conv2_1",
        "10" : "conv3_1",
        "19" : "conv4_1",
        "21" : "conv4_2",
        "28" : "conv5_1",
    }

    features = {}
    for name, layer in model._modules.items():
        image = layer(image)
        if name in layers:
            features[layers[name]] = image

    return features


content_features = get_features(content, vgg)
style_features = get_features(style, vgg)


def gram_matrix(tensor):
    # arbitrary vector times vector.T
    _, d, h, w = tensor.size()
    tensor = tensor.view(d, h*w)
    gram = torch.mm(tensor, tensor.t())
    return gram

style_grams = {layer : gram_matrix(style_features[layer]) for layer in style_features}


style_weights = {
    "conv1_1" : 1.,
    "conv2_1" : 0.75,
    "conv3_1" : 0.2,
    "conv4_1" : 0.2,
    "conv5_1" : 0.2
}
content_weight = 1
style_weight = 1e6


# target imgの最適化
target = content.clone().requires_grad_(True).to(device)
optimizer = optim.Adam([target], lr=0.003)


show_every = 100
steps = 2100
heights, widths, channels = im_convert(target).shape
image_array = np.empty(shape=(300, heights, widths, channels))
capture_frame = steps / 300
counter = 0

for itr in range(1, steps+1):
    target_features = get_features(target, vgg)
    content_loss = torch.mean((target_features['conv4_2'] - content_features['conv4_2']) **2)
    style_loss = 0

    # layerは辞書のキー
    for layer in style_weights:
        target_feature = target_features[layer]
        target_gram = gram_matrix(target_feature)
        style_gram = style_grams[layer]
        layer_style_loss = style_weights[layer] * torch.mean((target_gram - style_gram) **2)
        _, d, h, w = target_feature.shape
        # unit lossを得るためにnormalizeする必要がある
        style_loss += layer_style_loss / (d * h * w)

    total_loss = content_weight * content_loss + style_weight * style_loss
    optimizer.zero_grad()
    total_loss.backward()
    optimizer.step()

    if itr % show_every == 0:
        print('iterlation: ', itr,"   ",  'total loss: ' , total_loss.item())
        plt.imshow(im_convert(target))
        plt.axis('off')
        plt.savefig(save_path+str(itr).zfill(8)+".png" )
    if itr % capture_frame == 0:
        image_array[counter] = im_convert(target)
        counter = counter + 1

# content, style, targetの全画像の可視化
fig, (ax1, ax2, ax3) = plt.subplots(1, 3, figsize=(20,10))
ax1.imshow(im_convert(content))
ax1.axis('off')
ax2.imshow(im_convert(style))
ax2.axis('off')
ax3.imshow(im_convert(target))


# target画像の保存
utils.save_image(target, save_path+'all.png', nrow=4)
ax3.axis('off')