はじめに
Terraformの学習を行うため、公式ドキュメントのチュートリアルに沿ってEC2インスタンスを構築してみました。
日本語ドキュメントはないため、翻訳しつつ挑戦してみました。
詰まったところも含めて備忘録としてまとめます。
行ったチュートリアル
1.Terraformのインストール
hashicorp/tapパッケージをインストール
$ brew tap hashicorp/tap
asa mydir % brew tap hashicorp/tap
==> Tapping hashicorp/tap
Cloning into '/opt/homebrew/Library/Taps/hashicorp/homebrew-tap'...
remote: Enumerating objects: 6244, done.
remote: Counting objects: 100% (1034/1034), done.
remote: Compressing objects: 100% (284/284), done.
remote: Total 6244 (delta 904), reused 752 (delta 750), pack-reused 5210 (from 2)
Receiving objects: 100% (6244/6244), 1.09 MiB | 13.95 MiB/s, done.
Resolving deltas: 100% (4480/4480), done.
Tapped 2 casks and 32 formulae (99 files, 1.5MB).
Terraformをインストール
その後、Terraformをインストール homebrewを使用します。
brew install hashicorp/tap/terraform
asa mydir % brew install hashicorp/tap/terraform
==> Fetching downloads for: terraform
✔︎ Formula terraform (1.14.3)                                                                 Verified     28.7MB/ 28.7MB
==> Installing terraform from hashicorp/tap
🍺  /opt/homebrew/Cellar/terraform/1.14.3: 5 files, 95.6MB, built in 2 seconds
==> Running `brew cleanup terraform`...
Disable this behaviour by setting `HOMEBREW_NO_INSTALL_CLEANUP=1`.
Hide these hints with `HOMEBREW_NO_ENV_HINTS=1` (see `man brew`).
homebrewがインストールされていない場合はこちらの記事を参照ください。
新しいターミナルを開き、インストールされていることを確認
$ terraform -help
asa mydir % terraform -help
Usage: terraform [global options] <subcommand> [args]

The available commands for execution are listed below.
The primary workflow commands are given first, followed by
less common or more advanced commands.

Main commands:
  init          Prepare your working directory for other commands
  validate      Check whether the configuration is valid
  plan          Show changes required by the current configuration
  apply         Create or update infrastructure
  destroy       Destroy previously-created infrastructure

All other commands:
  console       Try Terraform expressions at an interactive command prompt
  fmt           Reformat your configuration in the standard style
  force-unlock  Release a stuck lock on the current workspace
  get           Install or upgrade remote Terraform modules
  graph         Generate a Graphviz graph of the steps in an operation
  import        Associate existing infrastructure with a Terraform res
  ・・・
オプションの使い方を参照したいとき
terraform plan -help
タブ補完を使用する
bashやzshを使用している場合、タブ補完が使えます。
自分の使用しているshellを確認、
$ echo $SHELL
/bin/zsh
.zshrcを作成し、terraform -install-autocompleteを実行します。
$ touch ~/.zshrc
$ terraform -install-autocomplete
ターミナル再起動で完了
2.TerraformでEC2のインスタンスを作る
前提条件
- Terraform CLI がインストールされていること(1.で実施済み)
- AWS CLIがインストールされていること
-
us-west-2リージョンにEC2やVPCを構成できるassociated credentials、AWSアカウントを持っていること
無料枠で実施できるようにチュートリアルは構成されていますが、放置すると請求が発生する可能性があります。作成後はインスタンスを削除することを推奨しています。(後ほど実施予定)
作成したインスタンスを消したい場合はこちらを参考
AWS CLIのインストール
コマンドでAWS CLIがインストールされているか確認
$ which aws
/usr/local/bin/aws
$ aws --version
aws-cli/2.33.11 Python/3.13.11 Darwin/25.2.0 exe/arm64
インストールされていない場合、公式サイトよりダウンロードする
IAMユーザーの認証
terraformにアクセスキーを登録する
練習用のIAMユーザーを作成し、アクセスキーを作成しました。
アクセスキーを作成する場合
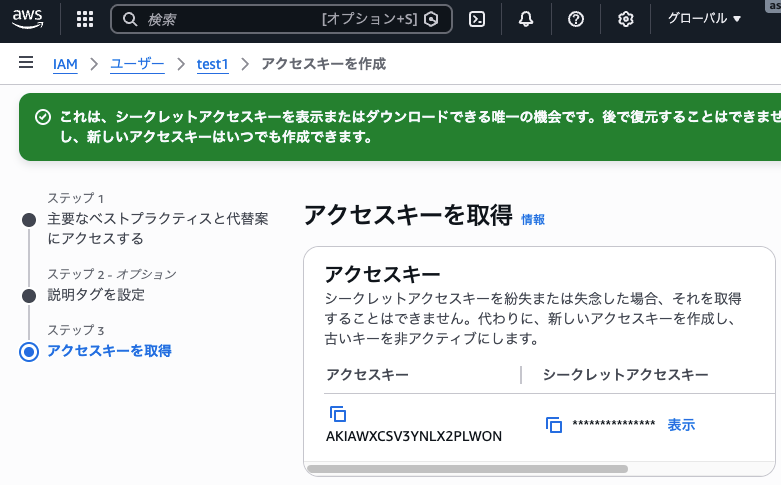
作成したアクセスキーを登録します。
# アクセスキー
$ export AWS_ACCESS_KEY_ID=
# シークレットキー
$ export AWS_SECRET_ACCESS_KEY=
aws configure listで登録確認

フォルダを作成
$ mkdir learn-terraform-get-started-aws
$ cd learn-terraform-get-started-aws
terraform.tfを作成
Terraformの設定ファイルはHashiCorp's configuration language, HCLで管理します。拡張子は.tf
作成したフォルダ内でterraform.tfを作成し、terraform自体の設定を定義します。
learn-terraform-get-started-aws % touch terraform.tf
以下の内容を記載します。
# required_providersブロックでプロバイダー管理を行える
# Terraform Registryにてプロバイダーを取得できる
terraform {
  required_providers {
    aws = {
      source  = "hashicorp/aws"
      version = "~> 5.92"
    }
  }
  # Terraform自身のバージョン定義terraform -versionでわかる
  required_version = ">= 1.2"
}
- terraformブロック:terraform自身の定義
- required_providersブロック:プロバイダー管理を行える
- required_version:Terraform自身のバージョン定義
terraform -versionコマンドで調べられる
required_providersブロックを使用すると、構成で使用するプロバイダーのバージョン制約を設定できます。
HashiCorpはTerraform Registryを管理しており、そこからパブリックTerraformを取得できます。
dockerのimagesみたいなものと理解しました。
プロバイダーとは
AWSが用意しているAPIを操作するためのツール
main.tfの作成
main.tfにはインフラリソースの定義を記述します。
今回は、EC2インスタンスを作成するため、main.tfに以下の内容を記述します。
# required_providerに定義したプロバイダーの詳細を設定する
provider "aws" {
  region = "us-west-2"
}

# AWSから最新のUbuntu AMI情報を動的に取得する
# AMI IDをハードコードせず、常に最新版を使える
data "aws_ami" "ubuntu" {
  most_recent = true

  filter {
    name   = "name"
    values = ["ubuntu/images/hvm-ssd-gp3/ubuntu-noble-24.04-amd64-server-*"]
  }

  owners = ["099720109477"] # Canonical
}

resource "aws_instance" "app_server" {
  ami           = data.aws_ami.ubuntu.id
  instance_type = "t3.micro"

  tags = {
    Name = "learn-terraform"
  }
}
フォーマットをかける
$ terraform fmt
terraformworkspaceの初期化
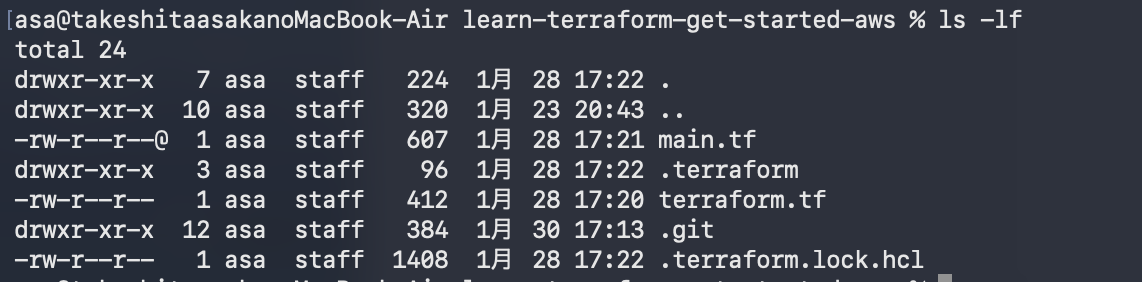
$ terraform init
実行後、.terraformと.terraform.lock.hclファイルが出来上がる
構文があっているかどうかを確かめたいとき
$ terraform validate
設定内のエラーを特定するのに役立つ。
リソース名を誤って入力したり、リソースがサポートしていない引数を参照したりすると、エラーを教えてくれます。
インフラ構造の作成
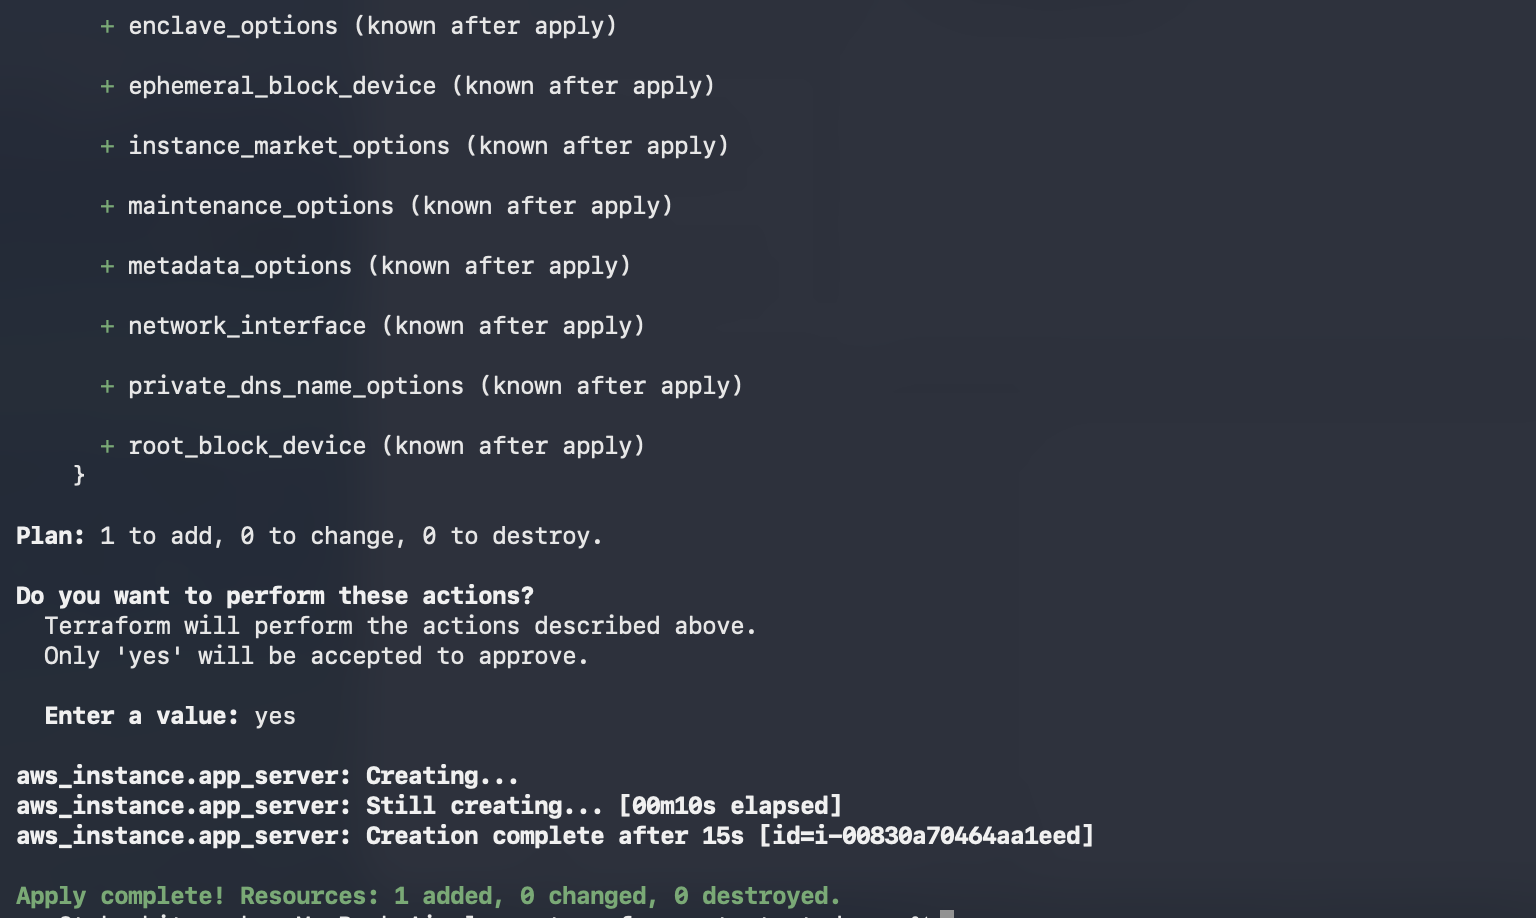
$ terraform apply
コマンド入力後、Enter a value: でyesを入力
asa@takeshitaasakanoMacBook-Air learn-terraform-get-started-aws % terraform apply
data.aws_ami.ubuntu: Reading...
data.aws_ami.ubuntu: Read complete after 1s [id=ami-0786adace1541ca80]

Terraform used the selected providers to generate the following execution plan. Resource actions are indicated with the
following symbols:
  + create

Terraform will perform the following actions:

  # aws_instance.app_server will be created
  + resource "aws_instance" "app_server" {
      + ami                                  = "ami-0786adace1541ca80"
      + arn                                  = (known after apply)
      + associate_public_ip_address          = (known after apply)
      + availability_zone                    = (known after apply)
      + cpu_core_count                       = (known after apply)
      + cpu_threads_per_core                 = (known after apply)
      + disable_api_stop                     = (known after apply)
      + disable_api_termination              = (known after apply)
      + ebs_optimized                        = (known after apply)
      + enable_primary_ipv6                  = (known after apply)
      + get_password_data                    = false
      + host_id                              = (known after apply)
      + host_resource_group_arn              = (known after apply)
      + iam_instance_profile                 = (known after apply)
      + id                                   = (known after apply)
      + instance_initiated_shutdown_behavior = (known after apply)
      + instance_lifecycle                   = (known after apply)
      + instance_state                       = (known after apply)
      + instance_type                        = "t2.micro"
      + ipv6_address_count                   = (known after apply)
      + ipv6_addresses                       = (known after apply)
      + key_name                             = (known after apply)
      + monitoring                           = (known after apply)
      + outpost_arn                          = (known after apply)
      + password_data                        = (known after apply)
      + placement_group                      = (known after apply)
      + placement_partition_number           = (known after apply)
      + primary_network_interface_id         = (known after apply)
      + private_dns                          = (known after apply)
      + private_ip                           = (known after apply)
      + public_dns                           = (known after apply)
      + public_ip                            = (known after apply)
      + secondary_private_ips                = (known after apply)
      + security_groups                      = (known after apply)
      + source_dest_check                    = true
      + spot_instance_request_id             = (known after apply)
      + subnet_id                            = (known after apply)
      + tags                                 = {
          + "Name" = "learn-terraform"
        }
      + tags_all                             = {
          + "Name" = "learn-terraform"
        }
      + tenancy                              = (known after apply)
      + user_data                            = (known after apply)
      + user_data_base64                     = (known after apply)
      + user_data_replace_on_change          = false
      + vpc_security_group_ids               = (known after apply)

      + capacity_reservation_specification (known after apply)

      + cpu_options (known after apply)

      + ebs_block_device (known after apply)

      + enclave_options (known after apply)

      + ephemeral_block_device (known after apply)

      + instance_market_options (known after apply)

      + maintenance_options (known after apply)

      + metadata_options (known after apply)

      + network_interface (known after apply)

      + private_dns_name_options (known after apply)

      + root_block_device (known after apply)
    }

Plan: 1 to add, 0 to change, 0 to destroy.

Do you want to perform these actions?
  Terraform will perform the actions described above.
  Only 'yes' will be accepted to approve.

  Enter a value: yes
作成できました。
GUIでも確認できました。

遭遇したエラー、詰まったこと
Error: No valid credential sources foundエラーが発生する
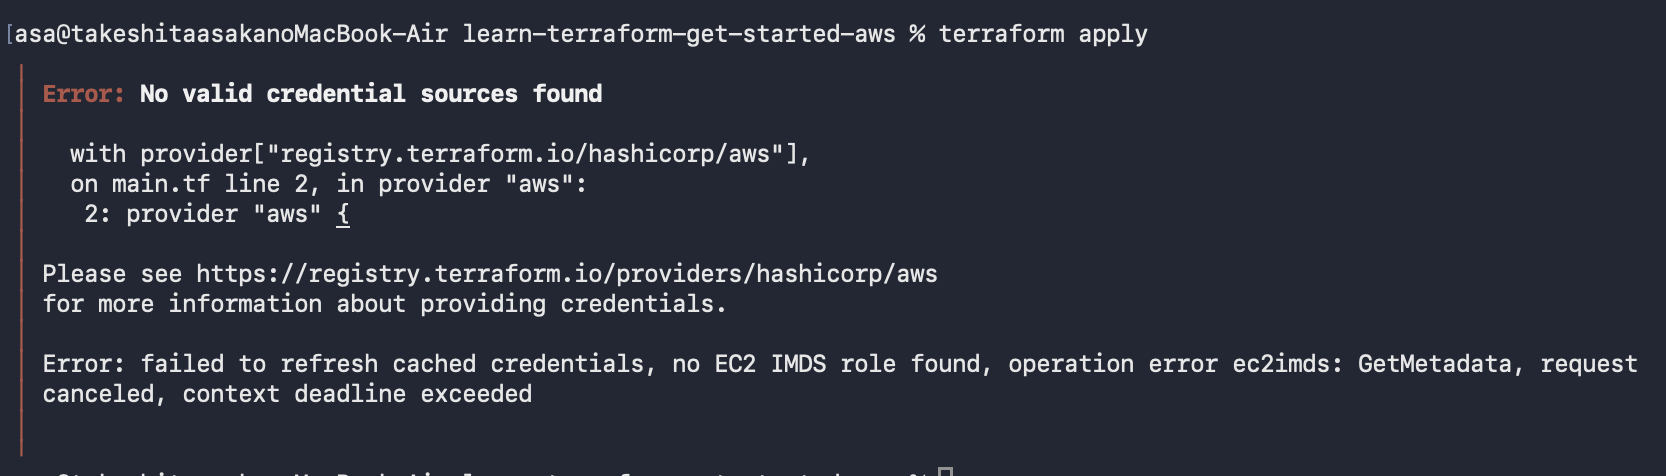
原因
AWS CLIのインストール、認証設定が未実施だったため

解決方法
AWS CLIのインストール、IAMユーザーの作成、アクセスキーの作成、登録
2.TerraformでEC2のインスタンスを作る(AWS CLIのインストール〜を参照)
Error: You are not authorized to perform this operationエラーが発生する

原因
IAMユーザーにEC2権限が不足
解決方法
IAMユーザーにEC2の権限を追加
Error: InvalidParameterCombination: The specified instance type is not eligible for a free Tierエラーが発生する

原因
t2.microがus-west-2リージョンでは無料枠対象外となっていた。
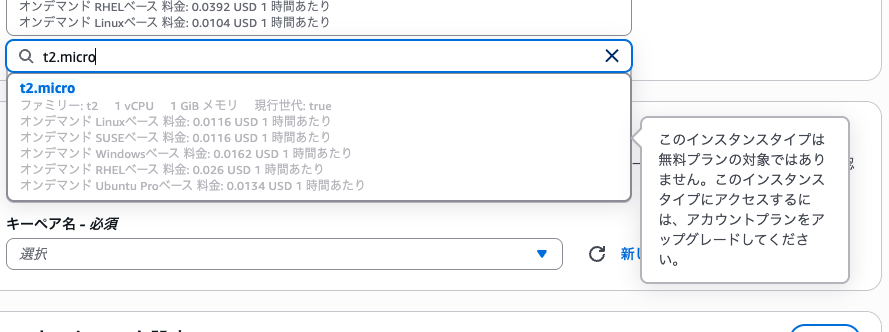
解決方法
t3.microに変更する
provider "aws" {
  region = "us-west-2"
}

# AWSから最新のUbuntu AMI情報を動的に取得する
# AMI IDをハードコードせず、常に最新版を使える
data "aws_ami" "ubuntu" {
  most_recent = true

  filter {
    name   = "name"
    values = ["ubuntu/images/hvm-ssd-gp3/ubuntu-noble-24.04-amd64-server-*"]
  }

  owners = ["099720109477"] # Canonical
}

resource "aws_instance" "app_server" {
  ami           = data.aws_ami.ubuntu.id
-  instance_type = "t2.micro"
+  instance_type = "t3.micro"

  tags = {
    Name = "learn-terraform"
  }
}
おわりに
IAMユーザーの認証周り、ubuntuの選択に少し詰まりましたが、丁寧なドキュメントのおかげでチュートリアルに挑戦することができました。
チュートリアルはインスタンスの管理、削除まであるので実施後、記事に追記していきます。
参考資料