概要
- zenityの簡単な紹介
- pythonのsubprocessチュートリアル
- 簡易GUIの使用例
zenityのオプションは一つだけ縛りで、とりあえず動かすことを目的とします。
※subprocessのオプションは使います
1. 事前準備
zenityについて
zenityはLinuxコマンドで、簡単なGUI画面を表示できます。
Raspbery pi OSなどのデスクトップ環境Linuxなら最初から入っていることが多いです。
最初にターミナルで実行してみて、コマンドが使えるか確認してください。
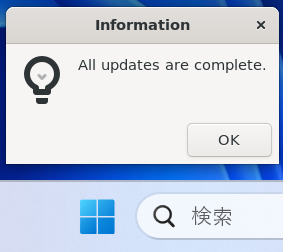
$ zenity --info
コマンドが使える状態なら、GUIのダイアログが表示されます。
画像は実行例、左からRaspberryPi OS Bookworm, Windows11+WSL2+Ubunru22.04, MacOs sonoma。


zenityコマンドがない場合(例えばWindowsのWSL2にインストールしたてのUbuntuなど)はzenityのインストールが必要です。(snap install zenityやapt install zenityなど)
MacOSもbrew install zenityでインストールしないと使用できません。
※ ほかのコマンドに依存して、知らないうちにインストールしてる場合もある。geditを入れたとか。
コマンドがターミナルで動くなら、Pythonからsubprocessで使用可能です。
python3でGUI使用
(確認環境はRaspberry Pi OS Desktop 64bitのBookworm)
python3を立ち上げます。
$ python3
Python 3.11.2 (main, Mar 13 2023, 12:18:29) [GCC 12.2.0] on linux
Type "help", "copyright", "credits" or "license" for more information.
subprocessをimportします。
>>> import subprocess
その1: subprocess.runで実行のみ(GUIで表示表示するだけ)
ダイアログを表示するだけ。
subprocess.run()でコマンド実行。
windowを開いてる間はコマンドが進まないので、batファイルのpauseのようにも使えます。
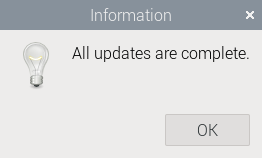
# 情報ダイアログ
>>> subprocess.run(['zenity', '--info'])
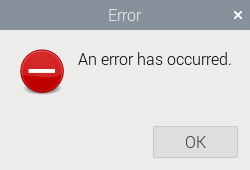
# アイコン違いで警告やエラーの使い分けが可能。
>>> subprocess.run(['zenity', '--warning'])
>>> subprocess.run(['zenity', '--error'])

その2: subprocess.runとリターンコードで分岐
subprocess.run()のリターンコード取得。typeはint。
OKまたはyesを押した場合はリターン0。NoやCancelを押したり、window右上のxアイコンで閉じたらリターン1。
>>> proc = subprocess.run(['zenity', '--question'])
>>> proc = subprocess.run(['zenity', '--question'])
>>> if proc.returncode == 0:
... print('yesが押されました')
... else:
... print('キャンセルします')
# 0や1以外の数値になる場合もある(スペルミスでコマンド失敗など)
>>> type(proc.returncode)
# <class 'int'>
# 下記でも分岐判断が可能。(通常はオプション追加して表示をカスタムしながら使う)
>>> proc = subprocess.run(['zenity', '--forms'])
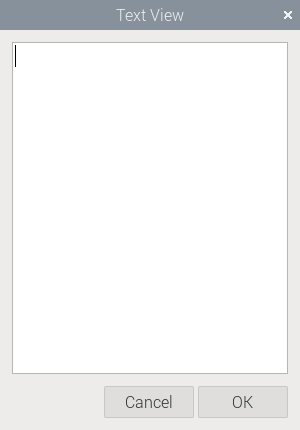
>>> proc = subprocess.run(['zenity', '--text-info'])


2択の--questionが基本。
--formsは本来はいろいろなフォームを組み合わせますが、上の画像は何もフォームを追加していないのでただの2択です。
--text-infoは長文(利用規約など)を表示しつつ同意を求めたり、「ただ今キャンペーン中!」的なグラフィカルなおしらせを表示する使い方ができますが、上の画像はファイルもURLも開いてないのでただの2択です。
なお、--infoなどでも「OKを押した」か「windowsアイコンのxで閉じた」かで分岐可能。そういう横着をすると大体ろくなことにならない
その3: subprocess.runと標準出力(stdout)で情報取得
subprocess.run()にstdout=subprocess.PIPEをつけて情報取得。
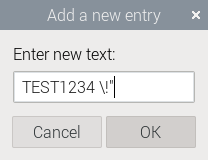
--entryで基本的な挙動の確認。後述するほかのオプションも共通の挙動。
# テキスト入力(基本動作)
>>> proc = subprocess.run(['zenity', '--entry'],
...                        stdout=subprocess.PIPE)
# stdoutは「typeがbytes」かつ「末尾に改行コード(\n)付き」
>>> print(proc.stdout)
b'TEST1234\n'
# bytesではなくstrにしたい場合はdecode()を使う(デコードできないとエラーになるので注意)
>>> print(proc.stdout.decode())
TEST1234

# returncodeは--questionオプションと同様。returncodeが0以外のときはstdoutが空なので注意。
>>> print(proc.returncode)
0
# 改行コードはrstrip()で削除できる。slice指定などでも可能。
>>> print(proc.stdout.rstrip())
b'TEST1234'
# subprocess.runのオプションで「text=True」を指定する方法でもstr型で取得可能。
>>> proc = subprocess.run(['zenity', '--entry'],
...                        stdout=subprocess.PIPE, text=True)
>>> print(proc.stdout)
TEXT1234
他のオプションの使用例を下記に示す。
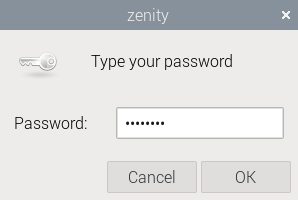
# --password : 入力中の文字を隠しながらテキスト入力
>>> proc = subprocess.run(['zenity', '--password'],
... stdout=subprocess.PIPE)
# 出力内容はentryと同じ。
>>> print(proc.stdout)
b'TEST1234\n'
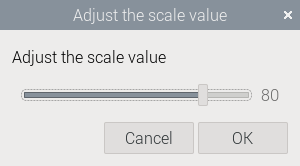
# --scale : スライダーを動かして0から100の値を指定
>>> proc = subprocess.run(['zenity', '--scale'],
... stdout=subprocess.PIPE)
# 0から100の値を出力
>>> print(proc.stdout)
b'80\n'
# --calendar : カレンダーで年月日を指定
>>> proc = subprocess.run(['zenity', '--calendar'],
... stdout=subprocess.PIPE)
# 年月日を出力(注意として、デフォルトでは表示フォーマットがOSや設定で変わる)
>>> print(proc.stdout)
b'12/08/2023\n'
# --color-selection : 色を選択してRGB(透過率も変更した場合はRGBA)を取得
>>> proc = subprocess.run(['zenity', '--color-selection'],
... stdout=subprocess.PIPE)
# 色だけを変更した場合はRGBの合計3個の数値を出力
>>> print(proc.stdout)
b'rgb(255,0,0)\n'
# 透過率も変更したらRGBAの合計4個の数値を出力
# b'rgba(140,207,6,0.697917)\n'
# --file-selection : ファイルを選択してパスを出力
>>> proc = subprocess.run(['zenity', '--file-selection'],
... stdout=subprocess.PIPE)
# 選択したファイルの絶対パスを取得する。
>>> print(proc.stdout)
b'/home/pitest/Pictures/20231205_14h16m54s_grim.png\n'
# pathlibで使用する場合、decode()でbytesからstrへ変換し、rstrip()で改行コード削除して対応可能。
>>> import pathlib
>>> path_picture = pathlib.Path(proc.stdout.decode().rstrip())
>>> path_picture.exists()
True


その4: subprocess.Popenと標準入力(stdin)で進捗表示(プログレスバー)
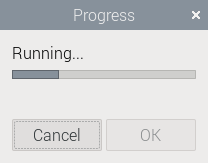
GUIで「処理完了まで〇〇%」と表示する進捗バー。
ここまでのGUIと違って、画面に表示してるときに止まってほしくないので、subprocess.run()ではなくsubptrocess.Popon()を使います。
進捗具合は0から100までを自己申告する形式。
# --progress : プログレスバーの表示。標準入力に数値(0から100)を渡すとバーが動く。
# 100%になるとOKボタンが有効化する。
>>> proc = subprocess.Popen(['zenity', '--progress'],
...                          stdin=subprocess.PIPE)
# stdinにwrite()で数値と改行コードを渡す。
>>> proc.stdin.write(b'25\n')
# flush()でGUI表示に反映される
>>> proc.stdin.flush()

# 100を渡すとOKを押せるようになる。
>>> proc.stdin.write(b'100\n')
>>> proc.stdin.flush()

# GUIが表示中か、閉じられたかはpoll()で確認可能。
>>> print(proc.poll())
# None : まだGUI表示中
# 0 : OKを押してGUIを閉じてる
# 1 : Cancelしたり、右上のxアイコンで閉じてる
# プロセスをkillしたなど、0や1以外の数字になる場合あり。

# pythonからGUIを終了させたい場合はterminate()やkill()などを使用可能
>>> proc.terminate()
# terminateで閉じた場合、poll()すると-15
>>> proc.kill()
# killで閉じた場合、poll()すると-9
>>> proc.send_signal(subprocess.signal.SIGINT)
# SIGINT送信で閉じた場合、poll()すると-2
※Popenでstdin.write()を使うとデッドロックの原因になりうるらしく非推奨になっているので、使用時はその点を考慮してください。
簡単なプログレスバー使用例
import subprocess
import time

# プログレスバーを別プロセスで表示
proc = subprocess.Popen(['zenity', '--progress'],
                         stdin=subprocess.PIPE)
# プログレスバーを表示したまま、処理を模擬
for i in range(101):
    # 進捗の途中でキャンセルしたら中断。ループをbreakして終了表示に進む。
    if proc.poll() is not None:
        print('ABORT!!')
        break
    # 0からカウントアップしてGUIにwrite
    bin_send = f'{i}\n'.encode()
    proc.stdin.write(bin_send)
    proc.stdin.flush()
    # 本来はここで何らかの処理。処理のかわりに0.1秒待機
    time.sleep(0.1)

# GUI表示している間、ループして待機
while proc.poll() is None:
    time.sleep(0.1)

if proc.poll() == 0:
    # OKが押された(100%になるまで待って、正規の手順でGUIを閉じた)場合
    subprocess.run(['zenity', '--info'])
else:
    # 進捗の途中で中止した、100%まで待ったけどキャンセルで閉じた、など
    subprocess.run(['zenity', '--error'])
その5: オプション無しだと使えないので今回対象外
# --list : リスト選択。オプションを使って選択肢を用意しないとGUI表示できない
>>> subprocess.run(['zenity', '--list'])
No column titles specified for List dialog.
CompletedProcess(args=['zenity', '--list'], returncode=255)

# --notification : 通知。デスクトップ画面の隅っこにピロンッと出てくるやつ。
# window表示じゃないためか、いろいろと追加で準備が必要。
# macOSだとこのオプション自体が存在しないようです。
>>> subprocess.run(['zenity', '--notification'])
CompletedProcess(args=['zenity', '--notification'], returncode=1)
おまけ: help表示
ターミナルでzenity --helpと入力するとzenityの概要が、zenity --help-generalと入力するとGUIの横幅指定やタイトル変更など汎用的なオプションの説明が、zenity --help-progressなどGUIの種類をつけるとそのGUI特有のオプション説明が確認できます。
実行環境によって機能に差があるようなので、まずは自前の環境で確認するのが無難です。
Raspberry pi OS(Bookworm)の場合
$ zenity --help
Usage:
  zenity [OPTION…]

Help Options:
  -h, --help                                        Show help options
  --help-all                                        Show all help options
  --help-general                                    Show general options
  --help-calendar                                   Show calendar options
  --help-entry                                      Show text entry options
  --help-error                                      Show error options
  --help-info                                       Show info options
  --help-file-selection                             Show file selection options
  --help-list                                       Show list options
  --help-notification                               Show notification icon options
  --help-progress                                   Show progress options
  --help-question                                   Show question options
  --help-warning                                    Show warning options
  --help-scale                                      Show scale options
  --help-text-info                                  Show text information options
  --help-color-selection                            Show color selection options
  --help-password                                   Show password dialog options
  --help-forms                                      Show forms dialog options
  --help-misc                                       Show miscellaneous options
  --help-gtk                                        Show GTK+ Options

Application Options:
  --calendar                                        Display calendar dialog
  --entry                                           Display text entry dialog
  --error                                           Display error dialog
  --info                                            Display info dialog
  --file-selection                                  Display file selection dialog
  --list                                            Display list dialog
  --notification                                    Display notification
  --progress                                        Display progress indication dialog
  --question                                        Display question dialog
  --warning                                         Display warning dialog
  --scale                                           Display scale dialog
  --text-info                                       Display text information dialog
  --color-selection                                 Display color selection dialog
  --password                                        Display password dialog
  --forms                                           Display forms dialog
  --display=DISPLAY                                 X display to use
今回はここまで。
皆さんも、pythonでお手軽にGUIを使ってみましょう。
もっと凝ったGUIを組みたくなったらGTKやQtなどでガッツリ作りましょう。