この記事は、Mac + Mojaveを前提としております。
Windows環境の方はうまく読み替えていただけますと幸いです。
EthereumのPoA環境?
通常EthereumはPoWといって、不特定多数のノードで合意形成を行っていますが、PoAでは、特定少数のノードが一定数以上合意すればOKという形で合意形成を簡略化しています。
PoAのメリットとしては少ないノード数でブロックチェーンが構成できる、高速にトランザクションをさばくことができるといったところがあります。さらには、トランザクション手数料を無料すること行ったオリジナルの設定を入れることもできます。逆に、少数で合意を取るため乗っ取りに対する安全性や、合意形成を行うノードを信頼できるものに託さないといけないというデメリットがあります。
私は、トランザクション手数料を無料にし、高速にトランザクションをさばき、そしてEthereumという開発フレンドリーなプラットフォームが使えることにメリットを感じており、PoAチェーンを使っています。
構築前の前提
homebrewを使ってEthereum環境のインストールしておきます。
brew tap ethereum/ethereum
brew install ethereum
brew install ethereum --devel
Ethereumのアカウントの設定
$ geth account new
passphraseを聞かれるので入力してからメモをとる
Your new account is locked with a password. Please give a password. Do not forget this password.
Passphrase:
Repeat passphrase:
Address: {507f459eef2113f58e6142b0e15f272cbdafd7f5}
最後に出てきてAddressがあなたのAddressです。
いったんGethを起動してみましょう
$ geth
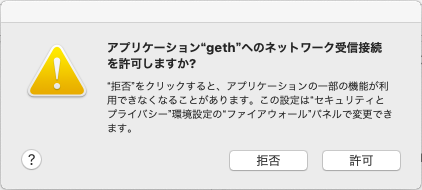
するとこんなダイアログが出てくるので、許可を押しましょう。
これをしないとgethがネットワークに繋がりません。
ほっとくと本番のEtherumのブロックチェーンとの同期が始まりますが、PoAチェーンの構成には必要ないので、[ctrl]+[c]で止めてしまいましょう。
PoAチェーンの構築
さて、ここからが本番です。
PoAチェーンの構築にはこちらの記事を参考にしました。
https://qiita.com/shiki_tak/items/e0635a0ca4e322716573
1.アカウントの作成
privateconsortiumというディレクトリを用意し、その中にこの開発環境用のアカウントを作成します。
$ geth account new --datadir ./privateconsortium/node1
パスフレーズを設定して、アカウントが生成され、Addressも生成されます。
パスフレーズはメモっておきましょう。
Addressも後で使うのでメモっておきましょう。
INFO [12-20|11:37:00.688] Maximum peer count                       ETH=25 LES=0 total=25
Your new account is locked with a password. Please give a password. Do not forget this password.
Passphrase:
Repeat passphrase:
Address: {57da1c524a3e762a8921983f52d3ce21672357f7}
パスフレーズとAddressのメモを忘れずに!
2.ジェネシスブロックの生成
ジェネシスブロックとは最初の1個目のブロックです。これは、神様が作るものとされています。パブリックチェーンではこれ以降のブロックはブロックチェーンに参加している方々が承認しチェーンが伸びていきますが、今回はプライベートチェーンなので、自信のノードが承認してチェーンが伸びていきます。
network名をprivateconsortiumとして、puppethを実行します。
$ cd privateconsortium
$ puppeth
実行するとインタラクティブに進んでい行きます。
+-----------------------------------------------------------+
| Welcome to puppeth, your Ethereum private network manager |
|                                                           |
| This tool lets you create a new Ethereum network down to  |
| the genesis block, bootnodes, miners and ethstats servers |
| without the hassle that it would normally entail.         |
|                                                           |
| Puppeth uses SSH to dial in to remote servers, and builds |
| its network components out of Docker containers using the |
| docker-compose toolset.                                   |
+-----------------------------------------------------------+

Please specify a network name to administer (no spaces, hyphens or capital letters please)
>
そして最初の質問。networkの名前をつけます。今回は「privateconsortium」にします。
> privateconsortium

Sweet, you can set this via --network=privateconsortium next time!

INFO [12-20|22:50:34.728] Administering Ethereum network           name=privateconsortium
INFO [12-20|22:50:34.740] No remote machines to gather stats from
Sweetって褒めてもらえます。
次に何をしますかと聞かれ、新しいジェネシスブロックを作ります「2」と入力
What would you like to do? (default = stats)
 1. Show network stats
 2. Configure new genesis
 3. Track new remote server
 4. Deploy network components
> 2
次に、ジェネシスブロックの作り方を聞かれます。新しくつくるので「1」を選択します。これであなたも神様です。
What would you like to do? (default = create)
 1. Create new genesis from scratch
 2. Import already existing genesis
> 1
次はコンセンサスアルゴリズムの選択です。ここで今回の目的であるPoA「2」を選択します。
Which consensus engine to use? (default = clique)
1. Ethash - proof-of-work
2. Clique - proof-of-authority
> 2
次はブロックの生成感覚の秒数を設定します。今回は5秒で行ってみましょう
How many seconds should blocks take? (default = 15)
> 5
次に、どのアカウントが承認できるかをAddressで設定します。先程メモしたAddressを入力します。
Which accounts are allowed to seal? (mandatory at least one)
> 0x57da1c524a3e762a8921983f52d3ce21672357f7
> 0x
最初「0x」だけ表示されていますがその後ろにアドレスを続けてください。
Enterを押すと、また「0x」と表示されますが、これは無視してEnterを押してください。
「0x」のままEnterを押されれると入力モードを抜けます。
次に最初からお金持っている人を決めます。これも先程のと同じ手順とAddressでOKです。
Which accounts should be pre-funded? (advisable at least one)
> 0x57da1c524a3e762a8921983f52d3ce21672357f7
> 0x
precompile addresには最初から1wei付与するかと聞かれます。アドバイスどおりYesにしましょう。
Should the precompile-addresses (0x1 .. 0xff) be pre-funded with 1 wei? (advisable yes)
> yes
ネットワークIDの設定です。今回は1515としました。
Specify your chain/network ID if you want an explicit one (default = random)
>
> 1515
INFO [12-20|22:53:30.593] Configured new genesis block
最後にジェネシスブロックの情報を書き出します。「2」を選択して、設定の管理を選びます
What would you like to do? (default = stats)
1. Show network stats
2. Manage existing genesis
3. Track new remote server
4. Deploy network components
> 2
そして、エクスポートします。
 1. Modify existing fork rules
 2. Export genesis configurations
 3. Remove genesis configuration
> 2
保存先を聞いてくるので、デフォルトで良ければEnterを押しましょう。
Which folder to save the genesis specs into? (default = current)
  Will create privateconsortium/.json, privateconsortium/-aleth.json, privateconsortium/-harmony.json, privateconsortium/-parity.json
>
結果は以下に格納されました。
IINFO [12-20|22:54:03.661] Saved native genesis chain spec          path=privateconsortium.json
ERROR[12-20|22:54:03.662] Failed to create Aleth chain spec        err="unsupported consensus engine"
ERROR[12-20|22:54:03.662] Failed to create Parity chain spec       err="unsupported consensus engine"
INFO [12-20|22:54:03.663] Saved genesis chain spec                 client=harmony path=privateconsortium-harmony.json
いくつか失敗していますが、今回のPoAチェーンでは不要なものです。
ここまで終わったら[ctrl]-[c]で抜けてください。
3.ネットワークを開始する
$ cd privateconsortium
$ geth --datadir node1 init privateconsortium.json
INFO [12-20|17:25:52.914] Maximum peer count                       ETH=25 LES=0 total=25
INFO [12-20|17:25:52.944] Allocated cache and file handles         database=/Users/aram.mine/develop/privateconsortium/node1/geth/chaindata cache=16 handles=16
INFO [12-20|17:25:52.958] Writing custom genesis block
INFO [12-20|17:25:52.978] Persisted trie from memory database      nodes=356 size=51.99kB time=2.129087ms gcnodes=0 gcsize=0.00B gctime=0s livenodes=1 livesize=0.00B
INFO [12-20|17:25:52.979] Successfully wrote genesis state         database=chaindata                                                       hash=15cb65…c0f2cf
INFO [12-20|17:25:52.979] Allocated cache and file handles         database=/Users/aram.mine/develop/privateconsortium/node1/geth/lightchaindata cache=16 handles=16
INFO [12-20|17:25:52.982] Writing custom genesis block
INFO [12-20|17:25:52.992] Persisted trie from memory database      nodes=356 size=51.99kB time=2.951636ms gcnodes=0 gcsize=0.00B gctime=0s livenodes=1 livesize=0.00B
INFO [12-20|17:25:52.992] Successfully wrote genesis state         database=lightchaindata                                                       hash=15cb65…c0f2cf
$ geth --datadir node1/ --syncmode 'full' --port 30311 --rpc --rpcaddr 'localhost' --rpcport 8545 --rpcapi 'personal,db,eth,net,web3,txpool,miner' --networkid 1515 --gasprice '0'
これで、gethが起動します。
このまま、もう一つターミナルを開き、承認作業を行いブロックチェーンを作っていきます。
$ cd privateconsortium
$ geth attach ipc:node1/geth.ipc
Welcome to the Geth JavaScript console!

instance: Geth/v1.8.20-stable/darwin-amd64/go1.11.2
coinbase: 0x57da1c524a3e762a8921983f52d3ce21672357f7
at block: 0 (Thu, 20 Dec 2018 22:51:35 JST)
 datadir: /Users/aram.mine/develop/privateconsortium/node1
 modules: admin:1.0 clique:1.0 debug:1.0 eth:1.0 miner:1.0 net:1.0 personal:1.0 rpc:1.0 txpool:1.0 web3:1.0
まずはアカウントをアンロックします。
$ personal.unlockAccount(eth.coinbase,"パスワード",0)
成功したらtrueと表示されます。
そして、デフォルトアカウントの設定をします。
> eth.defaultAccount = eth.coinbase
"0x57da1c524a3e762a8921983f52d3ce21672357f7"
ここまで来たらマイニングスタートです。(正確には承認作業開始です)
> miner.start()
null
>
これでブロックチェーンが動き出します!
# まとめ
手順は長いですが、これでPoAチェーンが動きます。Truffleで、このチェーンに対してスマートコントラクトをデプロイすれば、手数料無料で、高速なDApps実行環境ができます。プライベートチェーンだとDecentralizeとは言えませんが、しかし、ブロックチェーンの特徴を活かしたアプリケーションを作ることが可能になります。GAS代問題で悩んでいる方は、このPoAチェーンを試してみるのをお勧めます。
また、今回は、Qiita::Team(ブルー)で公開していた記事を、パブリックなQiita(グリーン)に転記しました。会社ではこれを「ブルーグリーンデプロイ」と呼んでいます。みなさんも、Qiita::Team(ブルー / プライベート)に載せた記事を、表のQiita(グリーン / パブリック)に公開するブルーグリーンデプロイをしてみませんか?