はじめに
UnityとVuforiaをFlutterに組み込み、iOS向けのARアプリを作成する方法をご紹介します。
本稿は【Vuforia × Unity】URLから取得した画像をARマーカーとして使うで作成したUnityプロジェクトを使用しています。
開発環境
macOS: 14.1.2
iOS: 17.3
Flutter: 3.19.0
Dart: 3.3.0
Unity: 2022.3.15f1
Vuforia: 10.21.3
VS Code: 1.84.2
XCode: 15.1 (15C65)
事前準備
- Unityプロジェクトの作成
https://qiita.com/aosounairo_/items/9a4cb9efed81f5738245
今回使用するUnityプロジェクトは以上のものを使用します。Vuforiaの導入から構築までを記載しているため、ご一読ください。
-
fuw-XXXX.unitypackageのダウンロード
https://github.com/juicycleff/flutter-unity-view-widget/tree/master/unitypackages
UnityのプロジェクトをFlutterにエクスポートするパッケージです。
最新のものをダウンロードしてください。
Unity側の作業
flutter unity widgetを用いることで、表題の通りUnityをFlutterに組み込むことができます。
今回はARアプリ作成に必要な箇所だけを抽出して解説を行いますので、あらかじめご了承ください。
Unityプロジェクトのセットアップ
Flutterのプロジェクトフォルダーに「unity」と言う名前のフォルダーを追加します。
フォルダー追加後、以前作成したUnityプロジェクトを「unity」フォルダー内にコピー(または移動)してください。
注意
Unityプロジェクトのパスがunity/プロジェクト名となっていることを確認してください。エクスポートに失敗する可能性があります。
プロジェクトを開き、先ほどダウンロードしたパッケージをAssets > Import Package > Custom Packageよりインストールします。
Unityプロジェクトをエクスポートする
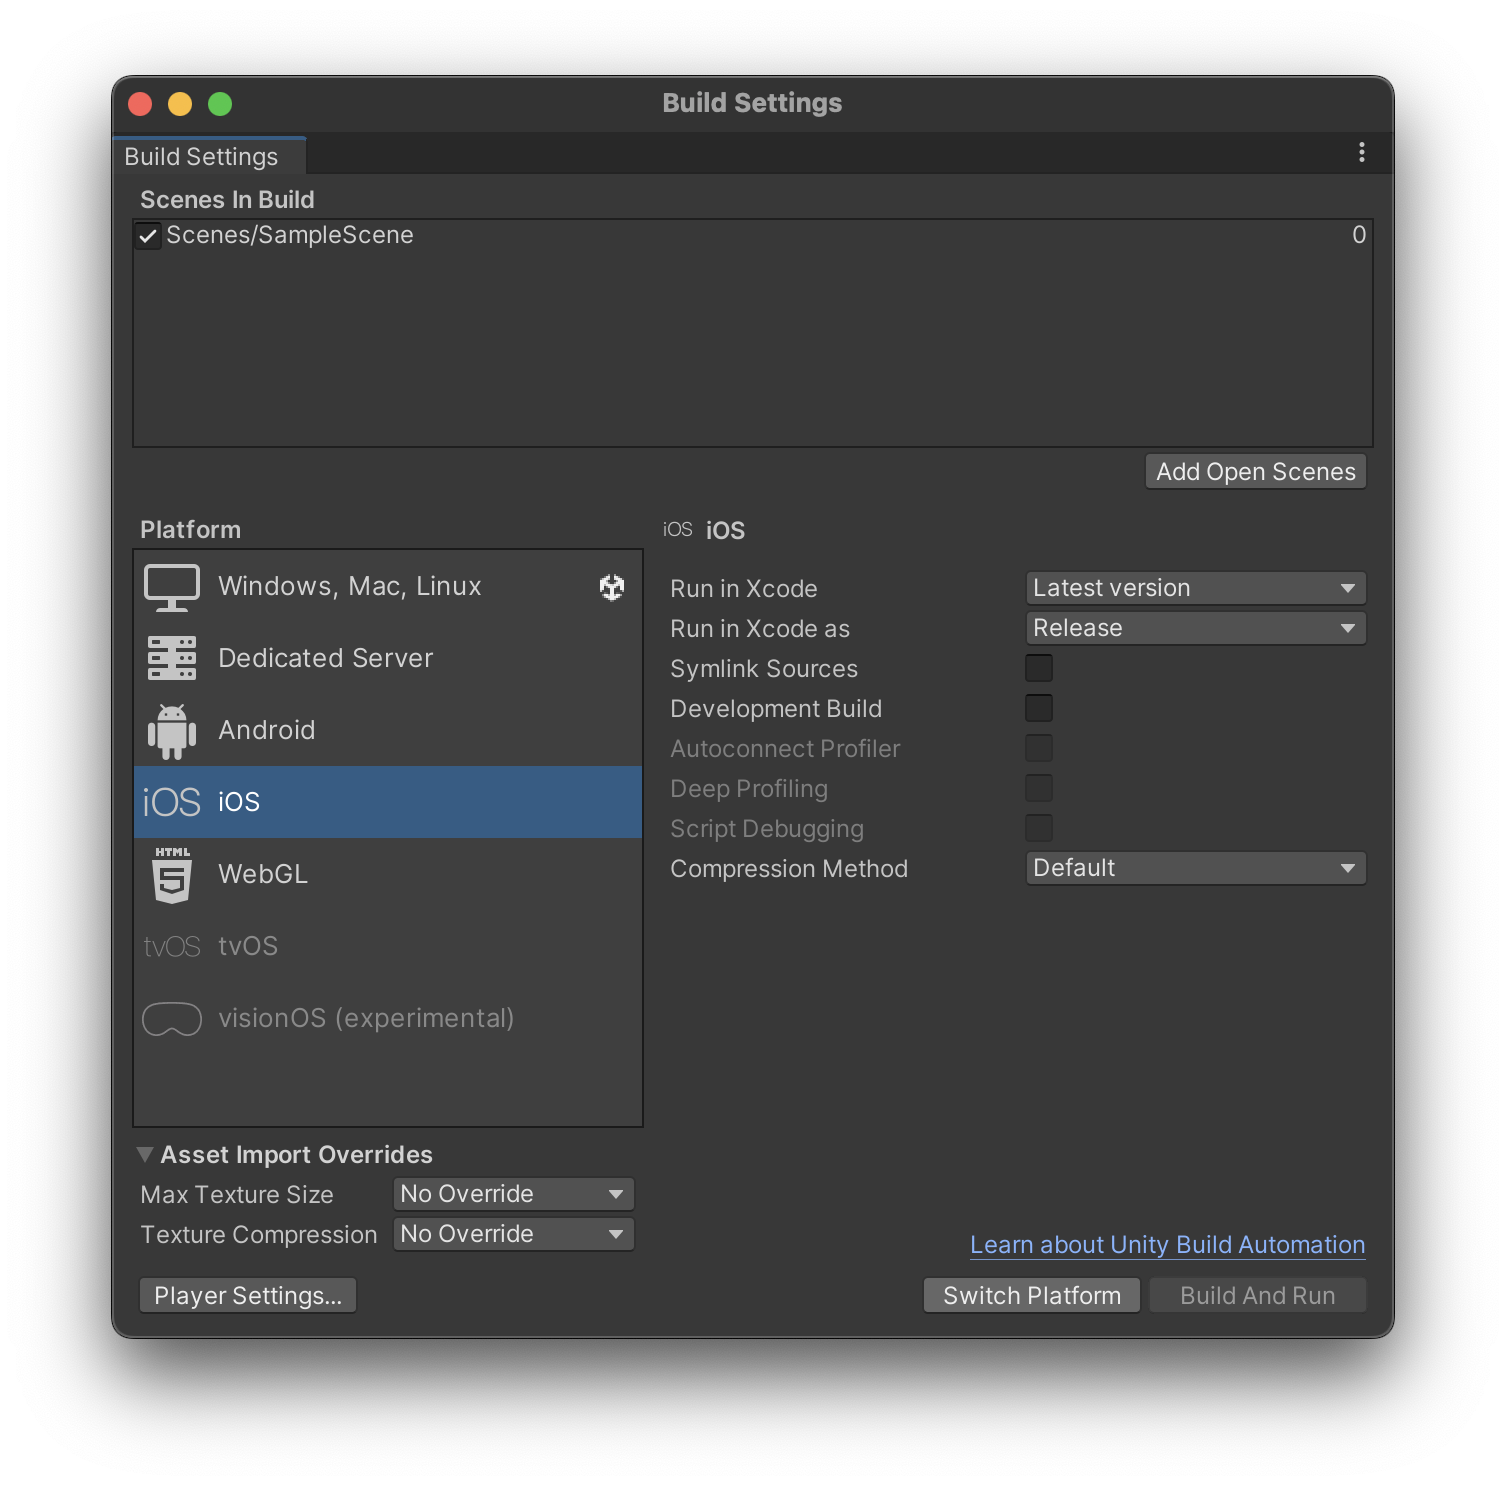
「⇧⌘B」を押下し、Build Settingsを起動します。
Add Open Scenesを押し、現在のSceneをScene In Buildに追加します。
次に、Platform内のiOSを選択し、Switch Platformより変更してください。
最後にPlayer Settingsを押し、Camera Usage Descriptionの欄に「Used to read AR markers」と記述します。(カメラにアクセスする際は利用目的を明示する必要があるため。ちなみに文字列はなんでも良い。)
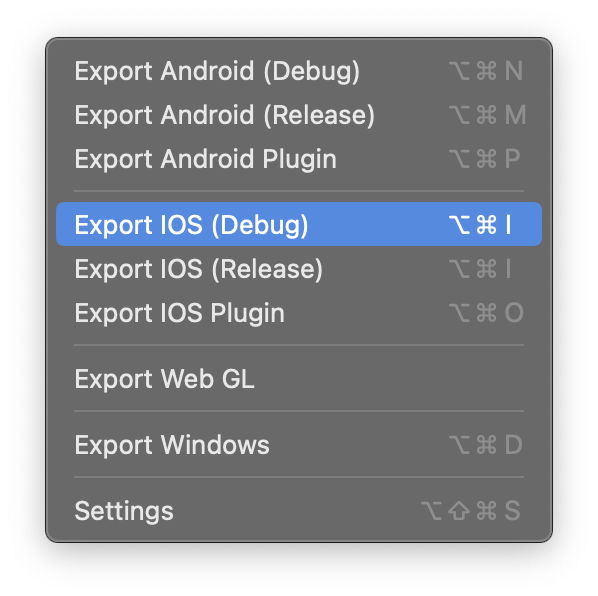
以上の設定が完了したら、Flutter > Export iOS (Debug)よりプロジェクトをエクスポートします。
Flutter側の作業
lib直下にar.dartを作成します。
-lib
    -main.dart
    -ar.dart
そして、それぞれのファイルを以下のように書き換えます。
main.dart
import 'package:flutter/material.dart';
import 'ar.dart';

void main() => runApp(const MyApp());

class MyApp extends StatefulWidget {
  const MyApp({super.key});

  @override
  State<MyApp> createState() => _MyAppState();
}

class _MyAppState extends State<MyApp> {
  @override
  void initState() {
    super.initState();
  }

  @override
  Widget build(BuildContext context) {
    return const MaterialApp(
      home: Home(),
    );
  }
}

class Home extends StatelessWidget {
  const Home({super.key});

  @override
  Widget build(BuildContext context) {
    return Scaffold(
      appBar: AppBar(
        title: const Text('Unity Flutter Demo'),
      ),
      body: Center(
        child: Column(
          mainAxisAlignment: MainAxisAlignment.center,
          children: [
            ElevatedButton(
              onPressed: () {
                Navigator.push(
                  context,
                  MaterialPageRoute(builder: (context) => const AR()),
                );
              },
              child: const Text('AR'),
            ),
          ],
        ),
      ),
    );
  }
}
ar.dart
import 'package:flutter/material.dart';
import 'package:flutter_unity_widget/flutter_unity_widget.dart';

class AR extends StatefulWidget {
  const AR({super.key});

  @override
  State<AR> createState() => _ARState();
}

class _ARState extends State<AR> {
  @override
  void initState() {
    super.initState();
  }

  @override
  Widget build(BuildContext context) {
    return Scaffold(
      appBar: AppBar(
        title: const Text('AR'),
      ),
      body: Card(
        margin: const EdgeInsets.all(8),
        clipBehavior: Clip.antiAlias,
        shape: RoundedRectangleBorder(
          borderRadius: BorderRadius.circular(20.0),
        ),
        child: UnityWidget(
          onUnityCreated: onUnityCreated,
          fullscreen: false,
        ),
      ),
    );
  }

  // Callback that connects the created controller to the unity controller
  void onUnityCreated(controller) {}
}
AppDelegate.swiftの変更
ios/Runner/AppDelegate.swiftを以下のように変更します。
import UIKit
import Flutter
import flutter_unity_widget

@UIApplicationMain
@objc class AppDelegate: FlutterAppDelegate {
  override func application(
    _ application: UIApplication,
    didFinishLaunchingWithOptions launchOptions: [UIApplication.LaunchOptionsKey: Any]?
  ) -> Bool {
    InitUnityIntegrationWithOptions(argc: CommandLine.argc, argv: CommandLine.unsafeArgv, launchOptions)
    GeneratedPluginRegistrant.register(with: self)
    return super.application(application, didFinishLaunchingWithOptions: launchOptions)
  }
}
Info.plistの変更
ios/Runner/Info.plistに以下を追加します。
<dict>
    <key>NSCameraUsageDescription</key>
    <string>Used to read AR markers</string>
</dict>
アプリをビルドする
最後に、アプリをビルドするためにXCodeで設定を行えば完了です。
XCodeでios/Runner.xcworkspaceファイルを開き、Add Files to "Runner"を押してios/UnityLibrary/Unity-Iphone.xcodeprojを追加します。
拡張子に注意してください!
次にUnity-iPhone/Dataフォルダーを選択し、DataフォルダーのTarget MembershipをUnityFrameworkのみに変更します。
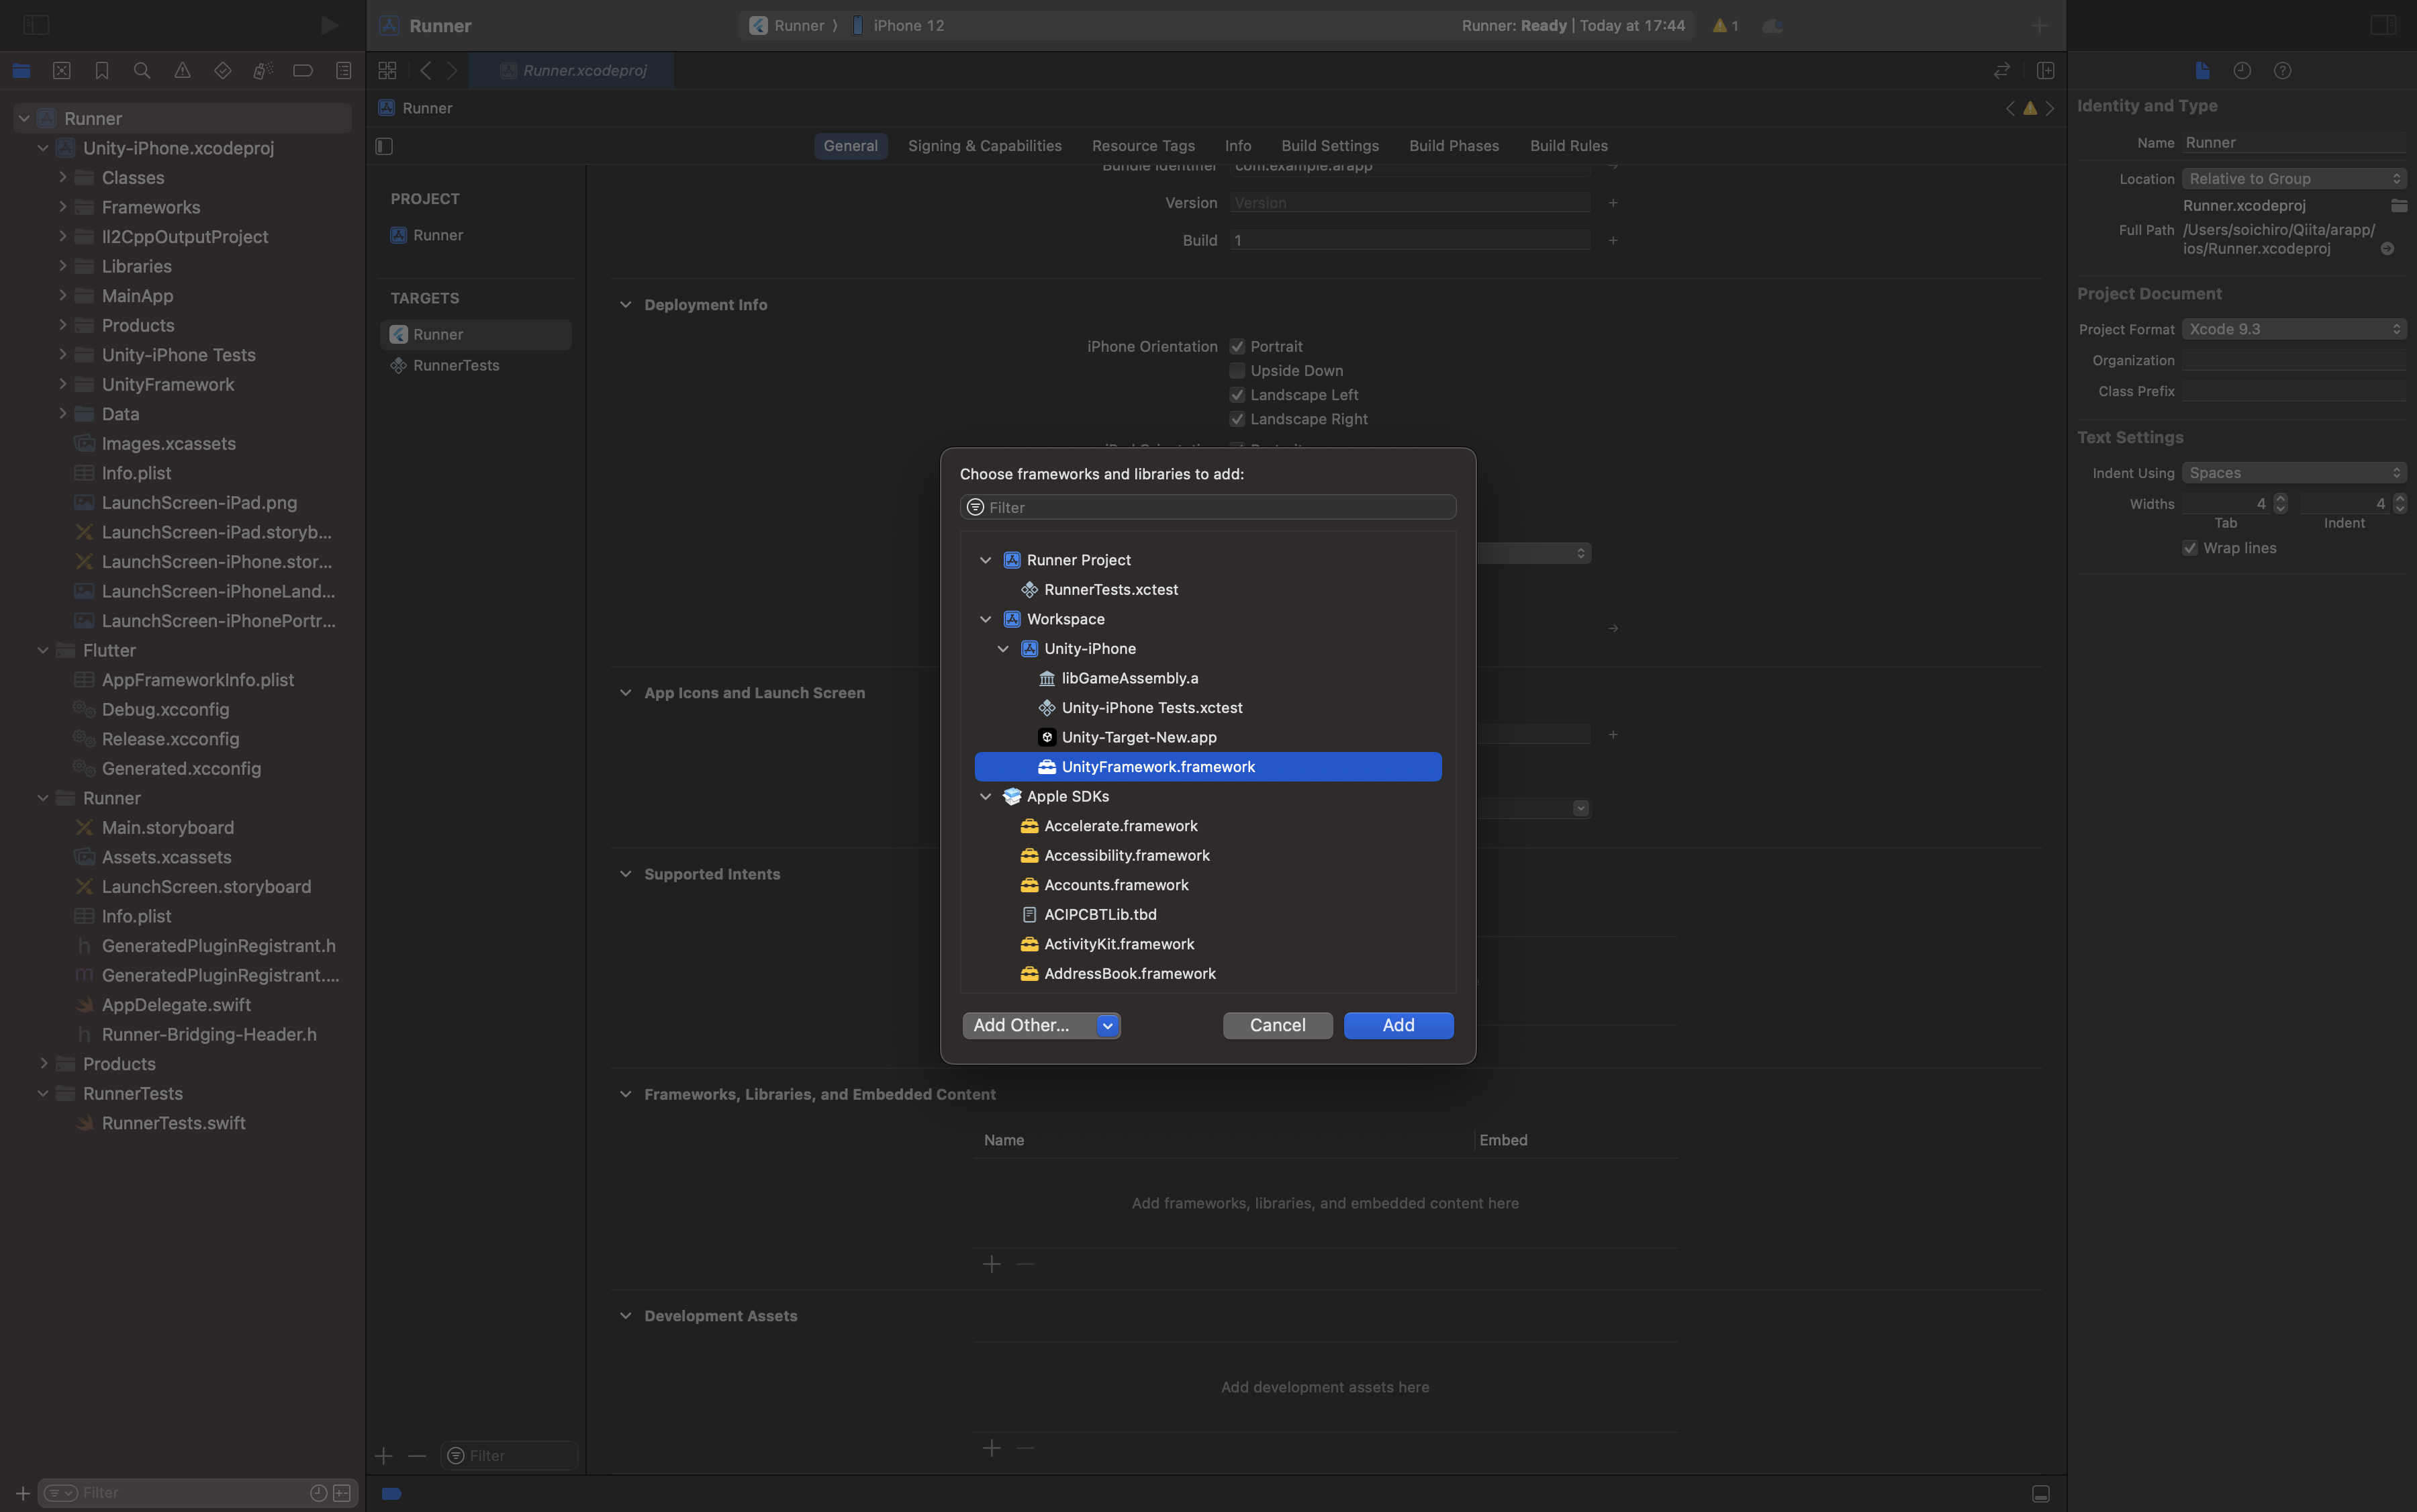
Runnerを選択し、General > Frameworks,Libraries and Embedded Contentの+ボタンよりUnityFramework.frameworkを追加します。
もう一度+ボタンを押し、Add Other... > Add Files... を選択したら、UnityLibrary > Frameworks > com.ptc.vuforia.engine > Vuforia > Plugins > iOS 直下にある2つのフォルダーを選択し、Openを押してください。
以下のようにframeworkが追加されればOKです。
最後に...
Signing & Capabilities でサインインすることを忘れずに!
すべての設定が完了すれば、いよいよビルドが実行可能です。
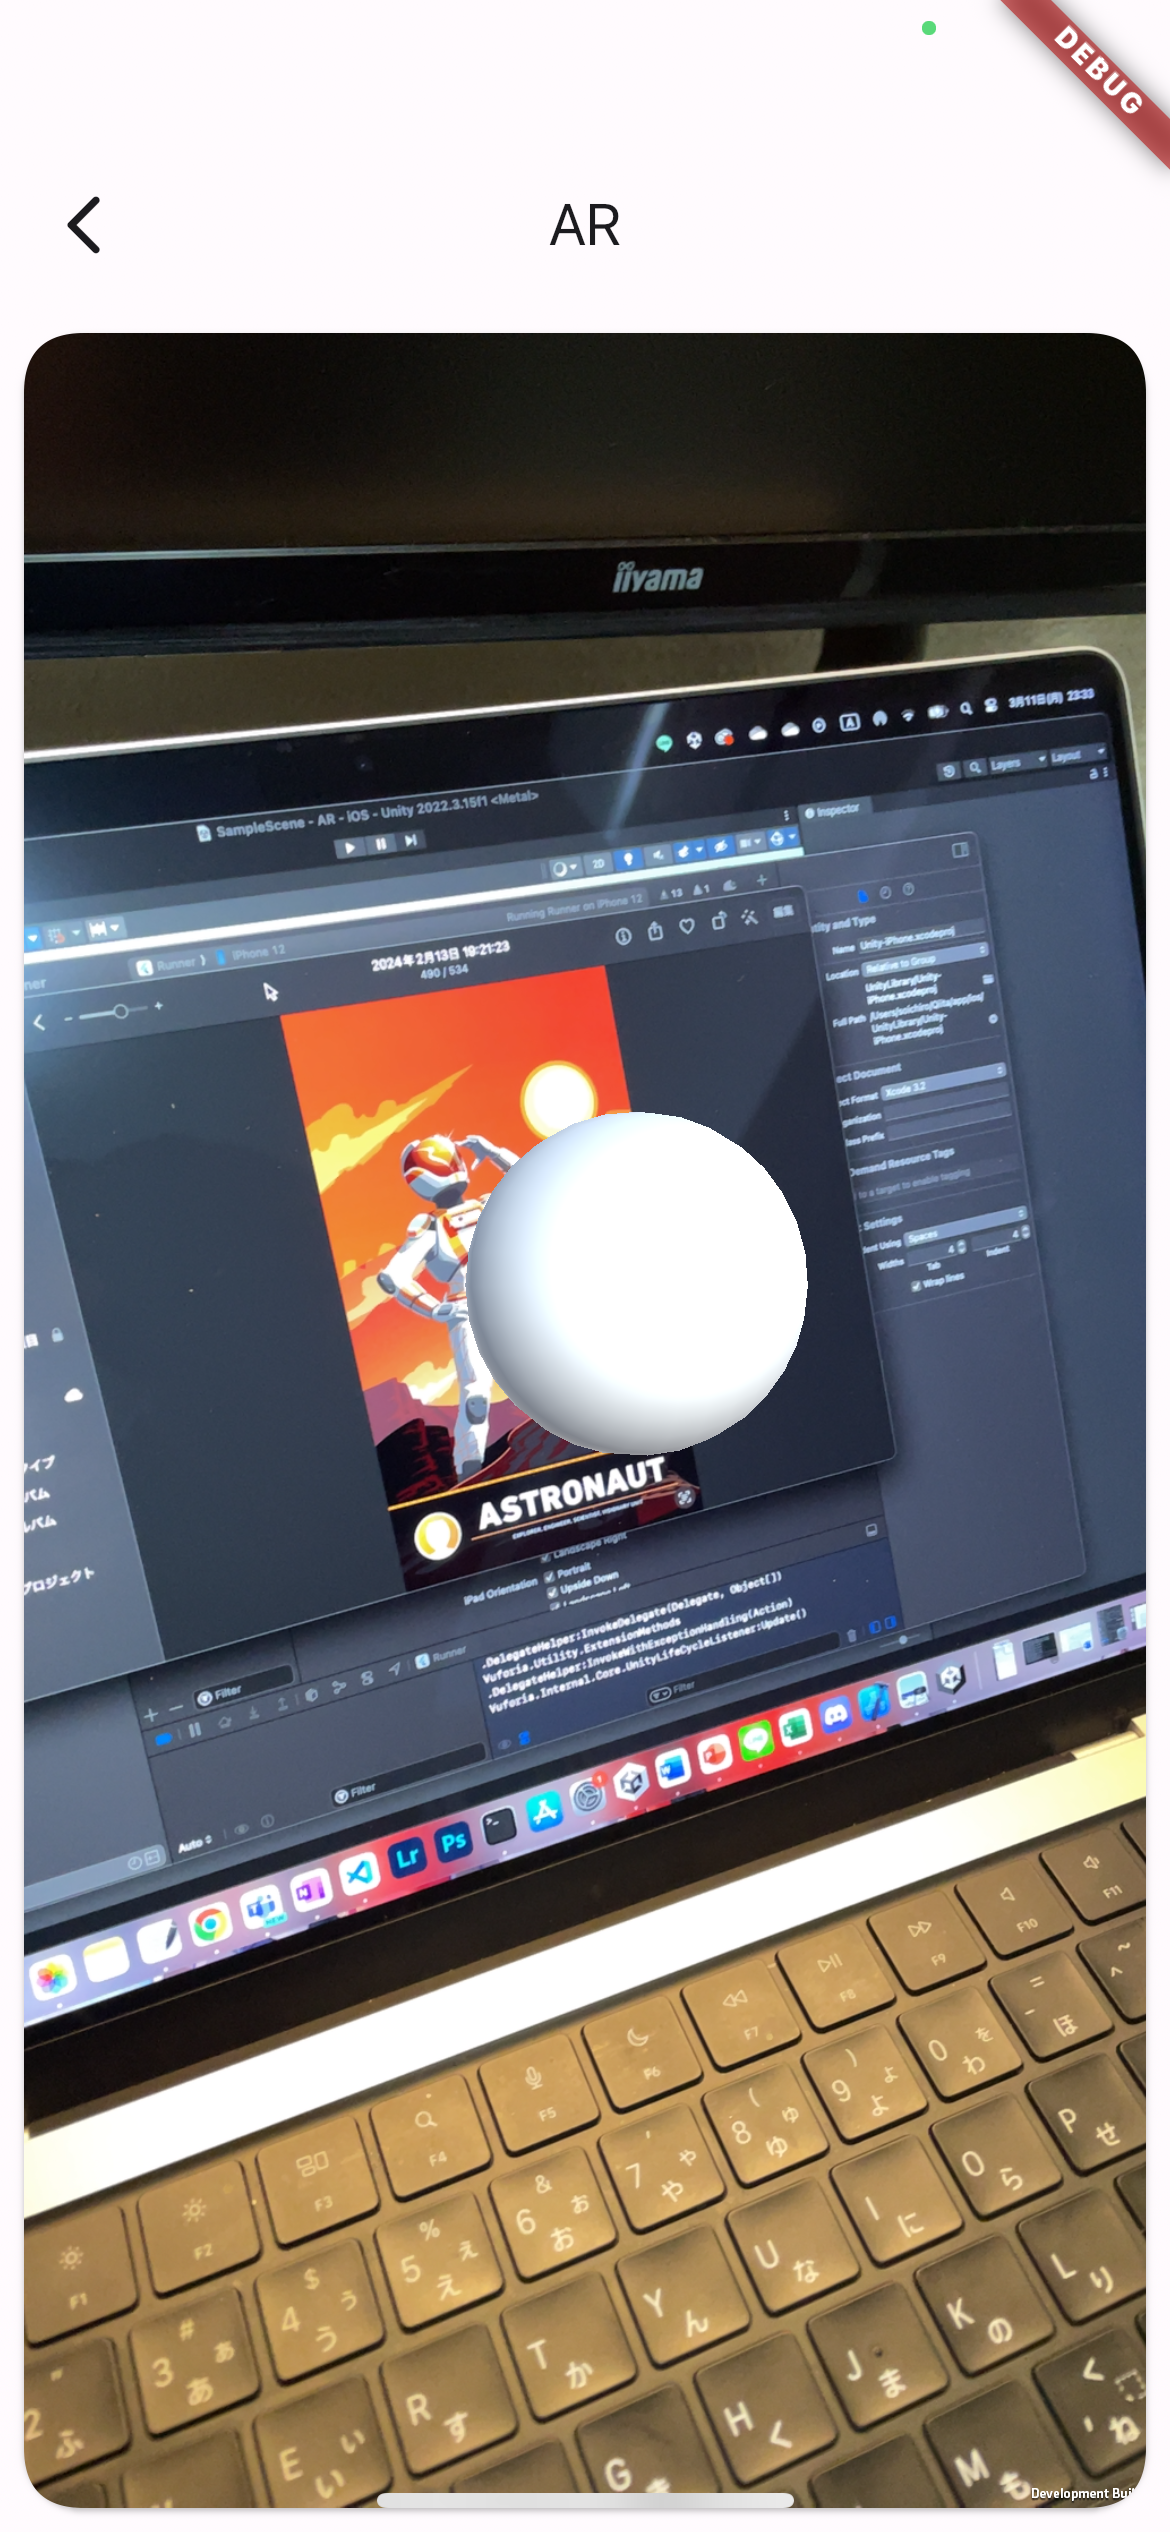
ARマーカー上に、作成した3D Objectが表示されるはずです!
おわりに
今回はUnityとVuforiaをFlutterに組み込み、iOS向けのARアプリを作成する方法をご紹介しました。従来、iOS向けのARアプリといえばARKitを用いることが一般的かと思いますが、せっかくクロスプラットフォーム開発を行えるFlutterを用いるのであればOSに依存しない方法でARを表示できないかと思い本稿を執筆しました。
UnityとFlutterを用いることでかなり拡張性の高いアプリが作成できることかと思いますが、一つ欠点を挙げるとすれば起動時にかなり重くなってしまうことでしょうか。アニメーションを追加するなどしてユーザビリティの向上を図りたいですね。


