背景
職場の温度が暑くて、担当部署に改善要望を出したい!!(切実)
では、主観じゃなくデータを出せと言われたので、(←管理部門の仕事な気もするが)
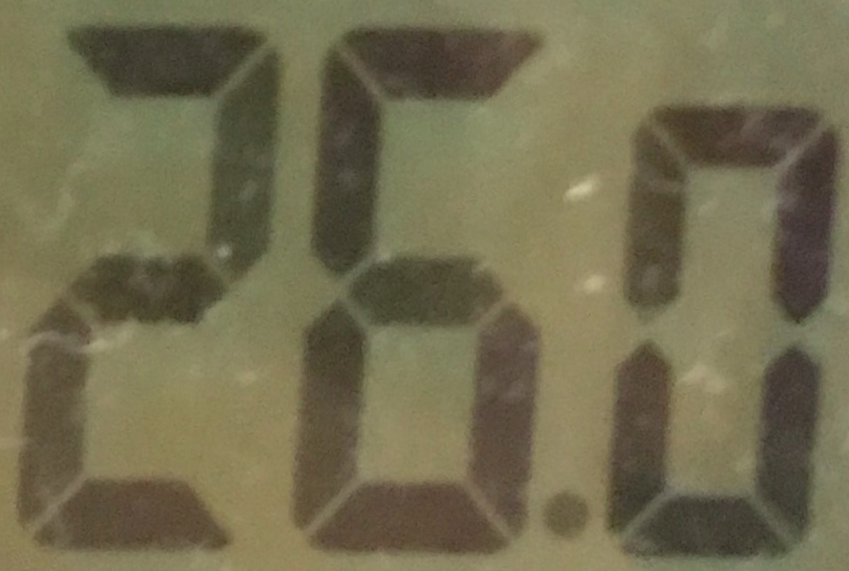
デジタル温度計の表示をOCRで読み取って温度履歴を取ります。
(温度計の他にPCに接続されていない計測器にも応用できるかも!と企んでみたり)
環境
MacOS Mojave ver10.14.4
Anaconda Navigator 1.9.7
※Anacondaのインストールは、こちらを参考にいたしました
JupiterNotebook 5.4.0
OpenCV 3.4.2
事前準備
画像の取得
Webカメラで取得する方法を一定時間ごとに撮影する時間を考えましたが、
手元にwebカメラがすぐ用意できず断念。。。
デジカメがあったので、タイムラプス撮影で一定時間ごとに静止画を撮影して、
1日の温度計の静止画を取得しました。
https://smartparty.jp/powershot-g1-x-mark-iii-timelapse
OCR環境の構築
まずは、OCRできる環境を用意します。
「Anacondaだけで環境を構築して、Python+OCRをやってみる」
https://qiita.com/anzanshi/items/9ee94affecd74be33159
今回は、温度計のデジタル数字(7セグメント)を読み取るので、学習データを追加します。
「Python+OCR(tesseract)の新しい学習データ(言語データ)を追加してみた」
https://qiita.com/anzanshi/items/c7d554a6cc8aa4c39b5c
実践
画像のトリミング
まずは、撮影した画像をトリミングして、下記コードで数字情報だけにします。
※お使いの画像に合わせて、トリミング範囲を指定してください。
import cv2
img_or = cv2.imread('ORIGINAL_PHOTO.JPG')
img_tr = img_or[1900:2400, 1200:1900 ] #トリミング範囲を指定

画像処理
このままの画像だと、読み取り精度が落ちるので、
グレースケール化→2値化→ノイズ処理します。
import cv2
import numpy as np

# グレースケール化
img_gray = cv2.cvtColor(img_tr, cv2.COLOR_RGB2GRAY)
# 2値化(100:2値化の閾値/画像を見て調整する)
ret,thresh1 = cv2.threshold(gray,100,255,cv2.THRESH_BINARY)
# ノイズ処理(モルフォロジー変換)
kernel = np.ones((5,5),np.uint8)
img_opening = cv2.morphologyEx(thresh1, cv2.MORPH_OPEN, kernel)

OCR(文字認識)の実行!!
さて、いよいよOCRの実行です!
from PIL import Image
import sys
import pyocr
import pyocr.builders
import cv2

# OpenCV型→PIL型に変換
def cv2pil(image):
    ''' OpenCV型 -> PIL型 '''
    new_image = image.copy()
    if new_image.ndim == 2:  # モノクロ
        pass
    elif new_image.shape[2] == 3:  # カラー
        new_image = cv2.cvtColor(image, cv2.COLOR_BGR2RGB)
    elif new_image.shape[2] == 4:  # 透過
        new_image = cv2.cvtColor(image, cv2.COLOR_BGRA2RGBA)
    new_image = Image.fromarray(new_image)
    return new_image

# OCRの準備
tools = pyocr.get_available_tools()
if len(tools) == 0:
    print("No OCR tool found")
    sys.exit(1)
# The tools are returned in the recommended order of usage
tool = tools[0]
print("Will use tool '%s'" % (tool.get_name()))
# Ex: Will use tool 'libtesseract'

langs = tool.get_available_languages()
print("Available languages: %s" % ", ".join(langs))
lang = langs[0]
print("Will use lang '%s'" % (lang))

# OCR実行
temp_pil_im = cv2pil(img_opening) #上述の画像処理後の画像データ
txt = tool.image_to_string(
    temp_pil_im,
    lang="letsgodigital",
    builder=pyocr.builders.TextBuilder(tesseract_layout=6)
)
print( txt )
26.0
終わりに
無事に温度情報を取得することができました!
これを管理部門に叩きつけて、快適な職場環境を手に入れたいです!(切実)
本当はWebカメラでリアルタイムに情報が取得できると望ましいので、次回はwebカメラを用意して記事を書きたいと思います!
参考
「tesseract-OCRで遊んでみる」
http://blog.nomulabo.com/article/422712502.html
「Real-time image preprocess and OCR」
https://github.com/arturaugusto/display_ocr