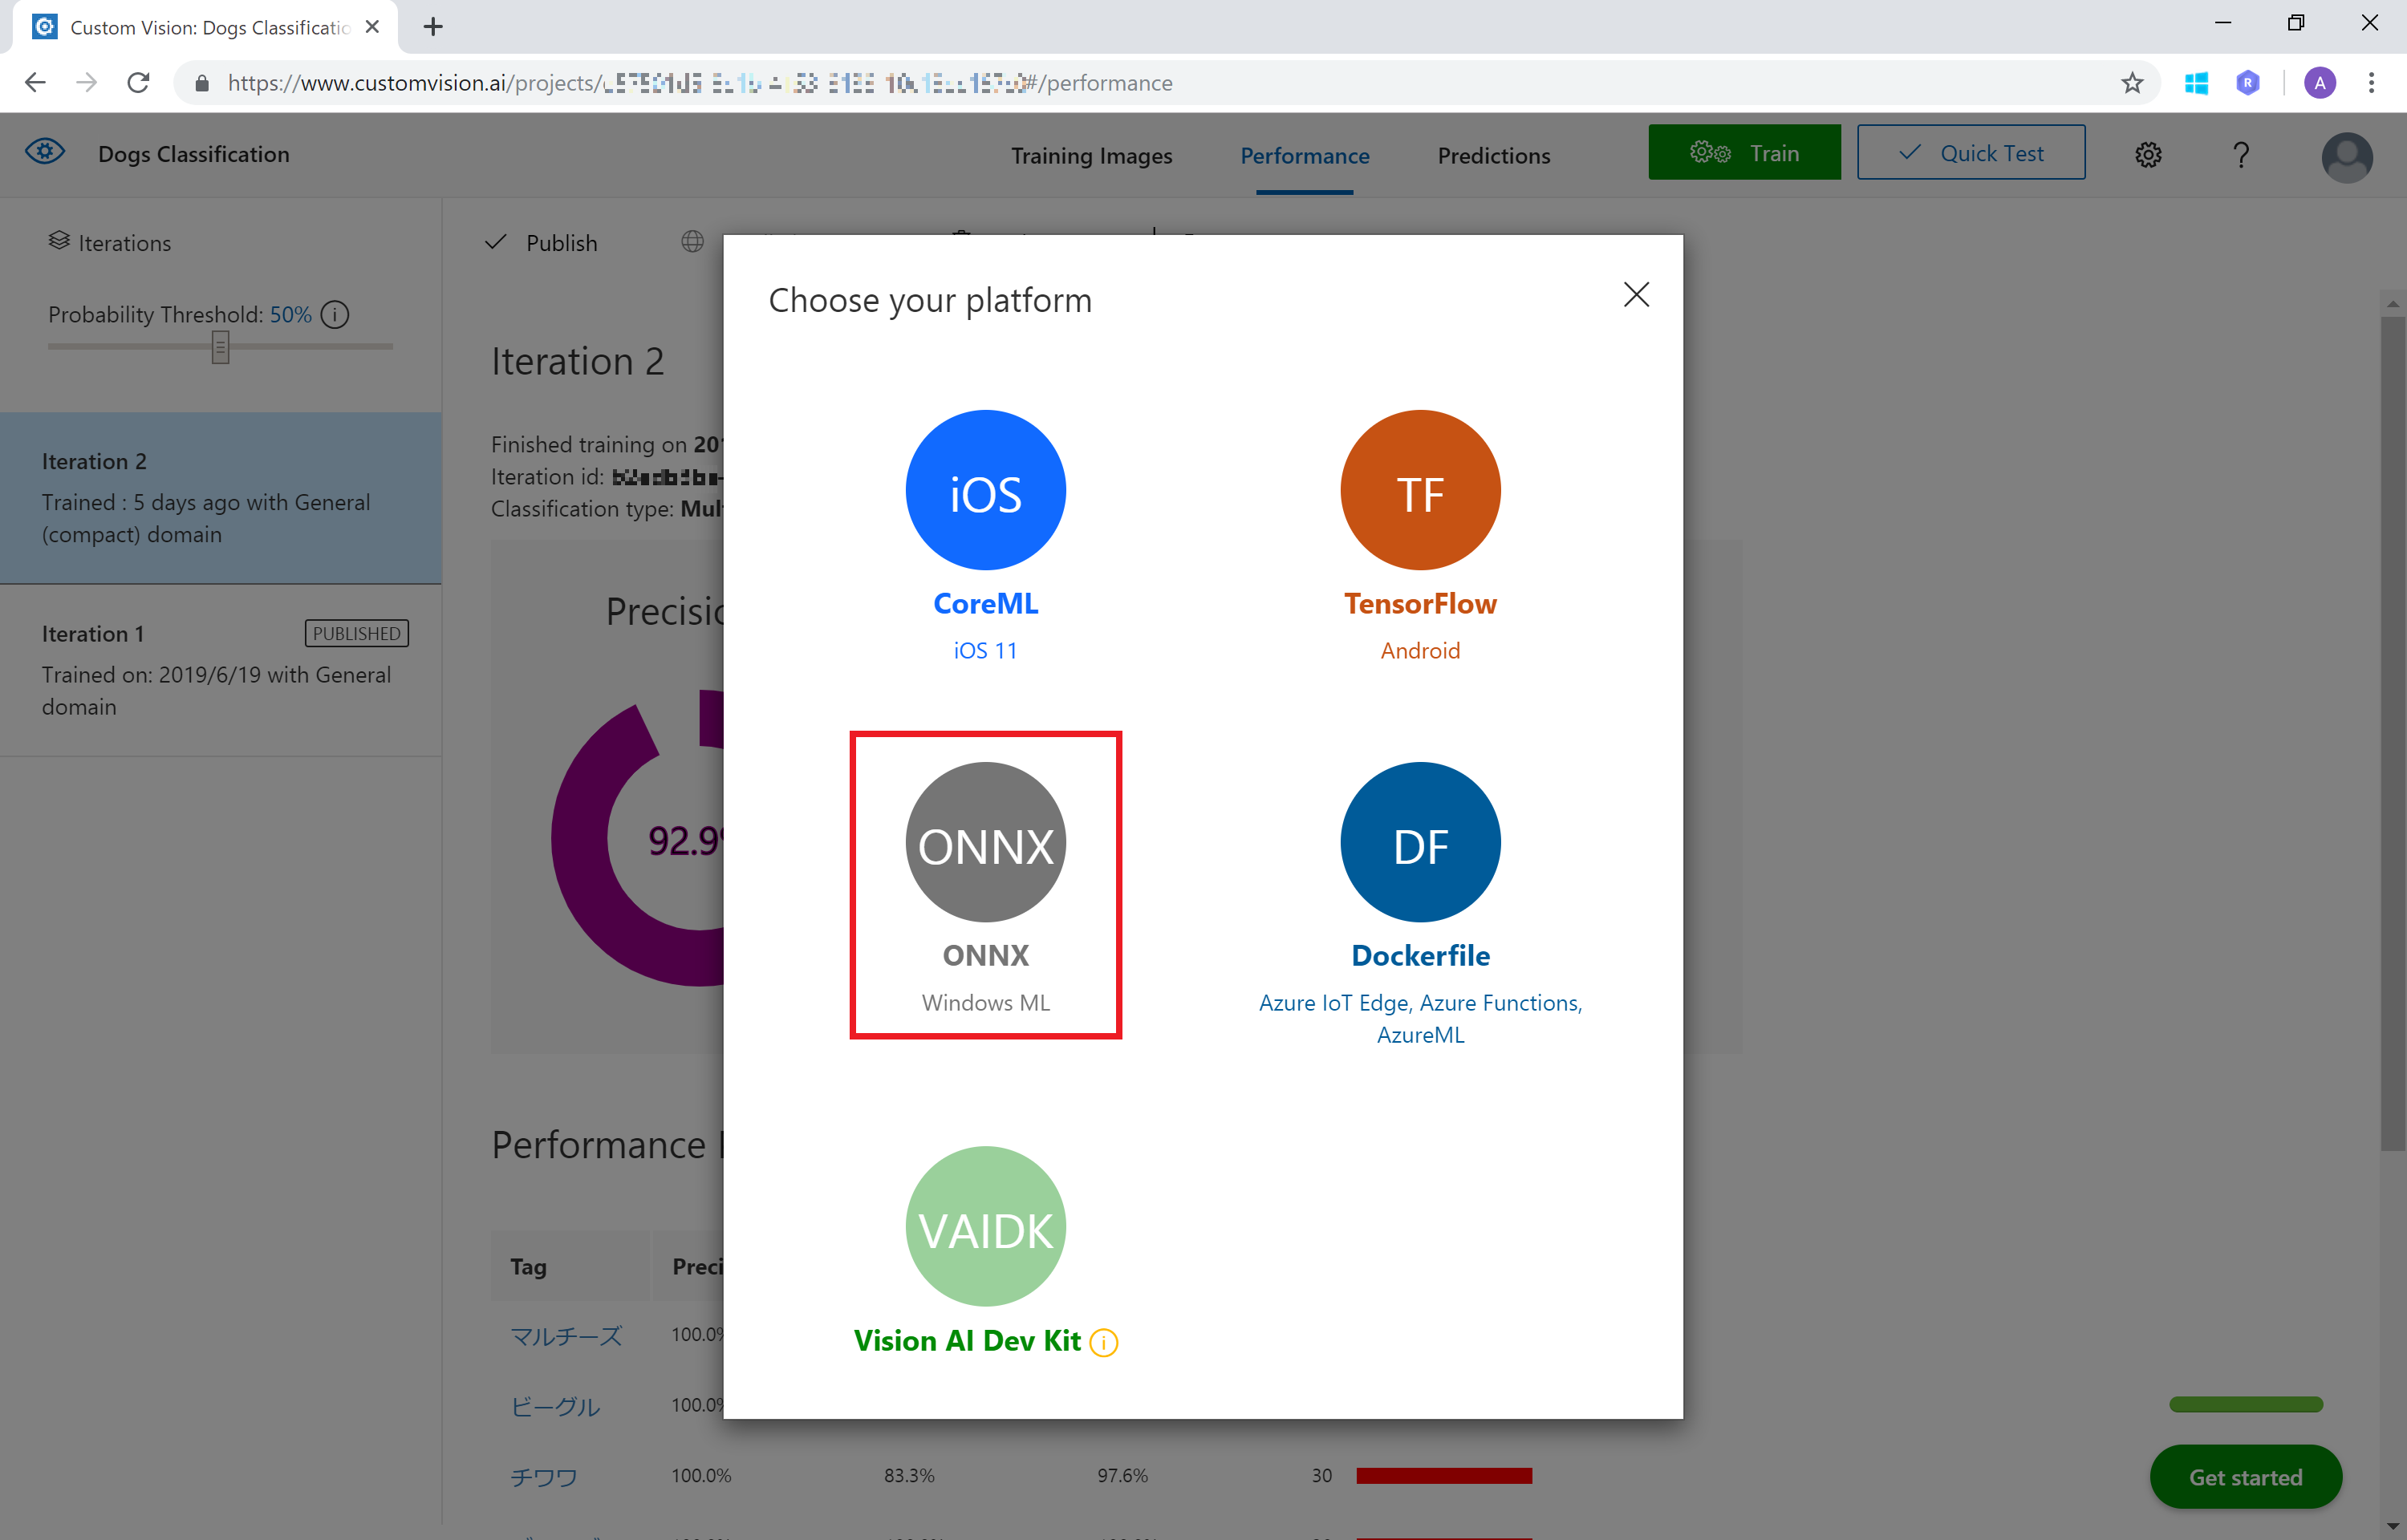
Custom Vision を利用すると、最小で画像5枚から画像解析モデルを作成し、Web API や CoreML、TensorFlow、ONNX、または Dockerimage として Export して利用できます。
今回は Custom Vision で作成したモデルを ONNX として Export して、ローカルの UWP (Universal Windows Platform: Windows 10 向け) アプリに取り込んで、画像解析してみるまでの手順を紹介します。
サクッとサンプルコードを確認したい場合はこちら
https://github.com/ayako/CogServicesVisionSamples_201906/tree/master/samples/ONNX
準備
- Custom Vision の利用環境
- Cognitive Services Custom Vision で画像解析モデルを作成します。
- 利用準備: Microsoft Azure & Cognitive Services 利用準備
- UWP 開発環境
- Windows 10 (Build 17738 以上)
- 以下の手順では Build 18362、ONNX 1.2 で確認しています
- Build 17110~17738 未満の場合は、ONNX 1.0 を利用してください。(それ以下の Build には対応していません)
- Visual Studio 2017 以上 (ユニバーサル Windows プラットフォーム開発 ワークロード)
- 以下の手順では、Visual Studio 2019 (v16.1.5) で確認しています
- Windows Machine Learning Code Generator
- AI 開発用の拡張機能。Visual Studio のバージョンに合わせてインストールしておきます↓
- Visual Studio 2019 用 | Visual Studio 2017 用
- Windows 10 (Build 17738 以上)
手順
Custom Vision で画像解析モデルを作成、Export
Custom Vision で画像解析モデルを作成
Custom Vision を利用した独自の画像分類およびオブジェクト検出のアルゴリズム構築 の手順を参考に、画像分類(Classification) または オブジェクト検出(Object Detection) モデルを作成します。
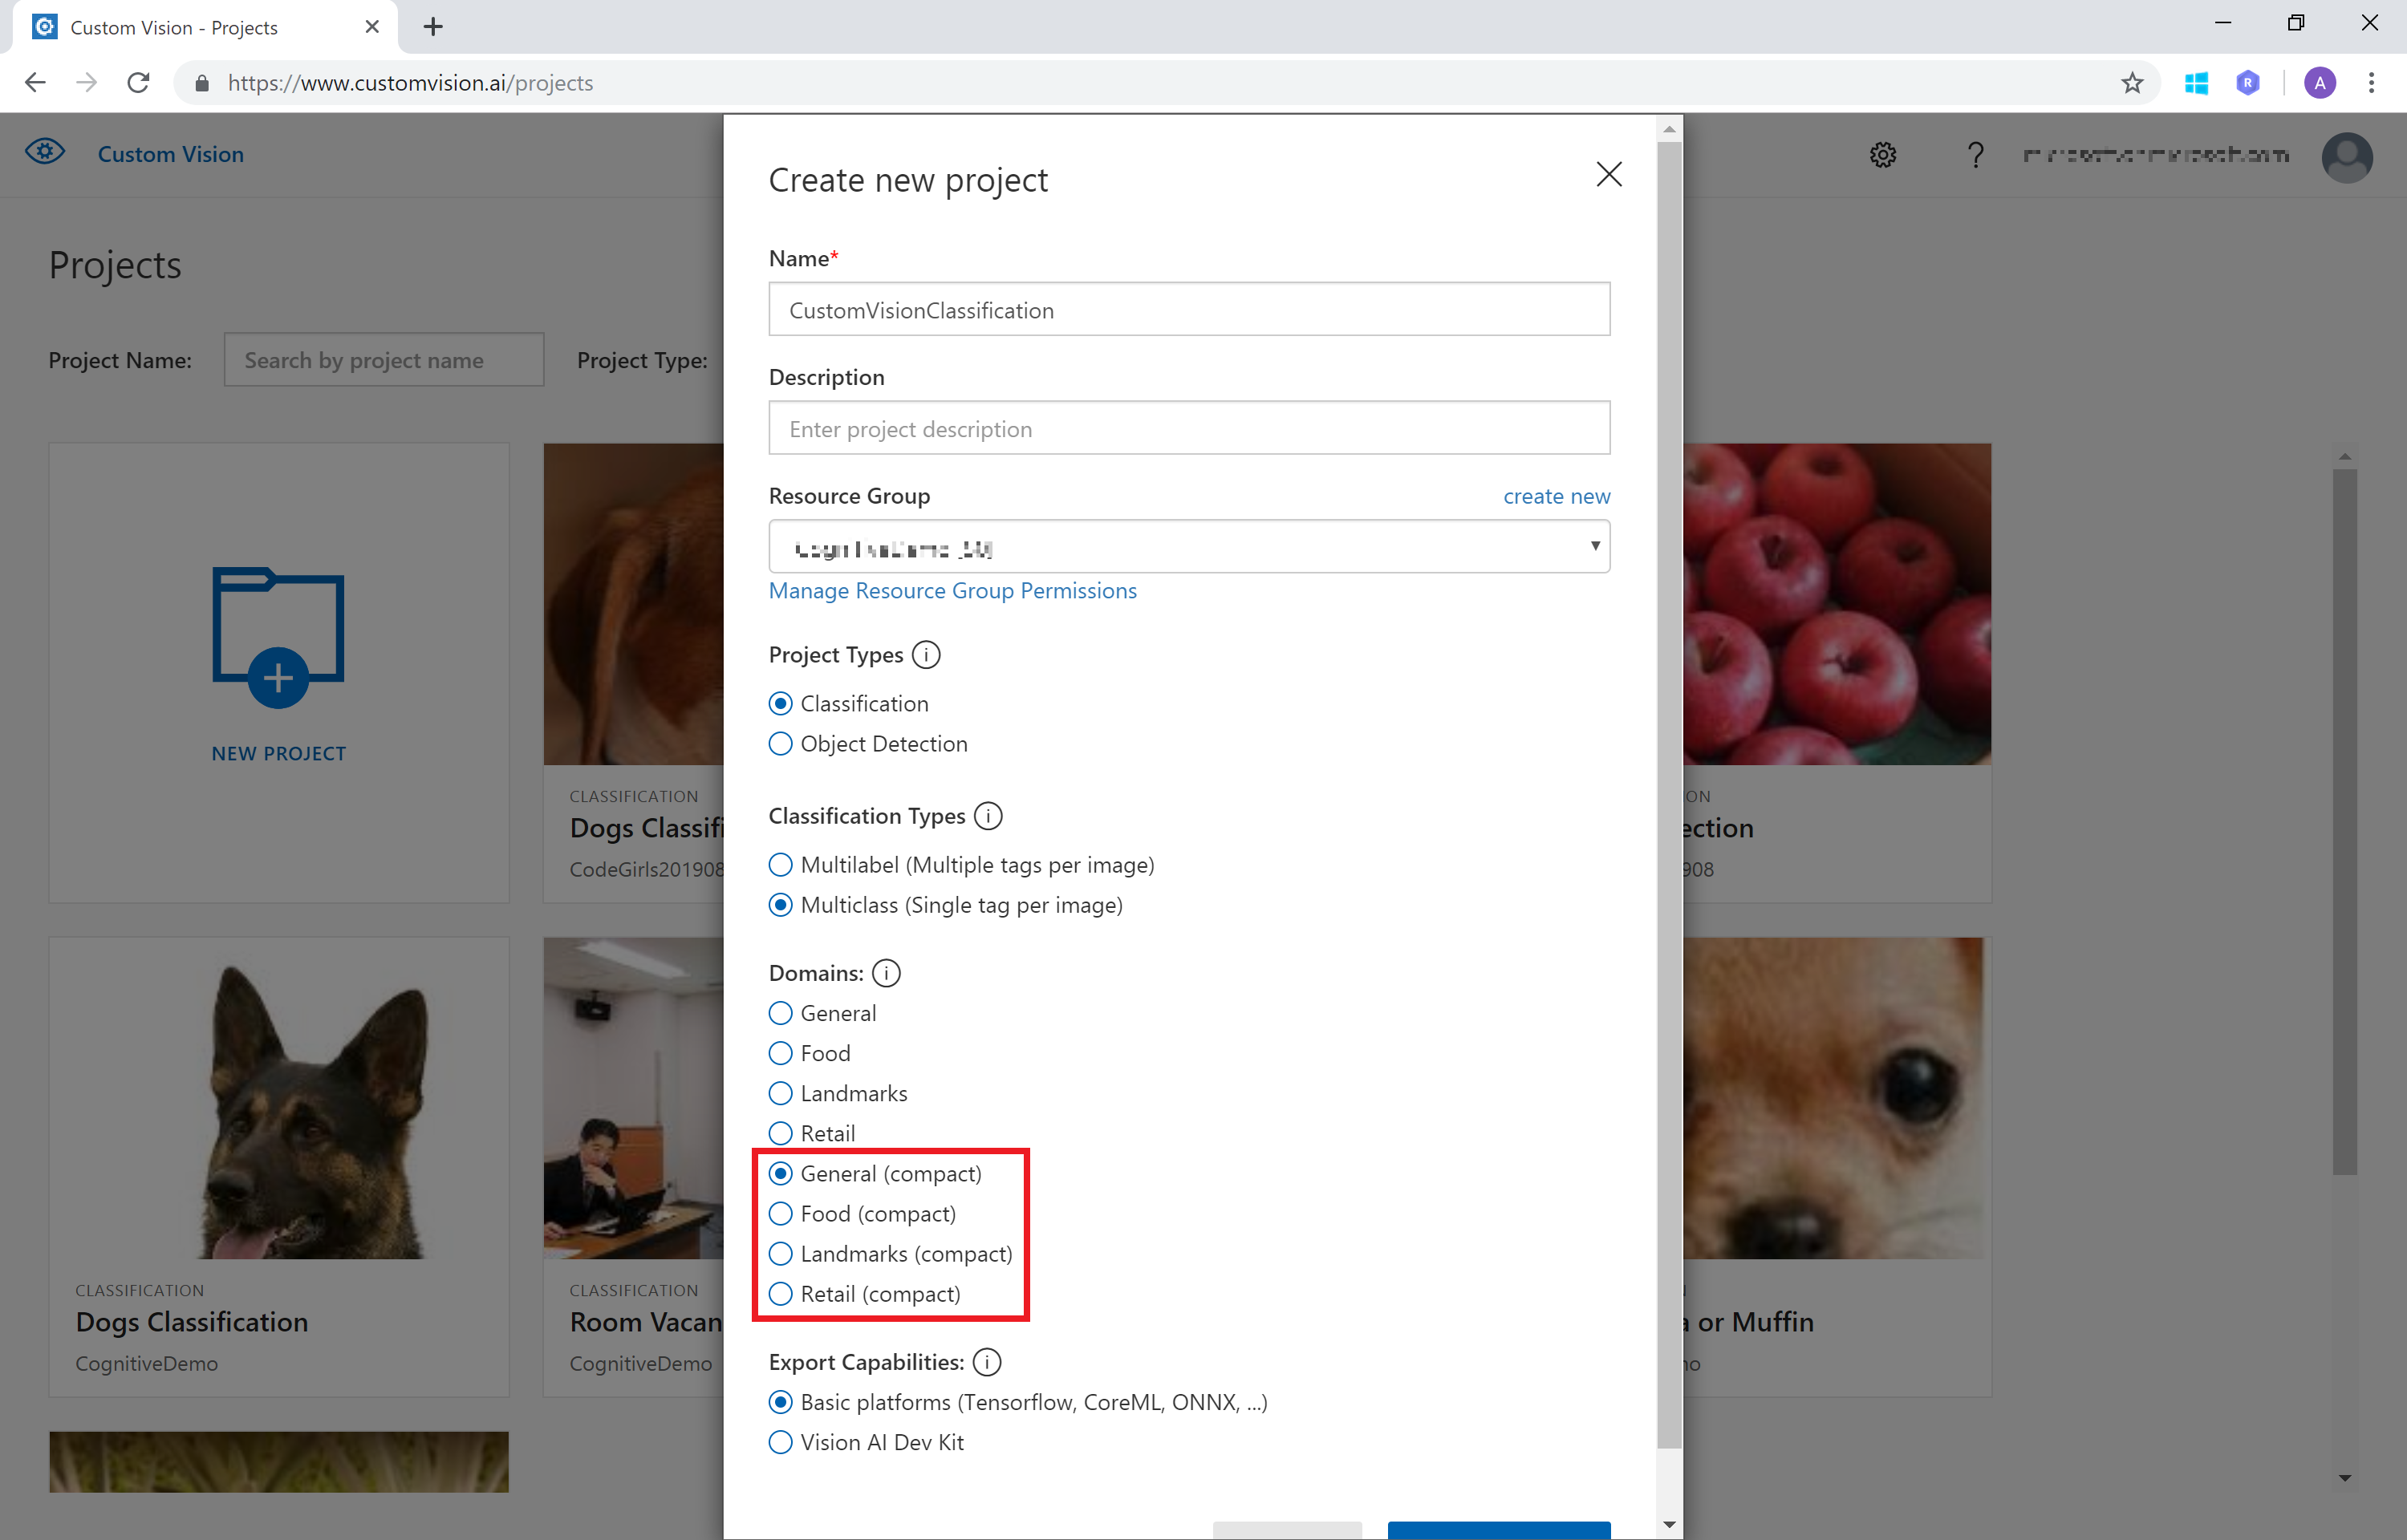
モデルの Export を行いたいときは、Project 作成時に "compact" と書かれている Domain を選択します。
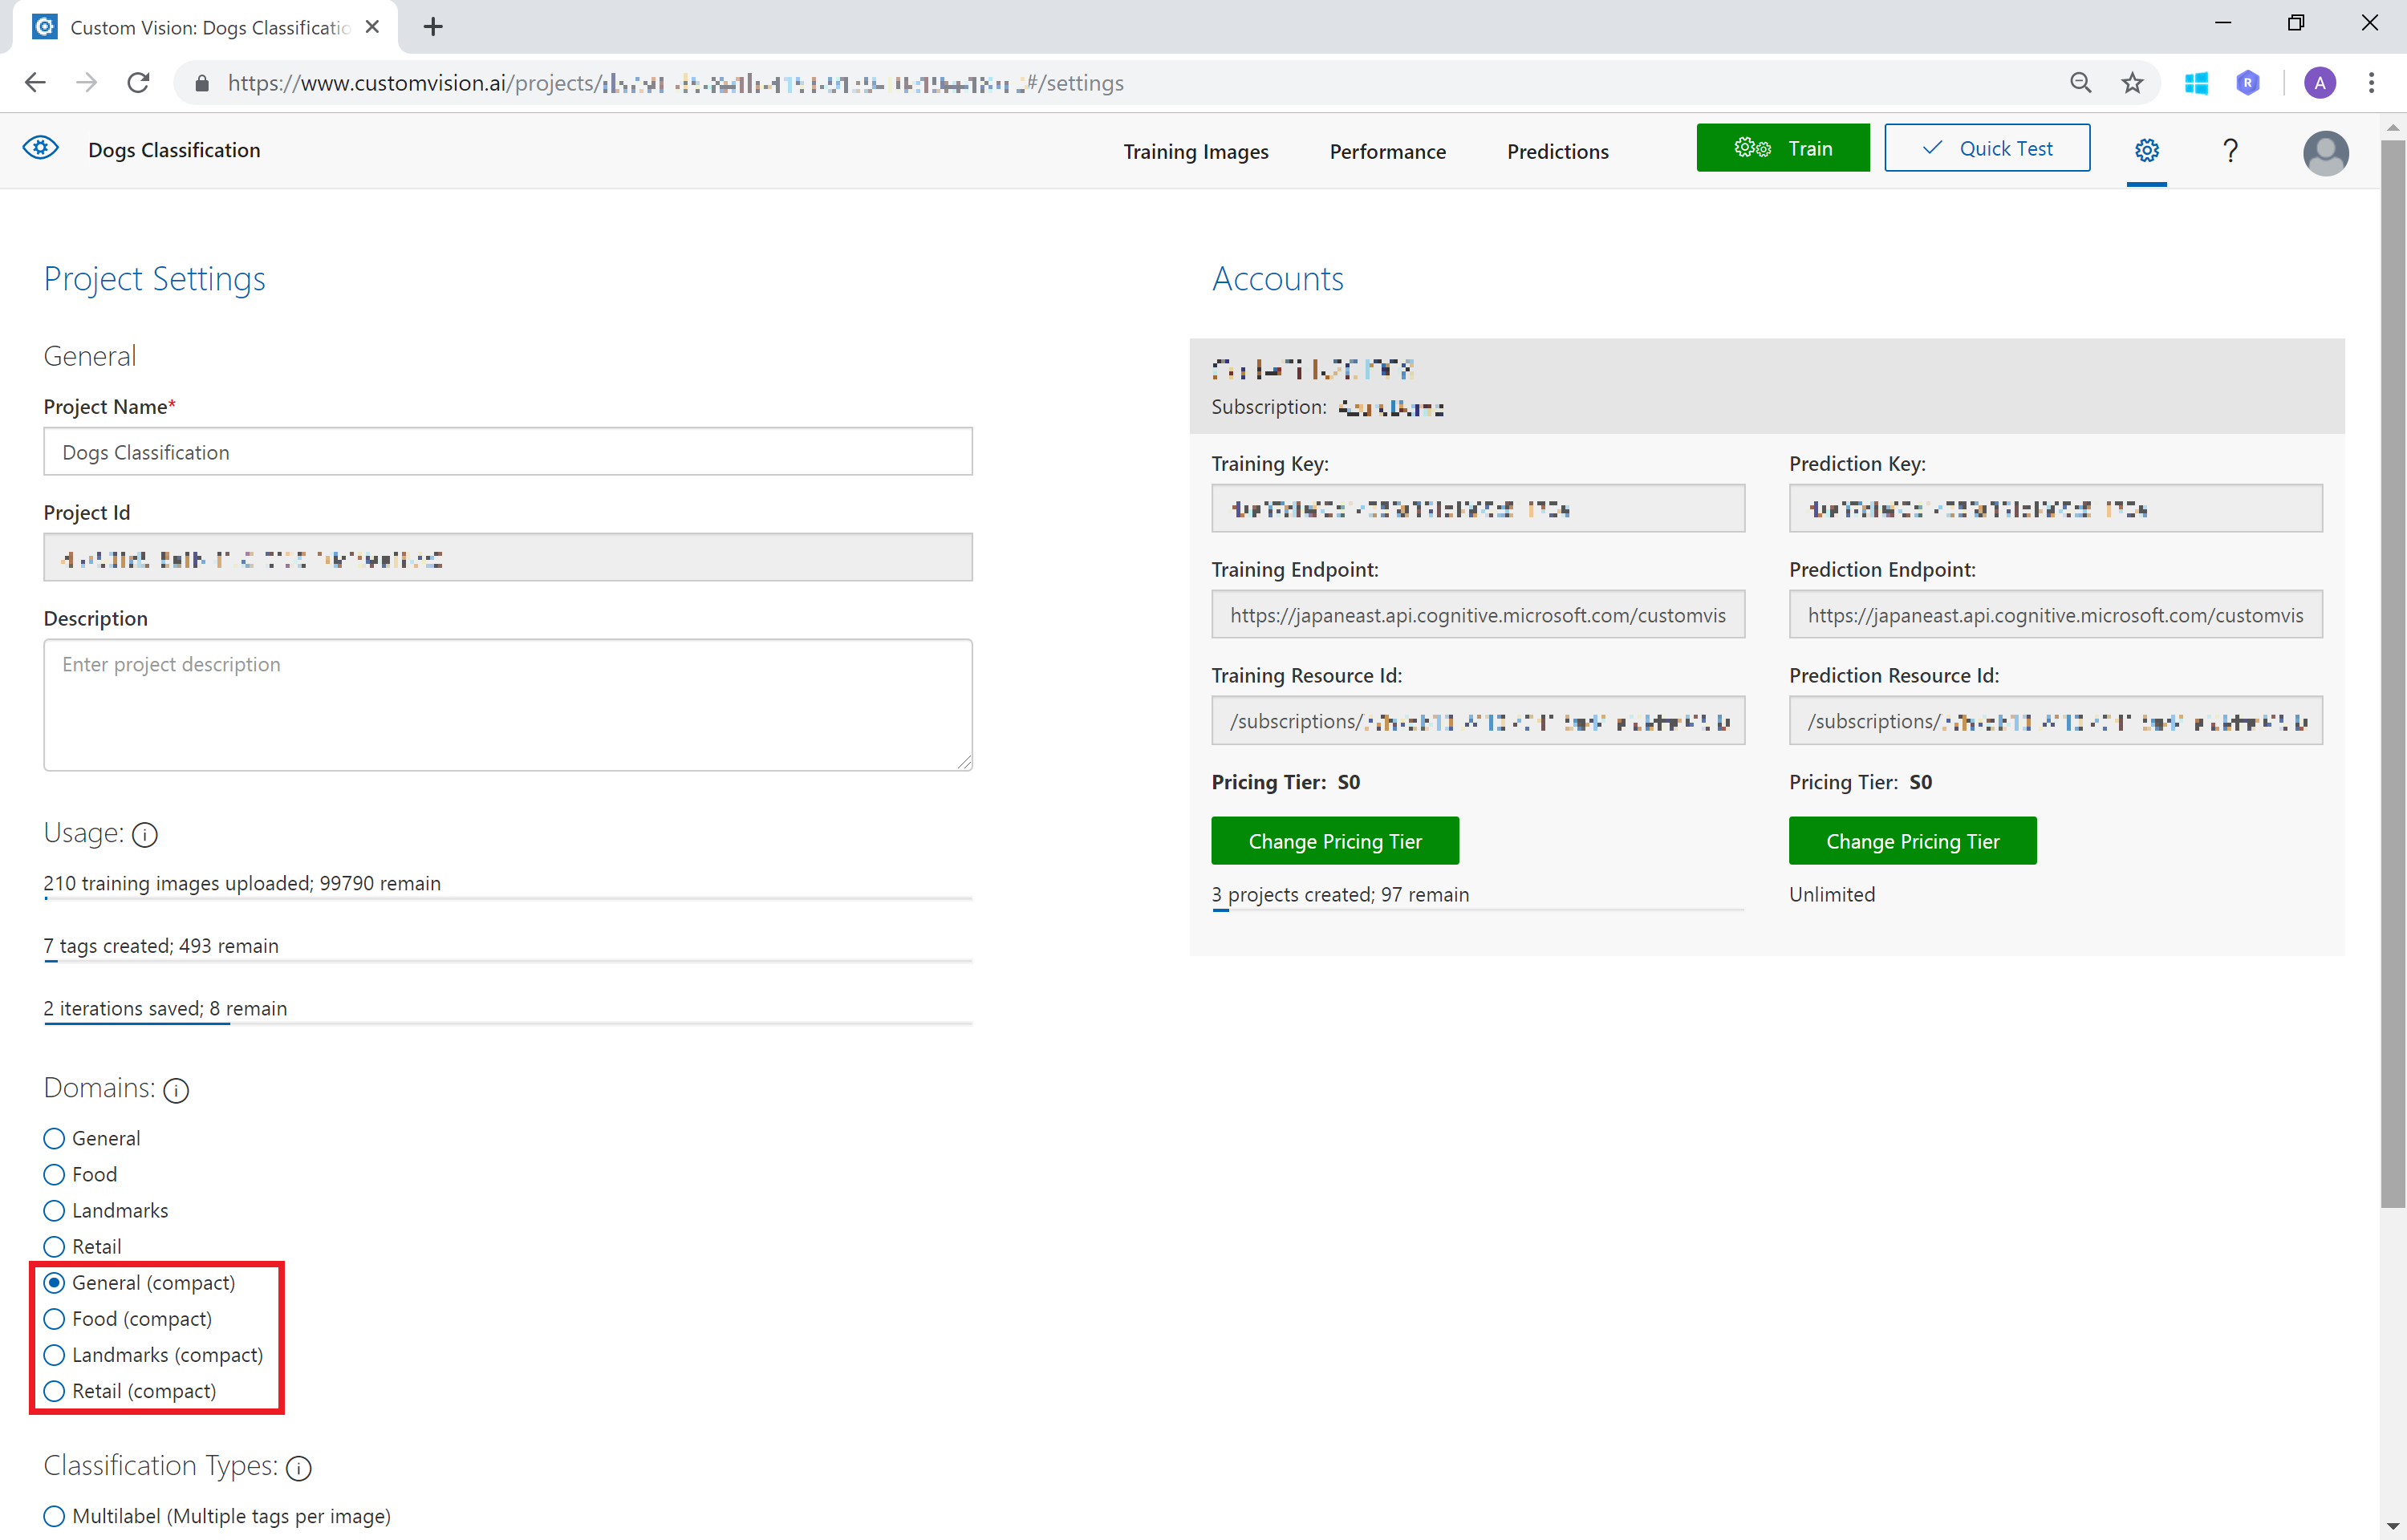
作成済みの Project を使いたい場合は、設定画面で "compact" と記されている Domain を選択し、Train すると Compact モデルが作成されます。
ONNX で Export
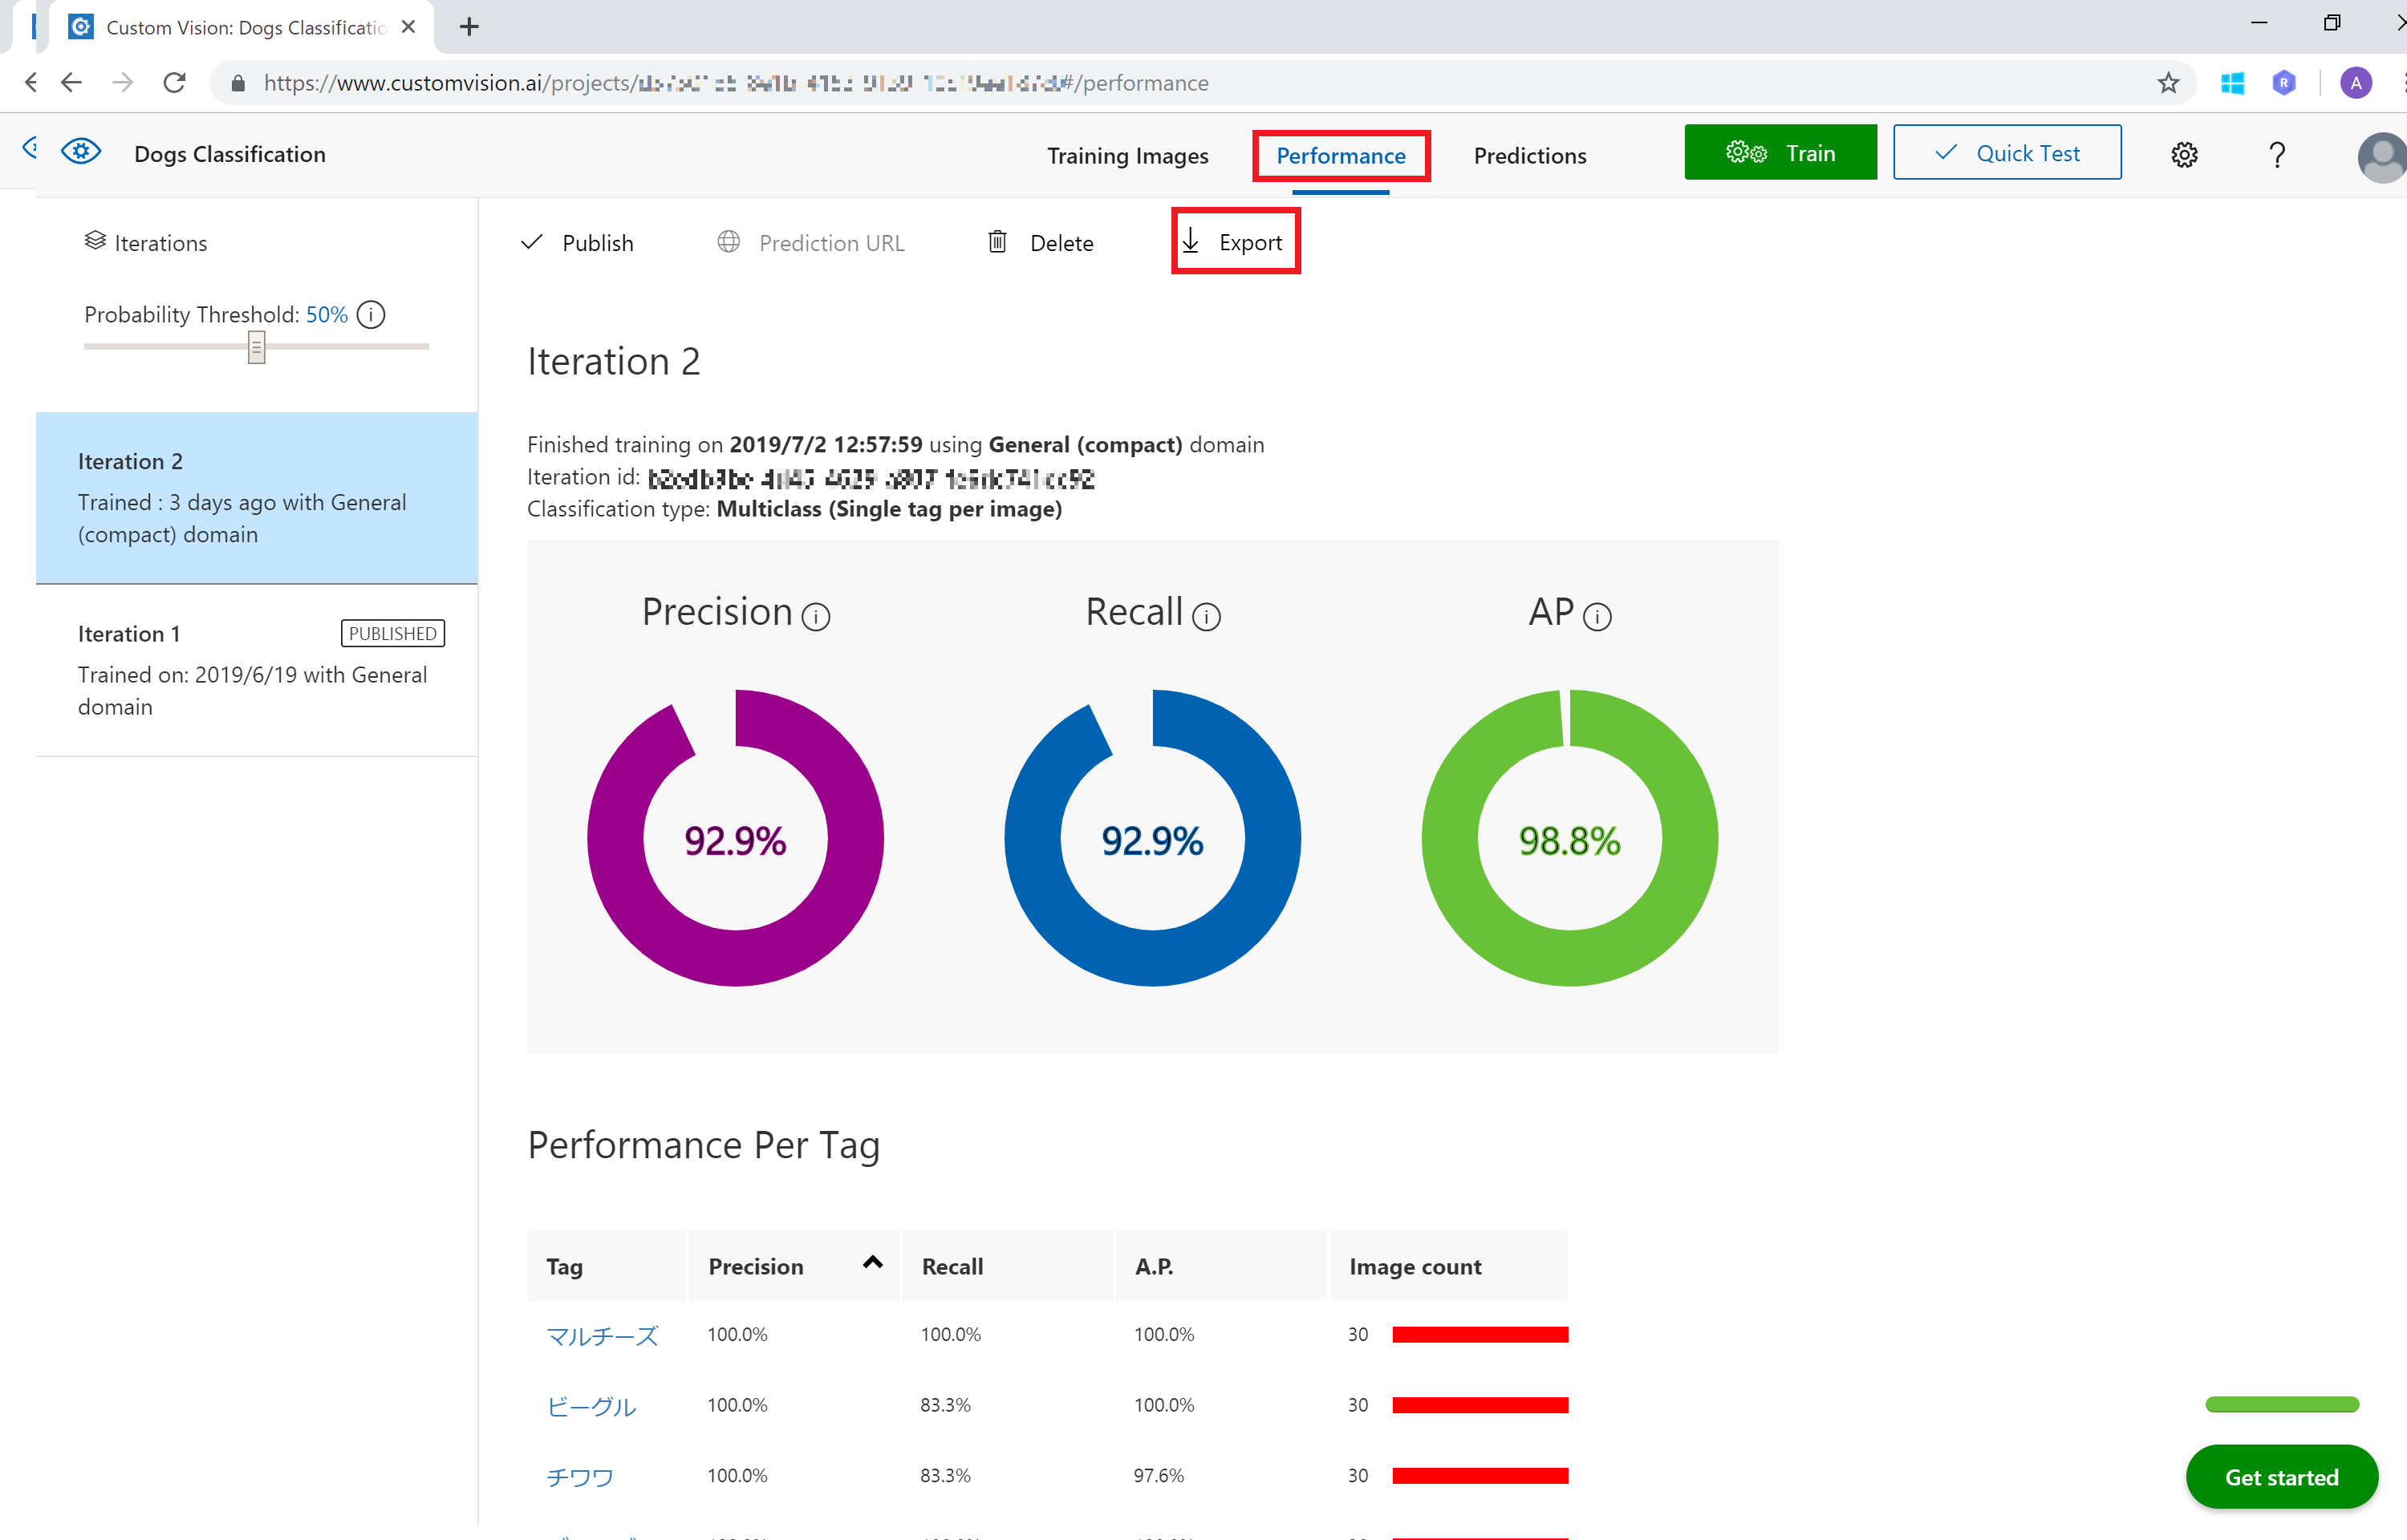
モデルを作成した Project で [Performance] 画面を開きます。
上部バーの [Export] をクリックします。
モデルが準備できて [Download] と表示されたらクリックしてダウンロードします。

ダウンロードしたファイルは IterationId.onnx といった形式になります。こちら IterationId を分かりやすいファイル名に変更しておきます。(ここでは CustomVision.onnx として進めます)
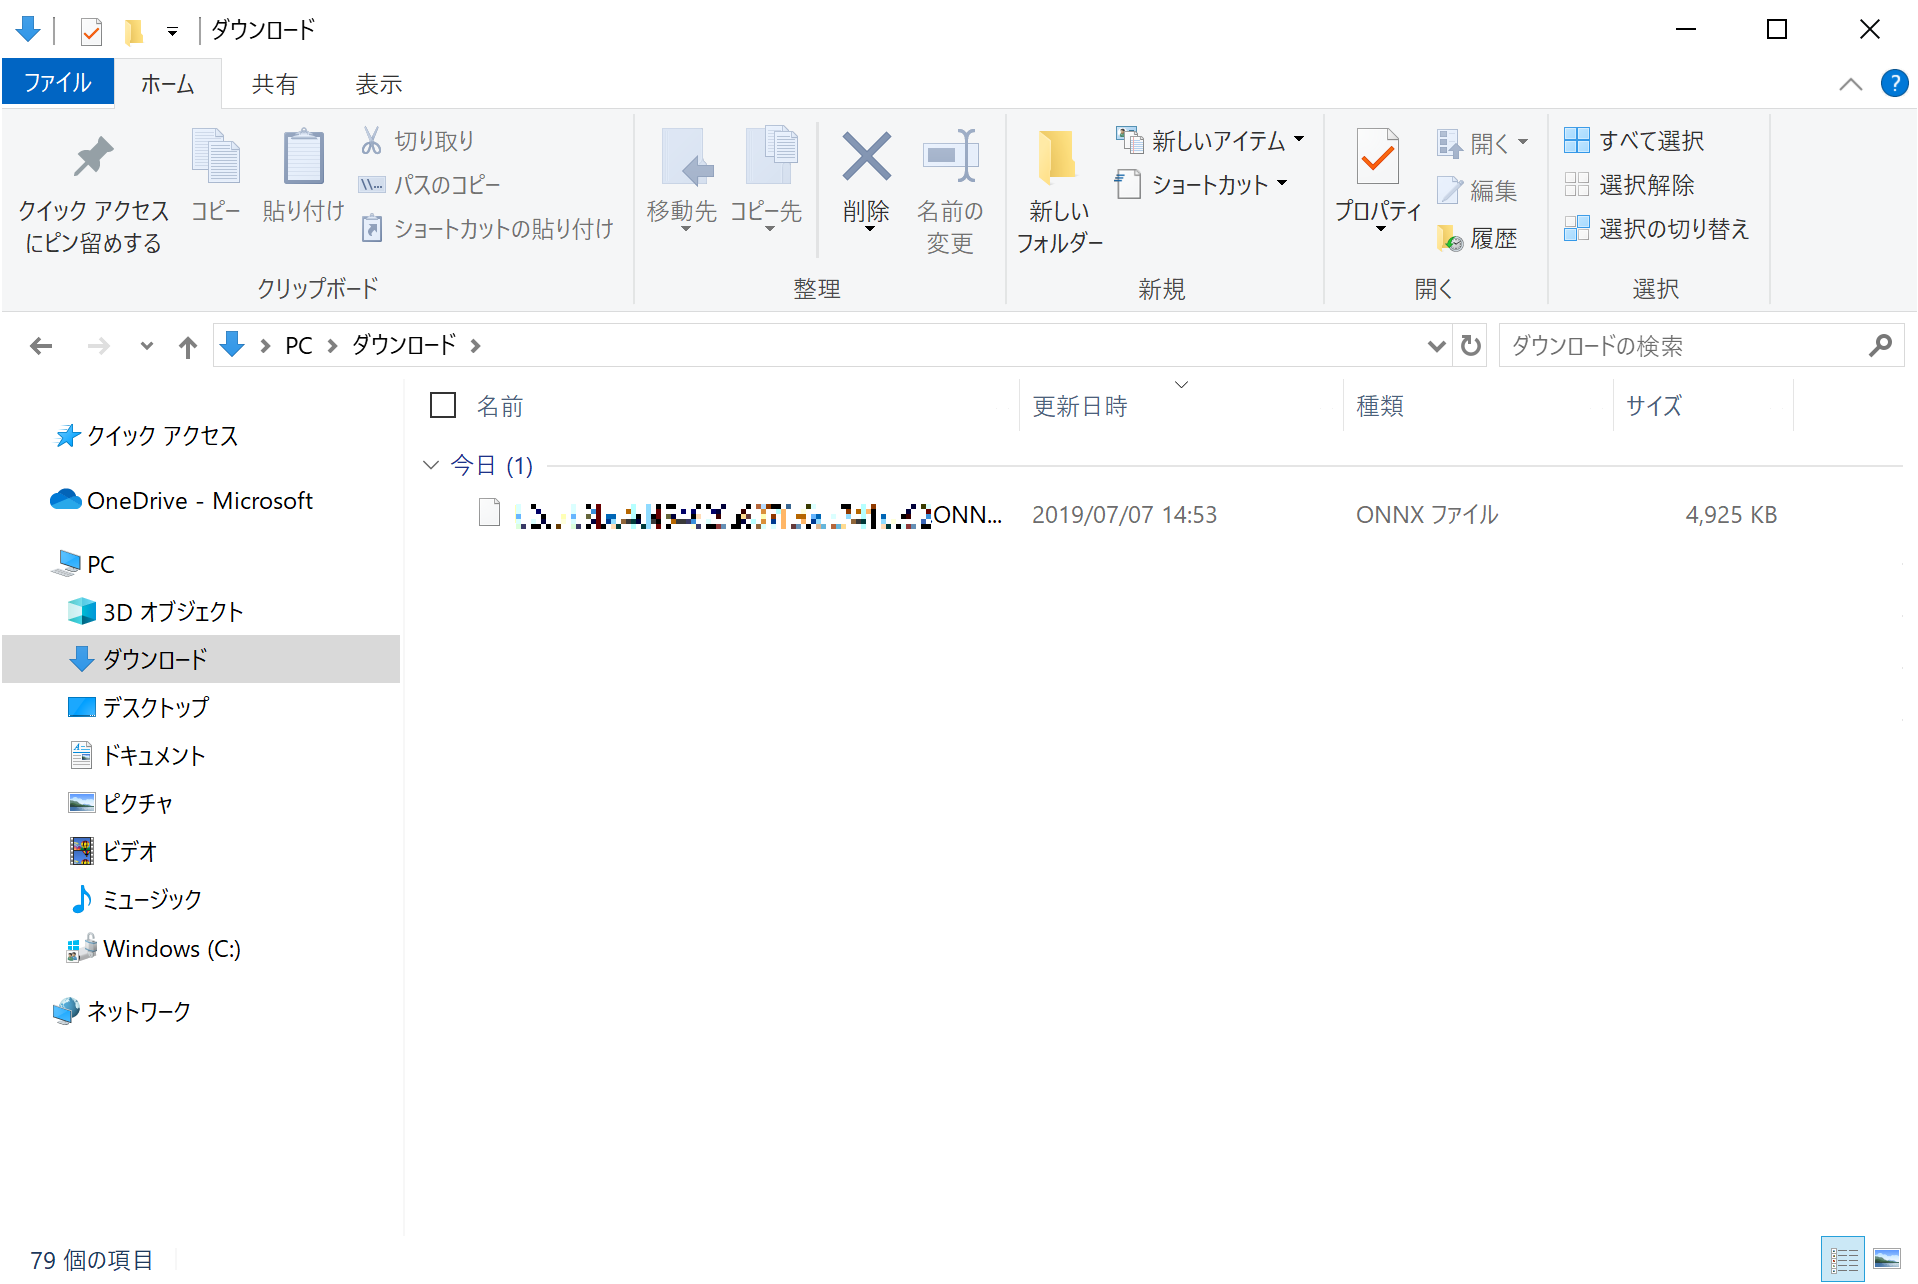
UWP アプリの ONNX 取り込み
新規 UWP アプリの作成
Visual Studio で新規 ユニバーサル Windows (UWP) アプリを作成します。 今回は C# 版を選択します。

MainPage.xaml の編集
アプリ UI 部分を作成します。
MainPage.xaml に画像をアップロードする Button と画像を表示する StackPanel、結果を表示する TextBlock を配置します。
<Grid> </Grid>の部分を以下のように記述します。
<Grid Background="{ThemeResource ApplicationPageBackgroundThemeBrush}">
    <Grid.RowDefinitions>
        <RowDefinition Height="*" />
        <RowDefinition Height="80" />
        <RowDefinition Height="80" />
    </Grid.RowDefinitions>

    <StackPanel Grid.Row="0" VerticalAlignment="Center">
        <Image Name="UIPreviewImage"/>
    </StackPanel>
    <Button Grid.Row="1" HorizontalAlignment="Stretch" Height="80" Content="Load Image" FontSize="36" Click="Button_Click" />
    <TextBlock Grid.Row="2" HorizontalAlignment="Stretch" Height="80" Name="ResultText" Text="Result" FontSize="48" TextAlignment="Center" Visibility="Collapsed"/>
</Grid>
修正後の MainPage.xaml は サンプルコード を確認してください。
ONNX ファイルの取り込み
Visual Studio のソリューションエクスプローラーで、作成したプロジェクトを右クリックし、[追加] > [既存の項目] をクリックします。
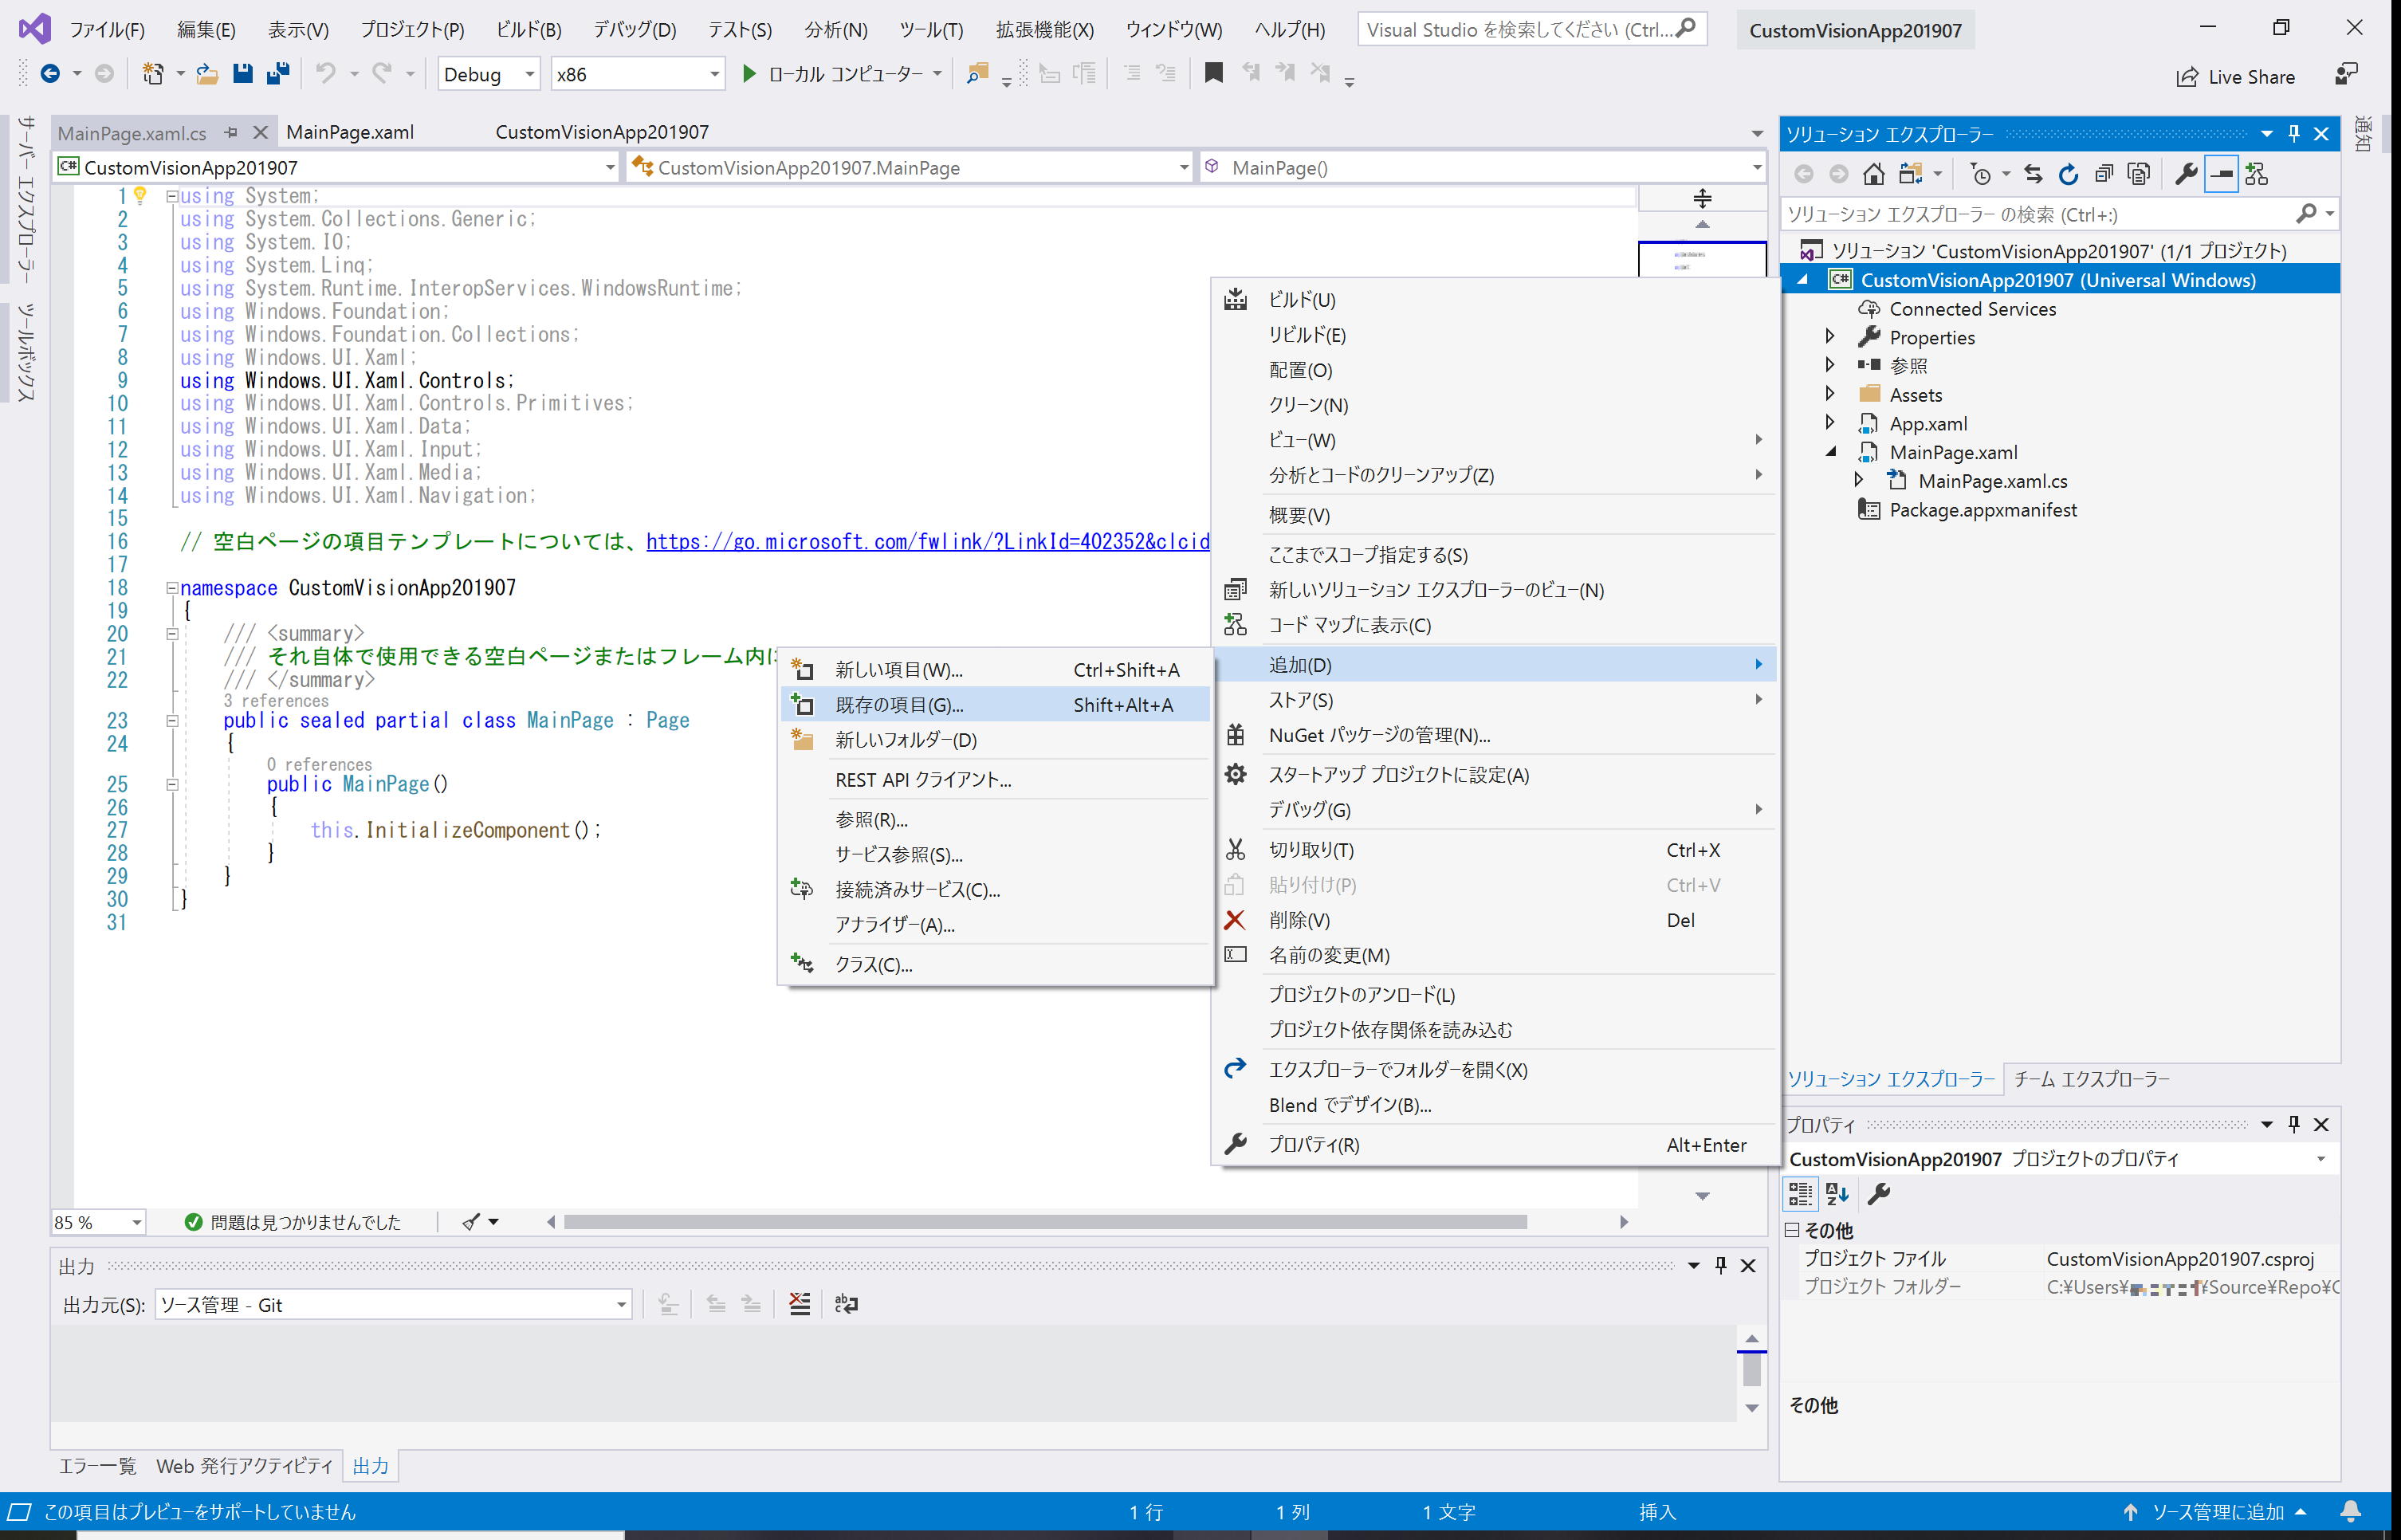
ダウンロードした ONNX ファイルを選択して追加します。
ONNXファイルが読み込まれ、プロジェクトに ONNX ファイル (ここでは CustomVision.onnx) とそれを利用するためのクラスライブラリ (ここでは CustomVision.cs) が自動で追加されます。

ONNX 用クラスライブラリの修整
作成された ONNX 用クラスライブラリ (CustomVision.cs) はそのまま利用できますが、今回使いやすいように修整します。
CustomVisionInput クラスを以下のように修整し、VideoFrame を入力データとして利用できるようにします。
public sealed class CustomVisionInput
{
    //public ImageFeatureValue data; // BitmapPixelFormat: Bgra8, BitmapAlphaMode: Premultiplied, width: 224, height: 224
    // 以下のように修整
    public VideoFrame data;
}
CustomVisionModel クラスにに以下のように CreateFromFileAsync というメソッドを追加し、ONNIX を StorageFile として読み込めるようにします。
public sealed class CustomVisionModel
{
     :

    // 以下を追加
    public static async Task<CustomVisionModel> CreateFromFileAsync(StorageFile file)
    {
        CustomVisionModel learningModel = new CustomVisionModel();
        learningModel.model = await LearningModel.LoadFromStorageFileAsync(file);
        learningModel.session = new LearningModelSession(learningModel.model);
        learningModel.binding = new LearningModelBinding(learningModel.session);
        return learningModel;
    }
}
修正後の CustomVision.cs は サンプルコード を確認してください。
MainPage.xaml.cs の編集
まず、ボタンをクリックしたときの動作を Button_Click として追加します。
ユーザーがアップロードした画像を SoftwareBitmap として取得して、StackPanel に表示し、VideoFrame に変換して EvaluateVideoFrameAsync (※この後作成します) で ONNX モデルを使って画像解析を行います。
public sealed partial class MainPage : Page
{
    public MainPage()
    {
        this.InitializeComponent();
    }

    // ボタンをクリックしたときの動作を追加
    private async void Button_Click(object sender, RoutedEventArgs e)
    {
        UIPreviewImage.Source = null;
        ResultText.Visibility = Visibility.Collapsed;
        try
        {
            // Get image using FileOpenPicker
            var fileOpenPicker = new FileOpenPicker();
            fileOpenPicker.SuggestedStartLocation = PickerLocationId.PicturesLibrary;
            fileOpenPicker.FileTypeFilter.Add(".jpg");
            fileOpenPicker.FileTypeFilter.Add(".jpeg");
            fileOpenPicker.FileTypeFilter.Add(".png");
            fileOpenPicker.ViewMode = PickerViewMode.Thumbnail;
            var selectedStorageFile = await fileOpenPicker.PickSingleFileAsync();

            // Change image to SoftwareBitmap to show in AppPage
            SoftwareBitmap softwareBitmap;
            using (var stream = await selectedStorageFile.OpenAsync(FileAccessMode.Read))
            {
                var decoder = await BitmapDecoder.CreateAsync(stream);
                softwareBitmap = await decoder.GetSoftwareBitmapAsync();
                softwareBitmap = SoftwareBitmap.Convert(softwareBitmap, BitmapPixelFormat.Bgra8, BitmapAlphaMode.Premultiplied);
            }

            // Show image on AppPage
            var imageSource = new SoftwareBitmapSource();
            await imageSource.SetBitmapAsync(softwareBitmap);
            UIPreviewImage.Source = imageSource;

            // Change image from SoftwareBitmap to VideoFrame
            var inputImage = VideoFrame.CreateWithSoftwareBitmap(softwareBitmap);

            await EvaluateVideoFrameAsync(inputImage);
        }
        catch (Exception ex)
        {
        }
    }
}
先ほど修整した CustomVision.cs を使って、ONNX を読み込んで画像解析をするメソッドを以下のように EvaluateVideoFrameAsync として記述します。
public sealed partial class MainPage : Page
{
    public MainPage()
    {
        this.InitializeComponent();
    }

    private async void Button_Click(object sender, RoutedEventArgs e)
        : (省略)

    // ONNX モデルを使って画像解析
    private async Task EvaluateVideoFrameAsync(VideoFrame inputFrame)
    {
        if (inputFrame != null)
        {
            try
            {
                // Get ONNX file
                var modelFile = await StorageFile.GetFileFromApplicationUriAsync(new Uri($"ms-appx:///CustomVision.onnx"));

                // Create WinML Model
                var model = await CustomVisionModel.CreateFromFileAsync(modelFile);

                // Set image(VideoFrame)
                var input = new CustomVisionInput
                {
                    data = inputFrame
                };

                // Detect image
                var output = await model.EvaluateAsync(input);

                ResultText.Text = output.classLabel.GetAsVectorView()[0];
                ResultText.Visibility = Visibility.Visible;
            }
            catch (Exception ex)
            {
            }
        }
    }
}
修正後の MainPage.xaml.cs は サンプルコード を確認してください。
動作確認
Visual Studio でデバックを行います。ご自身の環境に合わせて x86 / x64 などを選択し、[▶ ローカルコンピューター] をクリックしてデバック実行します。

アプリ画面が表示され、ボタンをクリックして画像をアップロード、画像解析結果が表示されれば完了です。

Troubleshooting
ONNX 用のクラスライブラリ (CustomVision.cs) が自動生成されない
- Windows Machine Learning Code Generator がインストールされていることを確認してください
- Windows 10 のビルド番号を確認してください。ONNX 1.2 は Build 17738 以上で利用可能です。それ以下の Build の場合は、ONNX 1.0 でお試しください
