はじめに
5回目の時に、Sidebarをやっていましたが、iPhoneの場合はSidebarではなく、TabBarを使うのが一般的です。今回はTabBarと画面遷移をやっていきます。
目次
TabBar
・5回目の時、osと関係なくSiderbar()を呼び出していました。
今回では、macの場合はSidebar()を呼び出します。iOSの場合は、iPhoneならばTabBar()、iPadならばSidebar()というふんに切り分けます。
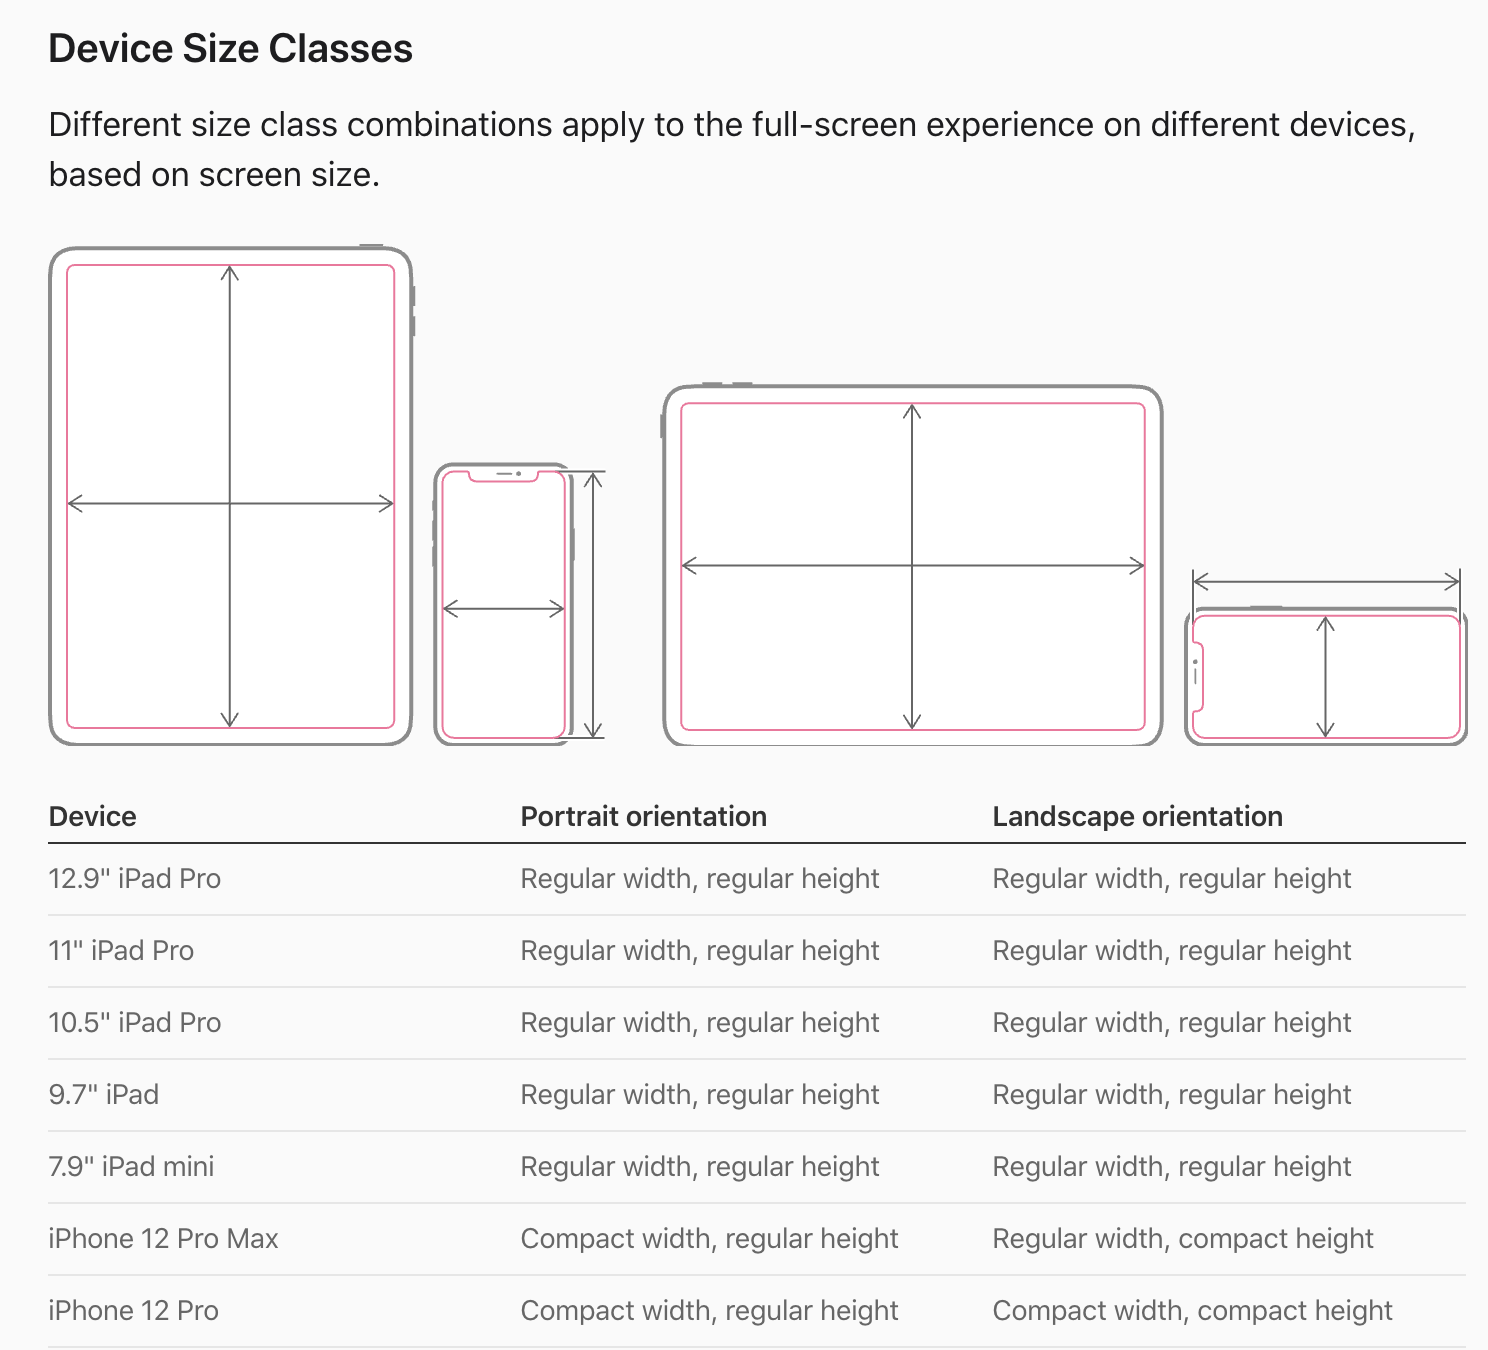
・iPadなのか、iPhoneなのか、とう判断するというと...
Human Interface GuidelinesでDevice Sizeがcompactの端末をiPhoneとして認識し、regularであればiPadとして認識されています。
ContentView.swift
struct ContentView: View {
    #if os(iOS)
    @Environment(\.horizontalSizeClass) var horizontalsizeClass
    #endif

    @ViewBuilder
    var body: some View {
        #if os(iOS)
        if horizontalsizeClass == .compact {
            TabBar()            // ↑ iPadならばregular
        } else {
            Sidebar()
        }
        #else
        Sidebar()
            .frame(minWidth: 1000, minHeight: 600)
        #endif
    }
}
・`TabBar.swift`は`NavigationView`に遷移先を入れて、`tabItem`にImageやTextを入れれば完成です。ピンや縦横幅などの設定は入りません。

TabBar.swift
struct TabBar: View {
    var body: some View {
        TabView {
            NavigationView {
                CoursesView()
            }
            .tabItem {
                Image(systemName: "book.closed")
                Text("Courses")
            }
            NavigationView {
                CourseList()
            }
            .tabItem {
                Image(systemName: "list.bullet.rectangle")
                Text("Tutorials")
            }
         }
    }
}
Navigation Link & sheet
・Navigation Linkの使い方もとてもシンプルで、destinationに遷移先を決めれば、
ただ、CourseRow()Listの色は全部紫色になっているので、CourseRow()であらためて決める必要があります。
CoursesView.swift
@Namespace var namespace

ForEach(courseSections) { item in
    NavigationLink(
       destination: CourseDetail(nameSpace: namespace)
    ) {
        CourseRow(item: item)
     }
}
・画面遷移はNavigation Linkのほかに、sheetを使って画面遷移もできます。
CourseDetail.swift
@State var showModal = false

VStack {
  ForEach(courseSections) { item in
      CourseRow(item: item)
         .sheet(isPresented: $showModal) {
                             // $は双方向blinding
             CourseList()
      }
      .onTapGesture {
         showModal = true
      }
   Divider()
  }
}
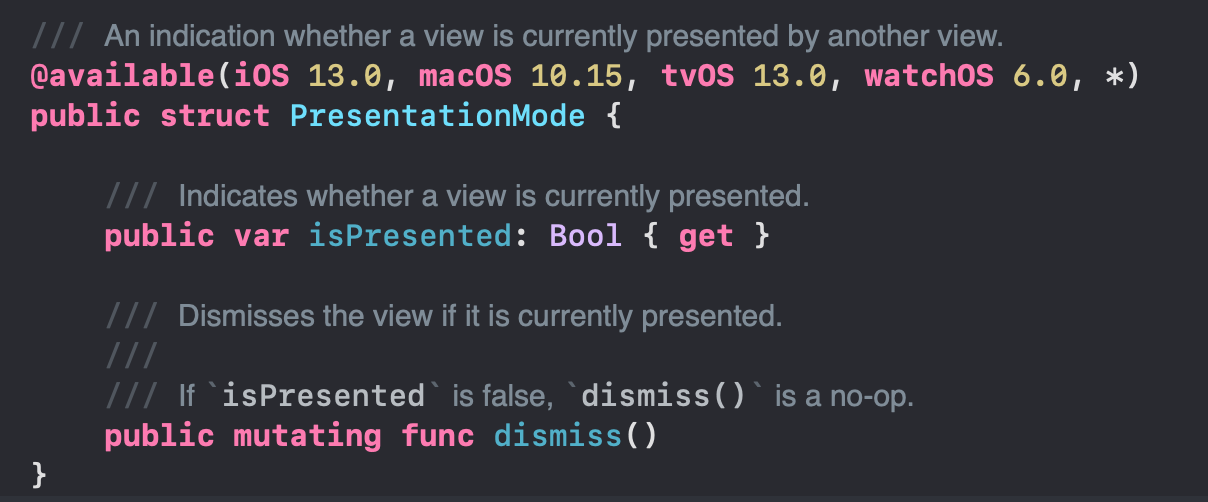
・sheetを使う場合は、閉じるボタンを自分で用意する必要があって、嬉しいなのはdismissで易しくできます。
CourseSectionDetail.swift
@Environment(\.presentationMode) var presentationMode

CloseButton()
   .onTapGesture {
       presentationMode.wrappedValue.dismiss()
   }

まとめ
ソースコードGithub