はじめに
Toolbarは2020年リリースした新しい機能です。今日からこれを勉強していきます。
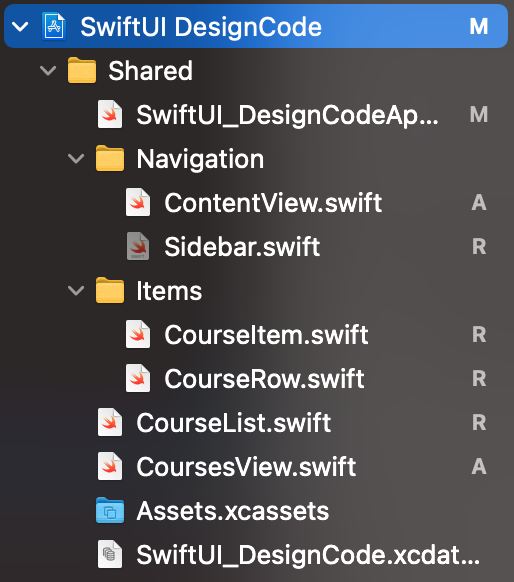
また、ファイル数がだんだん増えてきたため、どういうふうに管理すれば良いのかも見ていきましょう。
目次
Toolbar in iOS
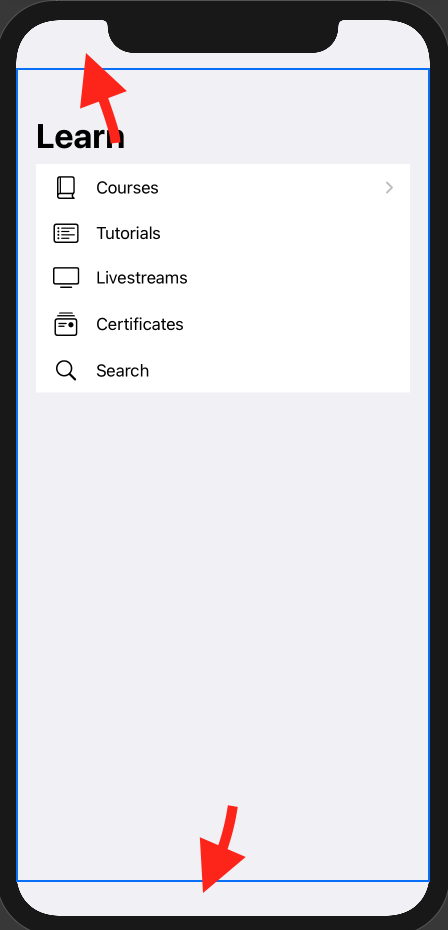
・Toolbar画面の一番上と下の部分、safeAreaとnavigationBarと若干似ていますけれども、クロスプラットフォームできるのが魅力的です。
# if os(iOS)
content
    .navigationTitle("Learn")
    .toolbar {
       ToolbarItem {
           Image(systemName: "person.crop.circle")
       }
     }
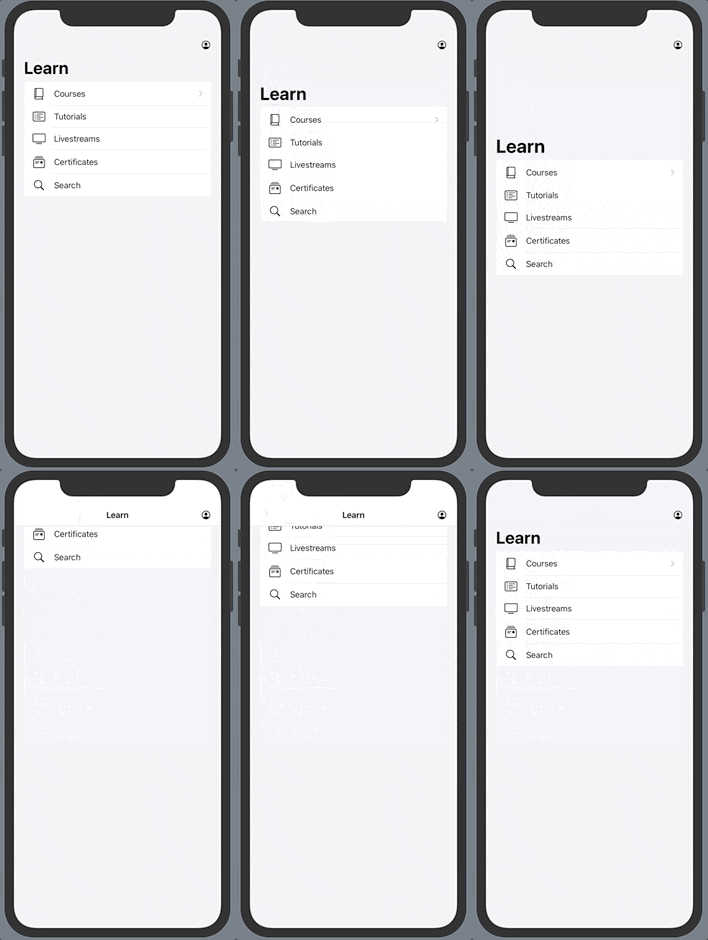
・toolbar(placement: )で場所は自由に変更することもできます。bottomBarにしたら画面の一番下に持っていきます。
# if os(iOS)
content
    .navigationTitle("Learn")
    .toolbar(placement: .bottomBar) {
       ToolbarItem {
           Image(systemName: "person.crop.circle")
       }
     }
Toolbar in macOS
・macの場合はiOSのtoolbar(placement: )をそのまま使えません。
・前回の記事のように、iOSとmacOSとそれぞれの処理を行います。また、placement:もmacが使えるアイテムに変更します。
# else
content
    .navigationTitle("Learn")
    .toolbar(placement: .automatic) {
       ToolbarItem {
           Image(systemName: "person.crop.circle")
       }
     }
# endif
・imageだけじゃなく、Buttonにするのもできます。
# else
content
    .navigationTitle("Learn")
    .toolbar(placement: .automatic) {
       ToolbarItem {
          Button(action: {}) {
              Image(systemName: "person.crop.circle")
          }
       }
     }
# endif
・ContentView.swiftに1回目の記事で書いたカードのコードをそこに置かないべきです。
bodyの中身を全部新しいファイルCourseItem.swiftに移します。
・ContentView.swiftにはSidebar()を呼び出して、os別の処理を追加します。
struct ContentView: View {
    @ViewBuilder
    var body: some View {
        #if os(iOS)
        Sidebar()
        #else
        Sidebar()
            .frame(minWidth: 1000, minHeight: 600)
        #endif
    }
}
ファイル管理
・綺麗なコードを書くための教材は無論Appleのオフィシャルドキュメントです。
・Appleのオフィシャルドキュメントを参考に分類しましょう。

まとめ
・今回までは特に難しい内容がなかったと思います。次回も頑張っていきましょう。
ソースコードGithub

