はじめに
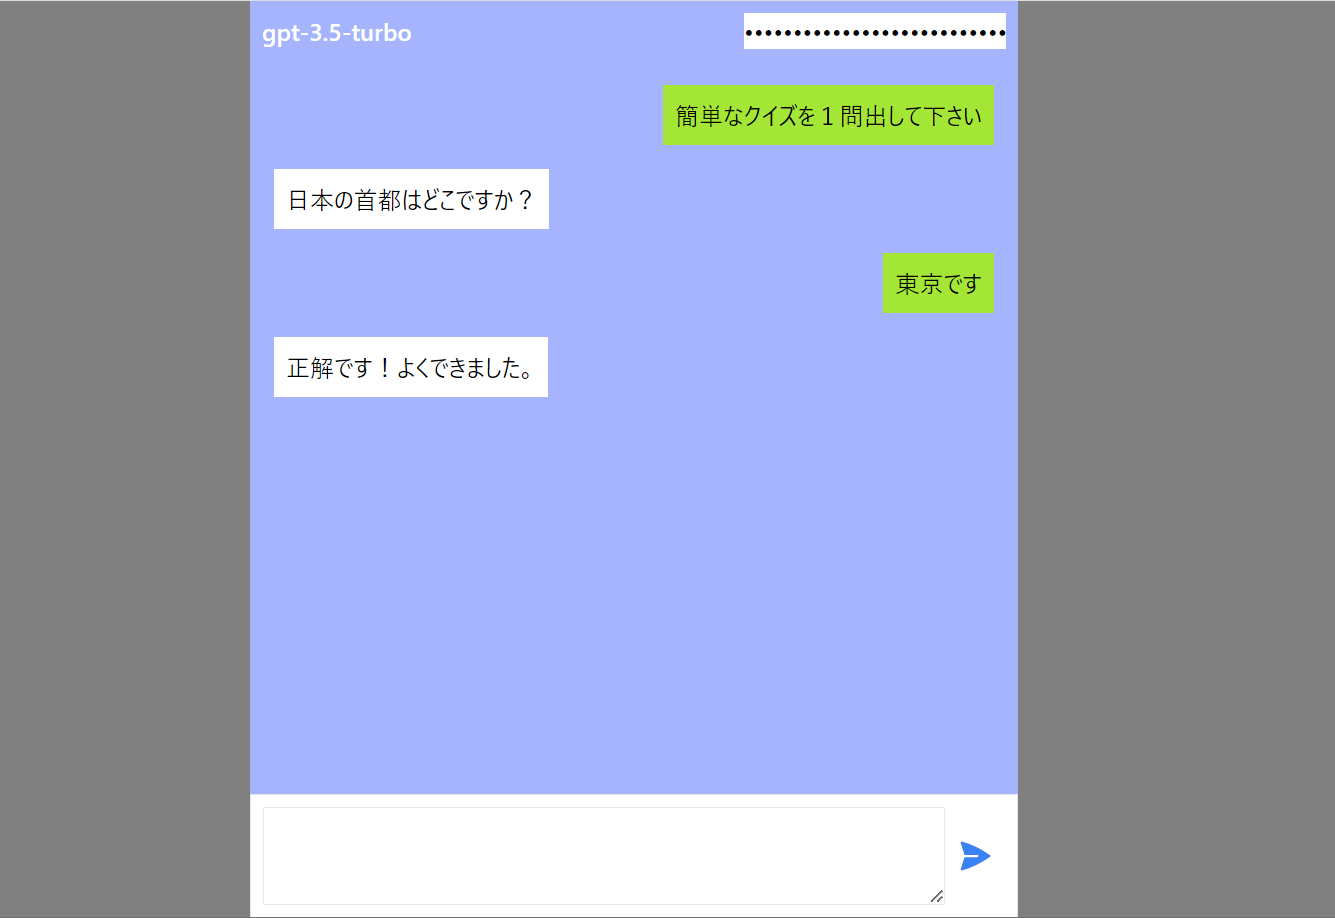
OpenAI REST APIを利用したチャット画面のサンプルアプリを紹介します。(デモサイト)
※実際に会話を行うにはOpenAI REST APIのAPI Keyが必要です。
※ブラウザとOpenAI REST APIで直接通信を行います。
以下のコード全体をindex.htmlにコピペすればローカルでも動かせるのでぜひ動かしてみてください。
コード全体
<!DOCTYPE html>
<html lang="en">
  <head>
    <meta charset="UTF-8" />
    <title>Chat UI</title>
    <script crossorigin src="https://unpkg.com/react@18/umd/react.production.min.js"></script>
    <script crossorigin src="https://unpkg.com/react-dom@18/umd/react-dom.production.min.js"></script>
    <script src="https://unpkg.com/@babel/standalone/babel.min.js"></script>
    <script crossorigin src="https://cdn.jsdelivr.net/npm/axios/dist/axios.min.js"></script>
    <script src="https://cdn.tailwindcss.com"></script>
    <style>
      html,body,#root {height: 100%; background-color: grey;}
    </style>
  </head>
  <body>
    <div id="root"></div>

    <script  type="text/babel">
      const App=()=> {
        const [apiKey, setApiKey] = React.useState("");
        const [messages, setMessages] = React.useState([]);
        const [isLoading, setIsLoading] = React.useState(false);
        const [inputMessage, setInputMessage] = React.useState("");

        const sendMessage = () => {
          setMessages(prev=> [...prev, {role:"user", content:inputMessage}] );
          setIsLoading(true);
          setInputMessage("");
        };

        React.useEffect(()=>{
            if(isLoading){
              const getChatCompletion = async(messages, apiKey) => {
                try{
                  const API_URL = "https://api.openai.com/v1/chat/completions";
                  const headers = { "Content-Type": "application/json", Authorization: `Bearer ${apiKey}` };
                  const data = { model: "gpt-3.5-turbo", messages: messages };
                  const response = await axios.post(API_URL, data, { headers: headers });
                  const content = response.data.choices[0].message.content.trim();
                  setMessages([...messages, {role:"assistant", content: content}]);
                }catch(error){
                  console.error(error);
                  setMessages([...messages, {role:"assistant", content: error.response.data.error.message}]);
                }finally{
                  setIsLoading(false);
                }
              };
              getChatCompletion(messages,apiKey);
            }
          }
          ,[isLoading]
        );

        return (
          <div className="mx-auto max-w-lg flex flex-col justify-end h-full">
            <header className="flex bg-indigo-300 p-2">
              <span className="grow text-white font-bold">gpt-3.5-turbo</span>
              <input type="password" placeholder="input your api key" value={apiKey} onChange={(e) => setApiKey(e.target.value)} />
            </header>
            <div className="grow overflow-y-auto bg-indigo-300">
              {messages?.map( message => {
                const bgColor=message.role=="user" ? "bg-lime-400" : "bg-white"
                const side=message.role=="user" ? "flex flex-row-reverse" : "flex"
                return (
                  <div className={`${side} m-4`}>
                    <div className={`${bgColor} p-2 max-w-md break-words`}>
                      {message.content}
                    </div>
                  </div>
                );
              })}
            </div>
            <div className="border p-2 flex bg-white">
              <textarea className="grow border p-2" value={inputMessage} onChange={(e) => setInputMessage(e.target.value)} />
              <button className="text-blue-500 p-2" disabled={isLoading} onClick={sendMessage} >
                <svg xmlns="http://www.w3.org/2000/svg" viewBox="0 0 24 24" fill="currentColor" class="w-6 h-6">
                  <path d="M3.478 2.405a.75.75 0 00-.926.94l2.432 7.905H13.5a.75.75 0 010 1.5H4.984l-2.432 7.905a.75.75 0 00.926.94 60.519 60.519 0 0018.445-8.986.75.75 0 000-1.218A60.517 60.517 0 003.478 2.405z" />
                </svg>
              </button>
            </div>
          </div>
        );
      }

      ReactDOM.render(<App />, document.getElementById("root"));
    </script>
  </body>
</html>
解説
依存ライブラリ
サンプルではCDN経由で以下のライブラリを読み込んでいます。
- react, react-dom
- UI全体のロジック構築に採用しました。
- babel
- jsxのコンパイルに必要です
- axios
- REST APIの接続で利用しています
- tailwind css
- classを指定することでCSSを細かいレベルで適用することができます
    <script crossorigin src="https://unpkg.com/react@18/umd/react.production.min.js"></script>
    <script crossorigin src="https://unpkg.com/react-dom@18/umd/react-dom.production.min.js"></script>
    <script src="https://unpkg.com/@babel/standalone/babel.min.js"></script>
    <script crossorigin src="https://cdn.jsdelivr.net/npm/axios/dist/axios.min.js"></script>
    <script src="https://cdn.tailwindcss.com"></script>
チャット取得ロジック
状態の管理
ユーザーとアシスタントのメッセージをmessagesとしてオブジェクトの配列で状態を保持しています。また、isLoadingはAPI送信のフラグ、inputMessageはユーザーの送信テキストを管理しています。
const [apiKey, setApiKey] = React.useState("");
const [messages, setMessages] = React.useState([]);
const [isLoading, setIsLoading] = React.useState(false);
const [inputMessage, setInputMessage] = React.useState("");
送信ボタン押下時の処理
送信ボタンのonChangeイベント発生時に以下の関数を設定しています。キーとなる処理はmessagesへのオブジェクト追加とisLoadingフラグの発火です。
const sendMessage = () => {
    setMessages(prev=> [...prev, {role:"user", content:inputMessage}] );
    setIsLoading(true);
    setInputMessage("");
};
メッセージの取得
useEffectでisLoadingがtrueになった時にOpenAI REST APIへの接続処理が実行されるようにしています。リファレンスに従ってリクエストを送信し、受信したレスポンスからメッセージを取得しています。
React.useEffect(()=>{
if(isLoading){
  const getChatCompletion = async(messages, apiKey) => {
    try{
      const API_URL = "https://api.openai.com/v1/chat/completions";
      const headers = { "Content-Type": "application/json", Authorization: `Bearer ${apiKey}` };
      const data = { model: "gpt-3.5-turbo", messages: messages };
      const response = await axios.post(API_URL, data, { headers: headers });
      const content = response.data.choices[0].message.content.trim();
      setMessages([...messages, {role:"assistant", content: content}]);
    }catch(error){
      console.error(error);
      setMessages([...messages, {role:"assistant", content: error.response.data.error.message}]);
    }finally{
      setIsLoading(false);
    }
  };
  getChatCompletion(messages,apiKey);
}
}
,[isLoading]
);
デザイン
全体構成
よくあるチャット画面はヘッダー領域、チャット領域、入力領域から構成されます。親要素に縦方向のFlexBoxを指定し、チャット領域にFlex growを指定することで中段のチャット領域を広げた形にすることができます。
Tailwind CSSの場合は以下のようなクラス指定で実現できます。
  <div className="flex flex-col justify-end h-full">
    <header className="">
        ...
    </header>
    <div className="grow">
        メッセージ表示
    </div>
    <div className="">
        入力のUIを表示
    </div>
  </div>
吹き出しの表示
各messageのroleによってFlexBoxの逆順配置を指定し、左右の配置を制御しています。また、合わせて色も切り替えています。
<div className="grow overflow-y-auto bg-indigo-300">
  {messages?.map( message => {
    const bgColor=message.role=="user" ? "bg-lime-400" : "bg-white"
    const side=message.role=="user" ? "flex flex-row-reverse" : "flex"
    return (
      <div className={`${side} m-4`}>
        <div className={`${bgColor} p-2 max-w-md break-words`}>
          {message.content}
        </div>
      </div>
    );
  })}
</div>
おわりに
今回のサンプルではindex.htmlに収まる量でOpenAI REST APIと接続するチャット画面の実装を行いました。本格的に作りこむためにはreactのプロジェクトを作成し、typescriptを導入した方が開発はやりやすくなります。
また、自分好みのチャット画面にするために以下のような拡張をしてみるのも面白いと思います。
- マークダウンのレンダリング
- ユーザーメッセージの編集
- ストリーミングによる連続的なメッセージの受信
- 会話の保存
以上、ありがとうございました。