お久しぶりです。
多忙な日々を送っていたらもう4月になってました。
今更感がすごいのですが前回の環境構築編からそのまま放置状態だったので
今回は簡単なスプラッシュ〜Helloworldを作成していきましょう。
画像を呼び出せるように設定する。
スプラッシュスクリーンで画像を表示しようと思うのでpubspec.yamlにて下記の設定を追加します。
flutter:

  # The following line ensures that the Material Icons font is
  # included with your application, so that you can use the icons in
  # the material Icons class.
  uses-material-design: true

  # To add assets to your application, add an assets section, like this:
  # ↓この部分を追加する↓
  assets:
    - assets/images/logo.png
プロジェクトディレクトリ配下にassets/imagesディレクトリを作成しlogo.pngを配置してください。
main.dartを修正する。
すでにプロジェクトディレクトリ内の/libの中にmain.dartというファイルがあるかと思います。
main.dartを下記のようにしてスッキリさせませう。
import 'package:flutter/material.dart';
import 'package:my_app/splash.dart';

void main() => runApp(MyApp());
スプラッシュ画面の作成
今回実装するスプラッシュではAppbarを利用しませんので記述しません。
3秒間スプラッシュ画面を表示してその後メインスクリーン(例ではAppScreen)に遷移するという流れです。
.thenを利用したいので非同期処理であるFutureを利用しています。
通常は画面遷移の場合Navigator.pushを利用するのですが、Navigator.pushでメインスクリーンへ遷移した場合スプラッシュ画面に戻れてしまいます。
そのため、画面を上乗せするのではなく、置き換えをするNavigator.pushReplacementを利用します。
FadeTransitionも利用していますが公式ドキュメントを読んでいただくかYoutubeの「Widget of the Week」にて説明していますのでそちらを参考にしていただければと思います。
import 'package:flutter/material.dart';
import 'package:flutter/animation.dart';
import 'package:my_app/app_screen.dart';

class MyApp extends StatelessWidget {
  @override
  Widget build(BuildContext context) {
    return MaterialApp(
      title: 'スプラッシュ',
      home: Splash(),
    );
  }
}

class Splash extends StatefulWidget {
  @override
  State<StatefulWidget> createState() => _SplashState();
}

class _SplashState extends State<Splash> with TickerProviderStateMixin {
  AnimationController _controller;
  Animation<double> _animation;
  @override
  void initState() {
    super.initState();
    Future.delayed(Duration(milliseconds: 3000)).then((value) =>
        Navigator.pushReplacement(
            context, MaterialPageRoute(builder: (context) => AppScreen())));
    _controller = AnimationController(
        duration: const Duration(milliseconds: 1000), vsync: this);
    _animation = CurvedAnimation(parent: _controller, curve: Curves.easeIn);
    _controller.forward();
  }

  @override
  Widget build(BuildContext context) {
    return Scaffold(
      body: SafeArea(
        child: Center(
          child: FadeTransition(
            opacity: _animation,
            child: Image.asset('assets/images/logo.png'),
          ),
        ),
      ),
    );
  }
}
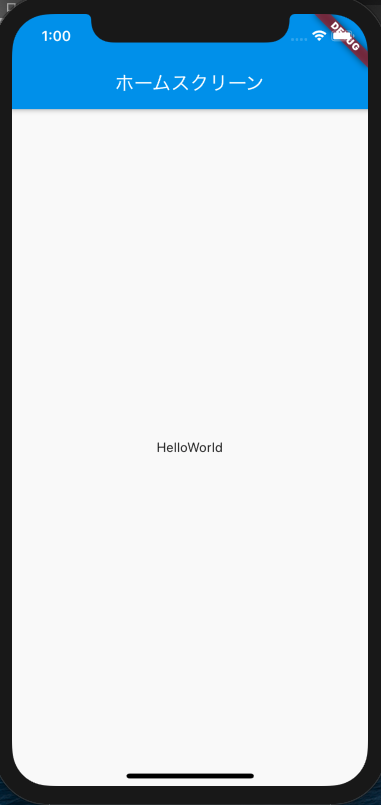
HelloWorldを表示する為だけのスクリーンを作成する。
import 'package:flutter/material.dart';

class AppScreen extends StatefulWidget {
  static const String routeName = '/app';

  @override
  _AppScreenState createState() => _AppScreenState();
}

class _AppScreenState extends State<AppScreen> {
  @override
  Widget build(BuildContext context) {
    return Scaffold(
        appBar: AppBar(
          title: Text('ホームスクリーン'),
        ),
        body: Center(child: Text("HelloWorld")));
  }
}
設定した画像がフェードで表示された後に一方通行の画面遷移をしてあとにHelloWorldが表示されたと思います!
おめでとうございます!!!![]()
![]()
![]()
