SourceGeneratorのデバッグ
昨今流行りのSourceGeneratorを作るとき、
毎回Unityにもって行って適切な生成ができているのか確認するのはさすがに大変です。
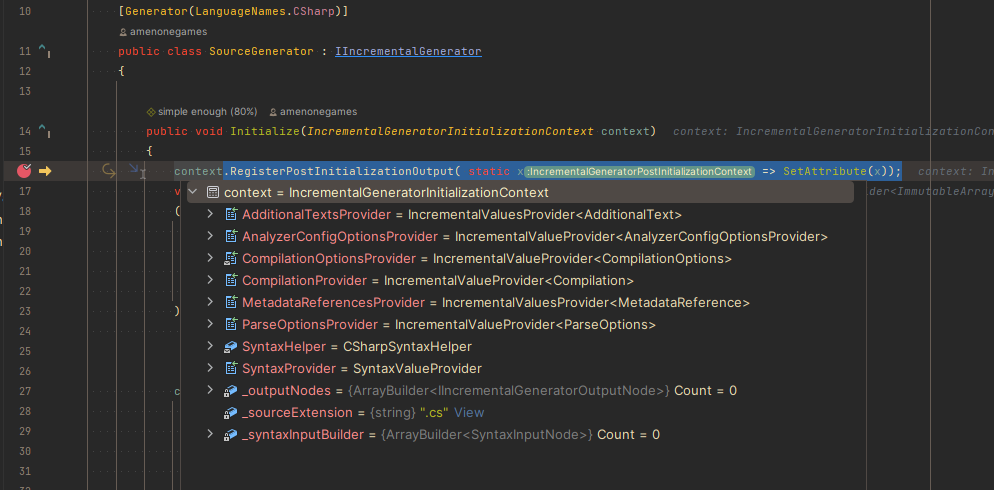
今回は、Rider上でブレークポイントを設置し、デバッグできるように、
SourceGeneratorを初期設定する方法をまとめてみました!
Visual Studioをご利用の方には
neuecc様のありがたい記事がありますので、こちらをどうぞ!
Solutionを作る
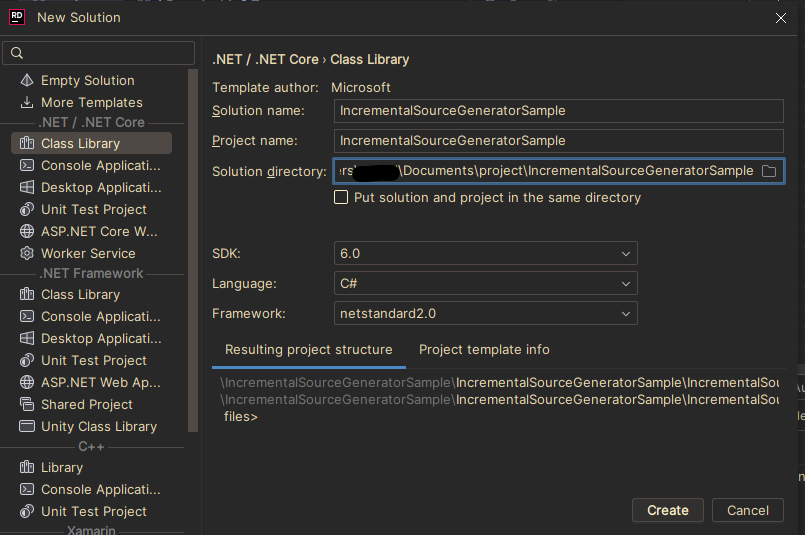
なにはともあれ、まずはSolutionを作成しましょう!
SDK:6.0
言語:C#
Framework:netstandard2.0
で作ります。
csprojファイルの変更
Explorerの表示をFileSystem表示に切り替えて、Solution名.csproj ファイルを開きましょう。
以下を参考に、不足部分を追記してください!
<Project Sdk="Microsoft.NET.Sdk">

    <PropertyGroup>
        <TargetFramework>netstandard2.0</TargetFramework>
        <!--ココカラ-->
        <IncludeBuildOutput>false</IncludeBuildOutput>
        <DevelopmentDependency>true</DevelopmentDependency>
        <IsRoslynComponent>true</IsRoslynComponent>
        <!--ココマデ追記-->
    </PropertyGroup>

    <ItemGroup>
      <PackageReference Include="Microsoft.CodeAnalysis.CSharp" Version="4.1.0" />
    </ItemGroup>


</Project>
デバッグ用のプロジェクトを設定する
SourceGeneratorは、他のプロジェクト上で動作し、コードの自動生成を行う技術です。
ですので、デバッグするために、別のプロジェクトを作成しておく必要があります!
Projectを追加する
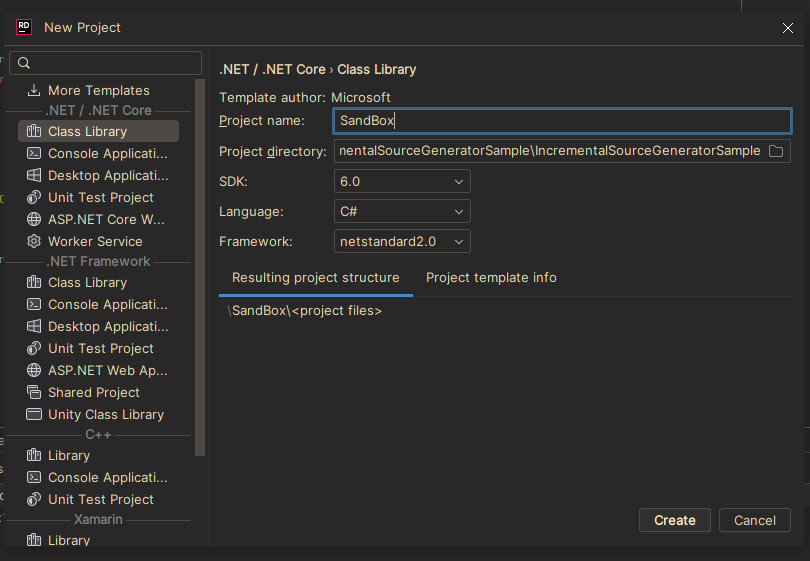
Solution上で右クリックし、Add>New Project しましょう!
今回はProject名をSandBoxにしておきます。
その他の設定は先程と同じでOKです!
csprojを編集
新しく作った SandBox.csproj を編集しましょう!
ProjectReference Includeには、SourceGeneratorのcsprojのアドレスを指定してください。
<Project Sdk="Microsoft.NET.Sdk">

    <PropertyGroup>
        <TargetFramework>netstandard2.0</TargetFramework>
    </PropertyGroup>
    <!--ココカラ-->
    <ItemGroup>
        <ProjectReference Include="../IncrementalSourceGeneratorSample/IncrementalSourceGeneratorSample.csproj"
                          OutputItemType="Analyzer"
                          ReferenceOutputAssembly="false" />
    </ItemGroup>
    <!--ココマデ追記-->
</Project>
launchSettingsを作る
SourceGenerator側のProjectに Properties というフォルダを作ってください。
その中に launchSettings.jsonという名前のjsonファイルを作成してください。
jsonファイルの中身に以下の内容をコピペしてください。
targetProject の中身は先程のSandBox.csprojのアドレスにしておきます。
{
  "$schema": "http://json.schemastore.org/launchsettings.json",
  "profiles": {
    "Generators": {
      "commandName": "DebugRoslynComponent",
      "targetProject": "../SandBox/SandBox.csproj"
    }
  }
}
デバッグしてみよう!
ここまでやると、launchSettings.jsonの左側に再生マーク(▷)が表示されるはずです。
二番目のDebugメニューを選択すると、デバッグが走ります!

当然ながら、ブレークポイントを設置していないと止まりません。
SourceGenerator側のコードにブレークポイントを設置しておいてください!

以上です!デバッグで快適なSourceGenerateライフを送ってください!!
謝辞
デバッグ方法の調査に当たってはneuecc様の記事、及びRider公式の記事を参考にさせていただきました。
この場を借りてお礼申し上げます。


