はじめに
Node.jsをからGoogleのCloud Speech APIを呼び出してみます。一式はGitHubに。
以下参考にさせていただきました。
Google Cloud Speech/Translation APIを使って翻訳アプリを作ってみよう (1/4):特集: Google Cloud Platformを使ってみる - @IT
環境
- 開発環境:Windows10
- IDE:VSCode
- 言語:Node.js
- 音声認識API:Google Cloud Speech API
フォルダ構成
node-discord-sonance
│  docker-compose.yml
│  Dockerfile
│  lpcm16-index.js
├─.vscode
│      launch.json
└─src
    │  .env
    │  index.json
    │  [キー].json
    │  package.json
    └─node_modules
         (内容省略)
セットアップ
Node.jsのインストールは割愛します。
Google Cloud SDKも入れろとか書いてあるけど、必要なら後で入れよう…
ライブラリインストール
npmモジュール
GoogleCloudSpeechAPI、lpcm16をインストールします。また、環境変数を管理したいのでdotenvも入れます。
srcフォルダ内で以下を実行。
> npm install --save @google-cloud/speech
> npm install --save node-record-lpcm16
> npm install --save dotenv
Google Cloud Speech/Translation APIを使って翻訳アプリを作ってみよう (1/4):特集: Google Cloud Platformを使ってみる - @ITを参考に、node_modulesフォルダの中にあるnode-record-lpcm16のindex.jsをいじらないとエラーが出ました(2018-07-04時点)。サボらないで直しましょう。
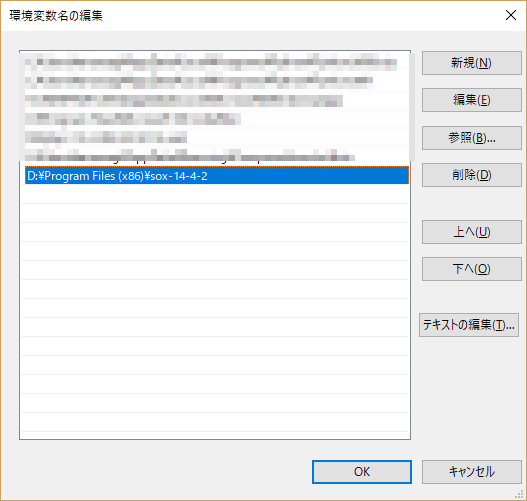
SoX
Windowsの場合はインストーラがあるので叩く。

その後、手動でパスを設定。
Linuxについてはデプロイ時に説明。
GoogleCloudPlatformの設定
アカウントを取るところや支払情報の設定とかは割愛します。
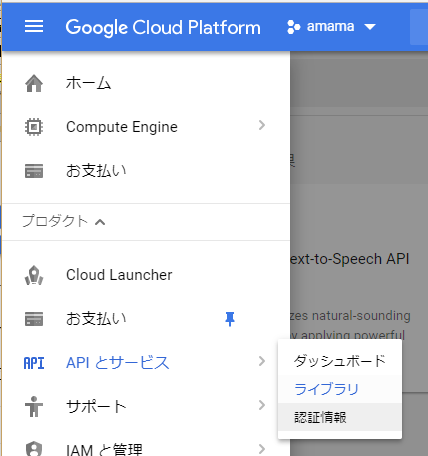
API有効化
GCPコンソールの「APIとサービス→ライブラリ」へ進みます。
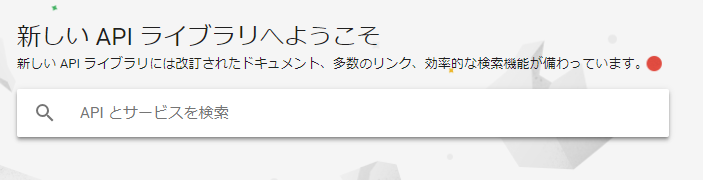
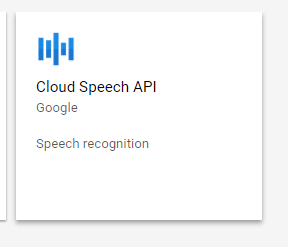
検索窓で「speech」で検索すれば…
出てきました。クリックします。
有効化されていれば以下のようになります。されていない場合は「APIの有効化」を押してください。
課金対象です。ご利用は計画的に。

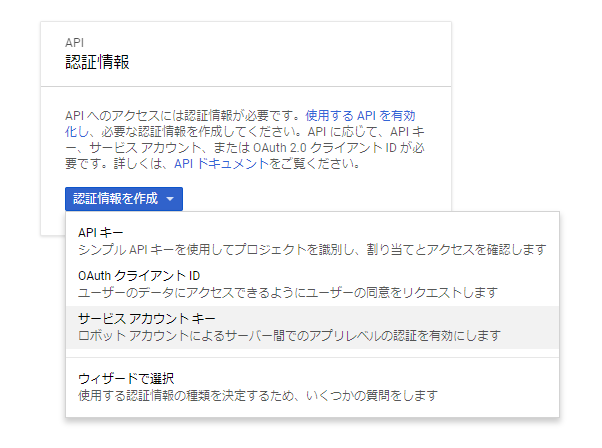
認証情報の取得
APIを呼ぶためにはサービスアカウントキーなるものが必要だそうです。
「APIとサービス→認証情報」へ進み、「認証情報を作成→サービスアカウントキー」をクリック。
アカウント情報を適当に設定。役割は無くても大丈夫っぽいです。
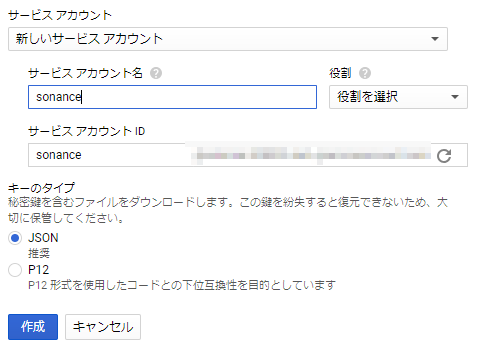
作成すると秘密鍵がjson形式でダウンロードできます。ダウンロードしたjsonをsrcフォルダ内に置きましょう。
index.jsの作成
まずは、普通に音声認識を行うところまで試せるindex.jsを、srcフォルダ内に作成します。
基本的にはGoogleのサンプルをまるっとコピー。一部変更する必要があります。
// 環境変数ロード
const dotenv = require('dotenv');
dotenv.config();

// [START speech_streaming_mic_recognize]
const record = require('node-record-lpcm16');

// Imports the Google Cloud client library
const speech = require('@google-cloud/speech');

// Creates a client
const client = new speech.SpeechClient();

/**
 * TODO(developer): Uncomment the following lines before running the sample.
 */
 const encoding = 'LINEAR16';
 const sampleRateHertz = 16000;
 const languageCode = 'ja-JP';

const request = {
  config: {
    encoding: encoding,
    sampleRateHertz: sampleRateHertz,
    languageCode: languageCode,
  },
  interimResults: false, // If you want interim results, set this to true
};

// Create a recognize stream
const recognizeStream = client
  .streamingRecognize(request)
  .on('error', console.error)
  .on('data', data =>
    // process.stdout.write(
    //   data.results[0] && data.results[0].alternatives[0]
    //     ? `Transcription: ${data.results[0].alternatives[0].transcript}\n`
    //     : `\n\nReached transcription time limit, press Ctrl+C\n`
    console.log(
      data.results[0] && data.results[0].alternatives[0]
        ? `Transcription: ${data.results[0].alternatives[0].transcript}\n`
        : `\n\nReached transcription time limit, press Ctrl+C\n`
    )
  );

// Start recording and send the microphone input to the Speech API
record
  .start({
    sampleRateHertz: sampleRateHertz,
    threshold: 0,
    // Other options, see https://www.npmjs.com/package/node-record-lpcm16#options
    verbose: false,
    recordProgram: 'sox', // Try also "arecord" or "sox"
    silence: '10.0',
  })
  .on('error', console.error)
  .pipe(recognizeStream);

console.log('Listening, press Ctrl+C to stop.');
修正箇所は以下2点。
- dotenvのロード
- 音声認識結果の出力をデバッグ用にコンソールに出力
.envの作成
srcフォルダ内に.envファイルを作成します。
APIを使用するため、環境変数GOOGLE_APPLICATION_CREDENTIALSに、jsonファイルの場所を指定してあげます。
GOOGLE_APPLICATION_CREDENTIALS=[ダウンロードしたjsonファイル名].json
起動設定
launch.jsonに起動設定を記載します。今回はルートではなくsrcフォルダ内にソース一式を置いているので、起動プログラムのパス修正と作業フォルダの設定を忘れずにやりましょう。
{
    // IntelliSense を使用して利用可能な属性を学べます。
    // 既存の属性の説明をホバーして表示します。
    // 詳細情報は次を確認してください: https://go.microsoft.com/fwlink/?linkid=830387
    "version": "0.2.0",
    "configurations": [
        {
            "type": "node",
            "request": "launch",
            "name": "プログラムの起動",
            "program": "${workspaceFolder}/src/index.js",
            "cwd": "${workspaceFolder}/src"
        }
    ]
}
実行
F5を押してマイクに話しかけると、結果がコンソールに出力されます。
コンテナ化
docker-composeを使用してコンテナ化して実行してみようと思ったんですがうまくいかなかったので、途中までのメモ。
環境は、この記事で作成したDebianを使います。
Dockerfileの作成
公式イメージ取得して、もろもろツールインストールして、ソースコピーします。
一応、上のほうでやったnode-record-lpvm16/index.jsの書き換えも適用しています。
FROM node:8.11.3

# install SOX
RUN apt-get update && apt-get install -y sox libsox-fmt-all

# copy source code
COPY src /src
COPY lpcm16-index.js /src/node_modules/node-record-lpcm16/index.js

# install modules
WORKDIR /src
RUN npm install

# execute
CMD [ "node", "index.js"]
docker-compose.ymlの作成
もう、ぶっちゃけただ起動するだけっすわ。。。なくてもいいくらい。
version: '2'
services:
  node:
    build: .
起動
サーバーにターミナル接続してdocker-compose upすれば起動できるんですが、一瞬で終了してしまうんですよね。。。
この原因がわからず断念します。
終わりに
元々は、Discordのボイスチャンネルで誰かが「そうなの」とか「そうなんす」とか発言した際に「ソーナンス!」と音声で返すBotを作ることを目指した記事でした(何を言ってるんだろう俺は)。ただ、ウチのボイスチャンネルは毎週土曜に零式1~4層で2時間くらいVC(中略)とにかく利用料が痛そうなので中止しました。また、会話の中から特定の単語を拾いたいだけの場合はGoogleのCloudSpeechAPIはなんとなくコスパが悪そうです。認識精度はぶっちぎりだと思うんですけどね…。
DiscordのBOTは別の方法で作成します。