はじめに
CocoaPodsの対応は色々なサイトにやり方が書いてあるので簡単かと思ったら意外とつまずいたのでメモ。
環境
- macOS High Sierra 10.13.2
- Xcode9.2
- swift4
やり方
これ(AMColorPicker)を例に導入してみます。
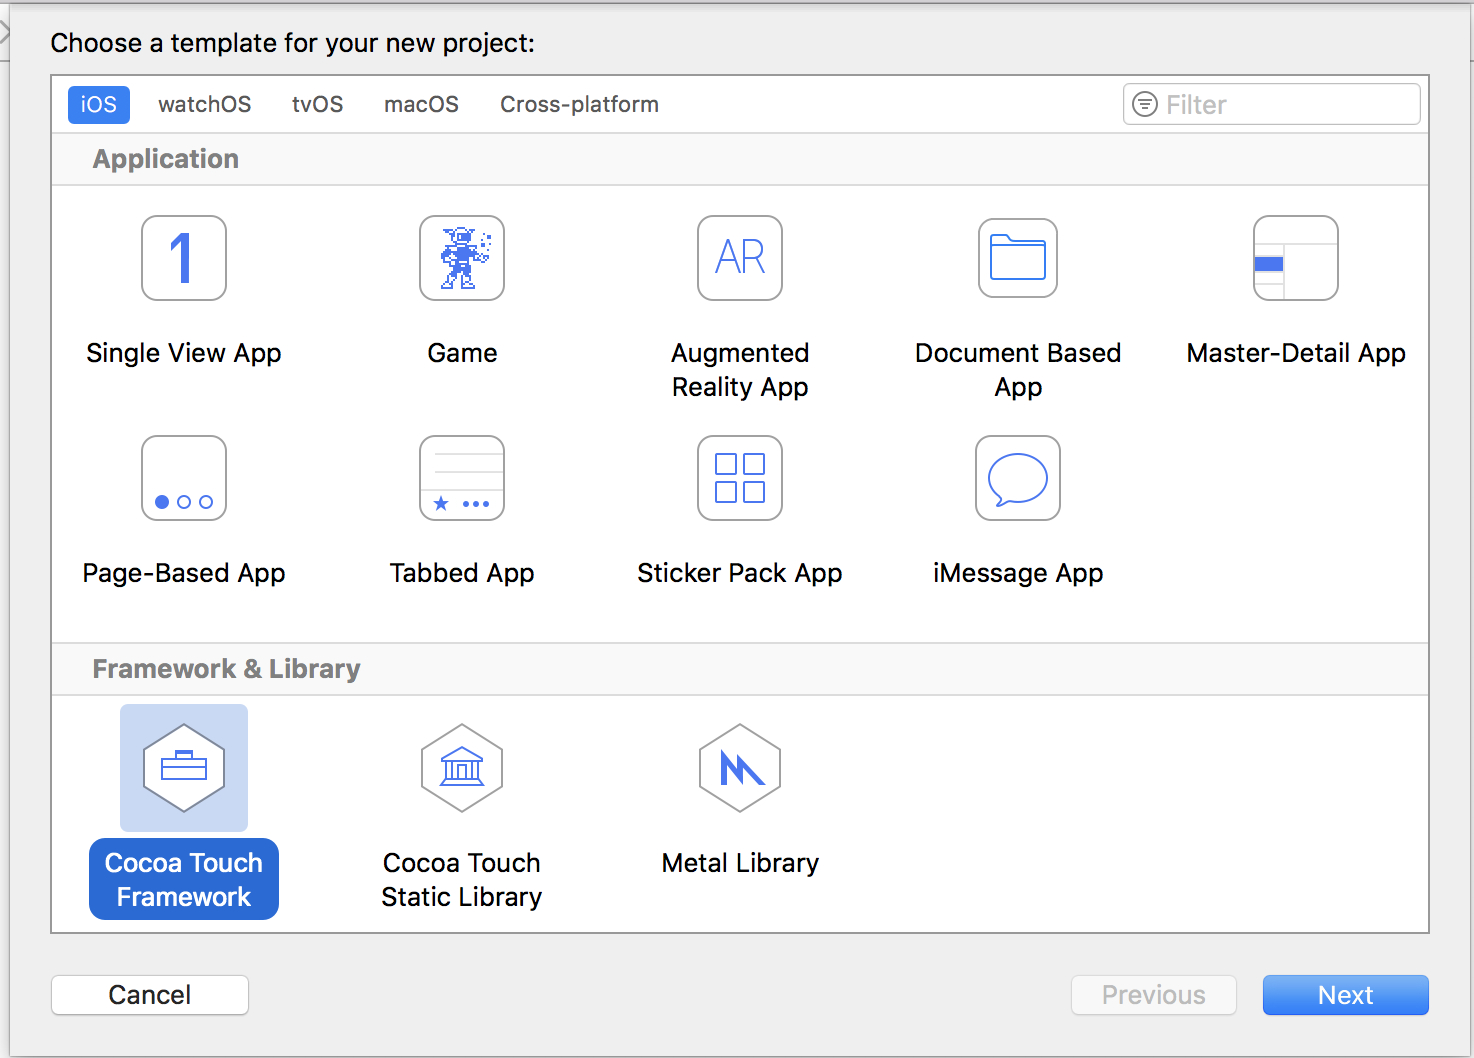
Cocoa Touch Frameworkを選択する。
-
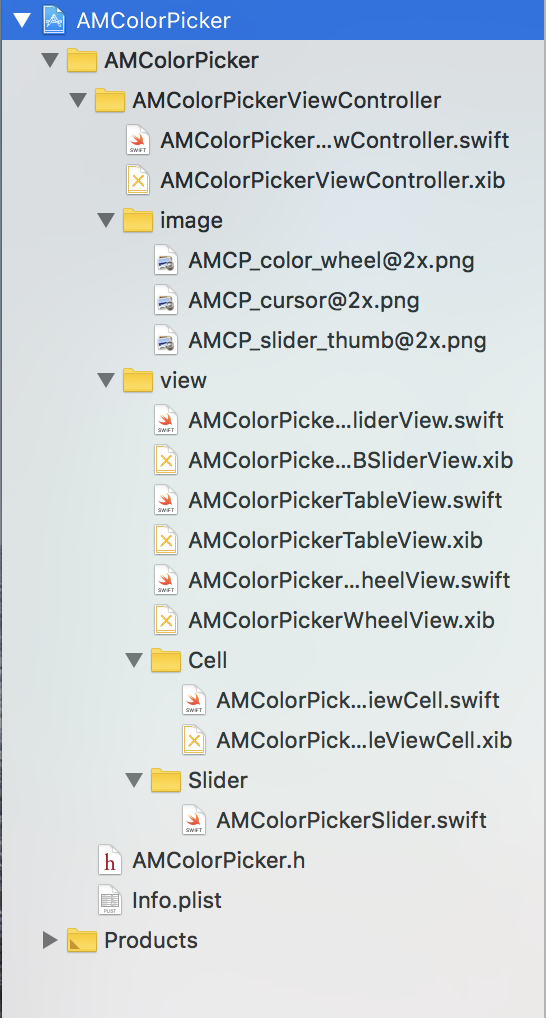
ライブラリのファイルを追加

ライブラリのクラファイル、xib、リソースなどを追加する。
-
外部アクセスするクラスやプロパティにpublic修飾子をつける
public class AMColorPickerViewController: UIViewController {

public var selectedColor:UIColor = UIColor.white
}
何も修飾子をつけない場合、
internalになるので外部からアクセスしたいものには全てpublic修飾子をつける必要がある。 -
コードでリソースを読み込む場合Bundleに注意する
xibのViewを読み込みたい場合、いつもは何も気にせず下記のように書いていたがこれではダメのよう。
let view = Bundle.main.loadNibNamed("AMColorPickerRGBSliderView", owner: self, options: nil)?.first as! UIView上記のようにmainだとライブラリを導入したアプリのバンドルが取得されるのでライブラリ内のxibを読み込めない。下記のようにするとライブラリのバンドルが取得できる。
let bundle = Bundle(for: AMColorPickerRGBSliderView.self)
let view = bundle.loadNibNamed("AMColorPickerRGBSliderView", owner: self, options: nil)?.first as! UIView
```
今回おこなった対応は下記のBundleの対応に記載する。
-
cocoapodsのインストールする
コマンドプロンプトで下記のコマンドを実行する。
sudo gem install cocoapods -
ライブラリのプロジェクトに移動する
コマンドプロンプトで下記のコマンドを実行してプロジェクトファイルに移動する。
cd プロジェクトファイルのパス -
podspecファイルを作成する
コマンドプロンプトで下記のコマンドを実行する。
pod spec create AMColorPickerAMColorPickerの部分はライブラリ名
これでプロジェクトファイルにAMColorPicker.podsecができる。 -
podspecを編集する
podsecファイルをXcodeなどで開き下記のように編集する。(元のコメントなどは全て削除する。)
Pod::Spec.new do |s|
s.name         = "AMColorPicker"
s.version      = "1.0"
s.summary      = "AMColorPicker can select color by three ways."
s.license      = { :type => 'MIT', :file => 'LICENSE' }
s.homepage     = "https://github.com/adventam10/AMColorPicker"
s.author       = { "名前" => "メールアドレス" }
s.source       = { :git => "https://github.com/adventam10/AMColorPicker.git", :tag => "#{s.version}" }
s.platform     = :ios, "9.0"
s.requires_arc = true
s.source_files = 'AMColorPickerViewController/**/*.{swift}'
s.resources    = 'AMColorPickerViewController/**/*.{xib,png}'
s.swift_version = "4.0"
end
```
s.versionの値はgitのタグ名と合わせる必要がある。
-
podsecを確認する
コマンドプロンプトで下記のコマンドを実行する。
pod lib lint問題がなければ、下記のように表示される
AMColorPicker passed validation. -
gitにpushする
-
gitにタグをpushする
1.0とバージョンのタグをつけてpushする。(何もない場合エラーになる)このタグ名はpodsecのバージョンと合わせる必要がある。数字のみでver1.0とかはダメなようです。
-
cocoapodsにユーザー登録する
コマンドプロンプトで下記のコマンドを実行する。
pod trunk register "メールアドレス" "名前"登録したメールアドレスにメールが届くので、リンクを開いて登録完了。
-
登録を確認する
コマンドプロンプトで下記のコマンドを実行する。
pod trunk me登録できていれば、Name:,Email:などが表示される。
-
cocoapodsにpodspecを登録する
コマンドプロンプトで下記のコマンドを実行する。
pod trunk push AMColorPicker.podspec2019/04/21時点で下記エラーが発生しました。
[!] The Pod Specification did not pass validation.
The following validation failed:
- Warnings: Unrecognized `swift_version` key.
下記コマンドでとりあえずpushできました。
pod trunk push AMColorPicker.podspec --allow-warnings
これでライブラリのcocoapods対応は完了
導入方法
-
ライブラリを導入するプロジェクトに移動する
コマンドプロンプトで下記のコマンドを実行してプロジェクトファイルに移動する。
cd プロジェクトファイルのパス -
podファイルを作成する
コマンドプロンプトで下記のコマンドを実行する。
pod init -
podファイルを編集する
podファイルを開いて
# Pods for プロジェクト名の下の行に追加するライブラリを記入する。# Pods for TestProject pod 'AMColorPicker'バージョンは下記で指定
pod 'AMColorPicker' // 最新 pod 'AMColorPicker', '2.0' // 2.0 pod 'AMColorPicker', '>= 1.0' // 1.0以上の最新 pod 'AMColorPicker' '~> 1.0' // 1.0以上2.0未満の最新 -
ライブラリをインストールする
コマンドプロンプトで下記のコマンドを実行する。
pod install
以上でライブラリの導入は完了(プロジェクトを開く場合はxcworkspaceを開く)
Bundleの対応
今回のライブラリでおこなったxibなどのリソースが読み込めない問題に対する対応法です。
- view
let bundle = Bundle(for: AMColorPickerTableView.self)
let view = bundle.loadNibNamed("AMColorPickerTableView", owner: self, options: nil)?.first as! UIView
- cell
let bundle = Bundle(for: AMColorPickerTableViewCell.self)
let nib = UINib(nibName: "AMColorPickerTableViewCell", bundle: bundle)
tableView.register(nib, forCellReuseIdentifier: "AMColorPickerTableViewCell")
- image
let bundle = Bundle(for: AMColorPickerSlider.self)
if let imagePath = bundle.path(forResource: "AMCP_slider_thumb@2x", ofType: "png") {

   setThumbImage(UIImage(contentsOfFile: imagePath), for: .normal)
}
- viewController
required public init(coder aDecoder: NSCoder) {
        super.init(coder: aDecoder)!
}

override init(nibName nibNameOrNil: String!, bundle nibBundleOrNil: Bundle!) {

        let bundle = Bundle(for: AMColorPickerViewController.self)
        super.init(nibName: "AMColorPickerViewController", bundle: bundle)
}

convenience init() {
        self.init(nibName: nil, bundle: nil)
}
ViewControllerはライブラリを導入したプロジェクト内で下記のように呼び出したかったので、上記のようにしたがこんな書き方でいいんだろうか?
   	let colorPickerViewController = AMColorPickerViewController()
present(colorPickerViewController, animated: true, completion: nil)
導入後の問題
-
importでエラーになる
xcodeproj開いている場合xcworkspaceを開く。
pod init後に一度ビルドする。
-
IBDesignablesとIBInspectablesが無効になる
どうやらコンパイルされると、IBDesignableとIBInspectableの情報がなくなるようです。
External Frameworkの@IBDesignable/@IBInspectableを有効にする方法のように有効にする方法もあるようですが、現状は公式な方法で有効にすることは無理なようです。追記(2019/4/21)
下記環境でライブラリを上げ直して見た所IBDesignablesとIBInspectablesが有効になっていました。
cocoapods 1.6.1
Xcode 10.2.1
ライブラリ https://github.com/adventam10/AMClockView -
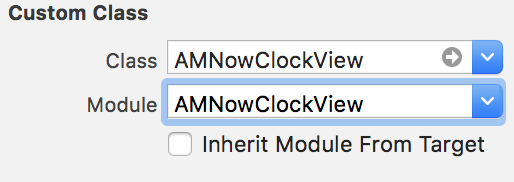
xibのカスタムクラスの設定でエラーになる
xibのViewのカスタムクラスにライブラリのクラスを設定すると下記のようなエラーになる。
Unknown class AMNowClockView in Interface Builder file今まであまり気にしたことがなかったが、どうやら
Moduleもちゃんと設定しなければいけないようです。
さいごに
ライブラリ内で画像やxibを読み込んでいたので、かなりハマった。
CocoaPodsに登録すると、知らない人がgithubにstarつけてくれるので嬉しい。
