はじめに
デフォルトTableViewサンプル集(swift)これのセル選択や編集などの操作編です。
| 複数選択 | 複数選択 2 | 一部選択不可 | セル編集 |
|---|---|---|---|
 |
 |
 |
 |
| メニュー | インデックスバー | スワイプ |
|---|---|---|
 |
 |
 |
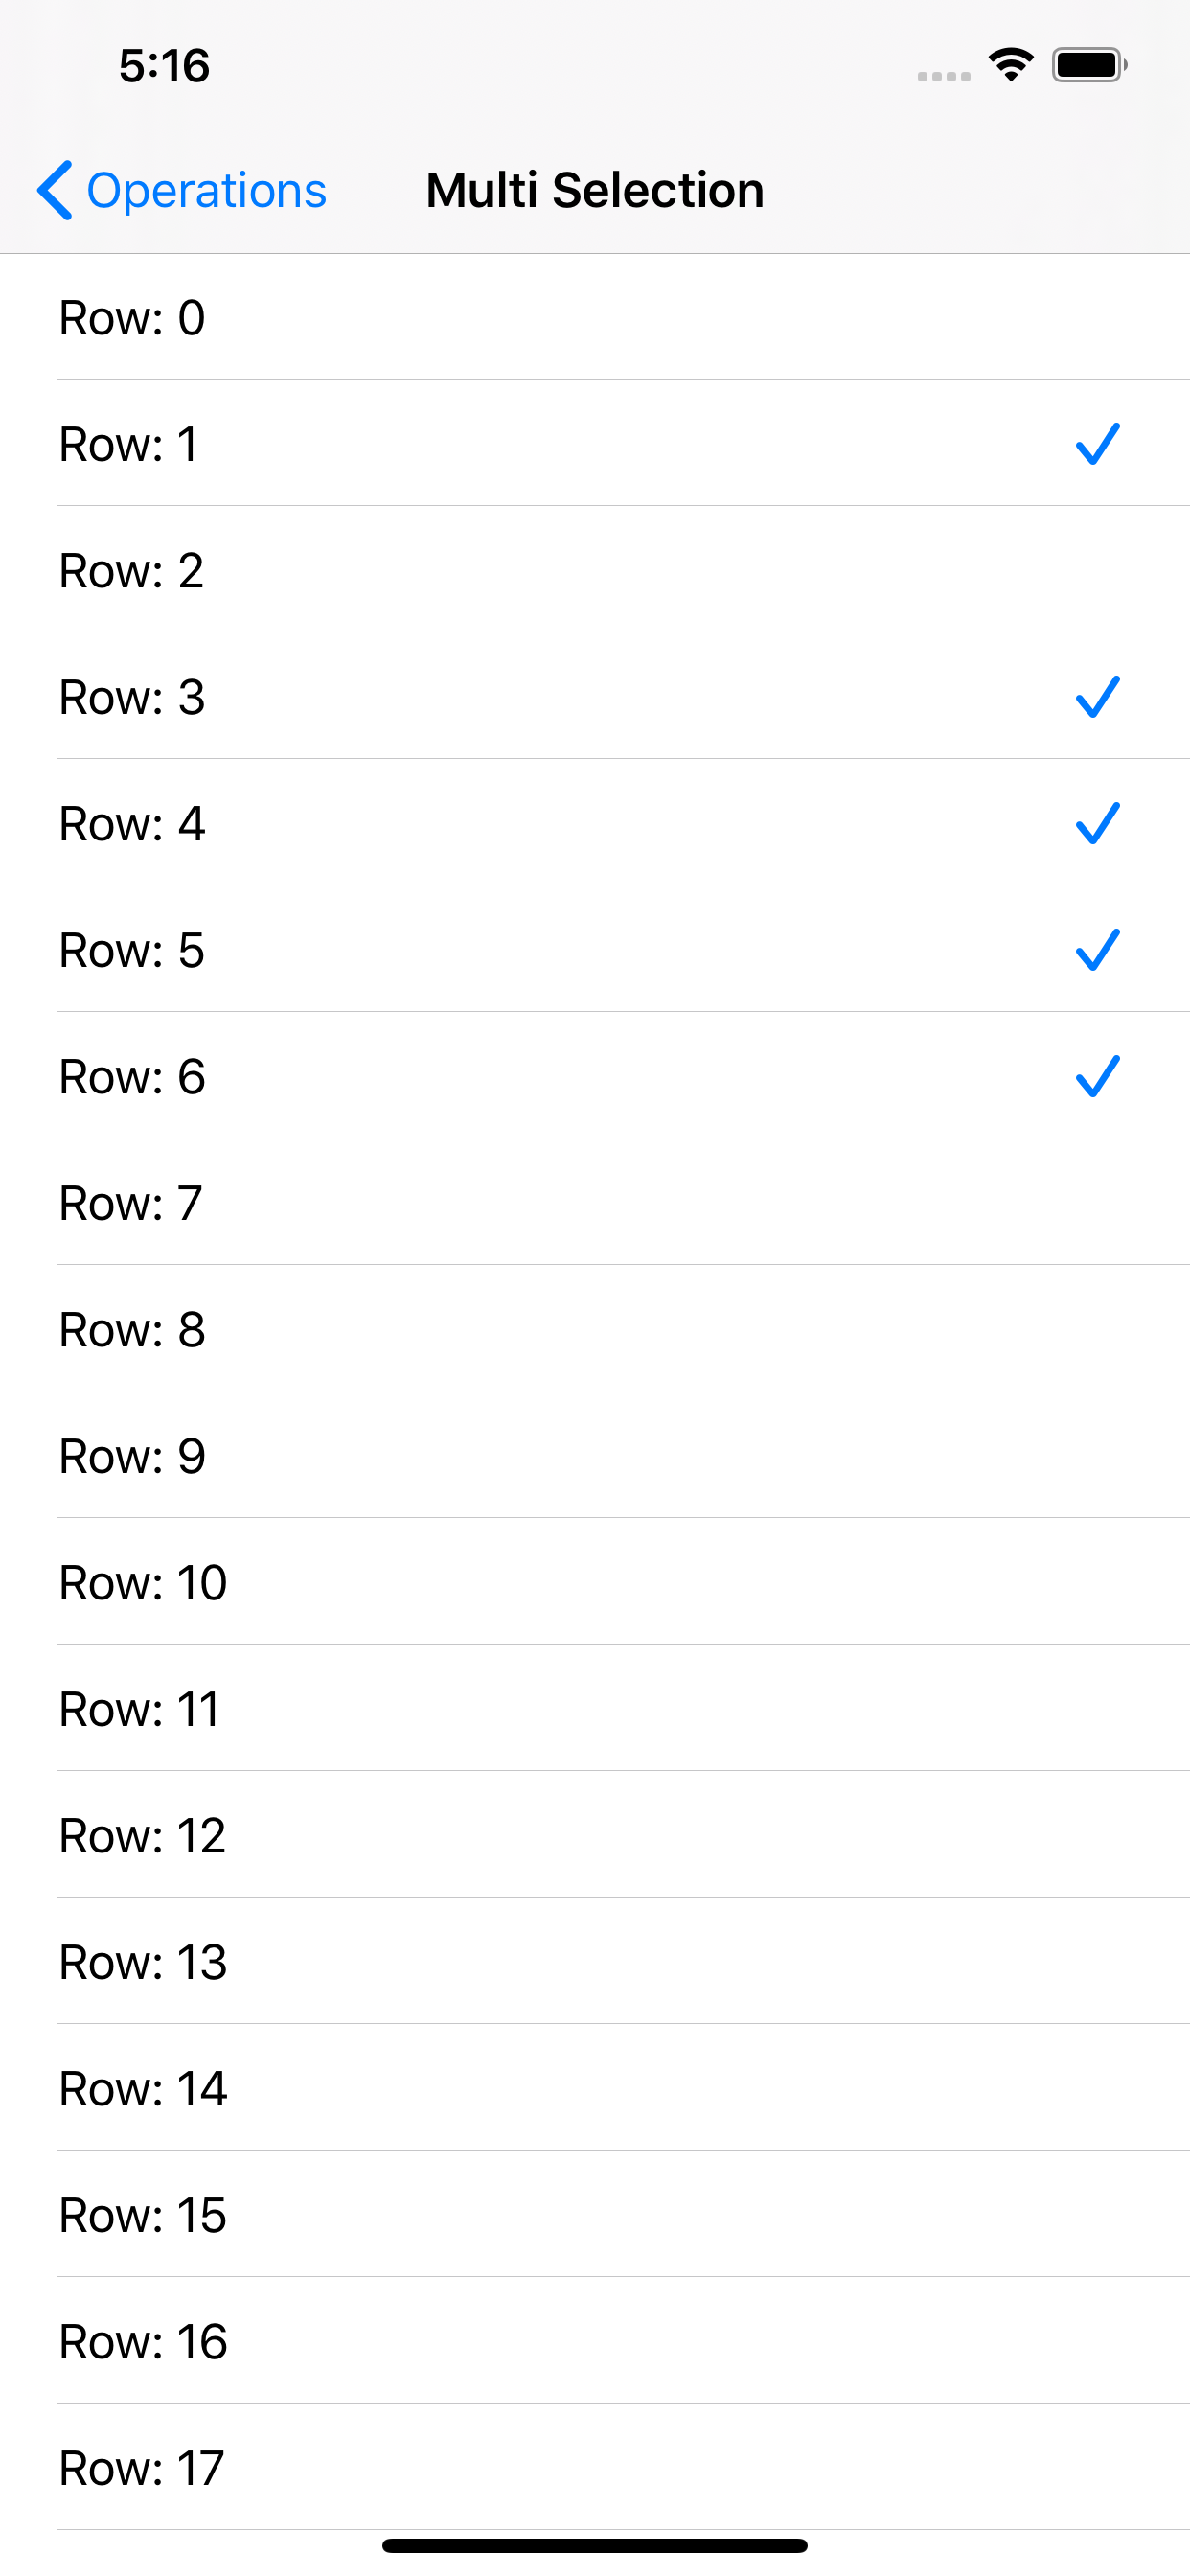
複数選択
セルの複数選択処理です。
こんな感じ。
下記のように設定
tableView.allowsMultipleSelection = true
処理としては上記のようにフラグを true にするだけでできる。
選択したものにチェックマークをつけたい場合は下記も実装。
func tableView(_ tableView: UITableView, cellForRowAt indexPath: IndexPath) -> UITableViewCell {
  let cell = tableView.dequeueReusableCell(withIdentifier: "Cell", for: indexPath)

  // ここ
  cell.accessoryType = tableView.indexPathsForSelectedRows?.contains(indexPath) == true ?  .checkmark : .none
  cell.selectionStyle = .none // 選択時に背景色を変えないため
  return cell
}

func tableView(_ tableView: UITableView, didSelectRowAt indexPath: IndexPath) {
  if let cell = tableView.cellForRow(at: indexPath) {
    cell.accessoryType = .checkmark // チェックつける
  }
}

func tableView(_ tableView: UITableView, didDeselectRowAt indexPath: IndexPath) {
  if let cell = tableView.cellForRow(at: indexPath) {
    cell.accessoryType = .none // チェックはずす
  }
}
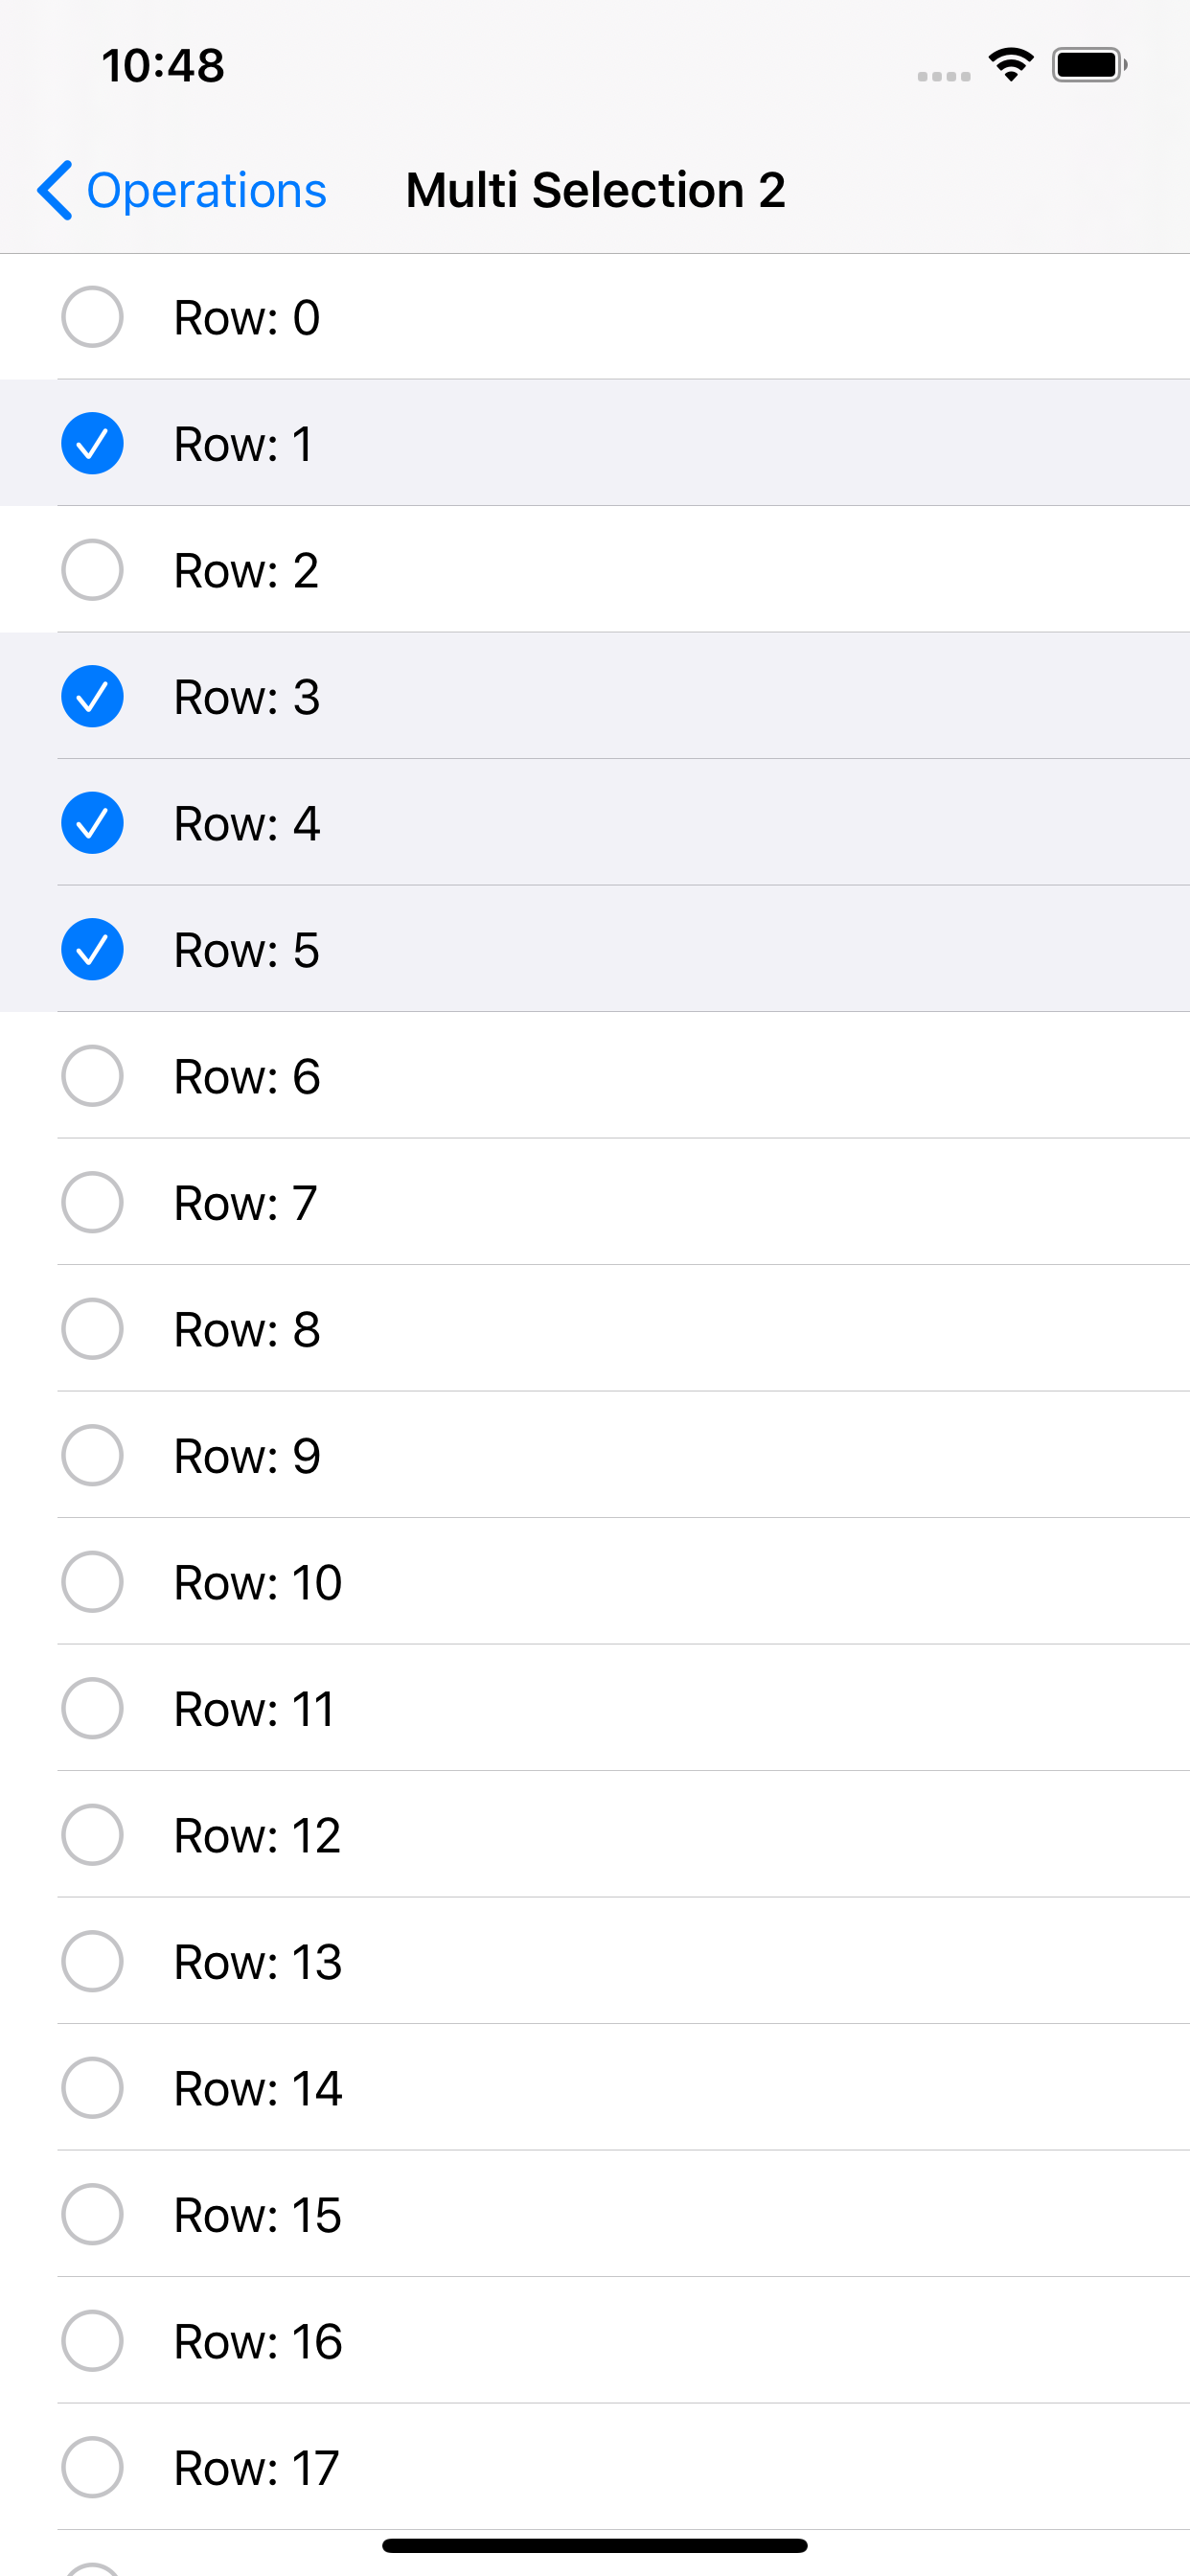
パターン2(20200325追記)
そういえば左側にチェックマーク置くのも簡単にできたので追記です。
こんな感じ。
実装は下記3行を追加するだけ!
tableView.isEditing = true
tableView.allowsMultipleSelection = true
tableView.allowsMultipleSelectionDuringEditing = true
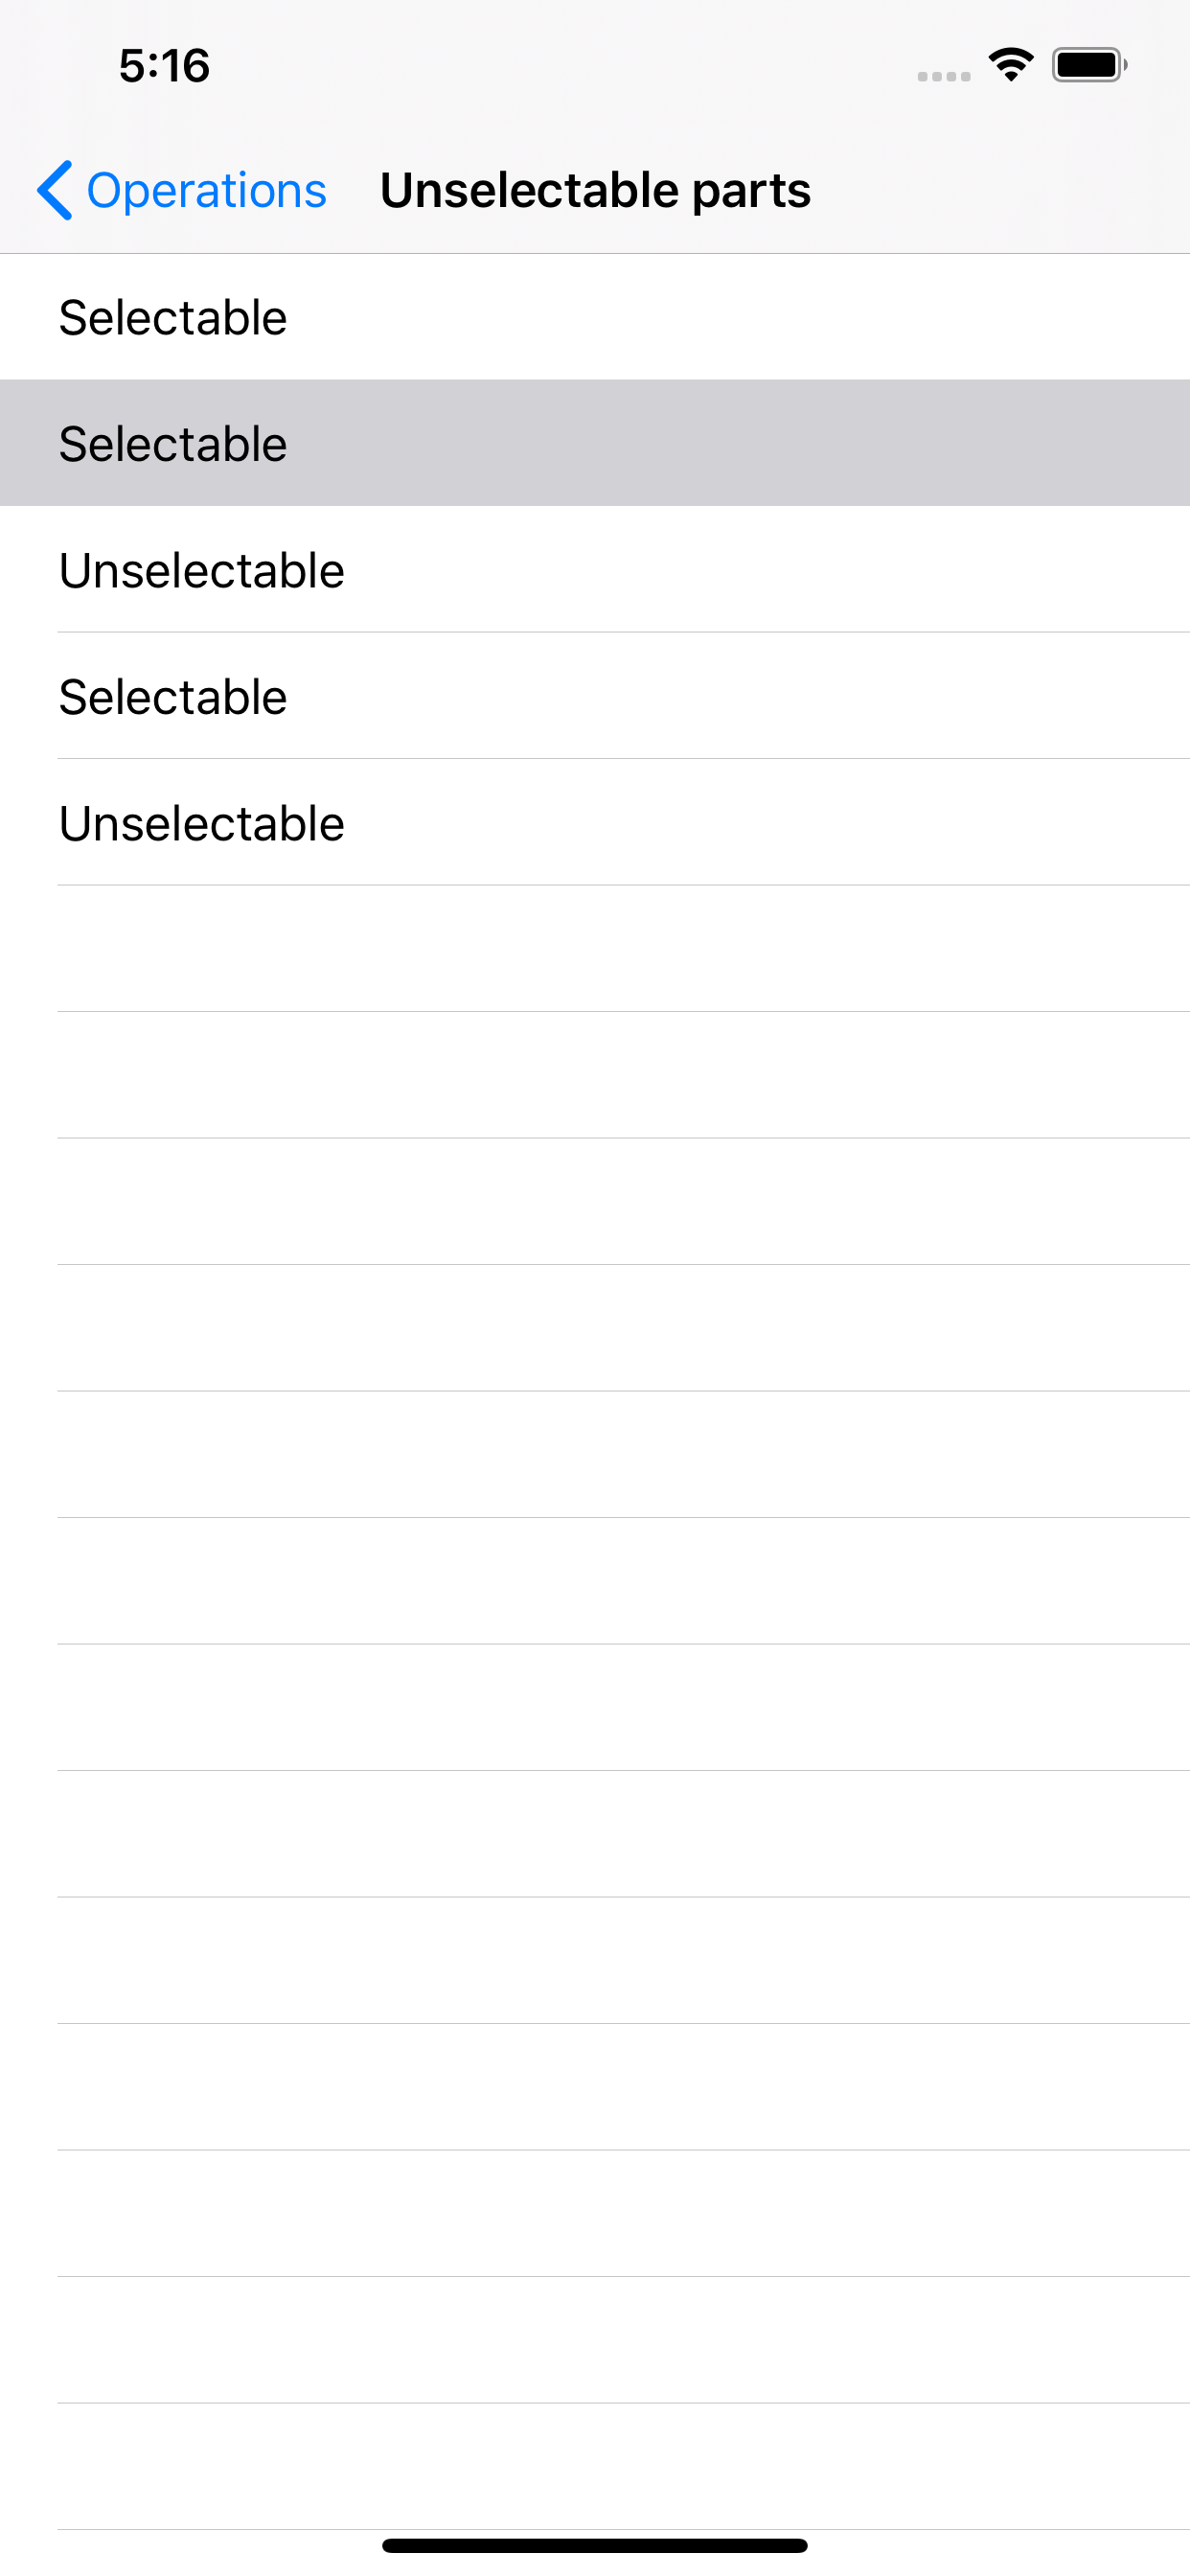
一部のセル選択不可
一部のセル選択不可にしたい場合は下記のように設定します。
func tableView(_ tableView: UITableView, cellForRowAt indexPath: IndexPath) -> UITableViewCell {
  let cell = tableView.dequeueReusableCell(withIdentifier: "Cell", for: indexPath)

  // 選択不可にしたい場合にnone設定
  cell.selectionStyle = selectable ? .default : .none
  return cell
}

func tableView(_ tableView: UITableView, willSelectRowAt indexPath: IndexPath) -> IndexPath? {
  // cell.selectionStyle = .noneだけだとselect自体はできる
   // 選択不可の場合にnilを設定する
  return selectable ? indexPath : nil
}
cell.selectionStyle = .none だけだとセルタップ時に tableView(_:didSelectRowAt:) は呼ばれるし indexPathForSelectedRow にも値が設定されてしまうので tableView(_:willSelectRowAt:) も設定する。
セルの編集
初期表示で編集モードにしたい場合は tableView.isEditing = true を設定する。
編集ボタンを表示したい場合は navigationItem.rightBarButtonItem = editButtonItemでいける!編集モードの場合は完了ボタンに自動で変わってくれる![]()
UITableViewController の場合は編集ボタン押下で自動で編集モードに変わってくれる![]()
![]() (
(UIViewController の場合は setEditing(_ editing: Bool, animated: Bool) を実装して tableView.isEditing = true で設定してやる必要がある)
編集モードの場合もセル選択を有効にしたい場合は tableView.allowsSelectionDuringEditing = true を設定する。
こんな感じ
削除
削除ボタンを表示する。
下記を設定する。
override func tableView(_ tableView: UITableView, commit editingStyle: UITableViewCell.EditingStyle, forRowAt indexPath: IndexPath) {
  if editingStyle == .delete {
    tableDataList.remove(at: indexPath.row) // 先にリストから削除する
    // テーブルの高さが変わるのでこれで囲む
    tableView.beginUpdates()
    tableView.deleteRows(at: [indexPath], with: .automatic)
    tableView.endUpdates()
  }
}
これで削除ボタンタップ時と左にスワイプした時に削除処理がはしる。
追加
追加ボタンを表示する。
下記を設定する。
override func tableView(_ tableView: UITableView, commit editingStyle: UITableViewCell.EditingStyle, forRowAt indexPath: IndexPath) {
  if editingStyle == .insert {
    // 対象セルの下に追加(先にリストに追加する)
    tableDataList.insert(0, at: indexPath.row + 1)
    tableView.beginUpdates()
    tableView.insertRows(at: [IndexPath(row: indexPath.row + 1, section: 0)], with: .automatic)
    tableView.endUpdates()
  }
}

override func tableView(_ tableView: UITableView, editingStyleForRowAt indexPath: IndexPath) -> UITableViewCell.EditingStyle {
  return .insert // これを設定しないと削除モードになる
}
移動
セルを移動させる。
下記を設定する。
override func tableView(_ tableView: UITableView, canMoveRowAt indexPath: IndexPath) -> Bool {
  return true
}

override func tableView(_ tableView: UITableView, moveRowAt sourceIndexPath: IndexPath, to destinationIndexPath: IndexPath) {
  // 移動処理
  let element = tableDataList[sourceIndexPath.row]
  tableDataList.remove(at: sourceIndexPath.row)
  tableDataList.insert(element, at: destinationIndexPath.row)
}
削除ボタンを表示したくない場合
override func tableView(_ tableView: UITableView, editingStyleForRowAt indexPath: IndexPath) -> UITableViewCell.EditingStyle {
  return .none
}
編集モード時にインデントを変更したくない場合(削除or追加ボタンがある場合は変わらない)
override func tableView(_ tableView: UITableView, shouldIndentWhileEditingRowAt indexPath: IndexPath) -> Bool {
  return false
}
移動不可
override func tableView(_ tableView: UITableView, canMoveRowAt indexPath: IndexPath) -> Bool {
  return indexPath.row != 0 // 一番上のセルを移動不可に設定
}
上記の設定で一番上のセル(row=0)は移動不可になりましたが他のセルを一番上に移動させることは可能です![]() 移動先としても不可にしたい場合は下記も設定する。
移動先としても不可にしたい場合は下記も設定する。
override func tableView(_ tableView: UITableView, targetIndexPathForMoveFromRowAt sourceIndexPath: IndexPath, toProposedIndexPath proposedDestinationIndexPath: IndexPath) -> IndexPath {
        return indexPath.row != 0 ? sourceIndexPath : proposedDestinationIndexPath
    }
ロングタップでメニュー表示

こんな感じのやつすぐ実装できんねや!知らんかった!と思ったら全部 iOS13 で Deprecated だった...
func tableView(_ tableView: UITableView, shouldShowMenuForRowAt indexPath: IndexPath) -> Bool
func tableView(_ tableView: UITableView, canPerformAction action: Selector, forRowAt indexPath: IndexPath, withSender sender: Any?) -> Bool
func tableView(_ tableView: UITableView, performAction action: Selector, forRowAt indexPath: IndexPath, withSender sender: Any?)
代わりにこれを使うらしい tableView(_:contextMenuConfigurationForRowAt:point:)
こんな感じ
override func tableView(_ tableView: UITableView, contextMenuConfigurationForRowAt indexPath: IndexPath, point: CGPoint) -> UIContextMenuConfiguration? {
  let configuration = UIContextMenuConfiguration(identifier: nil, previewProvider: nil) { actions -> UIMenu? in
    let copy = UIAction(title: "Copy", image: UIImage(systemName: "doc.on.doc"),
                                identifier: nil)
            { action in
                if let cell = tableView.cellForRow(at: indexPath) {
                  UIPasteboard.general.string = cell.textLabel?.text
                }
            }
            return UIMenu(__title: "Menu", image: nil, identifier: nil, children: [copy])
  }
  return configuration
}
インデックスバー
標準の電話帳アプリとかにあるやつ。
こんな感じ
テーブルの style が .grouped でも表示されるがドキュメントには .plain のみみたいなことが書いてあるので .plain にしましょう。
The table view must be in the plain style (UITableViewStylePlain).
参考:ドキュメント
func sectionIndexTitles(for tableView: UITableView) -> [String]? {
  return ["A", "B", "C"] // インデックスバーの文字設定
}

// 特殊なことをしないのであれば特に実装しなくても対象のセクションが表示される
func tableView(_ tableView: UITableView, sectionForSectionIndexTitle title: String, at index: Int) -> Int {
  return index
}
虫眼鏡アイコン下記のようにすると一番上に虫眼鏡アイコンが表示される。
func sectionIndexTitles(for tableView: UITableView) -> [String]? {
  return [UITableView.indexSearch, "A", "B", "C"]
}
使うなら一番上に置けみたいなことが書いてある。
This location should generally be the first title in the index.
参考:ドキュメント
これの使い道はよくわかりません。。。![]()
カスタム
下記のように色が設定できる。
tableView.sectionIndexColor = .white // 文字色
tableView.sectionIndexBackgroundColor = .systemPurple // バーの背景色
tableView.sectionIndexTrackingBackgroundColor = .systemRed // ハイライト時の背景色
スワイプ
なんか昔ライブラリ入れてやった気がしますが標準でスワイプアクションがあるそうです。
こんな感じ。
(めっちゃアクションを追加できるけどたぶんそんな使い方をすることはない)
下記のように実装する。
// 右へスワイプ
func tableView(_ tableView: UITableView, leadingSwipeActionsConfigurationForRowAt indexPath: IndexPath) -> UISwipeActionsConfiguration? {
  let action = UIContextualAction(style: .normal, title: "Action") { (action, view, completionHandler) in
           // なんか処理
           completionHandler(true) // 処理成功時はtrue/失敗時はfalseを設定する
           }
           let configuration = UISwipeActionsConfiguration(actions: [action])
        return configuration
}

// 左へスワイプ
func tableView(_ tableView: UITableView, trailingSwipeActionsConfigurationForRowAt indexPath: IndexPath) -> UISwipeActionsConfiguration? {
let action = UIContextualAction(style: .destructive, title: "Action") { (action, view, completionHandler) in
           // なんか処理
           completionHandler(true) // 処理成功時はtrue/失敗時はfalseを設定する
           }
           let configuration = UISwipeActionsConfiguration(actions: [action])
        return configuration
}
Action の style には normal と destructive (削除系)の2種類があります。
スワイプを引っ張り切ると UISwipeActionsConfiguration(actions: [action]) の最初の action が実行されます。
これを無効にした場合は configuration.performsFirstActionWithFullSwipe = false を設定する。
カスタム
action.backgroundColor = .systemBlue // 背景色設定
action.image = UIImage(systemName: "pencil.circle.fill") // 画像設定(タイトルは非表示になる)
さいごに
Table関連は頻繁に処理が追加されてるのでたまにチェックした方がいい。追加されたときは見るけど古いバージョンも動作保証してると使えないのでよく忘れます...たまにチェックしよう!
ドラッグドロップは色々できそうなのでまた時間があれば追加します...
プルリクくれてもええんやで![]()