今回、とある実装でUnityのEditor拡張に触れる機会があり、そこで得られた知見をメモとして記事を書きたいと思います。
SerializedObject
Edito拡張でObjectを操作するために必要なのが「SerializedObject」です。
通常のInspectorから値を変更する際も実はこの「SerializedObject」を使っています。
// targetObjectをSirializedObjectに変換する
var serializedObject = new SerializedObject(targetObject);
Update
Updateは対象のObjectの最新の情報を取得するメソッドです。
何かしらSerializedObjectに変更を加える前にかならずUpdateをする必要がある。
serializedObject.Update();
ApplyModifiedProperties
Objectに変更点を適応させます。
基本Update => ApplyModifiedPropertiesの順番に記述します。
serializedObject.ApplyModifiedProperties();
FindProperty
Objectのプロパティを取得します。
var hoge = serializedObject.FindProperty("hoge");
プロパティが配列の場合にはGetArrayElementAtIndexを使って取り出すこともできます。
var index = 1;
var array = serializedObject.FindProperty("array").GetArrayElementAtIndex(index);
GUILayout
ボタンなどのUIを作成するときのクラス。
- Button
- Toggle
- TextField
- Toolbar
Button
if (GUILayout.Button("Button"))
{
     Debug.LogError("ボタン押した");
}
TextField
// TextFieldが変更されたにログが吐かれる
 using (var scope = new EditorGUI.ChangeCheckScope())
{
    _text = GUILayout.TextField(_text);
    if (scope.changed)
    {
        Debug.Log(_text);
    }
}
HorizontalScope
横の範囲を指定できます。
次の例ではUsingの中に記載したUIはHorizontalScopeの設定した範囲内に表示される。
// 幅を300f指定
using (new GUILayout.HorizontalScope(GUILayout.Width(300f)))
{
}
GUILayout.VerticalScope
縦の範囲を指定できます。
using (new GUILayout.VerticalScope(GUILayout.Height(50f)))
{
}
GUILayoutUtility
GUILayoutクラスの便利関数です。
GetRect()
Rectを取得します。
var rect = GUILayoutUtility.GetRect(width,height)
GetLastRect();
直前のGUILayoutのRectを取得します。
// VerticalScopeのRectを取得する
using (new GUILayout.VerticalScope(GUILayout.Height(50f)))
{
    var rect = GUILayoutUtility.GetLastRect();
}
GUIContent
引数に渡したTextやTextureをUIとして表示させることができる。
ToggleやGenericMenuなどで利用できる
// GenericMenuでの使用例
var menu = new GenericMenu();
menu.AddItem(new GUIContent("メニュー1"), false, _ =>
{
    // メニュー押した時のAction
});


// ToggleにloopIconを表示させる
Texture loopIcon;
bool isOn;

GUILayout.Toggle(isOn, new GUIContent(loopIcon),"Toolbarbutton");
GUIStyle
GUIの見た目などを変更させるため利用するのがGUIStyleです
各UIパーツにGUIStyleを指定できる引数があります。
デフォルトで設定ができるStyleがあるのですが、これは文字列で指定する必要があります。
こちらのサイトに載っているのですが、見た目は実際に試してみてください
https://baba-s.hatenablog.com/category/Unity?page=1430097103
var textStyle = new GUIStyle("Label");
textStyle.normal.textColor = Color.white;
textStyle.fontSize = 10;
textStyle.alignment = TextAnchor.UpperLeft;

GUILayout.Label("GUIStyleで装飾できる", textStyle);
EditorGUI
エディタ拡張用のGUIクラス。
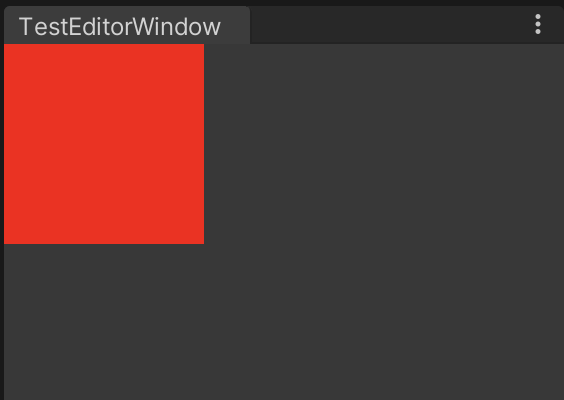
EditorGUI.DrawRect()
四角形を描画する
 var rect = new Rect(0.0f, 0.0f, 100f, 100f);
 EditorGUI.DrawRect(rect, Color.red);
EditorGUI.ChangeCheckScope()
using (var scope = new EditorGUI.ChangeCheckScope())
{
    GUILayout.Toggle();
    if (scope.changed)
    {
        // Toggleが切り替わったときに呼び出される
    }
}
EditorGUILayout
EditorGUILayoutとGUILayoutはほぼ同じです。
現状同じことができるので好きな方を使ってよいと思いますが、EditorGUILayoutでしかできないこともあります。
EditorGUILayout.ScrollViewScope
スクロールの領域を指定できます。
private Vector2 _ScrollArea = Vector2.zero;

using (var scrollView = new EditorGUILayout.ScrollViewScope(_ScrollArea, GUILayout.Width(100f), GUILayout.Height(50f)))
{
      _ScrollArea = scrollView.scrollPosition;
}
LabelField
文字列を表示します。
第2引数でStyleを指定することもできます。
EditorGUILayout.LabelField(behaviourName, (GUIStyle) "MiniToolbarButtonLeft");
FloatField
floatの入力項目を作成します。
EditorGUILayout.FloatField(floatValue, GUILayout.Width(50.0f));
EditorGUIUtility
EditorGUIの便利関数。
FindTexture
指定したファイル名のTextureを取得します。
次の例ではUnityにデフォルトで設定されている画像を取得する処理です。
現在次のサイトの画像が取得できそうでう。
https://baba-s.hatenablog.com/entry/2017/12/01/164517
// PlayButton用のテクスチャを取得する
 EditorGUIUtility.FindTexture("PlayButton");
GenericMenu
自作のメニューを作成できます。
AddItemを使って文言と選択したときのコールバックを記述します。
var menu = new GenericMenu();
menu.AddItem(new GUIContent("選択名",false,_ =>
{
   //選択したときのコールバック
},"");
何かしらデータをコールバックへ渡したいときには第4引数に指定します。
Handles
本来はEditor上での3D描画を行うクラスなのですが、いろいろな図形を書くことができます。
単純な線を引く場合には次のようなコードを書きます。
Vector3 startPos;
Vector3 endPos;

Handles.DrawLine(startPos,endPos);
実際Editor拡張をする際にHandlesについてはこちらを参考にしました。
https://qiita.com/kyourikey/items/7a5f693d1fe17bde5387
Event.current
イベントを取得するときにEvent.currentを使います。
if (Event.current.type == EventType.MouseUp)
{
    // 左ボタン
    if (Event.current.button == 0)
    {
        Debug.LogError("左ボタンを押した");
    }
}
イベント取得範囲を決めたい場合は、次のように実装ができます。
// 判定
if (Event.current.type == EventType.MouseUp && Event.current.button == 1)
{
     var boxRect = GUILayoutUtility.GetLastRect();
     var mousePos = Event.current.mousePosition;
     if (boxRect.Contains(mousePos))
     {
         // イベントを使い終わった
         Event.current.Use();
     }
}
EventTypeはこちらを参考に
https://docs.unity3d.com/ja/current/ScriptReference/EventType.html
その他
GUI.backgroundColor
UIの背景色を変える。
// 赤色にする
GUI.backgroundColor = Color.red;
GUI.FocusControl
複数のUIからどれが選択されているか知ることができる。
各UIにSetNextControlNameで名前(key)を設定し、それを何かしらのイベントでFocusする。
Focusされた名前をGetNameOfFocusedControlで取得し、それを使いUIを変更します。
// コントロールする名前を設定する
GUI.SetNextControlName("Focus String");
// 指定した名前にフォーカスする
GUI.FocusControl("Focus String");
// フォーカスされている名前を取得する
var focusString = GUI.GetNameOfFocusedControl()
