0. 概要
@mattn さんの mruby から TensorFlow Lite を操りブラックホールとポンデリングとオニオンフライを見分ける - Qiita を読んで面白そうだったので、Ubuntu上(実際はWSL)でx86版のmrubyと TensorFlow Lite をビルドし、さらにmruby-gdとMobileNetを使って画像分類してみた。
1. TensorFlow Liteのビルド
まずは libtensorflow-lite.a を作る。
https://github.com/tensorflow/tensorflow からcloneし、適当なバージョンをチェックアウトする(今回はr1.13.1を使った)。ホストのネイティブ版のライブラリは https://stackoverflow.com/a/55144057 のUPDATEに書いてある通りにコマンドを実行すればビルドできる。ただ、後でlibtensorflowlite_c.soを作るときに困るので、事前に Makefile を修正して、CXXFLAGSに-fPICを追加しておく。
+++ b/tensorflow/lite/tools/make/Makefile
@@ -51,7 +51,7 @@ LIBS := \
 # There are no rules for compiling objects for the host system (since we don't
 # generate things like the protobuf compiler that require that), so all of
 # these settings are for the target compiler.
-CXXFLAGS := -O3 -DNDEBUG
+CXXFLAGS := -O3 -DNDEBUG  -fPIC
 CXXFLAGS += $(EXTRA_CXXFLAGS)
 CCFLAGS := ${CXXFLAGS}
 CXXFLAGS += --std=c++11
tensorflowの直下で以下を実行すると、tensorflow/lite/tools/make/gen/linux_x86_64/lib/libtensorflow-lite.a ができる。
./tensorflow/lite/tools/make/download_dependencies.sh
make -f tensorflow/lite/tools/make/Makefile
2. C experimental APIライブラリのビルド
次に、libtensorflowlite_c.so をビルドする。
https://github.com/mattn/go-tflite を参考に、以下のようなMakefileを作り、tensorflow/lite/experimental/c でmakeを実行すると、tensorflow/lite/experimental/cにlibtensorflowlite_c.soができる。
SRCS =  c_api.cc c_api_experimental.cc
OBJS = $(subst .cc,.o,$(subst .cxx,.o,$(subst .cpp,.o,$(SRCS))))
TENSORFLOW_ROOT = ../../../../
CXXFLAGS = -DTF_COMPILE_LIBRARY -I$(TENSORFLOW_ROOT) -I$(TENSORFLOW_ROOT)/tensorflow/lite/tools/make/downloads/flatbuffers/include -fPIC
TARGET = libtensorflowlite_c
OS_ARCH = linux_x86_64
TARGET_SHARED := $(TARGET).so
LDFLAGS += -L$(TENSORFLOW_ROOT)/tensorflow/lite/tools/make/gen/$(OS_ARCH)/lib
LIBS = -ltensorflow-lite

.SUFFIXES: .cpp .cxx .o

all : $(TARGET_SHARED)

$(TARGET_SHARED) : $(OBJS)
        g++ -shared -o $@ $(OBJS) $(LDFLAGS) $(LIBS)
.cxx.o :
        g++ -std=c++14 -c $(CXXFLAGS) -I. $< -o $@
.cpp.o :
        g++ -std=c++14 -c $(CXXFLAGS) -I. $< -o $@
clean :
        rm -f *.o $(TARGET_SHARED)
事前にCXXFLAGSに-fPICを追加していないと、ここで以下のエラーが出る。その場合は、tensorflow/lite/tools/make/gen/linux_x86_64/obj/tensorflow/lite/tools/make/downloads/fft2d/fftsg.o を削除し、Makefileを修正して実行すればよい。
g++ -shared -o libtensorflowlite_c.so c_api.o c_api_experimental.o -L../../../..//tensorflow/lite/tools/make/gen/linux_x86_64/lib -ltensorflow-lite
/usr/bin/ld: ../../../..//tensorflow/lite/tools/make/gen/linux_x86_64/lib/libtensorflow-lite.a(fftsg.o): relocation R_X86_64_PC32 against symbol `cftmdl1' can not be used when making a shared object; recompile with -fPIC
/usr/bin/ld: final link failed: Bad value
collect2: error: ld returned 1 exit status
Makefile:24: recipe for target 'libtensorflowlite_c.so' failed
make: *** [libtensorflowlite_c.so] Error 1
3. mrubyのビルド
一通り必要なライブラリができたので、libtensorflowlite_c.soを組み込んだmrubyをビルドする。
https://github.com/mruby/mruby と https://github.com/mattn/mruby-tflite をcloneする。
3.1 mruby-tflite
GitHubを直接参照するとうまく行かなかったので、cloneしてmrgbem.rakeのパスを修正しておく。
--- a/mrbgem.rake
+++ b/mrbgem.rake
@@ -2,6 +2,7 @@ MRuby::Gem::Specification.new('mruby-tflite') do |spec|
   spec.license = 'MIT'
   spec.authors = 'mattn'

-  spec.cc.include_paths << ENV['TENSORFLOW_ROOT']
+  spec.cc.include_paths << ENV['TENSORFLOW_ROOT']
+  spec.linker.library_paths << ENV['TENSORFLOW_ROOT'] + "tensorflow/lite/experimental/c/"
   spec.linker.libraries << 'tensorflowlite_c'
 end
3.2 mrubyのビルド
build_config.rbに追加し、ローカルに展開したmruby-tfliteを参照する。
--- a/build_config.rb
+++ b/build_config.rb
@@ -16,11 +16,15 @@ MRuby::Build.new do |conf|
   # conf.gem 'examples/mrbgems/c_extension_example' do |g|
   #   g.cc.flags << '-g' # append cflags in this gem
   # end
+  conf.gem "#{root}/mrbgems/mruby-bin-mruby"
+  conf.gem "#{root}/mrbgems/mruby-bin-mirb"
   # conf.gem 'examples/mrbgems/c_and_ruby_extension_example'
   # conf.gem :core => 'mruby-eval'
   # conf.gem :mgem => 'mruby-io'
   # conf.gem :github => 'iij/mruby-io'
   # conf.gem :git => 'git@github.com:iij/mruby-io.git', :branch => 'master', :options => '-v'
+  conf.gem '../mruby-tflite'

   # include the default GEMs
   conf.gembox 'default'
mrubyの直下で、以下のコマンドを実行してビルドする。
export TENSORFLOW_ROOT=../tensorflow/
./minirake
これでmruby/bin以下にmrubyとmirbができる。
4. mrubyの動作確認
.soを読み込めるように、libtensorflowlite_c.soのあるディレクトリをLD_LIBRARY_PATHにセットしておく。
export LD_LIBRARY_PATH=$TENSORFLOW_ROOT/tensorflow/lite/experimental/c/
https://www.tensorflow.org/lite/guide/hosted_models から適当なモデルをダウンロードする。mirbで.tfliteファイルをロードできればここまではOK。
$ mruby/bin/mirb
mirb - Embeddable Interactive Ruby Shell

> model = TfLite::Model.from_file "mobilenet.tflite"
 => #<TfLite::Model:0x7ffff131a460>
5. mruby-gdの組み込み
さらに、画像を読み込むために、mrubyにmruby-gdを組み込む。
(GDのライブラリはインストールしておく)
conf.gem :github => 'qtkmz/mruby-gd'
3と同様にminirakeを実行してmrubyをビルドし、適当なスクリプトを書いてPNGを読めるか確認する。
im = GD::Image.new_from_png_file "test.png"

w = im.width
h = im.height

(0...w).each do |x|
  (0...h).each do |y|
    r = im.red(im.get_pixel(x, y))
    g = im.green(im.get_pixel(x, y))
    b = im.blue(im.get_pixel(x, y))
    puts "#{x},#{y}:#{r}-#{g}-#{b}"
  end
end

im.destroy
6. MobileNetで画像分類
MobileNetを使って画像分類する。
Quantized Modelを使うため、mruby-tflite/src/mrb_tflite.cを少し修正してkTfLiteUInt8を使えるようにする。
--- a/src/mrb_tflite.c
+++ b/src/mrb_tflite.c
@@ -230,6 +231,7 @@ mrb_tflite_tensor_data_get(mrb_state *mrb, mrb_value self) {

   type = TFL_TensorType(tensor);
   switch (type) {
+    case kTfLiteUInt8:
     case kTfLiteInt8:
       len = TFL_TensorByteSize(tensor);
       uint8s = (uint8_t*) TFL_TensorData(tensor);
@@ -275,6 +277,7 @@ mrb_tflite_tensor_data_set(mrb_state *mrb, mrb_value self) {

   type = TFL_TensorType(tensor);
   switch (type) {
+    case kTfLiteUInt8:
     case kTfLiteInt8:
       puts("byte");
       len = TFL_TensorByteSize(tensor);
修正後、mruby/build/host/mrbgems/mruby-tflite/src/mrb_tflite.oを削除してminirakeでmrubyを再コンパイルする。これで準備完了。
https://www.tensorflow.org/lite/guide/hosted_models から Mobilenet_V1_1.0_224_128_quant などをダウンロードして展開し、mruby から TensorFlow Lite を操りブラックホールとポンデリングとオニオンフライを見分ける - Qiita を参考に、以下のスクリプトでモデルのtflite・ラベルのテキスト・対象の画像を読み込ませて分類される。
model = TfLite::Model.from_file 'mobilenet_v1_1.0_224_quant.tflite'
interpreter = TfLite::Interpreter.new(model)
interpreter.allocate_tensors
input = interpreter.input_tensor(0)
expected_width = input.dim(1)
expected_height = input.dim(2)
expected_channel = input.dim(3)

puts "w: #{expected_width}"
puts "h #{expected_height}"
puts "ch: #{expected_channel}"

img = Array.new(expected_height * expected_width * expected_channel, 0)

im = GD::Image.new_from_png_file "Grace_Hopper.png"
w = im.width
h = im.height

if expected_width != w || expected_height != h
  puts "ERROR: image size mismatch"
  return
end

(0...w).each do |x|
  (0...h).each do |y|
    offset = (y * w + x ) * expected_channel
    img[offset] = im.red(im.get_pixel(x, y))
    img[offset + 1] = im.green(im.get_pixel(x, y))
    img[offset + 2] = im.blue(im.get_pixel(x, y))
  end
end

output = interpreter.output_tensor(0)
input = interpreter.input_tensor(0)
input.data = img
interpreter.invoke

labels = File.read('labels_mobilenet_quant_v1_224.txt').lines.map {|x| x.strip}

output.data.each_with_index do |v, i|
  puts "#{i} #{v} #{labels[i]}" if v > 5
end

im.destroy
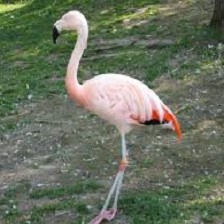
実行結果。左からラベルのインデックス、値、ラベル名。うまくいった!

466 8 bulletproof vest
653 151 military uniform
907 66 Windsor tie

131 255 flamingo