29
22

Delete article

Deleted articles cannot be recovered.

Draft of this article would be also deleted.

Are you sure you want to delete this article?

More than 1 year has passed since last update.

VisualStudioのincludeファイルパス設定について

Last updated at Posted at 2019-08-20

VisualStudioにはincludeする際にコードを省略できるインクルードディレクトリを設定することが出来ます。

場所

プロジェクト→右クリック→プロパティ
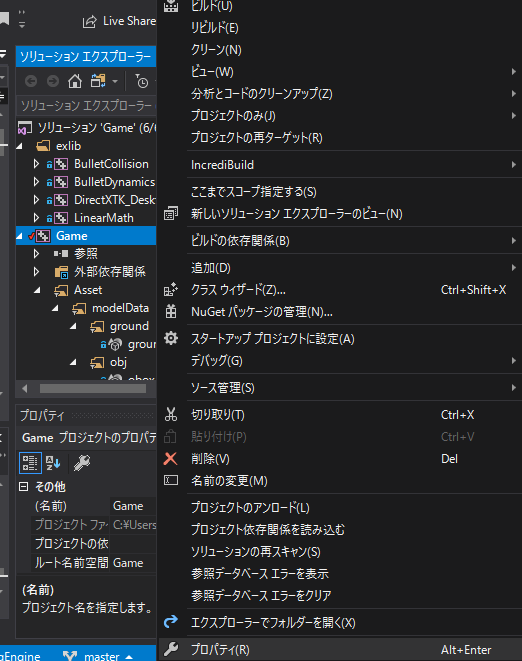
pro.png
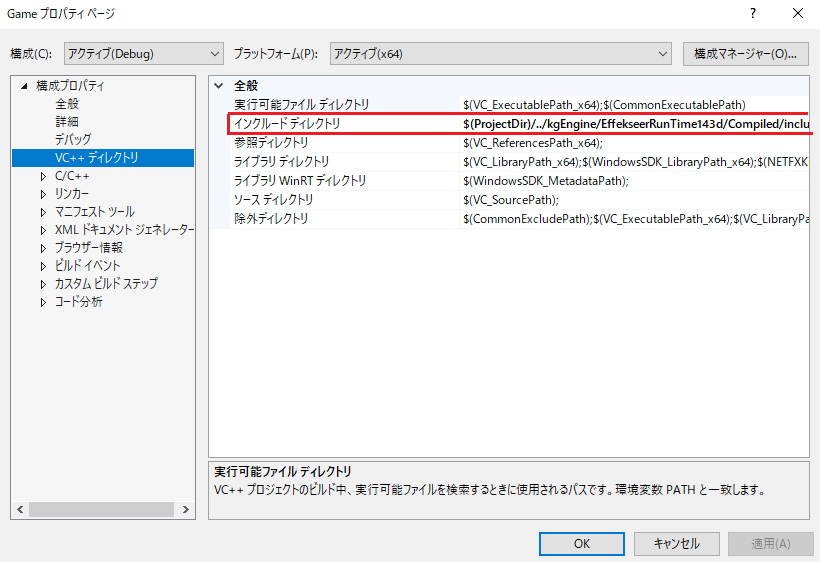
→構成プロパティ→VC++ディレクトリ→インクルードディレクトリです。
インクルードディレクトリ_2.png

使い方

例えばファイルの場所が下記の通りだと仮定します。
zu5.png

main.cppでEffectRender.hをincludeしたい場合

main.cpp
#include "Effect/EffectRender/EffectRender.h"

となりますよね。
でもインクルードディレクトリを設定すると

main.cpp
#include "EffectRender.h"

という風にコードを省略することが出来ます!

書き方

例えば、ファイルが下記の状態と仮定します。
zu4.png

main.cppからEffect.hをincludeしたい場合、インクルードディレクトリを

$(ProjectDir)/../;

$(SolutionDir)/;

という風に設定するといいでしょう。

ProjectDir・・・プロジェクトファイルのあるフォルダ
SolutionDir・・・ソリューションファイルのあるフォルダ
.. ・・・一つ上の階層のフォルダ

メリット

一つはやはりコードが省略出来るということでしょう。

もう一つはファイルの移動による影響が少ないということです。
例えば
zu3.png
のようにObject.hを複数のファイルでincludeしていた場合、Object.hが移動したら各ファイルのincludeのコードを変えなければいけませんよね?でもインクルードディレクトリを設定していたら、そこを変えるだけでよくなるのです。

29
22
0

Register as a new user and use Qiita more conveniently

  1. You get articles that match your needs
  2. You can efficiently read back useful information
  3. You can use dark theme
What you can do with signing up
29
22

Delete article

Deleted articles cannot be recovered.

Draft of this article would be also deleted.

Are you sure you want to delete this article?