はじめに
最近ログやリソース状況を把握するためにInfluxDBを利用しようと考えていて、@takaidohigasiの紹介もありInfluxDB社が提供しているメトリックス収集ツールであるTelegrafを使ったのでメモしておく。
より詳細なTelegrafの紹介は以下を参照してください。
http://qiita.com/takaidohigasi/items/fdc81db8336aa7601fc9
Telegrafとは
https://github.com/influxdb/telegraf
^に記載されているようにInfluxDBにデータを登録するためのGO製の収集ツールとのこと。
サポートしているメトリックスは以下。
- disque
- elasticsearch
- exec (generic JSON-emitting executable plugin)
- haproxy
- httpjson (generic JSON-emitting http service plugin)
- kafka_consumer
- leofs
- lustre2
- memcached
- mongodb
- mysql
- nginx
- postgresql
- prometheus
- rabbitmq
- redis
- rethinkdb
- system (mem, CPU, load, etc.)
InfluxDB用のツールではあるが以下のアウトプット先をサポートしているとのこと。
- influxdb
- kafka
- datadog
環境
- OS: CentOS7.1
- InfluxDB: 0.9.3
- HAProxy: 1.5.4
Install
RPMパッケージを提供してくれているので以下のコマンドでインストールする。
$ sudo yum -y install http://get.influxdb.org/telegraf/telegraf-0.1.7-1.x86_64.rpm
$
設定
以下のコマンドでサンプルの設定ファイルを作成する。
$ telegraf -sample-config > telegraf.toml
HAProxyプラグインの設定
telegrafの便利な機能として各種プラグインについての設定方法は以下のコマンドで確認出来る。
$ /opt/telegraf/telegraf -usage haproxy
# Read metrics of haproxy, via socket or csv stats page
[haproxy]
# An array of address to gather stats about. Specify an ip on hostname
	# with optional port. ie localhost, 10.10.3.33:1936, etc.
	#
	# If no servers are specified, then default to 127.0.0.1:1936
	servers = ["http://myhaproxy.com:1936", "http://anotherhaproxy.com:1936"]
	# Or you can also use local socket(not work yet)
	# servers = ["socket:/run/haproxy/admin.sock"]$
^を参考にして以下のように設定ファイルを作成。
注意: ここで指定するURIは統計情報のCSVファイルであり統計情報ページではない。
# Telegraf configuration
# Telegraf is entirely plugin driven. All metrics are gathered from the
# declared plugins.
# Even if a plugin has no configuration, it must be declared in here
# to be active. Declaring a plugin means just specifying the name
# as a section with no variables. To deactivate a plugin, comment
# out the name and any variables.
# Use 'telegraf -config telegraf.toml -test' to see what metrics a config
# file would generate.
# One rule that plugins conform to is wherever a connection string
# can be passed, the values '' and 'localhost' are treated specially.
# They indicate to the plugin to use their own builtin configuration to
# connect to the local system.
# NOTE: The configuration has a few required parameters. They are marked
# with 'required'. Be sure to edit those to make this configuration work.
# Tags can also be specified via a normal map, but only one form at a time:
[tags]
	# dc = "us-east-1"
# Configuration for telegraf itself
[agent]
	interval = "10s"
	# debug = false
	hostname = "telegraf01"
# Read metrics of haproxy, via socket or csv stats page
###############################################################################
# OUTPUTS #
###############################################################################
[outputs]
# Configuration for influxdb server to send metrics to
[outputs.influxdb]
	# The full HTTP endpoint URL for your InfluxDB instance
	url = "http://localhost:8086" # required.
	# The target database for metrics. This database must already exist
	database = "telegraf" # required.
	# Connection timeout (for the connection with InfluxDB), formatted as a string.
	# Valid time units are "ns", "us" (or "µs"), "ms", "s", "m", "h".
	# If not provided, will default to 0 (no timeout)
	# timeout = "5s"
	# username = "telegraf"
	# password = "metricsmetricsmetricsmetrics"
	# Set the user agent for the POSTs (can be useful for log differentiation)
	# user_agent = "telegraf"
###############################################################################
# PLUGINS #
###############################################################################
[haproxy]
# An array of address to gather stats about. Specify an ip on hostname
	# with optional port. ie localhost, 10.10.3.33:1936, etc.
	#
	# If no servers are specified, then default to 127.0.0.1:1936
	servers = ["http://localhost:8080/haproxy/stats;csv"]
	# Or you can also use local socket(not work yet)
	# servers = ["socket:/run/haproxy/admin.sock"]
HAProxyの設定/起動
HAProxyの設定ファイルに以下を追記して起動してやる。
# admin #
listen hastats
 bind *:8080
 mode http
 stats enable
 stats show-legends
 stats uri /haproxy/stats
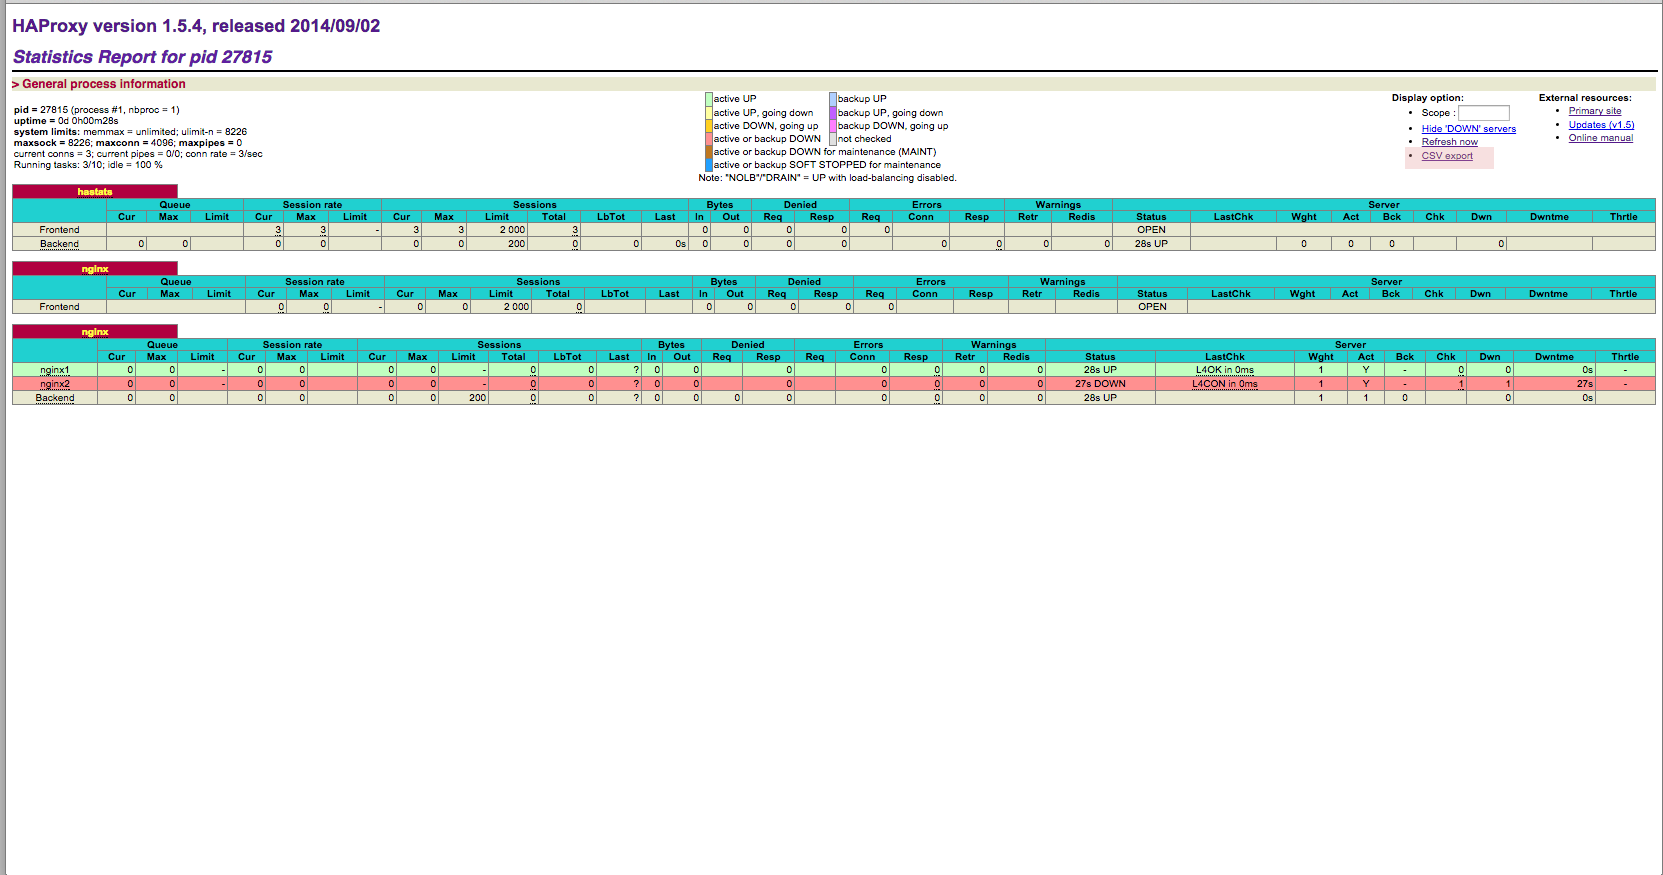
起動後ブラウザで*:8080/haproxy/statsアクセスすると以下の画面が表示される。
画面右上にあるCSV exportリンクをクリックするとCSVファイルが表示されるのでこのリンクをtelegrafの設定ファイルに指定する。
起動してみる
以下のコマンドでforegroudで起動してやる。
$ /opt/telegraf/telegraf -config=telegraf.toml
2015/09/01 12:03:47 Starting Telegraf (version 0.1.7)
2015/09/01 12:03:47 Loaded outputs: influxdb
2015/09/01 12:03:47 Loaded plugins: haproxy
2015/09/01 12:03:47 Tags enabled: host=telegraf01
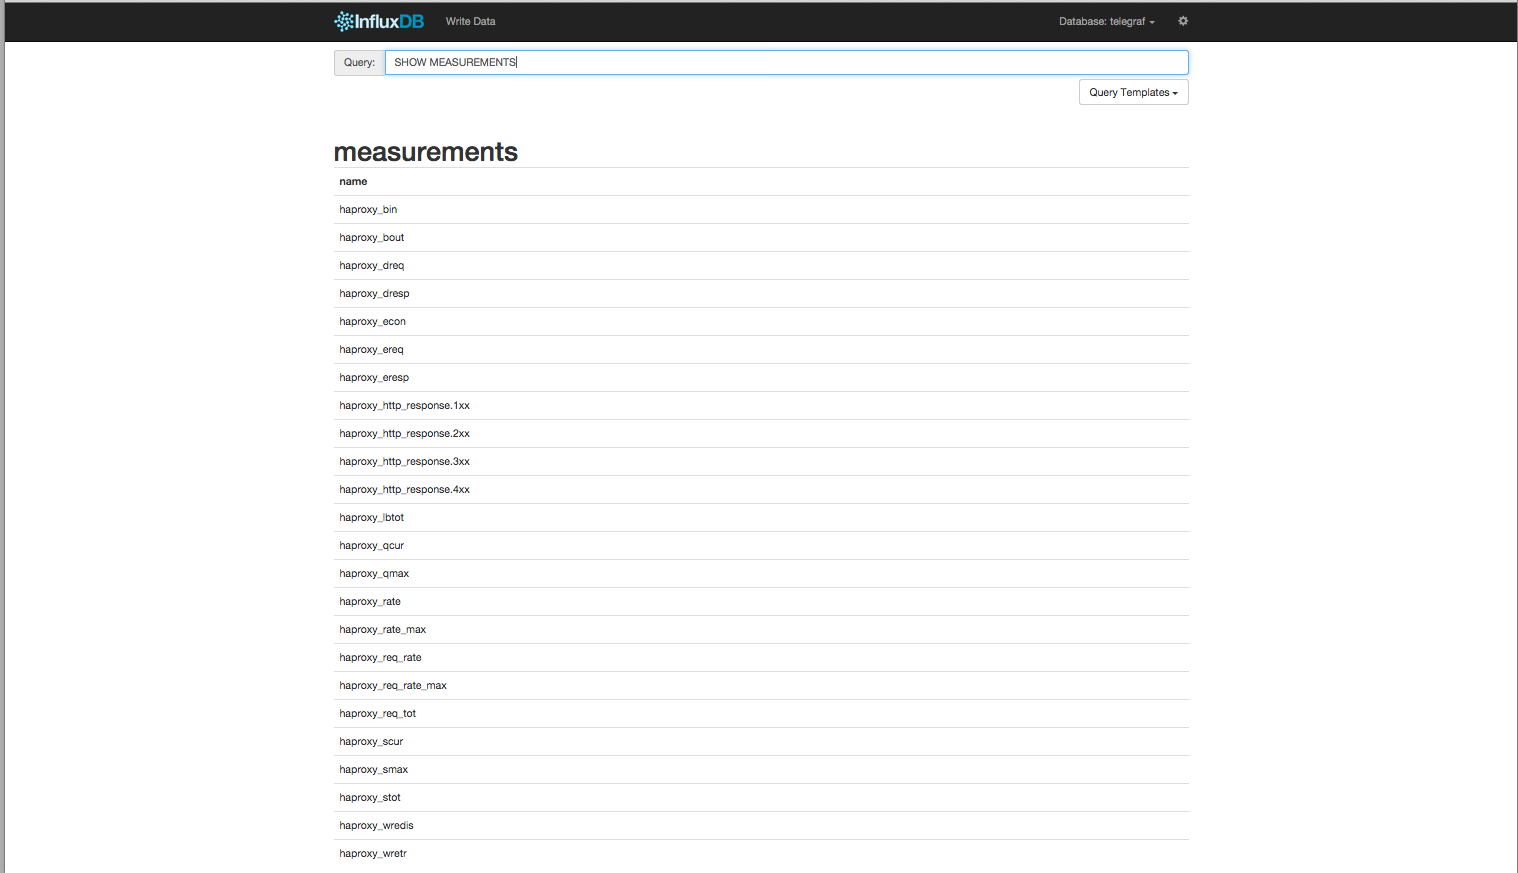
しばらくたってinfluxDBで確認するとtelegrafというDBに各種measurementsが入っていることがわかる。
Grafanaで見てみる
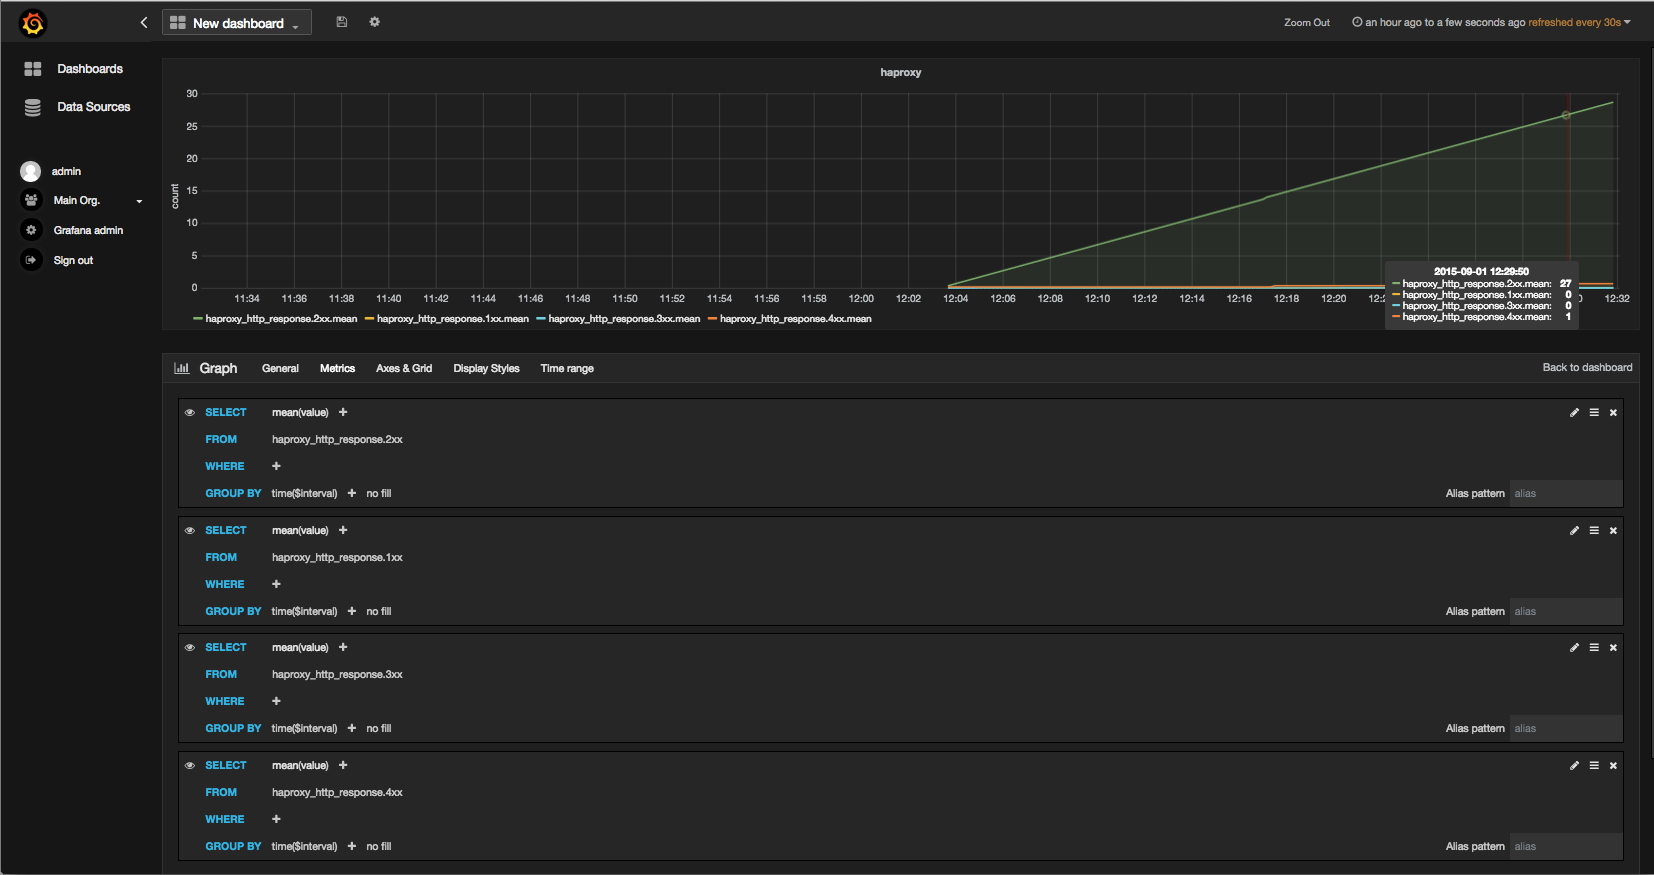
DatasourceにtelegrafというDBを追加してDashboardでhttpのresponsecode毎に表示してやれば以下のように表示される。
Responsecodeの積算値で表示してくれている。
これは使えそうですね。
おしまい。


