お疲れ様です。秋並です。
Pybullet公式gitリポジトリのサンプルコードを解説するシリーズです(一覧はこちら)。
今回は、biped2d_pybullet.pyを解説します。(コードのリンクはこちら)
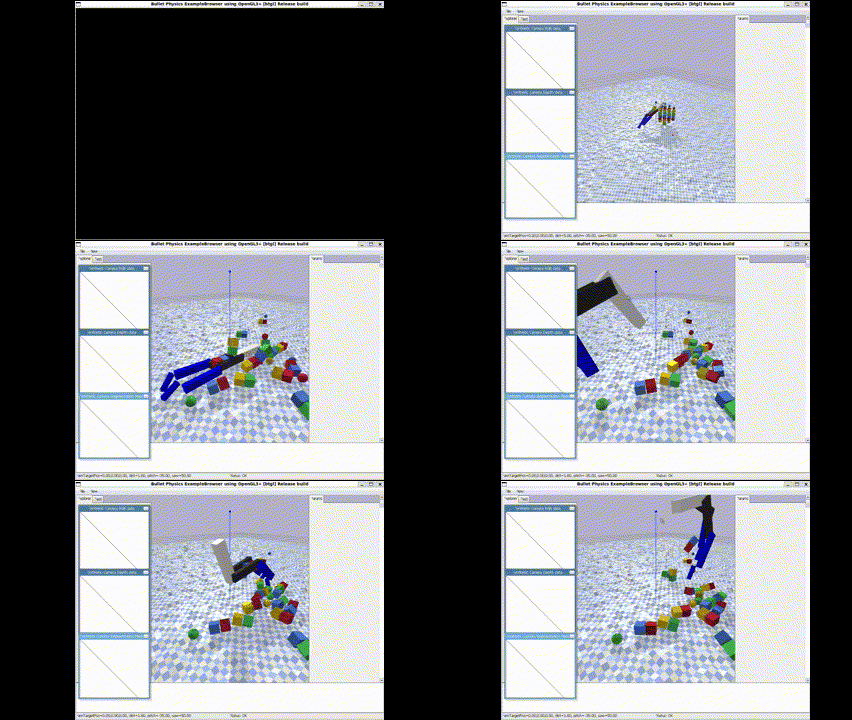
本コードを実行すると、凸凹した地面と、複数のオブジェクト、2足歩行ロボットが生成されます。
どちらかというと、二足歩行ロボットの生成よりも凸凹な形状の生成の方がメインな気がするので、そちらについて説明します。
使用している機能
本コードは、以下の機能を使用して「凸凹した形状の床の生成」を実現しています。
- 地形の衝突情報の設定
地形の衝突情報の設定
pybulletでは、createCollisionShape関数を使用することで「物体の衝突情報」を設定することができます。
また、今回のサンプルコードでは3種類の地形生成方法が実装されているので、それぞれ説明します。
ランダムに地形の高さを設定する方法
colisionShape = pybullet.createCollisionShape(
    shapeType,
    meshScale,
    heightfieldTextureScaling,
    heightfieldData,
    numHeightfieldRows,
    numHeightfieldColumns
)
-
shapeType:地形の形状タイプを設定- 今回の場合、
p.GEOM_HEIGHTFIELD(高さフィールドモード)に設定しています
- 今回の場合、
-
meshScale:メッシュのスケールを設定([x,y,z]) -
heightfieldTextureScaling:高さフィールドのテクスチャのスケールを設定 -
heightfieldData:地形データを設定(各ポイントの高さ情報を持つリスト) -
numHeightfieldRows:地形データの行数を設定 -
numHeightfieldColumns:地形データの列数を設定
txtファイルの情報から地形の高さ情報を設定
colisionShape = pybullet.createCollisionShape(
    shapeType,
    meshScale,
    fileName,
    heightfieldTextureScaling
)
-
shapeType:地形の形状タイプを設定- 今回の場合、
p.GEOM_HEIGHTFIELD(高さフィールドモード)に設定しています
- 今回の場合、
-
meshScale:メッシュのスケールを設定([x,y,z]) -
fileName:地形情報のファイル- 今回は、txtファイルの各数値が高さ情報(コード上はcsvファイルのように見えるが実際はtxtファイルを読み込んでいる)
-
heightfieldTextureScaling:高さフィールドのテクスチャのスケールを設定
サンプルコードでは、以下のようなtxtファイルを読み込んでいます(長いので、途中までしか記載していません。完全なファイルはこちら)。
-0.60575, -0.60948, -0.65511, -0.77243, -0.76525, -0.68419, -0.65576, -0.60841,...
PNGファイルの情報から地形の高さ情報を設定
colisionShape = pybullet.createCollisionShape(
    shapeType,
    meshScale,
    fileName
)
-
shapeType:地形の形状タイプを設定- 今回の場合、
p.GEOM_HEIGHTFIELD(高さフィールドモード)に設定しています
- 今回の場合、
-
meshScale:メッシュのスケールを設定([x,y,z]) -
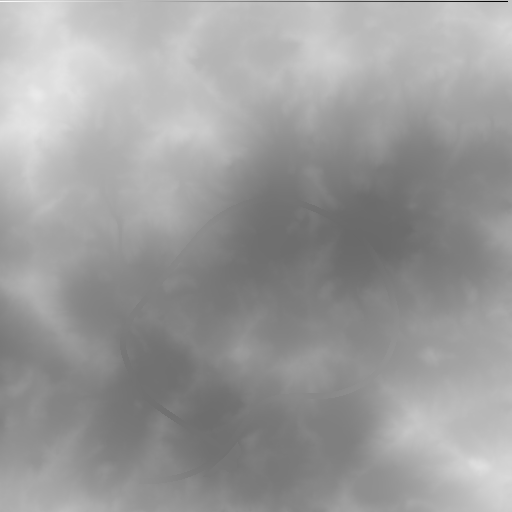
fileName:地形情報のファイル- 今回は、PNGファイルの各画素値が高さ情報に相当しています
サンプルコードでは、以下のようなPNGファイルを読み込んでいます

コメントをつけたサンプルコード
サンプルコードにコメントをつけたものが以下になります(もともとあった不要と思われるコメント等については削除しています)
import pybullet as p
import pybullet_data as pd
import math
import time
import os

# GUIモードでPybulletに接続
p.connect(p.GUI)

# Pybulletのデータまでのパスを設定
p.setAdditionalSearchPath(pd.getDataPath())

# テクスチャIDを無効値で初期化
textureId = -1

# 地形生成をプログラムにより生成することを示す定数
useProgrammatic = 0

# 地形生成をPNGファイルにより生成することを示す定数
useTerrainFromPNG = 1

# 地形生成をCSVファイルから生成することを示す定数(実際は、なぜかtxtファイルを読み込んでいる)
useDeepLocoCSV = 2

# 地形の更新が必要かどうかを示す変数
updateHeightfield = False

# 地形生成方法をプログラムにより生成する方法に設定
heightfieldSource = useProgrammatic

import random

# 乱数のシードを設定
random.seed(10)

# デバッグビジュアライザを無効化
p.configureDebugVisualizer(p.COV_ENABLE_RENDERING,0)

# 地形の変動範囲
heightPerturbationRange = 0.05

# プログラムによる地形生成を行う
if heightfieldSource==useProgrammatic:
  numHeightfieldRows = 256
  numHeightfieldColumns = 256
  heightfieldData = [0]*numHeightfieldRows*numHeightfieldColumns
  for j in range (int(numHeightfieldColumns/2)):
    for i in range (int(numHeightfieldRows/2) ):
      height = random.uniform(0,heightPerturbationRange)
      heightfieldData[2*i+2*j*numHeightfieldRows]=height
      heightfieldData[2*i+1+2*j*numHeightfieldRows]=height
      heightfieldData[2*i+(2*j+1)*numHeightfieldRows]=height
      heightfieldData[2*i+1+(2*j+1)*numHeightfieldRows]=height

  # 地形の衝突形状を作成し、位置と向きを設定
  terrainShape = p.createCollisionShape(shapeType = p.GEOM_HEIGHTFIELD, meshScale=[.05,.05,1], heightfieldTextureScaling=(numHeightfieldRows-1)/2, heightfieldData=heightfieldData, numHeightfieldRows=numHeightfieldRows, numHeightfieldColumns=numHeightfieldColumns)
  terrain  = p.createMultiBody(0, terrainShape)
  p.resetBasePositionAndOrientation(terrain,[0,0,0], [0,0,0,1])

# txtファイルから読み込んだ地形情報に設定
if heightfieldSource==useDeepLocoCSV:
  terrainShape = p.createCollisionShape(shapeType = p.GEOM_HEIGHTFIELD, meshScale=[.5,.5,2.5],fileName = "heightmaps/ground0.txt", heightfieldTextureScaling=128)
  terrain  = p.createMultiBody(0, terrainShape)
  p.resetBasePositionAndOrientation(terrain,[0,0,0], [0,0,0,1])

# PNGファイルから地形データを読み込み地形情報に設定
if heightfieldSource==useTerrainFromPNG:
  terrainShape = p.createCollisionShape(shapeType = p.GEOM_HEIGHTFIELD, meshScale=[.1,.1,24],fileName = "heightmaps/wm_height_out.png")
  textureId = p.loadTexture("heightmaps/gimp_overlay_out.png")
  terrain  = p.createMultiBody(0, terrainShape)
  p.changeVisualShape(terrain, -1, textureUniqueId = textureId)

# 地形の色情報を変更
p.changeVisualShape(terrain, -1, rgbaColor=[1,1,1,1])

# 球と箱の衝突形状を設定
sphereRadius = 0.05
colSphereId = p.createCollisionShape(p.GEOM_SPHERE, radius=sphereRadius)
colBoxId = p.createCollisionShape(p.GEOM_BOX,
                                  halfExtents=[sphereRadius, sphereRadius, sphereRadius])

# リンクの質量、衝突形状、位置、向き、関節パラメータを設定
mass = 1
visualShapeId = -1
link_Masses = [1]
linkCollisionShapeIndices = [colBoxId]
linkVisualShapeIndices = [-1]
linkPositions = [[0, 0, 0.11]]
linkOrientations = [[0, 0, 0, 1]]
linkInertialFramePositions = [[0, 0, 0]]
linkInertialFrameOrientations = [[0, 0, 0, 1]]
indices = [0]
jointTypes = [p.JOINT_REVOLUTE]
axis = [[0, 0, 1]]

# 3×3×3の位置に球や箱のオブジェクトを作成し、それぞれの位置と向きを設定
for i in range(3):
  for j in range(3):
    for k in range(3):
      basePosition = [
          i * 5 * sphereRadius, j * 5 * sphereRadius, 1 + k * 5 * sphereRadius + 1
      ]
      baseOrientation = [0, 0, 0, 1]
      if (k & 2):
        sphereUid = p.createMultiBody(mass, colSphereId, visualShapeId, basePosition,
                                      baseOrientation)
      else:
        sphereUid = p.createMultiBody(mass,
                                      colBoxId,
                                      visualShapeId,
                                      basePosition,
                                      baseOrientation,
                                      linkMasses=link_Masses,
                                      linkCollisionShapeIndices=linkCollisionShapeIndices,
                                      linkVisualShapeIndices=linkVisualShapeIndices,
                                      linkPositions=linkPositions,
                                      linkOrientations=linkOrientations,
                                      linkInertialFramePositions=linkInertialFramePositions,
                                      linkInertialFrameOrientations=linkInertialFrameOrientations,
                                      linkParentIndices=indices,
                                      linkJointTypes=jointTypes,
                                      linkJointAxis=axis)


      # オブジェクトの動力学パラメータを変更
      p.changeDynamics(sphereUid,
                       -1,
                       spinningFriction=0.001,
                       rollingFriction=0.001,
                       linearDamping=0.0)

      # オブジェクトの関節を速度制御モードに設定
      for joint in range(p.getNumJoints(sphereUid)):
        p.setJointMotorControl2(sphereUid, joint, p.VELOCITY_CONTROL, targetVelocity=1, force=10)

# デバッグビジュアライザのレンダリングを有効化
p.configureDebugVisualizer(p.COV_ENABLE_RENDERING,1)

# 重力、タイムステップを定義
GRAVITY = -9.8
dt = 1e-3

# 重力を設定
p.setGravity(0, 0, GRAVITY)

# タイムステップを設定
p.setTimeStep(dt)

# 二足歩行ロボットのurdfファイルを読み込む
cubeStartPos = [0, 0, 1.13]
cubeStartOrientation = p.getQuaternionFromEuler([0., 0, 0])
botId = p.loadURDF("biped/biped2d_pybullet.urdf", cubeStartPos, cubeStartOrientation)

# 二足歩行ロボットの各ジョイントを位置制御モードに設定
jointFrictionForce = 1
for joint in range(p.getNumJoints(botId)):
  p.setJointMotorControl2(botId, joint, p.POSITION_CONTROL, force=jointFrictionForce)

# リアルタイムシミュレーションを有効化
p.setRealTimeSimulation(1)

# ループを繰り返す
while (1):
  time.sleep(1 / 240.)
