2
0

Delete article

Deleted articles cannot be recovered.

Draft of this article would be also deleted.

Are you sure you want to delete this article?

More than 5 years have passed since last update.

QuantXでのデバッグについて

Posted at

#QuantXではprintデバッグができない
QuantXでアルゴリズムを開発している途中で、なんかよくわからないエラーが出てきてデバッグしたい時があります。

def _mavg_signal(data):
        m25 = data["close_price_adj"].fillna(method='ffill').rolling(window=25, center=False).mean()
        m75 = data["close_price_adj"].fillna(method='ffill').rolling(window=75, center=False).mean()
        ratio = m25 / m75

        buy_sig = ratio[(ratio > 1.02) & (ratio < 1.05)]
        sell_sig = ratio[ratio < 0.95]
        return {
            "mavg_25:price": m25,
            "mavg_75:price": m75,
            #"mavg_ratio:ratio": ratio,
            "buy:sig": buy_sig,
            "sell:sig": sell_sig,
        }

例えば上記のような場面で、m25ってどんな構造になってるんだっけって思った時に、

print(m25)

としてみるわけですが、
スクリーンショット 2019-02-01 14.19.54.png
何言ってんのお前、と言われます。
そういう時は、

#TinyLoggingオブジェクトを使おう

ctx.logger.debug(m25)

上記のように書いてあげると、
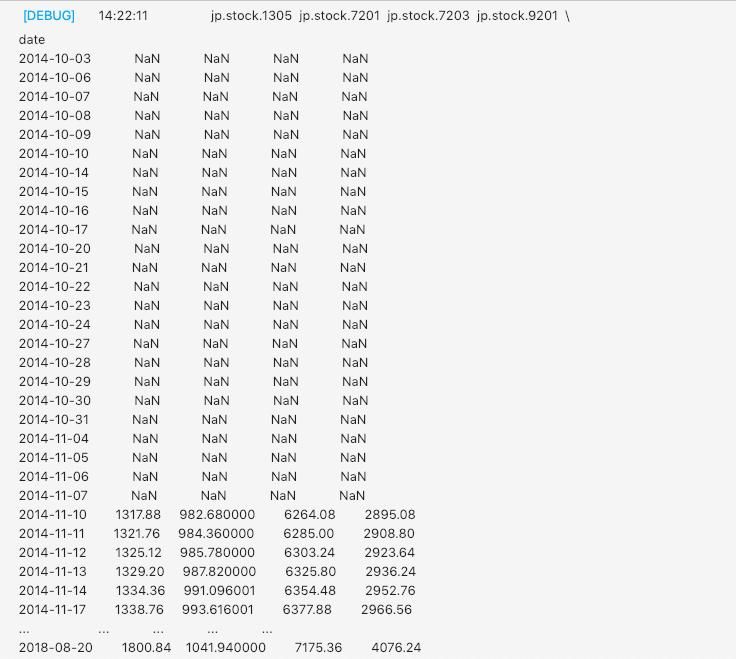
スクリーンショット 2019-02-01 14.22.23.png
ちゃんとm25の中身が返ってきます。

公式ドキュメントに書いてるし、テンプレートにも載っているので、さすがにお気付きの方も多いと思いますが、僕自身最初しばらくはこのやり方に気づけず、他のインターン生もあまり気づいていなかったので、Tipsとして残しておきます。

2
0
0

Register as a new user and use Qiita more conveniently

  1. You get articles that match your needs
  2. You can efficiently read back useful information
  3. You can use dark theme
What you can do with signing up
2
0

Delete article

Deleted articles cannot be recovered.

Draft of this article would be also deleted.

Are you sure you want to delete this article?