ゴール
- Go でマイコンボードや wasm の開発ができる TinyGo が何かわかる
- TinyGo で Arduino を動かせるようになる
背景
既存の Arduino 等のマイコンボード向けの開発言語は、C ないし C++ となっており、それ以外に選択肢はあまりありませんでした。
しかし近年、マイコンボード向けの開発言語も、徐々に選択肢が広がってきています。
今日紹介する TinyGo 以外でも、Rust や Micro Python 等もよく聞くようになっています。
そんな感じで組み込み分野も、プログラミング言語の選択肢が広がっているのはよいことだと思います。
今回は、個人的におすすめの、Go から 派生した TinyGo というプログラミング言語 を紹介します。
使用するマイコンボードは、比較的ポピュラーな Arduino を使用してみました。
TinyGo とは
TinyGo は Go をマイコン等や wasm 等の小さな環境で使用することができるプログラミング言語です。
TinyGo is a project to bring the Go programming language to
microcontrollers and modern web browsers by creating a new compiler based on LLVM.
tinygo.org
使用できるマイコンボード
記事執筆時点の ver0.17.0 では以下のボードに対応しています。
(記事も適宜メンテする予定)
今回取り上げる Arduino 以外だと、Adafruit の Feather シリーズや、
SeeedStudio の Xiao が比較的安価で性能が良いのでおすすめです。
Adafruit CLUE
Adafruit Circuit Playground Bluefruit
Adafruit Circuit Playground Express
Adafruit Feather M0
Adafruit Feather M4
Adafruit Feather STM32F405
Adafruit Feather nRF52840
Adafruit ItsyBitsy M0
Adafruit ItsyBitsy M4
Adafruit ItsyBitsy-nRF52840
Adafruit Matrix Portal M4
Adafruit Metro M4 Express AirLift
Adafruit PyBadge
Adafruit PyGamer
Adafruit PyPortal
Adafruit QtPy
Adafruit Trinket M0
Arduino MKR1000
Arduino Mega 2560
Arduino Nano
Arduino Nano33 IoT
Arduino Uno
Arduino Zero
BBC micro:bit
Bluepill
Digispark
Dragino LGT-92
ESP32 - Core board
ESP32 - mini32
ESP8266 - NodeMCU
ESP8266 - d1mini
Game Boy Advance
HiFive1 RevB
Nintendo Switch
Nucleo F103RB
PCA10031
PCA10040
PCA10056
Particle Argon
Particle Boron
Particle Xenon
PineTime
ProductivityOpen P1AM-100
STM32 Nucleo F722ZE
STM32 Nucleo L552ZE
STM32F4 Discovery
Seeed Seeeduino XIAO
Seeed Wio Terminal
Sipeed MAix Bit
Teensy 3.6
Teensy 4.0
X9 Pro Smartwatch
nRF52840-MDK
nRF52840-MDK-USB-Dongle
nice!nano v1.0
reel board
TinyGo のインストール
TinyGo
以下のウェブサイトへ、各 OS ごとのインストール方法が記載されています。
https://tinygo.org/getting-started/
こちらに従い、tinygo コマンドが実行できるようにしてください。
Arduino 用の書き込み環境のインストール avr-gcc
Arduino については、別途、マイコンボードへ書き込むためのソフトをインストールしてください。
https://blog.zakkemble.net/avr-gcc-builds/
Arduino の L チカ
Pin を指定するシンボルの定義
マイコンボードの各 Pin の定義は公式の以下のページに記載されています。
https://tinygo.org/microcontrollers/machine/arduino/
サンプルコード
内臓の LED を点滅させるコードは以下のように書けます。
package main

import (
	"machine"
	"time"
)

func main() {
	var led machine.Pin
	led = machine.LED
	led.Configure(machine.PinConfig{Mode: machine.PinOutput})

		for {
			println("running...")
			led.Low()
			time.Sleep(time.Millisecond * 300)
			led.High()
			time.Sleep(time.Millisecond * 300)
		}
	}
}
build して書き込む
以下のコマンドを実行してください。
その際にインストールした avr-gcc に Path が通っていないと怒られるので、
その場合は、path/to/avr-gcc-10.0.10-xxx/bin な場所へ Path を通してください。
--port の指定については、Windows の場合はデバイスマネージャーの「ポート(COM と LPT)」を見ればわかります。
コマンドの実行時、書き込み用のソフト (avrdude) の実行時メッセージが沢山出力されますが、
成功時は以下のように出力されます。
(たまに書き込みが 25% 程度でロックされ成功しないことがありますが、大抵は接続する USB ポートを変更すれば直ります)
$ tinygo flash --target arduino --port COM3

avrdude: AVR device initialized and ready to accept instructions

Reading | ################################################## | 100% -0.00s

avrdude: Device signature = 0x1e950f (probably m328p)
avrdude: NOTE: "flash" memory has been specified, an erase cycle will be performed
         To disable this feature, specify the -D option.
         avrdude: erasing chip
         avrdude: reading input file "C:\Users\aki01\AppData\Local\Temp\tinygo190349755\main.hex"
         avrdude: writing flash (774 bytes):

         Writing | ################################################## | 100% 0.16s

         avrdude: 774 bytes of flash written
         avrdude: verifying flash memory against C:\Users\aki01\AppData\Local\Temp\tinygo190349755\main.hex:
         avrdude: load data flash data from input file C:\Users\aki01\AppData\Local\Temp\tinygo190349755\main.hex:
         avrdude: input file C:\Users\aki01\AppData\Local\Temp\tinygo190349755\main.hex contains 774 bytes
         avrdude: reading on-chip flash data:

         Reading | ################################################## | 100% 0.14s

         avrdude: verifying ...
         avrdude: 774 bytes of flash verified

         avrdude: safemode: Fuses OK (E:00, H:00, L:00)

         avrdude done.  Thank you.
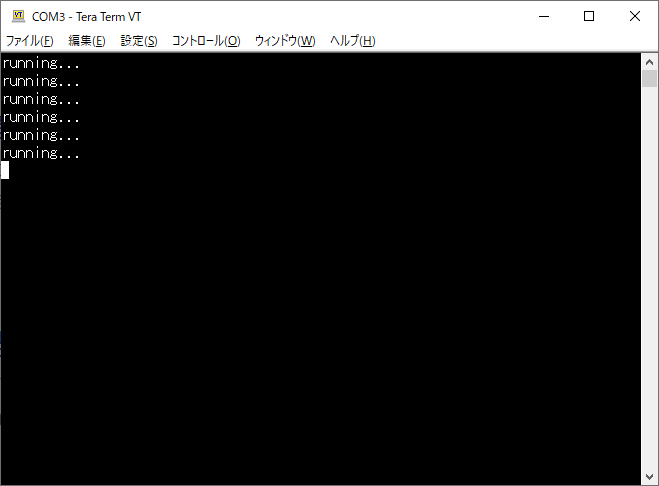
print (標準出力) の出力先について
TinyGo は、println や等の出力先が、シリアルポートとなっています。
よって、TeraTerm 等で接続することで以下のようにプリントデバッグをすることもできます。
(ちなみに fmt.Printf (フォーマット付き出力)は、本家の Arduino 環境同様、Arduino は対応していませんが、ARM coretex 系の samd21/51 等のプロセッサを積んだものは対応しています → Adafruit の Feather シリーズや Xiao 等)
まとめ
- TinyGo を使うと、普段 Go を書いている感覚でマイコンボードの開発ができる
- 様々なボードに対応していて、ポピュラーな Arduino にも対応している
- build ~書き込みはコマンドひとつでできるので簡単