reduxにおいてreducerのテストは重要性が高く、誰もがテストをしていると思いますが、今回はその方法を見ていくことにします。
最近ではテストはほとんど Jest が使われているので、Jest を前提としますが、他のテストフレームワークを使っている場合は適宜読み替えてください。
準備
とりあえず簡単な redux のコードを用意します。現環境で型がない環境であることは少ないでしょうから、flow を使います。TypeScript を使っているのであれば適宜読み替えてください。
// @flow
type Exact<T> = T & $Shape<T>

type State = { count: number, text: string }
type Action =
  | { type: 'inc' }
  | { type: 'dec' }
  | { type: 'setText', payload: string }

export const inc = (): Action => ({ type: 'inc' })
export const dec = (): Action => ({ type: 'dec' })
export const setText = (payload: string): Action => ({
  type: 'setText',
  payload
})

export const actions = { inc, dec, setText }

export const initialState = { count: 0, text: '' }

export default (state: State = initialState, action: Action): Exact<State> => {
  switch (action.type) {
    case 'inc':
      return { ...state, count: state.count + 1 }
    case 'dec':
      return { ...state, count: state.count - 1 }
    case 'setText':
      return { ...state, text: action.payload }
    default:
      return state
  }
}
toEqual
まずは、toEqualを使うテストを考えてみます。
how-to-test-reducers/toEqual.test.js at master · akameco/how-to-test-reducers
// @flow
import reducer, { initialState } from '.'

test('init', () => {
  // $FlowFixMe
  expect(reducer(undefined, { type: '@@INIT' })).toEqual(initialState)
})

test('inc', () => {
  expect(reducer(initialState, { type: 'inc' })).toEqual({ count: 1, text: '' })
})

test('dec', () => {
  expect(reducer(initialState, { type: 'dec' })).toEqual({
    count: -1,
    text: ''
  })
})

test('setText', () => {
  expect(reducer(initialState, { type: 'setText', payload: 'test' })).toEqual({
    count: 0,
    text: 'test'
  })
})
まあ、普通ですね。しかし、問題があります。新しく State にプロパティが増えたらどうでしょう?
export const initialState = { count: 0, text: '', hoge: '', fuga: '' }
なんとtoEqualの中身を全て変更する必要があります。これは reducer で処理する Action が一つ増えるごとに、全てのテストを更新する必要があることを意味します。まるで悪夢です。これはテストする対象が絞れていないから起きます。
次のテストを見てみましょう。
toMatchObject
toMatchObjectはオブジェクトの部分的な一致を確認するテストを書くことが出来ます。
// @flow
import reducer, { initialState } from '.'

test('init', () => {
  // $FlowFixMe
  expect(reducer(undefined, { type: '@@INIT' })).toEqual(initialState)
})

test('inc', () => {
  expect(reducer(initialState, { type: 'inc' })).toMatchObject({ count: 1 })
})

test('dec', () => {
  expect(reducer(initialState, { type: 'dec' })).toMatchObject({ count: -1 })
})

test('setText', () => {
  expect(
    reducer(initialState, { type: 'setText', payload: 'test' })
  ).toMatchObject({
    text: 'test'
  })
})
Cool!これで新しいテストを追加しても、他のテストを変更する必要がなくなりました。
しかし、まだ、問題があります。incアクションで誤って textプロパティを更新してしまったとしましょう。
    case 'inc':
-      return { ...state, count: state.count + 1 }
+      return { ...state, count: state.count + 1, text: 'inc' }
テストは落ちません。なぜならテストではcountの変化しか見ていないからです。reducer のテストでは、それぞれのアクションに対するリグレッションをテストする必要があるのがわかります。
次のテストにいきましょう。
toMatchSnapshot
スナップショットテスティング!これは革命です。詳しくは、以下の Jest の記事を読むといいでしょう。
// @flow
import reducer, { initialState } from '.'

test('init', () => {
  // $FlowFixMe
  expect(reducer(undefined, { type: '@@INIT' })).toMatchSnapshot()
})

test('inc', () => {
  expect(reducer(initialState, { type: 'inc' })).toMatchSnapshot()
})

test('dec', () => {
  expect(reducer(initialState, { type: 'dec' })).toMatchSnapshot()
})

test('setText', () => {
  expect(
    reducer(initialState, { type: 'setText', payload: 'test' })
  ).toMatchSnapshot()
})
// Jest Snapshot v1, https://goo.gl/fbAQLP

exports[`dec 1`] = `
Object {
  "count": -1,
  "text": "",
}
`;

exports[`inc 1`] = `
Object {
  "count": 1,
  "text": "",
}
`;

exports[`init 1`] = `
Object {
  "count": 0,
  "text": "",
}
`;

exports[`setText 1`] = `
Object {
  "count": 0,
  "text": "test",
}
`;
最高です。テストコードで値を考えることはなくなりました。アクションに対するリグレッションは完全です。しかし、もう一度、最初のtoEqualのテストを振り返ってみましょう。そうです、テスト対象が絞れていない問題が起きています。出力されたスナップショットを見ても、どのアクションによって、どこが変更されたかを判断することが難しいことがわかります。
次のテストを見てみましょう。
snapshot-diff
snapshot-diffという素晴らしいライブラリがあります。これは、文字通り差分をスナップショットするライブラリです。
jest-community/snapshot-diff: Diffing snapshot utility for Jest
// @flow
import snapshotDiff from 'snapshot-diff'
import reducer, { initialState } from '.'

test('init', () => {
  expect(
    // $FlowFixMe
    snapshotDiff(initialState, reducer(undefined, { type: '@@INIT' }))
  ).toMatchSnapshot()
})

test('inc', () => {
  expect(
    snapshotDiff(initialState, reducer(initialState, { type: 'inc' }))
  ).toMatchSnapshot()
})

test('dec', () => {
  expect(
    snapshotDiff(initialState, reducer(initialState, { type: 'dec' }))
  ).toMatchSnapshot()
})

test('setText', () => {
  expect(
    snapshotDiff(
      initialState,
      reducer(initialState, { type: 'setText', payload: 'test' })
    )
  ).toMatchSnapshot()
})
// Jest Snapshot v1, https://goo.gl/fbAQLP

exports[`dec 1`] = `
"Snapshot Diff:
- First value
+ Second value

  Object {
-   \\"count\\": 0,
+   \\"count\\": -1,
    \\"text\\": \\"\\",
  }"
`;

exports[`inc 1`] = `
"Snapshot Diff:
- First value
+ Second value

  Object {
-   \\"count\\": 0,
+   \\"count\\": 1,
    \\"text\\": \\"\\",
  }"
`;

exports[`init 1`] = `
"Snapshot Diff:
Compared values have no visual difference."
`;

exports[`setText 1`] = `
"Snapshot Diff:
- First value
+ Second value

  Object {
    \\"count\\": 0,
-   \\"text\\": \\"\\",
+   \\"text\\": \\"test\\",
  }"
`;
Great!どこが変更されたかスナップショットを見るだけで一目でわかります。やっと理想に辿り着いたように見えます。
しかし、テストコードを見てください。なんて冗長なんでしょう。s2s 環境で自動生成していな限り、このような冗長性はコーディングを遅くするので、避けるべきです。
次のテストを見てみましょう。
reducer-tester
reducerのテストのためのライブラリを使います。
yarn add --dev reducer-tester
reducer-tester: Utilities for testing redux reducers
// @flow
import reducerTester from 'reducer-tester'
import reducer, { initialState } from '.'

reducerTester({
  reducer,
  state: initialState,
  tests: [
    { type: 'inc' },
    { type: 'dec' },
    { type: 'setText', payload: 'test' }
  ]
})
// Jest Snapshot v1, https://goo.gl/fbAQLP

exports[`dec 1`] = `
Snapshot Diff:
- Before
+ After

  Object {
-   "count": 0,
+   "count": -1,
    "text": "",
  }
`;

exports[`handle initial state 1`] = `
Snapshot Diff:
Compared values have no visual difference.
`;

exports[`inc 1`] = `
Snapshot Diff:
- Before
+ After

  Object {
-   "count": 0,
+   "count": 1,
    "text": "",
  }
`;

exports[`setText 1`] = `
Snapshot Diff:
- Before
+ After

  Object {
    "count": 0,
-   "text": "",
+   "text": "test",
  }
`;
コードが非常に小さくなりました!新しいテストを書くときは、testsプロパティの配列にアクションを追加するだけです。
そして、出力はsnapshot-diffとほぼ変わりません!
もちろん、配列からアイテムが 1 つ減るだとかをテストしたい場合はreducerTesterの state を変更する必要があります。詳しくは、readme を読んでください。 akameco/reducer-tester: Utilities for testing redux reducers
これで十分なように思えますが、しかし、テスト対象であるコードを思い出してください。我々はすでに型付けを行っていました。なぜ、いちいちtype: ...なんてオブジェクトをテストに書く必要があるでしょう?
reducer-tester with actionCreator
型により保証されているが故に reducer のテスト内で毎回{type: ...}と書かずともActionCreatorを直接呼び出すだけです。
// @flow
import reducerTester from 'reducer-tester'
import reducer, { initialState, actions } from '.'

reducerTester({
  reducer,
  state: initialState,
  tests: [actions.inc(), actions.dec(), actions.setText('test')]
})
やりました!もう補完に任せるまま書くだけです。
とゆうより、reduxの公式サンプルでは、同じようにテスト内でActionCreatorを実行しているのであえてそれに逆らう必要もないですね。
Tips
Atom を使っている場合、snapshot をシンタックスを diff にすると変更がカラーでわかるので便利です。
file-typesとlanguage-diffをインストールし、config.csonに以下を追記しましょう。
  "file-types":
    "\\.js\\.snap$": "source.diff"
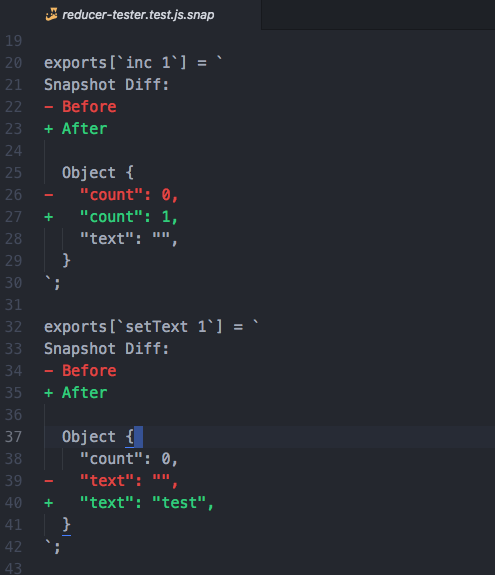
美しい!あとは色の付いてるところをさっと確認するだけです。
まとめ
reducer のテスト方法を見てきました。結論として、 reducer のテストは、以下の 2 つを満たせればいいとわかります。
- どこが変更されたかわかる
- 対応するアクションに対するリグレッション
これらに対する解答として、スナップショットのdiffを使うことで上記の条件を満たし、さらにreducer-testerを導入することで、冗長性を廃し、簡潔に記述できるようになりました。
もしよりよいテスト手法があれば、コメントや Twitter でメンション等で教えていただけるとうれしいです。
akameco/how-to-test-reducers
akameco/reducer-tester: Utilities for testing redux reducers
Utilities for testing redux reducers https://t.co/TYd5yiZIbx #redux pic.twitter.com/ppjgRlMqgZ
— 𝔸𝕂𝔸𝕄𝔼@新卒.js (@akameco) March 24, 2018
reducerのテストは、どこが変更されたかと対応するアクションに対してのリグレッションを防げればいいので、結論としてsnapshotのdiffという結論。
— 𝔸𝕂𝔸𝕄𝔼@新卒.js (@akameco) March 24, 2018
- スナップショットを見ればどこが変更されたらひと目
-スナップショットなので変更が楽
- 新しいアクションは配列に一つ足すだけ