Auth0のログをBigQueryを使って永続化したかった - Qiita
こちらの記事でも書かせていただいたとおり、 Auth0 のログ保有期間 Enterprise でも30日と、比較的保有期間が短いことがネックになっていました。私が今担当しているプロジェクトでは Firebase を利用しているため、
ログを定期的に API を使って取得し、 Storage にエクスポートしています。
ふとダッシュボードを見ると、Logs の中に Streams という機能が追加されており、見ると AWS の EventBridge と Webhook が使えそうなので、早速使ってみました。
Log Streams
Log Streams - Auth0
HTTP Event Log Streams - Auth0
このドキュメントを読むとおり、イベントが起きたタイミングで指定の Webhook をコールしてくれるので、以前書いた記事のような onRun() ではなく、使い慣れた onRequest() が利用できるようになります。ログの内容は body に入ってくる仕様です。
以前の記事にも書きましたが、 Stackdriver 経由で Storage にエクスポートしているので、今回は Stackdriver にぶち込む処理をこんな感じで書いてみました。
import { Logging } from '@google-cloud/logging';

interface firebaseEnvConfig {
  databaseURL: string;
  storageBucket: string;
  projectId: string;
}

const firebaseConfigRaw = process.env.FIREBASE_CONFIG as string;
const firebaseConfig: firebaseEnvConfig = JSON.parse(firebaseConfigRaw);

const logToStackDriverLogging = async (payload: any) => {
  const logging = new Logging({
    projectId: firebaseConfig.gcloudProject,
  });

  // NOTE: この辺はお好みで
  const log = logging.log('auth0');
  const metadata = {
    resource: {
      type: 'global',
    },
  };
  const entry = log.entry(metadata, payload);
  await log.write(entry);
};

export default logToStackDriverLogging;
import * as functions from 'firebase-functions';
import * as express from 'express';
import * as bodyParser from 'body-parser';
import logToStackdriverLogging from '../utils/logToStackDriverLogging';

const app = express();
app.use(bodyParser.json());

app.post('/auth0', async (req, res) => {
  res.setHeader('Content-Type', 'text/plain');

  const authorization = req.get('Authorization');
  if (!authorization) {
    console.error('No authorization header');
    res.status(400).json({ success: false });
    return;
  }

  // NOTE: ここはよしなに。
  if (authorization !== functions.config().auth0.token) {
    console.error('Authorization Token missmatch');
    res.status(401).json({ success: false });
  }

  const { body } = req;
  await logToStackdriverLogging(JSON.stringify(body));

  res.status(201).json({ success: true });
});

export const logStream = functions.https.onRequest(app);
Cloud Functions にデプロイしたら、あとは Auth0 のダッシュボードから、 Logs → Streams とたどり、 Custom Webhook の設定をします。
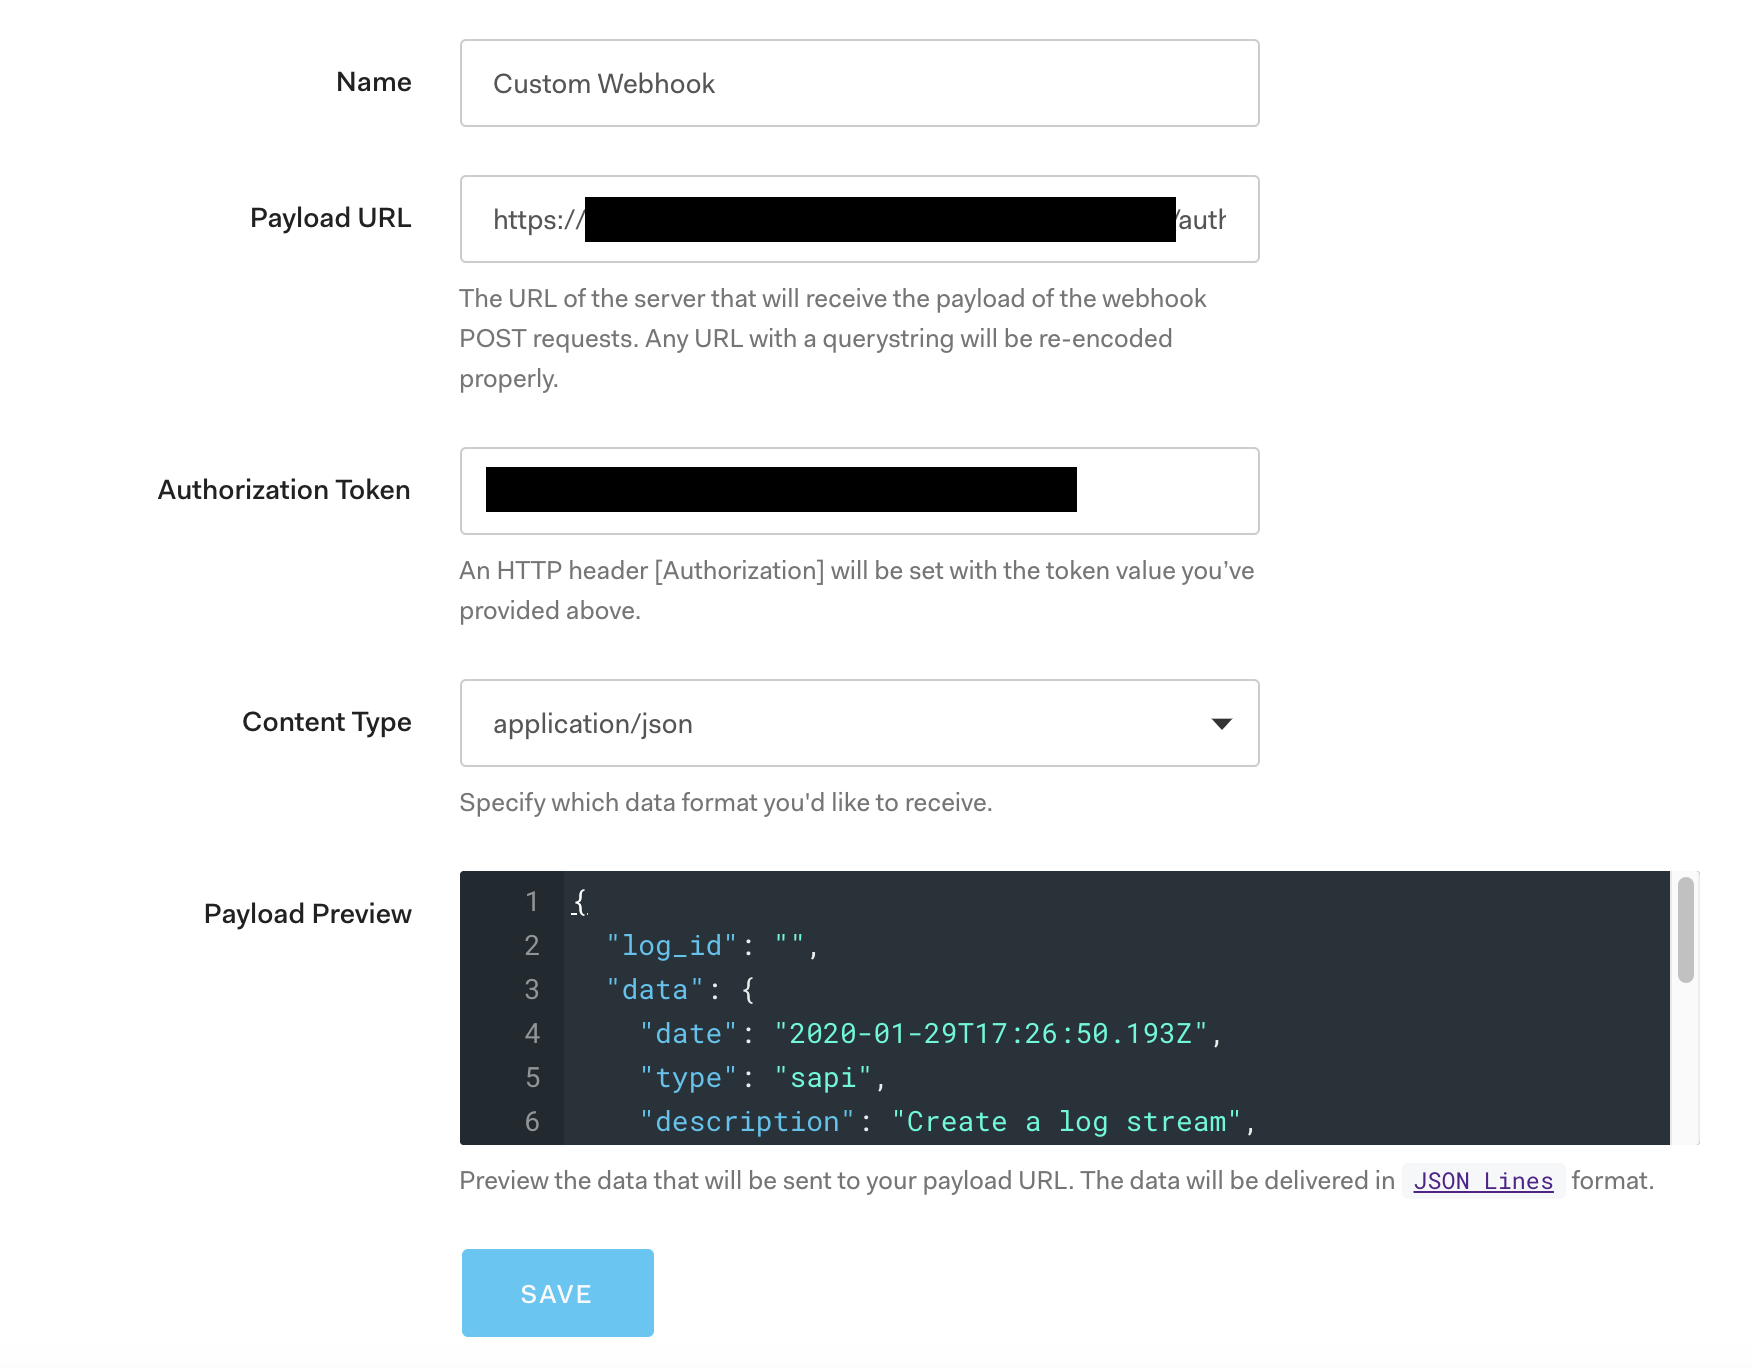
こんな感じにて Save 。
あとはログインしたりログアウトしたりします。

いけましたね![]() あとは Stackdriver → Storage のエクスポートは既に設定済みなので今回は説明省略しますが、ちゃんとエクスポートされていればOKです。
あとは Stackdriver → Storage のエクスポートは既に設定済みなので今回は説明省略しますが、ちゃんとエクスポートされていればOKです。
注意点
受け取る側の Webhook がエラーになった場合、3回は Auth0 はイベントを送ってきます。こちら側でrerunする処理を考えなくていいのでとても親切ですね!逆に言うと、エラーを吐いちゃうエンドポイントを何度も叩くことになりかねないので注意してください。
If your server is unable to receive the event, we will retry up to three times to deliver the event
それと、「リアルタイムエクスポート」って書きましたが、嘘です。たまに遅延します。多分これはどのサービスでも発生する可能性がありますが、ベストエフォートです。
Auth0 does not provide real-time logs for your tenant. While we do our best to index events as they arrive, you may see some delays.
それでは!