1.はじめに
@KzhtTkhsさんの「単眼デプス推定を用いて距離を計測するレシピ」がとても素晴らしかったので広めたいという思いと、自主学習結果の覚書です。
以降、この「レシピ」のことを本記事では「聖典」と位置付けます。
聖典では、Google colab環境で推論を実行したのち、距離測定をローカルで実行するコードを公開してくれています。
エッジAI好きとしてはぜひRaspberry Pi上で実行したくなったのでトライしてみました。
聖典たる単眼デプス推定を用いて距離を計測するレシピを未了の方は、修了してからご覧ください。
わーい😀 @KzhtTkhs さんありがとうございますmm
— AIRPOCKET (@AirpocketRobot) January 11, 2022
(ローカル環境づくりでコけたので後半はコードを読んだだけですが(;^_^A https://t.co/uON0VHIN9e pic.twitter.com/x2UHDXZd11
2.環境
ハードはRaspberry Pi 4B、OSはRaspberry Pi OS Bullseye 64bit版
$ uname -a
Linux raspberrypi 5.10.63-v8+ #1488 SMP PREEMPT Thu Nov 18 16:16:16 GMT 2021 aarch64 GNU/Linux
$ lsb_release -a
No LSB modules are available.
Distributor ID:	Debian
Description:	Debian GNU/Linux 11 (bullseye)
Release:	11
Codename:	bullseye
tfliteはV4.5.5、OpenCVはV2.7.0です。
$ python
Python 3.9.2 (default, Feb 28 2021, 17:03:44)
[GCC 10.2.1 20210110] on linux
Type "help", "copyright", "credits" or "license" for more information.
>>> import cv2
>>> import tflite_runtime as tf
>>> cv.__version__
Traceback (most recent call last):
  File "<stdin>", line 1, in <module>
NameError: name 'cv' is not defined
>>> cv2.__version__
'4.5.5'
>>> tf.__version__
'2.7.0'
>>>
matplotlibも入れておきます。
現環境ではVer3.5.1が入りました。
$ pip3 install matplotlib
Raspberry Pi OS 最新版(Bullseye)にTFlite環境を構築する方法は32bit版でも64bit版でも同じです。
過去記事に環境構築方法も紹介しています。
32bit版環境:Bullseyeで緊急避難的なTFlite環境
64bit版環境:Raspberry Pi OS Bullseye 64bitでTFLite環境構築
使用するモデルは、聖典にも使われている由緒正しきMiDasV2のTFliteモデルです。
https://tfhub.dev/intel/lite-model/midas/v2_1_small/1/lite/1
のTFLite (v1, lite)モデルをダウンロードして作業フォルダに保存します。
モデルのファイル名は「lite-model_midas_v2_1_small_1_lite_1.tflite」です。
サンプル画像(sample.jpg)も同じフォルダに保存しましょう。
3.とりあえずの動作テスト
では、聖典にのっとって、サンプル画像の表示まで進めます。
まずは保存したサンプル画像を取り込み、表示してみます。
import cv2
import matplotlib.pyplot as plt

image = cv2.imread('sample.jpg')
image = cv2.cvtColor(image, cv2.COLOR_BGR2RGB)
plt.imshow(image)
plt.show()
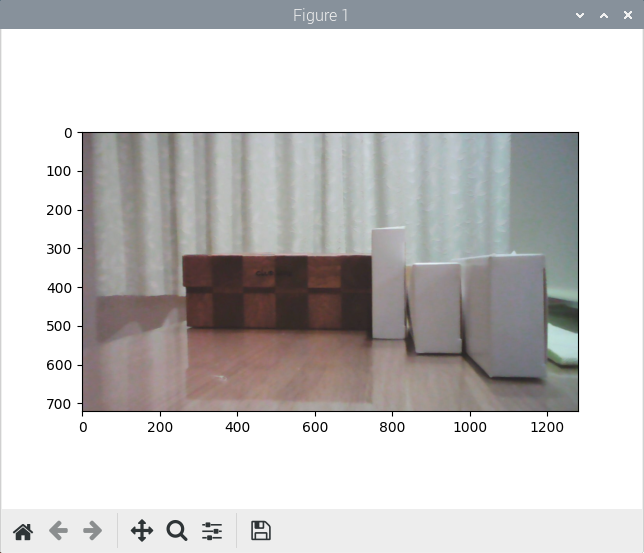
Figure 1というウィンドウに、サンプル画像が表示されました。
4.深度推定してみる
聖典のコードとMiDaS V2のデモコード両方を参考にして深度推定してみました。
まずはベタ書きのコードで処理の流れを確認します。
import cv2
import numpy as np
import matplotlib.pyplot as plt
from tflite_runtime.interpreter import Interpreter

interpreter = Interpreter("lite-model_midas_v2_1_small_1_lite_1.tflite")
interpreter.allocate_tensors()

input_details = interpreter.get_input_details()
input_shape = input_details[0]['shape']
inputHeight, inputWidth, channels, = input_shape[1], input_shape[2], input_shape[3]

output_details = interpreter.get_output_details()
output_shape = output_details[0]['shape']
outputHeight, outputWidth = output_shape[1], output_shape[2]

cv2.namedWindow("Depth Image")
image = cv2.imread('sample.jpg')

img = cv2.cvtColor(image, cv2.COLOR_BGR2RGB)

# Input values should be from -1 to 1 with a size of 128 x 128 pixels for the fornt model
# and 256 x 256 pixels for the back model
img_input = cv2.resize(img, (inputWidth,inputHeight),interpolation = cv2.INTER_CUBIC).astype(np.float32)

# Scale input pixel values to -1 to 1
mean=[0.485, 0.456, 0.406]
std=[0.229, 0.224, 0.225]
img_input = ((img_input/ 255.0 - mean) / std).astype(np.float32)
img_input = img_input[np.newaxis,:,:,:]

# Peform inference
interpreter.set_tensor(input_details[0]['index'], img_input)
interpreter.invoke()
output = interpreter.get_tensor(output_details[0]['index'])
output = output.reshape(outputHeight, outputWidth)

# Normalize estimated depth to have values between 0 and 255
depth_min = output.min()
depth_max = output.max()
normalizedDisparity = (255 * (output - depth_min) / (depth_max - depth_min)).astype("uint8")

# Resize disparity map to the sam size as the image inference
estimatedDepth = cv2.resize(normalizedDisparity, (img.shape[1], img.shape[0]), interpolation=cv2.INTER_CUBIC)
colorDepth = cv2.applyColorMap(estimatedDepth, cv2.COLORMAP_MAGMA)

cv2.imshow("Depth Image",colorDepth)

# cv2.waitKey(500)
cv2.waitKey(0)
cv2.destroyAllWindows()
関数は全部ばらしてるので見やすいような見にくいような。
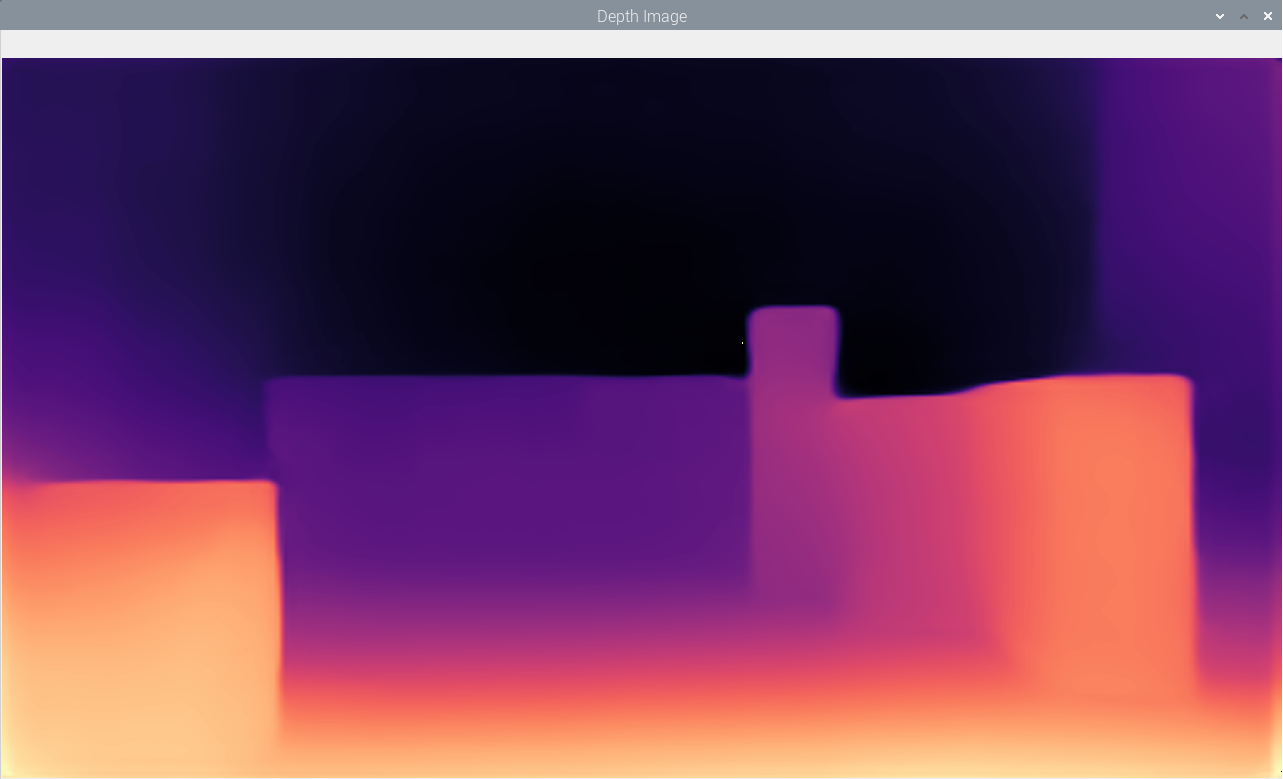
うまく動くとこんな深度画像が得られます。

5.距離測定する
既知の2点の距離を使ってキャリブレーションして、任意の2点の距離測定をするところまでです。
def linear_approximation(x, y)で最小二乗法でリニア近似して・・・という聖典の教え通りの内容です。
import cv2
import numpy as np
import matplotlib.pyplot as plt
from tflite_runtime.interpreter import Interpreter

def linear_approximation(x, y):
    n = len(x)
    a = ((np.dot(x, y) - y.sum() * x.sum() / n) /
         ((x**2).sum() - x.sum()**2 / n))
    b = (y.sum() - a * x.sum()) / n
    return a, b

interpreter = Interpreter("lite-model_midas_v2_1_small_1_lite_1.tflite")
interpreter.allocate_tensors()

input_details = interpreter.get_input_details()
input_shape = input_details[0]['shape']
inputHeight, inputWidth, channels, = input_shape[1], input_shape[2], input_shape[3]

output_details = interpreter.get_output_details()
output_shape = output_details[0]['shape']
outputHeight, outputWidth = output_shape[1], output_shape[2]

cv2.namedWindow("Depth Image")
image = cv2.imread('sample.jpg')

img = cv2.cvtColor(image, cv2.COLOR_BGR2RGB)

# Input values should be from -1 to 1 with a size of 128 x 128 pixels for the fornt model
# and 256 x 256 pixels for the back model
img_input = cv2.resize(img, (inputWidth,inputHeight),interpolation = cv2.INTER_CUBIC).astype(np.float32)

# Scale input pixel values to -1 to 1
mean=[0.485, 0.456, 0.406]
std=[0.229, 0.224, 0.225]
img_input = ((img_input/ 255.0 - mean) / std).astype(np.float32)
img_input = img_input[np.newaxis,:,:,:]

# Peform inference
interpreter.set_tensor(input_details[0]['index'], img_input)
interpreter.invoke()
output = interpreter.get_tensor(output_details[0]['index'])
output = output.reshape(outputHeight, outputWidth)

# Normalize estimated depth to have values between 0 and 255
depth_min = output.min()
depth_max = output.max()
normalizedDisparity = (255 * (output - depth_min) / (depth_max - depth_min))

# Resize disparity map to the sam size as the image inference
estimatedDepth = cv2.resize(normalizedDisparity, (img.shape[1], img.shape[0]), interpolation=cv2.INTER_CUBIC)
colorDepth = cv2.applyColorMap(estimatedDepth.astype("uint8") ,cv2.COLORMAP_MAGMA)

cv2.imshow("Depth Image",colorDepth)

print("25cm ->", estimatedDepth[230][460])
print("30cm ->", estimatedDepth[230][400])

relative_value_list = [estimatedDepth[230][460], estimatedDepth[230][400]]
absolute_value_list = [25, 30]

a, b = linear_approximation(
    np.array(relative_value_list),
    np.array(absolute_value_list),
)
print("a =", a, "b =", b)

absolute_value = (estimatedDepth[230][330] * a) + b
print("point [230][330] distance =", absolute_value)

absolute_value = (estimatedDepth[230][540] * a) + b
print("point [230][330] distance =", absolute_value)

# cv2.waitKey(500)
cv2.waitKey(0)
cv2.destroyAllWindows()
結果は下図の通り40.3cmと19.6cmというなかなか良い値です。聖典と数値が異なるのは、聖典よりも軽いモデルを使用していることと、正規化の方法も若干異なるためです。
今回はここまでとして、次回はリアルタイム計測アプリをRPiで動かしてみます。


