はじめに
フレームワークSpring Bootのフォームやデータベース接続について
メモしようと思い投稿しました。
環境構成
・STS
・Spring Boot
・Maven
・Thymeleaf
・SQLite
フォームによるリクエストパラメータの受け渡し
実装内容
・入力された名前に挨拶。
準備
STSにてSpring スターター・プロジェクトを作成
ポート番号設定
application.properties
server.port=8090
pom.xmlファイルのdependencies内にThymeleafのライブラリを追加
pom.xml
<dependency>
	<groupId>org.springframework.boot</groupId>
	<artifactId>spring-boot-starter-thymeleaf</artifactId>
</dependency>
HTML共通部品
<!DOCTYPE html>
<html xmlns:th="http://www.thymeleaf.org">
<head>
<meta http-equiv="Content-Type" content="text/html; charset=UTF-8">
<title></title>
</head>
<body>

</body>
</html>
ソースコード
画面遷移、フォームからのリクエストパラメータ受け渡しを管理
Controller
package com.example.demo.controller;

import org.springframework.stereotype.Controller;
import org.springframework.web.bind.annotation.RequestMapping;
import org.springframework.web.bind.annotation.RequestMethod;
import org.springframework.web.bind.annotation.RequestParam;
import org.springframework.web.servlet.ModelAndView;

@Controller
public class demoController {

	//input.html呼び出し
	@RequestMapping(value="/", method=RequestMethod.GET)
	public ModelAndView input(ModelAndView mav) {
		mav.setViewName("input");
		return mav;
	}

	//リクエストパラメータ取得。メッセージを保管してoutput.htmlへ遷移
	@RequestMapping(value="/output", method=RequestMethod.POST)
	public ModelAndView output(@RequestParam("name")String name, ModelAndView mav) {
		mav.setViewName("output");
		mav.addObject("msg","ようこそ" + name + "さん。");
		return mav;
	}
}
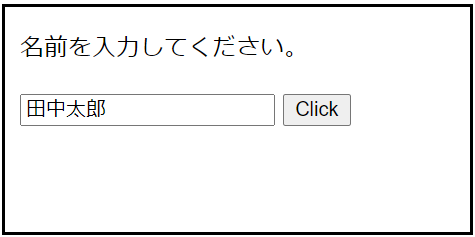
フォームを用いた入力画面。名前を入力
input.html
<body>
	<p>名前を入力してください。</p>
	<form method="post" action="/output">
		<input type="text" name="name">
		<input type="submit" value="Click">
	</form>
</body>
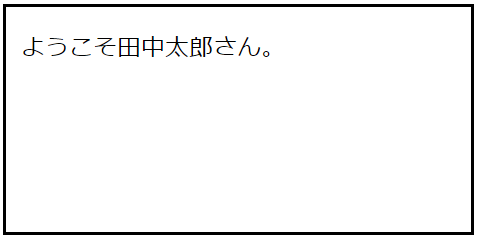
input画面で入力された内容を表示する画面
output.html
<body>
	<p th:text="${msg}"></p>
</body>
名前を入力してControllerで受け渡して、そのまま表示する単純な入力フォーム
次はデータベースで入力内容を管理する。
リポジトリを用いたデータベースへ保存と検索
実装内容
・リポジトリを用いてDB内のnamedataテーブルを全件取得
・入力された名前、年齢をデータベースに保存
・2画面を往復する。
準備
データベースファイルパス、ドライバー等の環境設定
application.properties
server.port=8090
spring.datasource.url=jdbc:sqlite:C:/データベースファイルパス/demo.db
spring.datasource.driver-class-name = org.sqlite.JDBC
spring.jpa.properties.hibernate.dialect=org.hibernate.dialect.SQLiteDialect
spring.jpa.hibernate.ddl-auto=update
pom.xmlファイルにデータベース接続の為に必要なライブラリの追加
※SQLite仕様の為JitPack、github(sqlite-dialect)も追加。
repositories
<repositories>
	<repository>
		<id>jitpack.io</id>
		<url>https://jitpack.io</url>
	</repository>
</repositories>

<dependencies>
	<dependency>
		<groupId>org.springframework.boot</groupId>
		<artifactId>spring-boot-starter-web</artifactId>
	</dependency>
	<dependency>
		<groupId>org.springframework.boot</groupId>
		<artifactId>spring-boot-starter-test</artifactId>
		<scope>test</scope>
		<exclusions>
			<exclusion>
				<groupId>org.junit.vintage</groupId>
				<artifactId>junit-vintage-engine</artifactId>
			</exclusion>
		</exclusions>
	</dependency>
	<dependency>
		<groupId>org.springframework.boot</groupId>
		<artifactId>spring-boot-starter-thymeleaf</artifactId>
	</dependency>
	<dependency>
		<groupId>org.springframework.boot</groupId>
		<artifactId>spring-boot-starter-data-jpa</artifactId>
	</dependency>
	<dependency>
		<groupId>org.xerial</groupId>
		<artifactId>sqlite-jdbc</artifactId>
	</dependency>
	<dependency>
		<groupId>com.github.gwenn</groupId>
		<artifactId>sqlite-dialect</artifactId>
		<version>master</version>
	</dependency>
</dependencies>
ソースコード
リポジトリとは、DBへのCRUDを自動で実装してくれるインターフェース
repository
package com.example.demo.repositories;

import org.springframework.data.jpa.repository.JpaRepository;
import org.springframework.stereotype.Repository;

import com.example.demo.entity.NameData;

@Repository
public interface NameDataRepository extends JpaRepository<NameData, Long> {

}
DBのテーブルからIDと名前、年齢を取得してくるための実体
entity
package com.example.demo.entity;

import javax.persistence.Column;
import javax.persistence.Entity;
import javax.persistence.GeneratedValue;
import javax.persistence.GenerationType;
import javax.persistence.Id;
import javax.persistence.Table;

@Entity
@Table(name="namedata")
public class NameData {

	@Id
	@GeneratedValue(strategy = GenerationType.AUTO)
	@Column
	private Long id;

	@Column(length = 50, nullable = false)
	private String name;

	@Column(nullable = true)
	private Integer age;

	public Long getId() {
		return id;
	}

	public void setId(Long id) {
		this.id = id;
	}

	public String getName() {
		return name;
	}

	public void setName(String name) {
		this.name = name;
	}

	public Integer getAge() {
		return age;
	}

	public void setAge(Integer age) {
		this.age = age;
	}
}
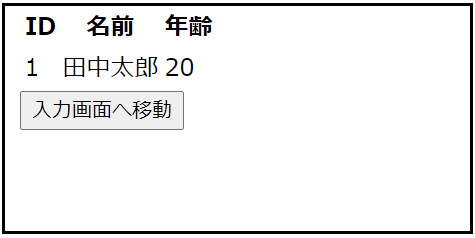
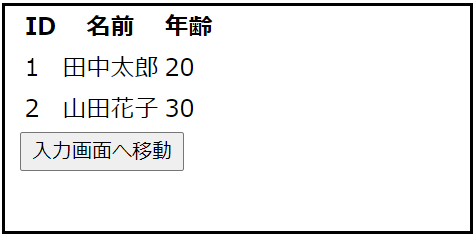
上記で作成したリポジトリとエンティティを用いてIDと名前、年齢を取得しlist.htmlへ遷移
また、ボタンによる入力画面へ遷移
Controller1
package com.example.demo.controller;

import org.springframework.beans.factory.annotation.Autowired;
import org.springframework.stereotype.Controller;
import org.springframework.web.bind.annotation.RequestMapping;
import org.springframework.web.bind.annotation.RequestMethod;
import org.springframework.web.servlet.ModelAndView;

import com.example.demo.entity.NameData;
import com.example.demo.repositories.NameDataRepository;

@Controller
public class DemoController1 {

	@Autowired
	NameDataRepository repository;

	//データベースから「NameData」を取得しlist.htmlを呼び出す
	@RequestMapping(value="/", method=RequestMethod.GET)
	public ModelAndView list(ModelAndView mav) {
		mav.setViewName("list");
		Iterable<NameData> list = repository.findAll();
		mav.addObject("datalist", list);
		return mav;
	}

	//input.htmlへ遷移
	@RequestMapping(value="/input", method=RequestMethod.POST)
	public String input() {
		return "redirect:/input";
	}
}
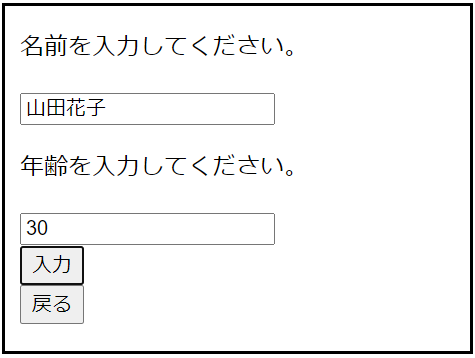
入力画面へ遷移
入力された値のDB保存、list.htmlへ遷移
Controller2
package com.example.demo.controller;

import org.springframework.beans.factory.annotation.Autowired;
import org.springframework.stereotype.Controller;
import org.springframework.web.bind.annotation.ModelAttribute;
import org.springframework.web.bind.annotation.RequestMapping;
import org.springframework.web.bind.annotation.RequestMethod;
import org.springframework.web.servlet.ModelAndView;

import com.example.demo.entity.NameData;
import com.example.demo.repositories.NameDataRepository;

@Controller
public class DemoController2 {

	@Autowired
	NameDataRepository repository;

	//input.html呼び出し
	@RequestMapping(value="/input", method=RequestMethod.GET)
	public ModelAndView input(ModelAndView mav) {
		mav.setViewName("input");
		return mav;
	}

	// リクエストパラメータ取得。データベースに保存、list.htmlへ遷移
	@RequestMapping(value="/list", method=RequestMethod.POST)
	public String form(@ModelAttribute("NameData") NameData namedata) {
		repository.saveAndFlush(namedata);
		return "redirect:/";
	}
}
list.html
<body>
	<table>
		<tr>
			<th>ID</th>
			<th>名前</th>
			<th>年齢</th>
		</tr>
		<tr th:each="obj : ${datalist}">
			<td th:text="${obj.id}"></td>
			<td th:text="${obj.name}"></td>
			<td th:text="${obj.age}"></td>
		</tr>
	</table>
	<form method="post" action="/input" >
		<input type="submit" value="入力画面へ移動">
	</form>
</body>
input.html
<body>
	<form method="post" action="/list">
		<p>名前を入力してください。</p>
		<input type="text" name="name" />
		<p>年齢を入力してください。</p>
		<input type="text" name="age" />
		<br>
		<input type="submit" value="入力" />
	</form>
	<form method="GET" action="/">
		<input type="submit" value="戻る">
	</form>
</body>
