はじめに
DjangoでGraphQLを触ってみる Part.2の続きです。
今回は、データの追加、削除、編集(Mutation)を実装します。
今回もdockerを使う前提で説明をします。詳しい内容は私のgitを参考にしてください。
パート解説
Part1 : 入門向け環境構築と基本的な書き方
Part2 : GraphQLでリレーションなしの絞り込み実装
Part3 : データ追加、削除、編集(Mutation)の実装 ←イマココ
実装
データ追加
まずはデータ追加を実装します。.save()を使うと簡単に実装できそうです。
graphql_sample/schema.py
...

# create_itemの挙動
class CreateItem(graphene.Mutation):
    # 受け取る変数
    class Arguments:
        name = graphene.String()
        description = graphene.String()
        brand = graphene.String()
        user = graphene.Int()

    # 表示するもの
    item = graphene.Field(ItemType)

    # mutationの処理内容
    def mutate(root, info, name, description, brand, user):
        user = User.objects.get(pk=user)
        item = Item(name=name, description=description, brand=brand, user=user)
        item.save() # データ保存をしている場所
        return CreateItem(item=item)

# MyMutationの中にcreate_itemを追記
class MyMutation(graphene.ObjectType):
    create_item = CreateItem.Field()

...

# mutation=を追加することでmutationを実行できるようにする
schema = graphene.Schema(query=Query, mutation=MyMutation)
実装ができたらコンテナを立ち上げ、localhost:8000/graphqlにアクセスし以下を試す。
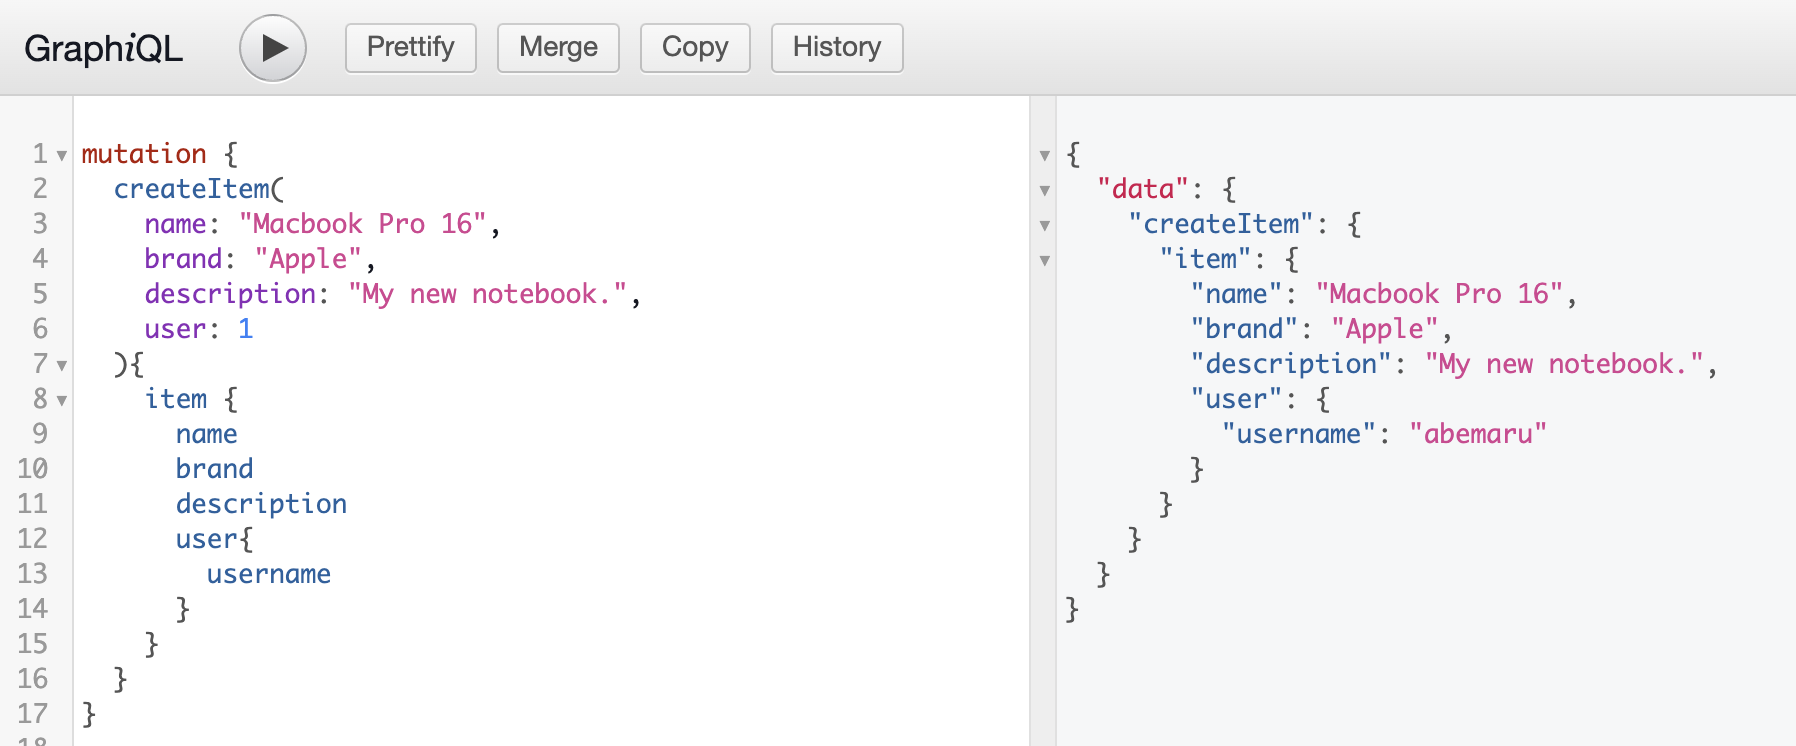
mutationを実行しdataが帰ってきたら、allItemクエリでデータが追加されていることを確認しましょう。

データ削除
データ追加ができたらデータ削除も実装しましょう。データ追加と似て、.delete()でサクっと実装します
graphql_sample/schema.py
...
# delete_item実行時の挙動を追加
class DeleteItem(graphene.Mutation):
    class Arguments:
        name = graphene.String()

    ok = graphene.Boolean()

    def mutate(root, info, name):
        item = Item.objects.filter(name=name)
        item.delete() # ここの部分で削除
        return DeleteItem(ok=True)


class MyMutation(graphene.ObjectType):
    create_item = CreateItem.Field()
    delete_item = DeleteItem.Field() # deleteを追加
...
実装したらまたコンテナを立ち上げます。deleteItem実行時にok: Trueと帰ってきて、allItemでMacbook Pro 16が消えていれば成功です。
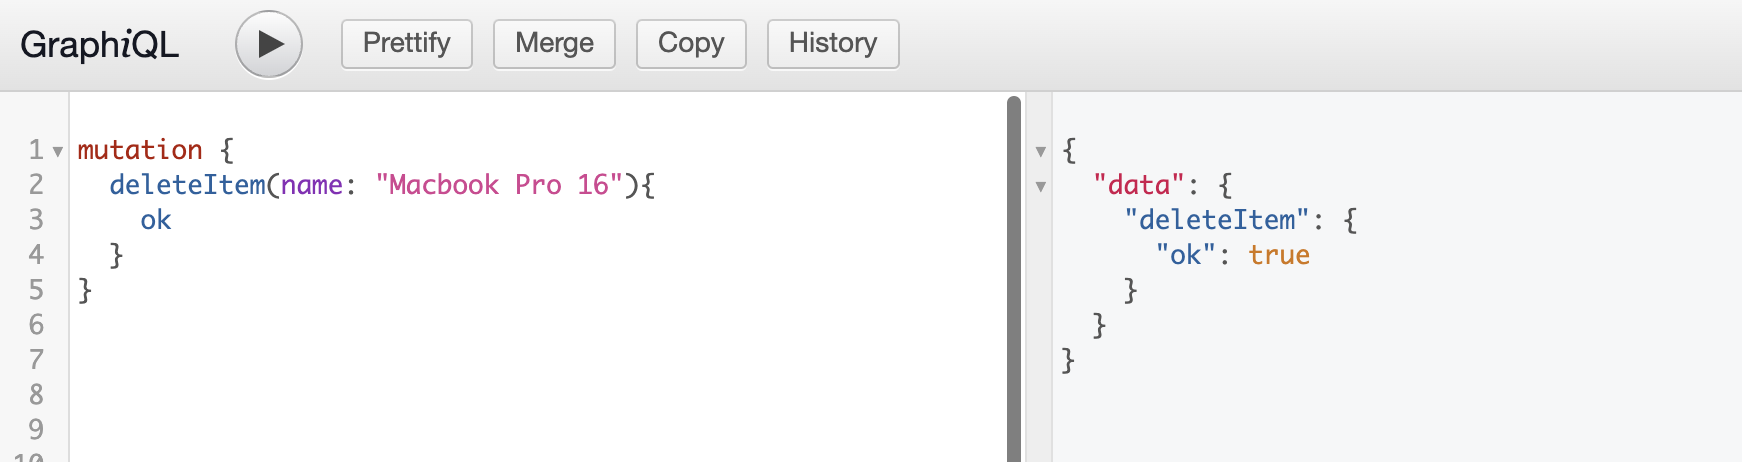
Macbook Pro 16が消えているので成功です!

データ編集
最後にデータの編集です。今回は、Macbook Pro 14の持ち主を変更したいと思います。
またまた、schema.pyを編集します。今回は.update()は使えなさそうだったので少し工夫します。
graphql_sample/schema.py
# update_item_userの挙動を設定
class UpdateItemUser(graphene.Mutation):
    class Arguments:
        name = graphene.String()
        user = graphene.Int()

    ok = graphene.Boolean()

    def mutate(root, info, name, user):
        # 単純な.updateで実装できなかったため以下のように実装
        # バージョンによって違いはありそう
        obj, _ = Item.objects.get_or_create(
            name=name,
            user_id=user
        )
        return UpdateItemUser(ok=True)


class MyMutation(graphene.ObjectType):
    create_item = CreateItem.Field()
    delete_item = DeleteItem.Field()
    update_item_user = UpdateItemUser.Field() # MyMutationに追加し使えるようにする
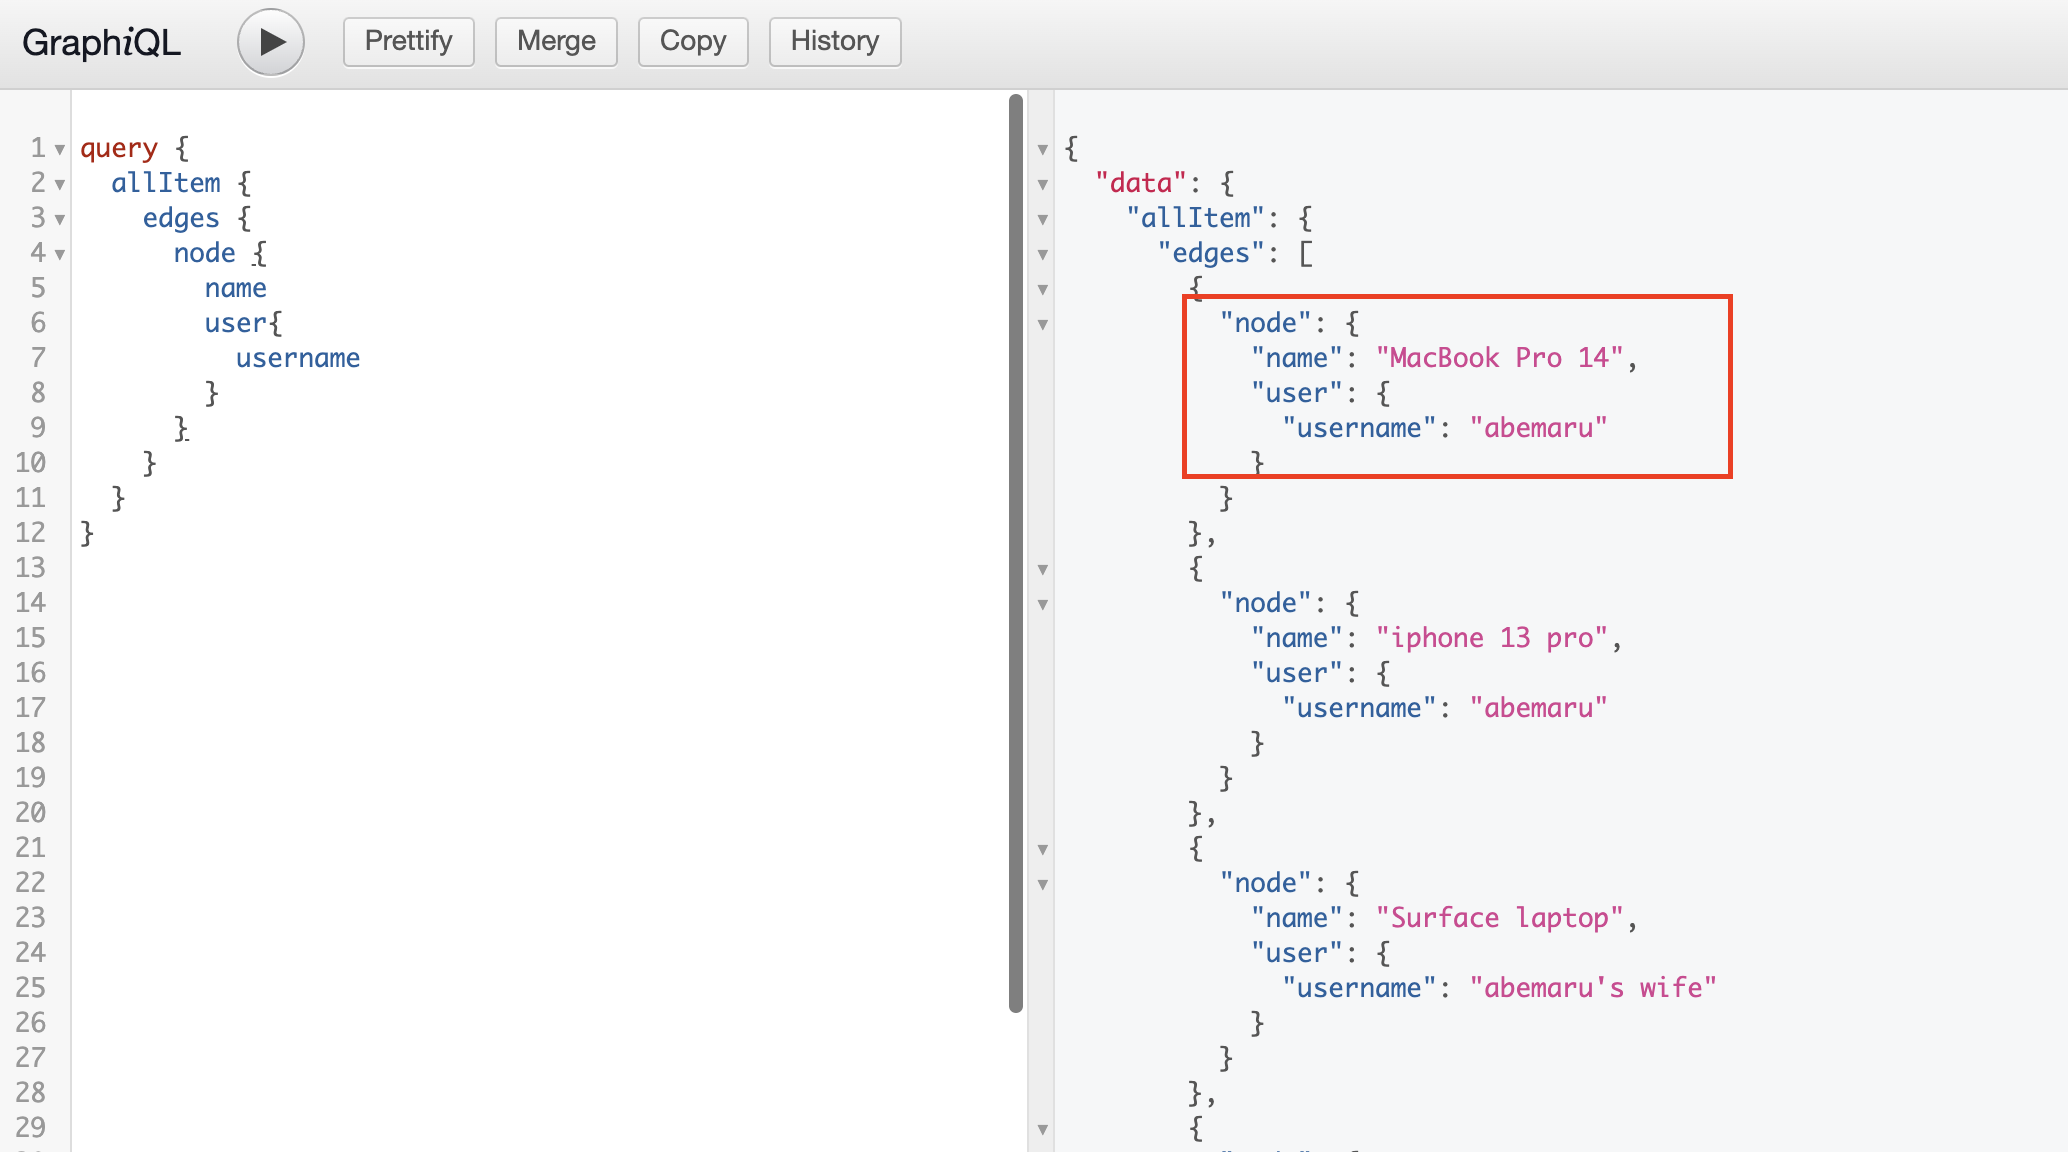
実装ができたらコンテナに接続し、updateItemUserを実行し、MacBook Pro 14のuserを1から2に変更しましょう。

変更が反映されたら、allItemで一覧を取得し、MacBook Pro 14のuserが変更されていることが確認できれば成功です。

さいごに
ここまでgrapheneの機能をどんどん実装してきたが、クエリを叩くこともできるはずなのでPart4ではクエリのたたき方を確認する。