Numpyでバイラテラル(Bilateral)フィルターを実装してみます。
ガウシアンフィルターでは空間方向の距離に応じてガウス分布で加重平均を求めることで画像を平滑化しました。バイラテラルフィルターでは空間方向の距離に加えて、画素値の差に応じてもガウス分布で重み付けします。これにより、エッジを保存したまま平滑化によりノイズを除去することができます。
入力画像を$f(i, j)$、出力画像を$g(i, j)$とすると、次のように表現できます。
g(i,j)=\frac{\sum_{n}\sum_{m}w(i,j,m,n)f(i+m,j+n)}{\sum_{n}\sum_{m}w(i,j,m,n)} \\
w(i,j,m,n)=exp(-\frac{m^2+n^2}{2\sigma^2_{space}})exp(-\frac{(f(i,j)-f(i+m,j+n))^2}{2\sigma^2_{pixel}})
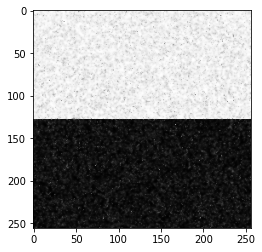
まず、検証用のテスト画像を作成します。
import numpy as np
import matplotlib.pyplot as plt

test_image = np.fromfunction(lambda y, _: np.where(y < 128, 1.0, 0.0), (256, 256))
test_image = np.clip(test_image + np.random.normal(0, 0.2, test_image.shape), 0.0, 1.0)
plt.imshow(test_image, cmap='gray')
Bilateralフィルターを適用する関数を定義します。
def bilateral_filter(image, size=(5, 5), space_sigma=1, pixel_sigma=0.2, boundary='edge'):
  pad_image = np.pad(image, ((int(size[0] / 2),), (int(size[1] / 2),)), boundary)
  areas = np.lib.stride_tricks.as_strided(pad_image, image.shape + size, pad_image.strides * 2)
  centers = np.tile(image.reshape(image.shape + (1, 1)), (1, 1) + size)
  dists = np.fromfunction(lambda y, x: (x - int(size[1] / 2)) ** 2 + (y - int(size[0] / 2)) ** 2, size)
  weights = np.exp(-dists / (2.0 * space_sigma * space_sigma)) * np.exp(-((centers - areas) ** 2) / (2.0 * pixel_sigma * pixel_sigma * 2.0))
  weight_sum = np.sum(weights, axis=(2, 3))
  return np.einsum('ijkl,ijkl->ij', weights, areas) / weight_sum
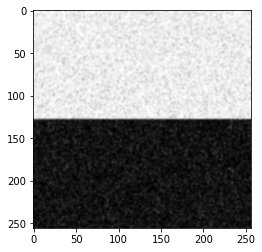
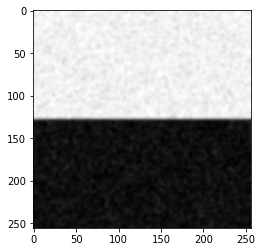
バイラテラルフィルターをテスト画像に繰り返し適用します。
1回目
bilateral_image1 = bilateral_filter(test_image)
plt.imshow(bilateral_image1, cmap='gray')
2回目
bilateral_image2 = bilateral_filter(bilateral_image1)
plt.imshow(bilateral_image2, cmap='gray')
3回目
bilateral_image3 = bilateral_filter(bilateral_image2)
plt.imshow(bilateral_image3, cmap='gray')
エッジを維持したまま、ノイズが低減することを確認できました。
比較のためにガウシアンフィルターをテスト画像に適用してみます。ガウシアンフィルターについては以下の記事を参照してください。
【画像処理】Numpyで平滑化フィルター - Qiita
def _convolve2d(image, kernel):
  shape = (image.shape[0] - kernel.shape[0] + 1, image.shape[1] - kernel.shape[1] + 1) + kernel.shape
  strides = image.strides * 2
  strided_image = np.lib.stride_tricks.as_strided(image, shape, strides)
  return np.einsum('kl,ijkl->ij', kernel, strided_image)

def _convolve2d_multichannel(image, kernel):
  convolved_image = np.empty((image.shape[0] - kernel.shape[0] + 1, image.shape[1] - kernel.shape[1] + 1, image.shape[2]))
  for i in range(image.shape[2]):
    convolved_image[:,:,i] = _convolve2d(image[:,:,i], kernel)
  return convolved_image

def _pad_singlechannel_image(image, kernel_shape, boundary):
  return np.pad(image, ((int(kernel_shape[0] / 2),), (int(kernel_shape[1] / 2),)), boundary)

def _pad_multichannel_image(image, kernel_shape, boundary):
  return  np.pad(image, ((int(kernel_shape[0] / 2),), (int(kernel_shape[1] / 2),), (0,)), boundary)

def convolve2d(image, kernel, boundary='edge'):
  if image.ndim == 2:
    pad_image = _pad_singlechannel_image(image, kernel.shape, boundary) if boundary is not None else image
    return _convolve2d(pad_image, kernel)
  elif image.ndim == 3:
    pad_image = _pad_multichannel_image(image, kernel.shape, boundary) if boundary is not None else image
    return _convolve2d_multichannel(pad_image, kernel)

def create_gaussian_kernel(size=(5, 5), sigma=1):
  center = ((size[0] - 1) / 2, (size[1] - 1) / 2)
  sigma2 = 2 * sigma * sigma
  kernel = np.fromfunction(lambda y, x: np.exp(-((x - center[0]) ** 2 + (y - center[1]) ** 2) / sigma2), size)
  kernel = kernel / np.sum(kernel)
  return kernel

gaussian_kernel = create_gaussian_kernel()
1回目
gaussian_image1 = convolve2d(test_image, gaussian_kernel)
plt.imshow(gaussian_image1, cmap='gray')
2回目
gaussian_image2 = convolve2d(gaussian_image1, gaussian_kernel)
plt.imshow(gaussian_image2, cmap='gray')
3回目
gaussian_image3 = convolve2d(gaussian_image2, gaussian_kernel)
plt.imshow(gaussian_image3, cmap='gray')
バイラテラルフィルターの結果と比較して、エッジが鈍っていることが確認できます。
バイラテラルフィルターをカラー画像に適用してみます。
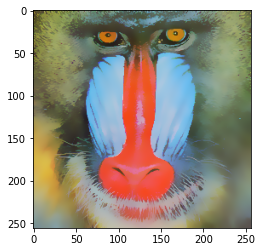
バイラテラルフィルターをカラー画像に繰り返し適用すると、イラスト調の画像になります。
使用する画像を読み込みます。
color_image = plt.imread(image_name)
if np.issubdtype(color_image.dtype, np.integer):
  color_image = color_image / np.iinfo(color_image.dtype).max
plt.imshow(color_image)
マルチチャネル画像にバイラテラルフィルターを適用する関数を定義します。
def bilateral_filter_multichannel(image, size=(5, 5), space_sigma=1, pixel_sigma=0.2, boundary='edge'):
  bilateral_image = np.empty(image.shape)
  for i in range(image.shape[2]):
    bilateral_image[:,:,i] = bilateral_filter(image[:,:,i], size, space_sigma, pixel_sigma, boundary)
  return bilateral_image
バイラテラルフィルターを繰り返し適用します。
1回目
bilateral_color_image1 = bilateral_filter_multichannel(color_image, size=(11, 11), space_sigma=3, pixel_sigma=0.05)
plt.imshow(bilateral_color_image1)
2回目
bilateral_color_image2 = bilateral_filter_multichannel(bilateral_color_image1, size=(11, 11), space_sigma=3, pixel_sigma=0.05)
plt.imshow(bilateral_color_image2)
3回目
bilateral_color_image3 = bilateral_filter_multichannel(bilateral_color_image2, size=(11, 11), space_sigma=3, pixel_sigma=0.05)
plt.imshow(bilateral_color_image3)
実装したコードはGoogle Colaboratoryに置いてあります。


