はじめに
SAM Pipelineで、リソース作成時のデプロイに対して、ファイルから設定値を渡す方法がわかりましたので、環境及び実行コマンドごとに設定ファイルを分けてみました。
概要
- デプロイ時に実行されるコマンドに、直接ファイルと環境名を引数で与えるよう修正
- mainブランチの際は、artifactsにて使う設定ファイルを指定する必要あり
経緯
生じた問題
- 今までの記事でサンプルとして用いていたものは、パラメータを与えて、それに応じた名前を持つLambda関数やIAMロールなどを作成
- パラメータの指定なしの場合は、デフォルト文字列を使用
- SAM Pipelineでは、bootstrapやinit、パイプライン作成のいずれの段階でも、上記サンプルへの
sam deployの引数の指定を行わない- 同じアカウント上に2つ目を生成しようとする場合、同じ名前があるため必ず失敗する
- featureブランチ用パイプラインが、複数ある場合
- 本番の2ステージモデル(TestDeploy、ProdDeployの両方で作成される)
- デフォルトでは引数なしとして動くか、同階層に置かれている
samconfig.tomlのdefaultテーブルを読み込む- この
samconfig.tomlは、以下の3つのデプロイの際のデフォルトの設定ファイルとして扱われる- パイプライン作成
- パイプライン内で行われる
sam deploy - パイプラインを使わない時の
sam deploy
- 異なる用途にもかかわらず同じファイル名をデフォルトとしているため、複数人で開発するときに上書きしかねない
- この
- 同じアカウント上に2つ目を生成しようとする場合、同じ名前があるため必ず失敗する
対応方法
以下の用に、状況に応じて設定ファイルを別にします。
- パイプライン作成時:
configs/deploypipeline.toml- パイプライン作成時に
--guidedを用いて、設定値の出力先とする
- パイプライン作成時に
- パイプライン内で行われる
sam deploy:configs/samconfig-onpipeline.toml- テーブル名で、ブランチやステージに応じた設定値を使用させる
- パイプラインを使わない時の
sam deploy:samconfig.toml
sam deployで指定するtomlファイルの記載方法は、以下の記事に詳細があります。
やったこと
環境
いつものcloud9です、最安価インスタンスで問題ないはずです。
事前準備
スクリプトやsamのテンプレート
ディレクトリとファイルを作成します。
mkdir sample-sam-pipeline
cd sample-sam-pipeline

mkdir function
touch function/function.py
touch template.yaml
ファイルの内容は以下のものを使いました。
リポジトリ作成・PUSH
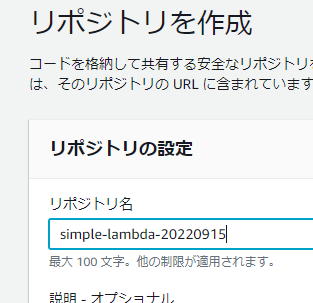
コンソールからCodeCommitのリポジトリを作成します。
先ほど作ったファイルをPUSHします。
git init

# ブランチ名をmainに
git branch -M main

# git configで自分好みに
git config --local user.name "Saki Kodaka"
git config --local user.email "rise-no10@extreme-hearts.com"
git config --local core.editor "vim"

git add .
git commit -m "feat: first commit"

git remote add origin [対象のリポジトリのHTTPS(GRC)]
git push -u origin main
今回は、featureブランチを2つ作成し、それぞれの更新をトリガーとしてデプロイを行います。
設定ファイルを指定せずにこのまま作成すると、Lambda関数やIAMロールが重複してしまい、2つ目が作成されません。
まずは1つ目のfeatureブランチを作成。
git branch feature-idol
git checkout feature-idol
パイプライン用のリソース作成
テンプレートは2ステージモデルなので、両ステージで使うリソースを作成します。
開発ステージ用(dev)
sam pipeline bootstrap
[1] Stage definition
Enter a name for this stage. This will be referenced later when you use the sam pipeline init command:
Stage name: dev

[2] Account details
The following AWS credential sources are available to use:
To know more about configuration AWS credentials, visit the link below:
https://docs.aws.amazon.com/cli/latest/userguide/cli-configure-files.html
        1 - Environment variables (not available)
        2 - default (named profile)
        q - Quit and configure AWS credentials
Select a credential source to associate with this stage: 2

Enter the region in which you want these resources to be created [ap-northeast-1]:
Enter the pipeline IAM user ARN if you have previously created one, or we will create one for you []:

[3] Reference application build resources
Enter the pipeline execution role ARN if you have previously created one, or we will create one for you []:
Enter the CloudFormation execution role ARN if you have previously created one, or we will create one for you []:
Please enter the artifact bucket ARN for your Lambda function. If you do not have a bucket, we will create one for you []:
Does your application contain any IMAGE type Lambda functions? [y/N]: N

[4] Summary
Below is the summary of the answers:
        1 - Account: 123456789012
        2 - Stage name: dev
        3 - Region: ap-northeast-1
        4 - Pipeline user: [to be created]
        5 - Pipeline execution role: [to be created]
        6 - CloudFormation execution role: [to be created]
        7 - Artifacts bucket: [to be created]
        8 - ECR image repository: [skipped]
Press enter to confirm the values above, or select an item to edit the value:

This will create the following required resources for the 'dev' environment:
        - Pipeline IAM user
        - Pipeline execution role
        - CloudFormation execution role
        - Artifact bucket
Should we proceed with the creation? [y/N]: y
本番ステージ用(prod)
本番ステージ用と同じものを使うのであれば.aws-sam/pipeline/pipelineconfig.tomlのdevテーブル部分をコピペして、テーブル名をprodに変更するだけでも良いです。
今回は別のリソースを作成しました。
sam pipeline bootstrap
[1] Stage definition
Enter a name for this stage. This will be referenced later when you use the sam pipeline init command:
Stage name: prod

[2] Account details
The following AWS credential sources are available to use:
To know more about configuration AWS credentials, visit the link below:
https://docs.aws.amazon.com/cli/latest/userguide/cli-configure-files.html
        1 - Environment variables (not available)
        2 - default (named profile)
        q - Quit and configure AWS credentials
Select a credential source to associate with this stage: 2

Enter the region in which you want these resources to be created [ap-northeast-1]:
Pipeline IAM user ARN: arn:aws:iam::123456789012:user/aws-sam-cli-managed-dev-pipeline-reso-PipelineUser-XXXXXXXXXXXXX

[3] Reference application build resources
Enter the pipeline execution role ARN if you have previously created one, or we will create one for you []:
Enter the CloudFormation execution role ARN if you have previously created one, or we will create one for you []:
Please enter the artifact bucket ARN for your Lambda function. If you do not have a bucket, we will create one for you []:
Does your application contain any IMAGE type Lambda functions? [y/N]: N

[4] Summary
Below is the summary of the answers:
        1 - Account: 123456789012
        2 - Stage name: prod
        3 - Region: ap-northeast-1
        4 - Pipeline user ARN: arn:aws:iam::123456789012:user/aws-sam-cli-managed-dev-pipeline-reso-PipelineUser-XXXXXXXXXXXXX
        5 - Pipeline execution role: [to be created]
        6 - CloudFormation execution role: [to be created]
        7 - Artifacts bucket: [to be created]
        8 - ECR image repository: [skipped]
Press enter to confirm the values above, or select an item to edit the value:

This will create the following required resources for the 'dev' environment:
        - Pipeline IAM user
        - Pipeline execution role
        - CloudFormation execution role
        - Artifact bucket
Should we proceed with the creation? [y/N]: y
パイプラインのテンプレートファイル作成
各ステージで使用するリソース(先ほど作成したもの)を用いて、テンプレートのファイルを作成します。
sam pipeline init
Select a pipeline structure template to get started:
Select template
        1 - AWS Quick Start Pipeline Templates
        2 - Custom Pipeline Template Location
Choice: 1

Cloning from https://github.com/aws/aws-sam-cli-pipeline-init-templates.git
CI/CD system
        1 - Jenkins
        2 - GitLab CI/CD
        3 - GitHub Actions
        4 - Bitbucket Pipelines
        5 - AWS CodePipeline
Choice: 5
You are using the 2-stage pipeline template.
 _________    _________
|         |  |         |
| Stage 1 |->| Stage 2 |
|_________|  |_________|

Checking for existing stages...

What is the Git provider?
        1 - Bitbucket
        2 - CodeCommit
        3 - GitHub
        4 - GitHubEnterpriseServer
Choice []: 2
What is the CodeCommit repository name?: simple-lambda-20220915
What is the Git branch used for production deployments? [main]:
What is the template file path? [template.yaml]:
We use the stage configuration name to automatically retrieve the bootstrapped resources created when you ran `sam pipeline bootstrap`.

Here are the stage names detected in .aws-sam/pipeline/pipelineconfig.toml:
        1 - dev
        2 - prod
Select an index or enter the stage 1's configuration name (as provided during the bootstrapping): 1
What is the sam application stack name for stage 1? [sam-app]: sam-app-stage-dev
Stage 1 configured successfully, configuring stage 2.

Here are the stage names detected in .aws-sam/pipeline/pipelineconfig.toml:
        1 - dev
        2 - prod
Select an index or enter the stage 2's configuration name (as provided during the bootstrapping): 2
What is the sam application stack name for stage 2? [sam-app]: sam-app-stage-prod
Stage 2 configured successfully.
(略)

Successfully created the pipeline configuration file(s):
        - assume-role.sh
        - codepipeline.yaml
        - pipeline/buildspec_build_package.yml
        - pipeline/buildspec_deploy.yml
        - pipeline/buildspec_feature.yml
        - pipeline/buildspec_integration_test.yml
        - pipeline/buildspec_unit_test.yml
作成されたスクリプトについて、以下の点を修正。
- IAMロールを作成するため
--capabilities CAPABILITY_NAMED_IAMを指定 - 設定値をファイルから参照するため、設定ファイルとテーブル名を指定
- テーブル名は、featureブランチ名と同じものとします
- (任意)作成時のリソース間の依存関係を追記
  build:
    commands:
      - sam build --use-container --template ${SAM_TEMPLATE}
      - . ./assume-role.sh ${TESTING_PIPELINE_EXECUTION_ROLE} feature-deploy
      - sam deploy --stack-name $(echo ${FEATURE_BRANCH_NAME} | tr -cd '[a-zA-Z0-9-]')
-                   --capabilities CAPABILITY_IAM
+                   --capabilities CAPABILITY_NAMED_IAM
                    --region ${TESTING_REGION}
                    --s3-bucket ${TESTING_ARTIFACT_BUCKET}
                    --no-fail-on-empty-changeset
                    --role-arn ${TESTING_CLOUDFORMATION_EXECUTION_ROLE}
+                   --config-file configs/samconfig-onpipeline.toml
+                   --config-env ${FEATURE_BRANCH_NAME}
mkdir configsして、設定ファイルを作成し、以下の内容を書き込みます。
テーブル名はブランチ名と同じものにします。
version = 0.1
[feature-idol]
[feature-idol.deploy]
[feature-idol.deploy.parameters]
# 以下はsam deploy時に直接渡している
# stack_name = ""
# s3_bucket = ""
# region = ""
# capabilities = ""
# template.yamlのパラメータを以下の形で渡す
parameter_overrides = "LambdaFunctionName=\"test-feature-idol-function\""
また、codepipeline.yamlで、パイプライン作成時のリソース間の依存関係も記載しておいた方が、削除するとき楽なので、以前と同様に修正します。
  #   ____          _      ____        _ _     _
  #  / ___|___   __| | ___| __ ) _   _(_| | __| |
  # | |   / _ \ / _` |/ _ |  _ \| | | | | |/ _` |
  # | |__| (_) | (_| |  __| |_) | |_| | | | (_| |
  #  \____\___/ \__,_|\___|____/ \__,_|_|_|\__,_|
  CodeBuildServiceRole:
    Type: AWS::IAM::Role
+   DependsOn: PipelineStackCloudFormationExecutionRole
    Properties:
パイプラインのデプロイ(feature-idolブランチ用)
修正したファイルを使用して、feature-idolブランチ用のパイプラインをデプロイします。
-
--config-file configs/deploypipeline.tomlで、設定の出力先ファイル名を指定 -
--config-env feature-idolで、ファイル内のテーブル名を指定- 今回は分かりやすくブランチ名と一緒にしていますが、任意の値で問題ないはずです
# 必要なパラメータは引数として与えておく。Enterやyだけで済むはず
sam deploy --guided \
 --template codepipeline.yaml \
 --stack-name sam-app-feature-idol-pipeline-stack \
 --capabilities=CAPABILITY_IAM \
 --config-file configs/deploypipeline.toml \
 --config-env feature-idol \
 --parameter-overrides="FeatureGitBranch=feature-idol"


## ブランチにPUSHして確認
git add .
git commit -m "feat: add pipeline for feature-idol"

git push --set-upstream origin feature-idol
パイプラインのデプロイ(feature-sportsブランチ用)
続けて、feature-sportsブランチ用のパイプラインを作成します。
# ブランチのコピー
git checkout -b feature-sports

# feature-sportsブランチ専用のパイプライン作成
sam deploy --guided \
 --template codepipeline.yaml \
 --stack-name sam-app-feature-sports-pipeline-stack \
 --capabilities=CAPABILITY_IAM \
 --config-file configs/deploypipeline.toml \
 --config-env feature-sports \
 --parameter-overrides="FeatureGitBranch=feature-sports"
feature-sportsブランチ専用のLambda関数名を定義します。
[feature-sports]
[feature-sports.deploy]
[feature-sports.deploy.parameters]
parameter_overrides = [
  "LambdaFunctionName=test-feature-sports-function"
]
parameter_overridesは、以下のページにあるように配列でも記述可能です。
あとはfeature-sportsブランチにPUSHします。
git add .
git commit -m "feat: add pipeline for feature-sports"
git push --set-upstream origin feature-sports
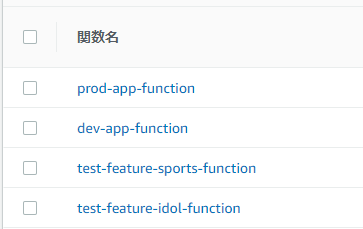
ブランチごとに別のパラメータを指定して、別の関数名ができていることが確認できました。

パイプラインのデプロイ(mainブランチ用)
mainブランチに切り替えて、パイプライン作成の設定を修正します。
# mainにmerge
git checkout main
git merge feature-sports
mainブランチでのパイプラインでは、使用するファイルを明示する必要があるため、それを追記します。
artifacts:
  files:
    - packaged-test.yaml
    - packaged-prod.yaml
    - assume-role.sh
    - pipeline/*
+   - configs/samconfig-onpipeline.toml
デプロイ時に動くsam deployコマンドに、設定ファイルを読むよう指定します。
  build:
    commands:
      - . ./assume-role.sh ${ENV_PIPELINE_EXECUTION_ROLE} deploy
      - sam deploy --stack-name ${ENV_STACK_NAME}
                    --template ${ENV_TEMPLATE}
-                   --capabilities CAPABILITY_IAM
+                   --capabilities CAPABILITY_NAMED_IAM
                    --region ${ENV_REGION}
                    --s3-bucket ${ENV_BUCKET}
                    --no-fail-on-empty-changeset
                    --role-arn ${ENV_CLOUDFORMATION_EXECUTION_ROLE}
+                   --config-file configs/samconfig-onpipeline.toml
+                   --config-env ${ENV_STACK_NAME}
TestDepryとProdDeployとでは同じコマンド、同じブランチが使われるため、tomlファイルのテーブル名をfeatureブランチの時とは別のルールにする必要があります。
TestDepryとProdDeployとでは、引数${ENV_STACK_NAME}が異なるため、この名前をtomlファイルのテーブル名として用いました。
この${ENV_STACK_NAME}は、テンプレート作成時に指定したステージ名(今回だと、"sam-app-stage-dev"と"sam-app-stage-prod")になります。
このステージ名で、tomlファイルに設定値を記載します。
# 以下、mainブランチにPUSH時のデプロイパラメータ
# Test,Prodの2つのステージ分、作成
[sam-app-stage-dev]
[sam-app-stage-dev.deploy]
[sam-app-stage-dev.deploy.parameters]
parameter_overrides = [
  "LambdaFunctionName=dev-app-function"
]
[sam-app-stage-prod]
[sam-app-stage-prod.deploy]
[sam-app-stage-prod.deploy.parameters]
parameter_overrides = [
  "LambdaFunctionName=prod-app-function"
]
パイプラインを作成して、PUSHします。
sam deploy --guided \
 --template codepipeline.yaml \
 --stack-name sam-app-main-pipeline-stack \
 --capabilities=CAPABILITY_IAM \
 --config-file configs/deploypipeline.toml \
 --config-env main

git add .
git commit -m "feat: add pipeline for release(main branch)"
git push
設定ファイルで指定した通り、TestDepryとProdDeployとで別々の関数が作成されました。
片づけ
CloudFormationのスタックで作成されていますので、逆順に削除していくだけです。
詳細は以下にあります。
おわりに
今回は、SAM Pipelineでパラメータを渡す方法を確認してみました。
パラメータを自由に指定する方法がわかり、ますます使いやすい印象を受けました。機会があれば積極的に使っていきたいと思います。