はじめに
AWS SAMを用いてLambdaを作ることはやっていましたが、CI/CDの環境を構築してみたく、SAM Pipelineを試してみました。
概要
- 「Git(今回はCodeCommit)にPUSHすると自動でデプロイする環境」を構築してくれる
- SAMのファイルがあればよい
- 今回は事前に、Lambda関数のPythonスクリプトと、SAMのテンプレートファイルの2つのみ用意
- パイプラインはテンプレートが用意されている
- 一度ファイルに出力されるためカスタマイズ可能ではあるが、かなり大変そう
参考
SAM Pipelineの例
用語
参考やほかのページにはパイプライン特有の用語が頻出しますので、以下のページを見ながら理解しました。
やったこと
環境
いつものCloud9です。最小のインスタンスで十分なはずです。
事前準備
プロジェクトのディレクトリと、サンプルのソースを作成します。
mkdir sample-sam-pipeline
cd sample-sam-pipeline

mkdir function
touch function/function.py
touch template.yaml
ソースは以前の内容を使いました。
リポジトリ作成・PUSH
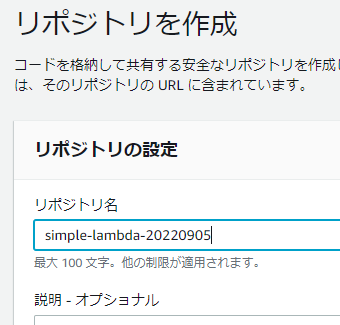
コンソールからCodeCommitでリポジトリを作成します。
プロジェクトにてgitの設定をして、CodeCommitにPUSHします。Cloud9だと、HTTPS(GRC)が使えるので楽です。
git init

# ブランチ名をmainに
git branch -M main

# git configで自分好みに
git config --local user.name "Hiyori Hayama"
git config --local user.email "rise-no5@extreme-hearts.com"
git config --local core.editor "vim"

git add .
git commit -m "feat: first commit"

git remote add origin [対象のリポジトリのHTTPS(GRC)]
git push -u origin main
パイプラインのテンプレート作成
sam pipelineを使って、対話形式でテンプレートを作成します。
ですがこのテンプレートから生成されるパイプラインは、対象のブランチの更新に対し”DeployTest ステージ”を経て”DeployProd ステージ”を実行する、2回デプロイを行う2ステージ構成になっています。
複雑なLambda関数で、本番にデプロイする前に自動テストや人手の承認をしたい場合はこれをベースに修正すればよいですが、今回の様に単純な場合は2ステージ構成はリッチすぎます。
しかしこのテンプレートは、パラメータで開発用のブランチが指定でき、そちら側の分岐では、"BuildAndDeployFeatureStackステージ"からなる、1ステージ構成になります。
本来であれば、「featureブランチ->開発環境デプロイ」という環境を作成するためと思われますが、今回はこちらを使って1ステージのパイプラインを(本番用として)作ります。
リソースの設定
各ステージにてパイプラインを動かしたり、CFnを動かしたりするロールが必要になります。
sam pipelineではそれらも対話式に作ってくれます。
ただし2ステージモデルのテンプレートを用いるため、”DeployTest ステージ”用と”DeployProd ステージ”用の2種類のリソース群を作成する必要があります。作成しないとテンプレート利用時に作成することになります。
(”DeployTest ステージ”と、(開発用リポジトリで使う)”BuildAndDeployFeatureStackステージ”は同じものが使われます。)
これから、この2ステージ分のリソース群をsam pipeline bootstrapを使って作成していきます。
使用するステージの設定
用いる方のステージの設定を行います。
sam pipeline bootstrap
ステージ名は本番として用いるので"prod"としたいですが、他の方の方法と混同しないように、今回は"used"としておきます。
[1] Stage definition
Enter a name for this stage. This will be referenced later when you use the sam pipeline init command:
Stage name: used
アカウントはデフォルト。リージョンもそのまま、IAMユーザは未指定にすると作ってくれます。
[2] Account details
The following AWS credential sources are available to use:
To know more about configuration AWS credentials, visit the link below:
https://docs.aws.amazon.com/cli/latest/userguide/cli-configure-files.html
        1 - Environment variables (not available)
        2 - default (named profile)
        q - Quit and configure AWS credentials
Select a credential source to associate with this stage: 2

Enter the region in which you want these resources to be created [ap-northeast-1]:
Enter the pipeline IAM user ARN if you have previously created one, or we will create one for you []:
ビルド時のリソースです。未指定で作ってもらうようにします。
最後のLambdaのタイプだけ、コンテナではないのでIMAGE不要のため"N"とします。
[3] Reference application build resources
Enter the pipeline execution role ARN if you have previously created one, or we will create one for you []:
Enter the CloudFormation execution role ARN if you have previously created one, or we will create one for you []:
Please enter the artifact bucket ARN for your Lambda function. If you do not have a bucket, we will create one for you []:
Does your application contain any IMAGE type Lambda functions? [y/N]: N
最後に作成されるリソースの確認です。これを作成するCFnが実行されます。
[4] Summary
Below is the summary of the answers:
        1 - Account: 123456789012
        2 - Stage name: used
        3 - Region: ap-northeast-1
        4 - Pipeline user: [to be created]
        5 - Pipeline execution role: [to be created]
        6 - CloudFormation execution role: [to be created]
        7 - Artifacts bucket: [to be created]
        8 - ECR image repository: [skipped]
Press enter to confirm the values above, or select an item to edit the value:

This will create the following required resources for the 'used' environment:
        - Pipeline IAM user
        - Pipeline execution role
        - CloudFormation execution role
        - Artifact bucket
Should we proceed with the creation? [y/N]: y
CFnでは以下のようなスタックが作成され、設定したリソースが作られていました。

プロジェクトのディレクトリには、以下のようなファイルが生成されました。自動作成されたリソースのarnが設定値として格納されていました。
version = 0.1
[default]
[default.pipeline_bootstrap]
[default.pipeline_bootstrap.parameters]
pipeline_user = "arn:aws:iam::123456789012:user/aws-sam-cli-managed-used-pipeline-res-PipelineUser-XXXXXXXXXXXXX"

[used]
[used.pipeline_bootstrap]
[used.pipeline_bootstrap.parameters]
pipeline_execution_role = "arn:aws:iam::123456789012:role/aws-sam-cli-managed-used-pip-PipelineExecutionRole-XXXXXXXXXXXXX"
cloudformation_execution_role = "arn:aws:iam::123456789012:role/aws-sam-cli-managed-used-CloudFormationExecutionR-XXXXXXXXXXXXX"
artifacts_bucket = "aws-sam-cli-managed-used-pipeline-artifactsbucket-xxxxxxxxxxxxx"
image_repository = ""
region = "ap-northeast-1"
使用しないステージの設定
使用しないステージですが設定を行います。作っておかないとテンプレート生成時に作ることになります。
再度、同じコマンドになります。
sam pipeline bootstrap
ステージ名は"dummy"とします。
[1] Stage definition
Enter a name for this stage. This will be referenced later when you use the sam pipeline init command:
Stage name: dummy
アカウントはデフォルト。リージョンもそのまま、IAMユーザは先ほど"used"を設定した時のものがそのまま使われます。
[2] Account details
The following AWS credential sources are available to use:
To know more about configuration AWS credentials, visit the link below:
https://docs.aws.amazon.com/cli/latest/userguide/cli-configure-files.html
        1 - Environment variables (not available)
        2 - default (named profile)
        q - Quit and configure AWS credentials
Select a credential source to associate with this stage: 2

Enter the region in which you want these resources to be created [ap-northeast-1]:
Pipeline IAM user ARN: arn:aws:iam::123456789012:user/aws-sam-cli-managed-used-pipeline-res-PipelineUser-XXXXXXXXXXXXX
ビルド時のリソースでは.aws-sam/pipeline/pipelineconfig.tomlを見て、先ほど"used"で自動作成されたものを指定します。
[3] Reference application build resources
Enter the pipeline execution role ARN if you have previously created one, or we will create one for you []: arn:aws:iam::123456789012:role/aws-sam-cli-managed-used-pip-PipelineExecutionRole-XXXXXXXXXXXXX
Enter the CloudFormation execution role ARN if you have previously created one, or we will create one for you []: arn:aws:iam::123456789012:role/aws-sam-cli-managed-used-CloudFormationExecutionR-XXXXXXXXXXXXX
Please enter the artifact bucket ARN for your Lambda function. If you do not have a bucket, we will create one for you []: aws-sam-cli-managed-used-pipeline-artifactsbucket-xxxxxxxxxxxxx
Does your application contain any IMAGE type Lambda functions? [y/N]: N
リソース確認しEnterで進めると、すべてのリソースが存在するのでスキップされる旨が表示されます。
[4] Summary
Below is the summary of the answers:
(略)
Press enter to confirm the values above, or select an item to edit the value:


All required resources for the dummy environment exist, skipping creation.
設定ファイルに、dummyの情報が追加されています。
version = 0.1
[default]
[default.pipeline_bootstrap]
[default.pipeline_bootstrap.parameters]
pipeline_user = "arn:aws:iam::123456789012:user/aws-sam-cli-managed-used-pipeline-res-PipelineUser-XXXXXXXXXXXXX"

[used]
[used.pipeline_bootstrap]
[used.pipeline_bootstrap.parameters]
pipeline_execution_role = "arn:aws:iam::123456789012:role/aws-sam-cli-managed-used-pip-PipelineExecutionRole-XXXXXXXXXXXXX"
cloudformation_execution_role = "arn:aws:iam::123456789012:role/aws-sam-cli-managed-used-CloudFormationExecutionR-XXXXXXXXXXXXX"
artifacts_bucket = "aws-sam-cli-managed-used-pipeline-artifactsbucket-xxxxxxxxxxxxx"
image_repository = ""
region = "ap-northeast-1"

[dummy]
[dummy.pipeline_bootstrap]
[dummy.pipeline_bootstrap.parameters]
pipeline_execution_role = "arn:aws:iam::123456789012:role/aws-sam-cli-managed-used-pip-PipelineExecutionRole-XXXXXXXXXXXXX"
cloudformation_execution_role = "arn:aws:iam::123456789012:role/aws-sam-cli-managed-used-CloudFormationExecutionR-XXXXXXXXXXXXX"
artifacts_bucket = ""
image_repository = ""
region = "ap-northeast-1"
テンプレート生成
次にパイプラインを作る設定ファイルを作成します。
sam pipeline init
Quick Start Pipeline Templatesの方を使います。CI/CD systemはAWS CodePipelineを指定します。
Select a pipeline structure template to get started:
Select template
        1 - AWS Quick Start Pipeline Templates
        2 - Custom Pipeline Template Location
Choice: 1

CI/CD system
        1 - Jenkins
        2 - GitLab CI/CD
        3 - GitHub Actions
        4 - Bitbucket Pipelines
        5 - AWS CodePipeline
Choice: 5
You are using the 2-stage pipeline template.
 _________    _________
|         |  |         |
| Stage 1 |->| Stage 2 |
|_________|  |_________|

Checking for existing stages...
CodePipelineで、最初の方で作成したCodeCommitを利用するよう設定します。
What is the Git provider?
        1 - Bitbucket
        2 - CodeCommit
        3 - GitHub
        4 - GitHubEnterpriseServer
Choice []: 2
What is the CodeCommit repository name?: simple-lambda-20220905
What is the Git branch used for production deployments? [main]:
What is the template file path? [template.yaml]:
次に、2ステージそれぞれで、どの設定を使うか指定します。
まずはStage1(=DeployTest ステージ、かつBuildAndDeployFeatureStackステージ)に、使う設定である"used"を指定します。アプリケーション名は適当につけました。
Here are the stage names detected in .aws-sam/pipeline/pipelineconfig.toml:
        1 - used
        2 - dummy
Select an index or enter the stage 1's configuration name (as provided during the bootstrapping): 1
What is the sam application stack name for stage 1? [sam-app]: used-app
その後、Stage2(=DeployProd ステージ)に使う設定を指定します。使わないので"dummy"を指定します。
Here are the stage names detected in .aws-sam/pipeline/pipelineconfig.toml:
        1 - used
        2 - dummy
Select an index or enter the stage 2's configuration name (as provided during the bootstrapping): 2
What is the sam application stack name for stage 2? [sam-app]: dummy-app
設定を終えるとテンプレートが作成され、作成されたファイル名が出力されます。
Successfully created the pipeline configuration file(s):
        - assume-role.sh
        - codepipeline.yaml
        - pipeline/buildspec_build_package.yml
        - pipeline/buildspec_deploy.yml
        - pipeline/buildspec_feature.yml
        - pipeline/buildspec_integration_test.yml
        - pipeline/buildspec_unit_test.yml
作成されたテンプレートcodepipeline.yaml内で設定されているパラメータFeatureGitBranchを指定する/しないで、(テンプレートが本来本番用と想定している)2ステージのパイプラインか、(テンプレートが本来開発用と想定している)1ステージのパイプラインか、が分けられます。
今回はパラメータを指定して、1ステージの方を構築します。
実行時に引数を与えてもいいのですが、忘れないようにデフォルト値で対象ブランチ名を入れておきます。(2ステージモデルを使用する際はデフォルト値を無しにして、Build時に何も指定しないでください。)
Parameters:

  FeatureGitBranch:
    Type: String
-   Default: ""
+   Default: "main"
またLambda用のIAMロールを作成するので、--capabilities CAPABILITY_NAMED_IAMを設定します。
対象のファイルはpipeline/buildspec_feature.ymlになります(2ステージモデルの際はpipeline/buildspec_deploy.ymlにも修正が必要と思われます)。
  build:
    commands:
      - sam build --use-container --template ${SAM_TEMPLATE}
      - . ./assume-role.sh ${TESTING_PIPELINE_EXECUTION_ROLE} feature-deploy
      - sam deploy --stack-name $(echo ${FEATURE_BRANCH_NAME} | tr -cd '[a-zA-Z0-9-]')
-                   --capabilities CAPABILITY_IAM
+                   --capabilities CAPABILITY_NAMED_IAM
                    --region ${TESTING_REGION}
                    --s3-bucket ${TESTING_ARTIFACT_BUCKET}
                    --no-fail-on-empty-changeset
                    --role-arn ${TESTING_CLOUDFORMATION_EXECUTION_ROLE}
またIAMロールに依存関係があるのでそれを指定します。作成時は問題ないのですが、削除時に失敗して面倒なので指定しておきます。
  #   ____          _      ____        _ _     _
  #  / ___|___   __| | ___| __ ) _   _(_| | __| |
  # | |   / _ \ / _` |/ _ |  _ \| | | | | |/ _` |
  # | |__| (_) | (_| |  __| |_) | |_| | | | (_| |
  #  \____\___/ \__,_|\___|____/ \__,_|_|_|\__,_|
  CodeBuildServiceRole:
    Type: AWS::IAM::Role
+   DependsOn: PipelineStackCloudFormationExecutionRole
    Properties:
また既にsamconfig.tomlが存在する場合、変更の確認を無効化しないと、タイムアウトでビルドが失敗します。
確認する旨を無効化します。
-confirm_changeset = true
+confirm_changeset = false
環境のデプロイ
作成したテンプレートを用いてsamをデプロイする場合は、テンプレートファイルを指定してsam deployします。
sam deploy --guided \
 --template codepipeline.yaml \
 --capabilities=CAPABILITY_IAM
必要に応じて設定値を入力します。
Configuring SAM deploy
======================

        Looking for config file [samconfig.toml] :  Not found

        Setting default arguments for 'sam deploy'
        =========================================
        Stack Name [sam-app]: lambda-app-pipeline-stack
        AWS Region [ap-northeast-1]:
        Parameter GitProviderType [CodeCommit]:
        Parameter CodeCommitRepositoryName [simple-lambda-20220905]:
        Parameter MainGitBranch [main]:
        Parameter SamTemplate [template.yaml]:
        Parameter TestingRegion [ap-northeast-1]:
        Parameter TestingStackName [used-app]:
        Parameter TestingPipelineExecutionRole [arn:aws:iam::123456789012:role/aws-sam-cli-managed-used-pip-PipelineExecutionRole-XXXXXXXXXXXXX]:
        Parameter TestingCloudFormationExecutionRole [arn:aws:iam::123456789012:role/aws-sam-cli-managed-used-CloudFormationExecutionR-XXXXXXXXXXXXX]:
        Parameter TestingArtifactBucket [aws-sam-cli-managed-used-pipeline-artifactsbucket-xxxxxxxxxxxxx]:
        Parameter TestingImageRepository []:
        Parameter ProdRegion [ap-northeast-1]:
        Parameter ProdStackName [dummy-app]:
        Parameter ProdPipelineExecutionRole [arn:aws:iam::123456789012:role/aws-sam-cli-managed-used-pip-PipelineExecutionRole-XXXXXXXXXXXXX]:
        Parameter ProdCloudFormationExecutionExeRole [arn:aws:iam::123456789012:role/aws-sam-cli-managed-used-CloudFormationExecutionR-XXXXXXXXXXXXX]:
        Parameter ProdArtifactBucket []:
        Parameter ProdImageRepository []:
        Parameter CodeStarConnectionArn []:
        Parameter FeatureGitBranch [main]:
        #Shows you resources changes to be deployed and require a 'Y' to initiate deploy
        Confirm changes before deploy [y/N]: N
        #SAM needs permission to be able to create roles to connect to the resources in your template
        Allow SAM CLI IAM role creation [Y/n]: Y
        Save arguments to configuration file [Y/n]: Y
        SAM configuration file [samconfig.toml]:
        SAM configuration environment [default]:
Confirm changes before deployですが、samconfig.tomlの中に結果が出力され、そのままパイプライン内で"Lambda作成を行うsam"のデプロイのパラメータに使われるようです。
そのためここで"Y"とすると、samconfig.tomlにconfirm_changeset = trueが出力され、それが使われてしまうようです。"N"と回答しておくのが良さそうです。
なお"N"と回答すると、samconfig.toml内のconfirm_changesetは修正しないような動作をするので、実行前にconfirm_changeset = falseになっているか確認しておいた方がよいです。
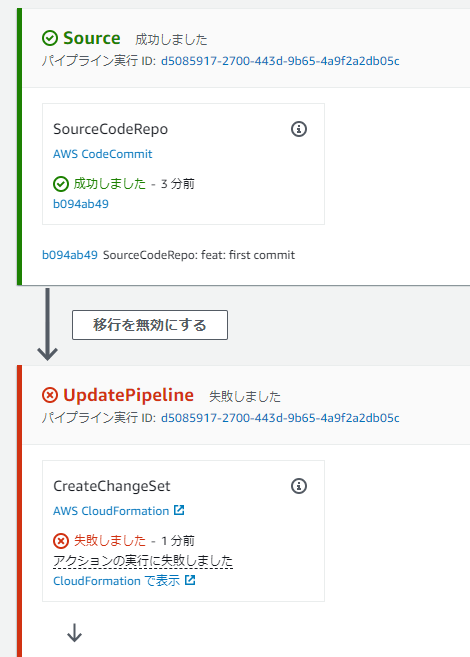
成功すると、CFnが作られています。

パイプラインも作られていますが失敗しています。対象のLambdaが作られていないためと思われます。
PUSH
試しにPUSHしてみます。
git add .
git commit -m "feat: add pipeline."
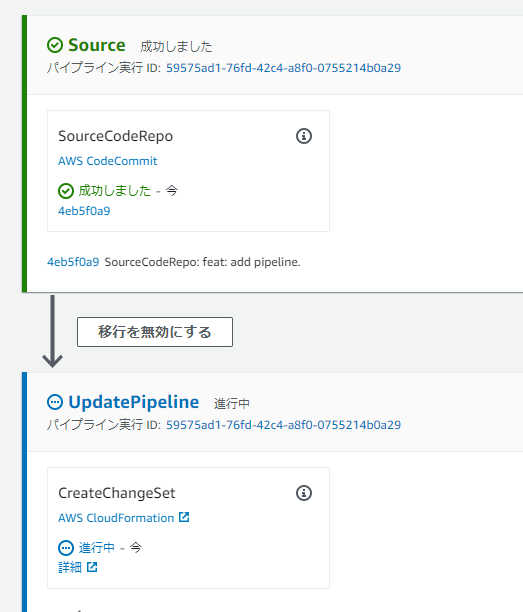
git push
パイプラインが動きました。完了に5分くらいかかりました。
CFnに、新しいスタックが作成されています

試しにLambda関数を実行してみます。関数名はtemplate.yamlで指定した名前になります。
aws lambda invoke \
  --function-name testfunction001 \
  --region ap-northeast-1 output; cat output

{"statusCode": 200, "body": "Hello from Lambda!"}
うまく動きました。
template.yamlに与えるパラメータについて
実際に構築されるLambda関数が記述されているtemplate.yamlに対してのパラメータを、sam pipelineコマンド実行時に指定するようにできないか見てみましたが、難しそうです。
- 実際に動く
sam deployは、pipeline/buildspec_deploy.yml(pipeline/buildspec_feature.yml)に記述 - 引数の値は環境変数で定義
- その環境変数は、
codepipeline.yaml内でEnvironmentVariablesで指定している- 4か所くらい指定箇所あり
4か所を問題なく修正し、デプロイコマンドの引数に渡すよう修正するのは大変なので、template.yamlのパラメータにデフォルト値を指定したほうが楽かと思っています。(簡単な方法をご存じの方、教えてください)
再度コミットして、PUSHするだけで反映されるか確認します。
コードを書き換えてみます。
def lambda_handler(event, context):

    print('sample function')
    return {
        'statusCode': 200,
-       'body': 'Hello from Lambda!'
+       'body': 'Hello from Pipeline!'
    }
git add .
git commit -m "feat: change return message. "
git push
5分後ぐらいして、デプロイが完了していることを確認して実行します。
aws lambda invoke \
  --function-name testfunction001 \
  --region ap-northeast-1 output; cat output

{"statusCode": 200, "body": "Hello from Pipeline!"}
片づけ
リソースはCFnから削除します。
- 対象のLambda関数を作成したスタックを削除
- ブランチ名である
mainというスタック名でした。
- ブランチ名である
- パイプラインを作成したスタックを削除
- S3バケットが2つありますので、先に両方を空にしておきます。
- 削除に失敗した場合、IAMロールの依存関係を指定しなかったために、削除する順番に誤っている恐れがあります。
- その際は以下の順序で削除できるはずです。
- 対象のスタックにアタッチしていた(先に削除されてしまった)IAMロールと同じ名前で、IAMロールを作成
- スタックを削除。消えなかったリソースは無視するように指定。
- スタックが消えたのち、残ってしまったIAMロールと、作ったIAMロールの2つを削除
- その際は以下の順序で削除できるはずです。
- パイプラインに用いるリソース作成スタックの削除
- S3バケットが2つありますので、先に両方を空にしておきます。
- CodeCommitの削除
- コンソールから作成したので、コンソールから消しました。
おわりに
CI/CD環境を、ほぼ知識がなくても構築できる、かなり便利な機能かと思います。パラメータの渡し方にはちょっと注意が必要そうです。
また1ステージモデルの方を使う場合、論理IDに"Test"等が入っていて、本番として扱うには若干躊躇する名前になっています。必要に応じて変える必要あると考えます。