Express + Node.jsを使ったアプリ開発をTypeScriptで行う
Azure使ったWebアプリを作ろうと思い立ち
このクイックスタートに沿って始めたが、型がない状態での開発に堪えられず、TypeScriptを導入することにしました。
1. まずはJavaScriptで
クイックスタートに沿ってExpressアプリを構築していく
> npx express-generator myExpressApp --view ejs --git
--view ejsの部分はクイックスタートでは--view pugとなっているが、これはhtmlを構成するテンプレートエンジンを選んでいる。僕は個人的に使いやすそうなのでejsにしました。
この辺の比較は
こちらが参考になりそうです。
とりあえずそのまま動かしてみます。新しく作成されたディレクトリに移動して
> npm install
> npm start
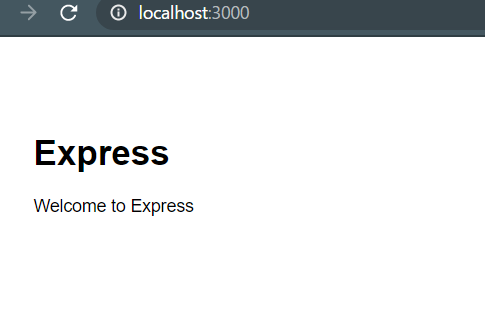
http://localhost:3000/をブラウザで開くと、無事↓のように表示されました。

2. TypeScript化
まず最初に、TypeScriptとExpressの型定義をインストールします。
> npm install -D typescript
> npm install -D @types/exrpess
無事インストールできたら
> npx tsc --init
を実行するとtsconfig.jsonが作成されます。
{
  "compilerOptions": {
      "target": "es6",
      "module": "commonjs",
      "outDir": "./dist",
      "strict": true,
      "esModuleInterop": true,
      "allowJs": true
  }
}
とりあえず、こんな感じにしました。途中のプロジェクトとかだと、いきなり全部tsにするのも大変なので、allowJs:trueにしておきました。
まずapp.jsからTypeScript化していきます。名前をapp.tsに変更して
import createError from 'http-errors';
import express from "express";
import {Request, Response, NextFunction} from 'express';
import path from 'path';
import cookieParser from 'cookie-parser';
import logger from 'morgan';

var indexRouter = require('./routes/index');
var usersRouter = require('./routes/users');

var app = express();

// view engine setup
app.set('views', path.join('views'));
app.set('view engine', 'ejs');

app.use(logger('dev'));
app.use(express.json());
app.use(express.urlencoded({ extended: false }));
app.use(cookieParser());
app.use(express.static(path.join('public')));

app.use('/', indexRouter);
app.use('/users', usersRouter);

// catch 404 and forward to error handler
app.use(function(req: Request, res: Response, next: NextFunction) {
  next(createError(404));
});

// error handler
app.use(function(err: any, req: Request, res: Response, next: NextFunction) {
  // set locals, only providing error in development
  res.locals.message = err.message;
  res.locals.error = req.app.get('env') === 'development' ? err : {};

  // render the error page
  res.status(err.status || 500);
  res.render('error');
});

module.exports = app;
こんな感じになりました。ほとんどそのままですが、型の追加、importあたりが変わっています。
ここでimportしているパッケージの型定義も必要になるのでインストールします。
> npm install -D @types/cookie-parser @types/morgan @types/http-errors
基本的にTypeScript関連で必要にあるものをインストールするときは、devDependenciesに入れるので-Dオプションを付けています。
あと、__dirnameを抹消しました。コンパイルされたjsファイルはdistディレクトリ下に置かれるので、相対パスの取り方が変わるからです。そこで、bin/wwwも変更する必要があります。
// var app = require('../app'); ←変更前
var app = require('../dist/app');
dist配下のappを指定しなければいけません。
> npx tsc
でコンパイルしてみます。
http://localhost:3000/にアクセスしてみて問題なければ成功です。これでじゃんじゃんTypeScript化を進めることができます。
3. まとめとおまけ
これで快適にwebアプリ開発が進められそうです。
ちなみに
npx tsc --watch
と--watchを付けることで、ファイルに変更があると自動でコンパイルしてくれます。
nodemonとかと組み合わせるともっと快適になりそうです。
2021/04/05:追記
"scripts": {
    "dev": "rd /s /q dist & tsc-watch --noClear --onSuccess 'node ./bin/www'",
    "start": "node ./bin/www"
}
のようにすることで、npm run devコマンドで自動コンパイルしながらnodeを起動しなおしてくれる快適な環境にできました。←tsc-watchのインストールが必要です > npm install -D tsc-watch
!!注意!!
僕の環境がwindowsなので、rdコマンドを用いていますが、MacやLinuxの場合は
"scripts": {
    "dev": "rm -rf dist & tsc-watch --noClear --onSuccess 'node ./bin/www'",
    "start": "node ./bin/www"
}
のような感じになると思います。