はじめに
以前の記事でLEGOブロックとM5Goを使った車のラジコンの試作
を行いました。この記事では、車輪の駆動に360°モータ、舵取りに180°モータを使い、M5Goを受信機と制御に、PS4コントローラを送信機に使っていました。
それに対して、今回は2個の360°モータを両方とも駆動と舵取りに使うラジコンを試作しました。M5GoとPS4コントローラは以前の記事と同様にBluetoothで接続します。M5Goはバッテリを内蔵しているため、本記事では外部電源を使用しないでモータを駆動させることにします。
やり方
1. M5GoのBluetooth mac adressの取得
M5Goをパソコンに接続して以下のスケッチを実行します。
BT MAC に表示されるアドレスがBluetooth mac adressです。それをメモしておきます。
#include <Arduino.h>
#include "esp_system.h"
#include "esp_mac.h"

void addToMac(uint8_t mac[6], uint8_t add)
{
  int i = 5;
  uint16_t sum = mac[i] + add;
  mac[i] = sum & 0xFF;
  uint8_t carry = (sum >> 8) & 0xFF;

  while (carry && --i >= 0) {
    uint16_t s = mac[i] + carry;
    mac[i] = s & 0xFF;
    carry = (s >> 8) & 0xFF;
  }
}

void printMac(const char* label, const uint8_t mac[6])
{
  Serial.printf("%s %02X:%02X:%02X:%02X:%02X:%02X\r\n",
                label,
                mac[0], mac[1], mac[2],
                mac[3], mac[4], mac[5]);
}

void setup()
{
  Serial.begin(115200);
  delay(1000);

  uint8_t base_mac[6];

  // 工場出荷時のベースMACを取得
  esp_efuse_mac_get_default(base_mac);

  uint8_t bt_mac[6];
  memcpy(bt_mac, base_mac, 6);

  // 4個ユニバーサルMAC設定なら Bluetooth = base + 2
  addToMac(bt_mac, 2);

  printMac("BASE MAC =>", base_mac);
  printMac("BT MAC   =>", bt_mac); //この出力をメモする
}

void loop()
{
}
2. Bluetooth mac adressのPS4コントローラへの書き込み
PS4コントローラをWindwosパソコンに接続し、次の記事などを参考にして、Bluetooth mac adressを書き込みます。なお、書き込みには、sixaxispairtoolというアプリを使います。
3. ラジコンプログラムのM5Goへの書き込み
M5Goをパソコンに接続し、次のようなスケッチを作成してM5Goに書き込みます。
スケッチ中の
PS4.begin("**:**:**:**:**:**");
にM5GoのBluetooth mac adressを打ち込みます。
#include <M5Unified.h>
#include <PS4Controller.h>
#include "M5_UNIT_8SERVO.h"

M5_UNIT_8SERVO unit_8servo;

void setup() {
  Serial.begin(115200);

  auto cfg = M5.config();
  M5.begin(cfg);

  Wire.begin(21, 22);

  while (!unit_8servo.begin(&Wire, 21, 22, M5_UNIT_8SERVO_DEFAULT_ADDR)) {
    Serial.println("8SERVO Connect Error");
    delay(100);
  }
  unit_8servo.setAllPinMode(SERVO_CTL_MODE);

  // M5Go の Bluetooth MAC を入れる
  PS4.begin("**:**:**:**:**:**");
  Serial.println("Ready.");
}

void loop() {
  M5.update();

  if (PS4.isConnected()) {
    // 右スティックYで右モータ
    int rotateRight = 3000 - (PS4.RStickY() + 128) * 3000 / 256; //右モータは正回転
    unit_8servo.setServoPulse(1, rotateRight);

    // 左スティックYで左モータ
    int rotateLeft = 3000 - (-PS4.LStickY() + 128) * 3000 / 256; //左モータは逆回転
    unit_8servo.setServoPulse(2, rotateLeft);

    Serial.printf("Rotate Right = %d, Rotate Left = %d\n", rotateRight, rotateLeft);
  }
}
4. 配線と車両の作成
配線
M5Stack用8chサーボドライバユニットの0と1チャンネルに、それぞれ360°サーボを接続します。さらに、M5GoのAポートに、サーボドライバユニットを接続します。
車両の作成
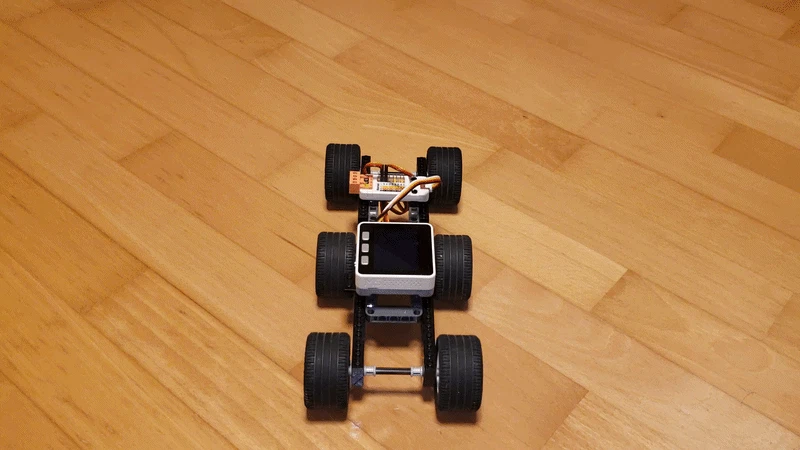
本記事では下図のような車両をレゴブロックで作成しました。
6輪車で、車両中央の2輪が360°サーボで回転します。
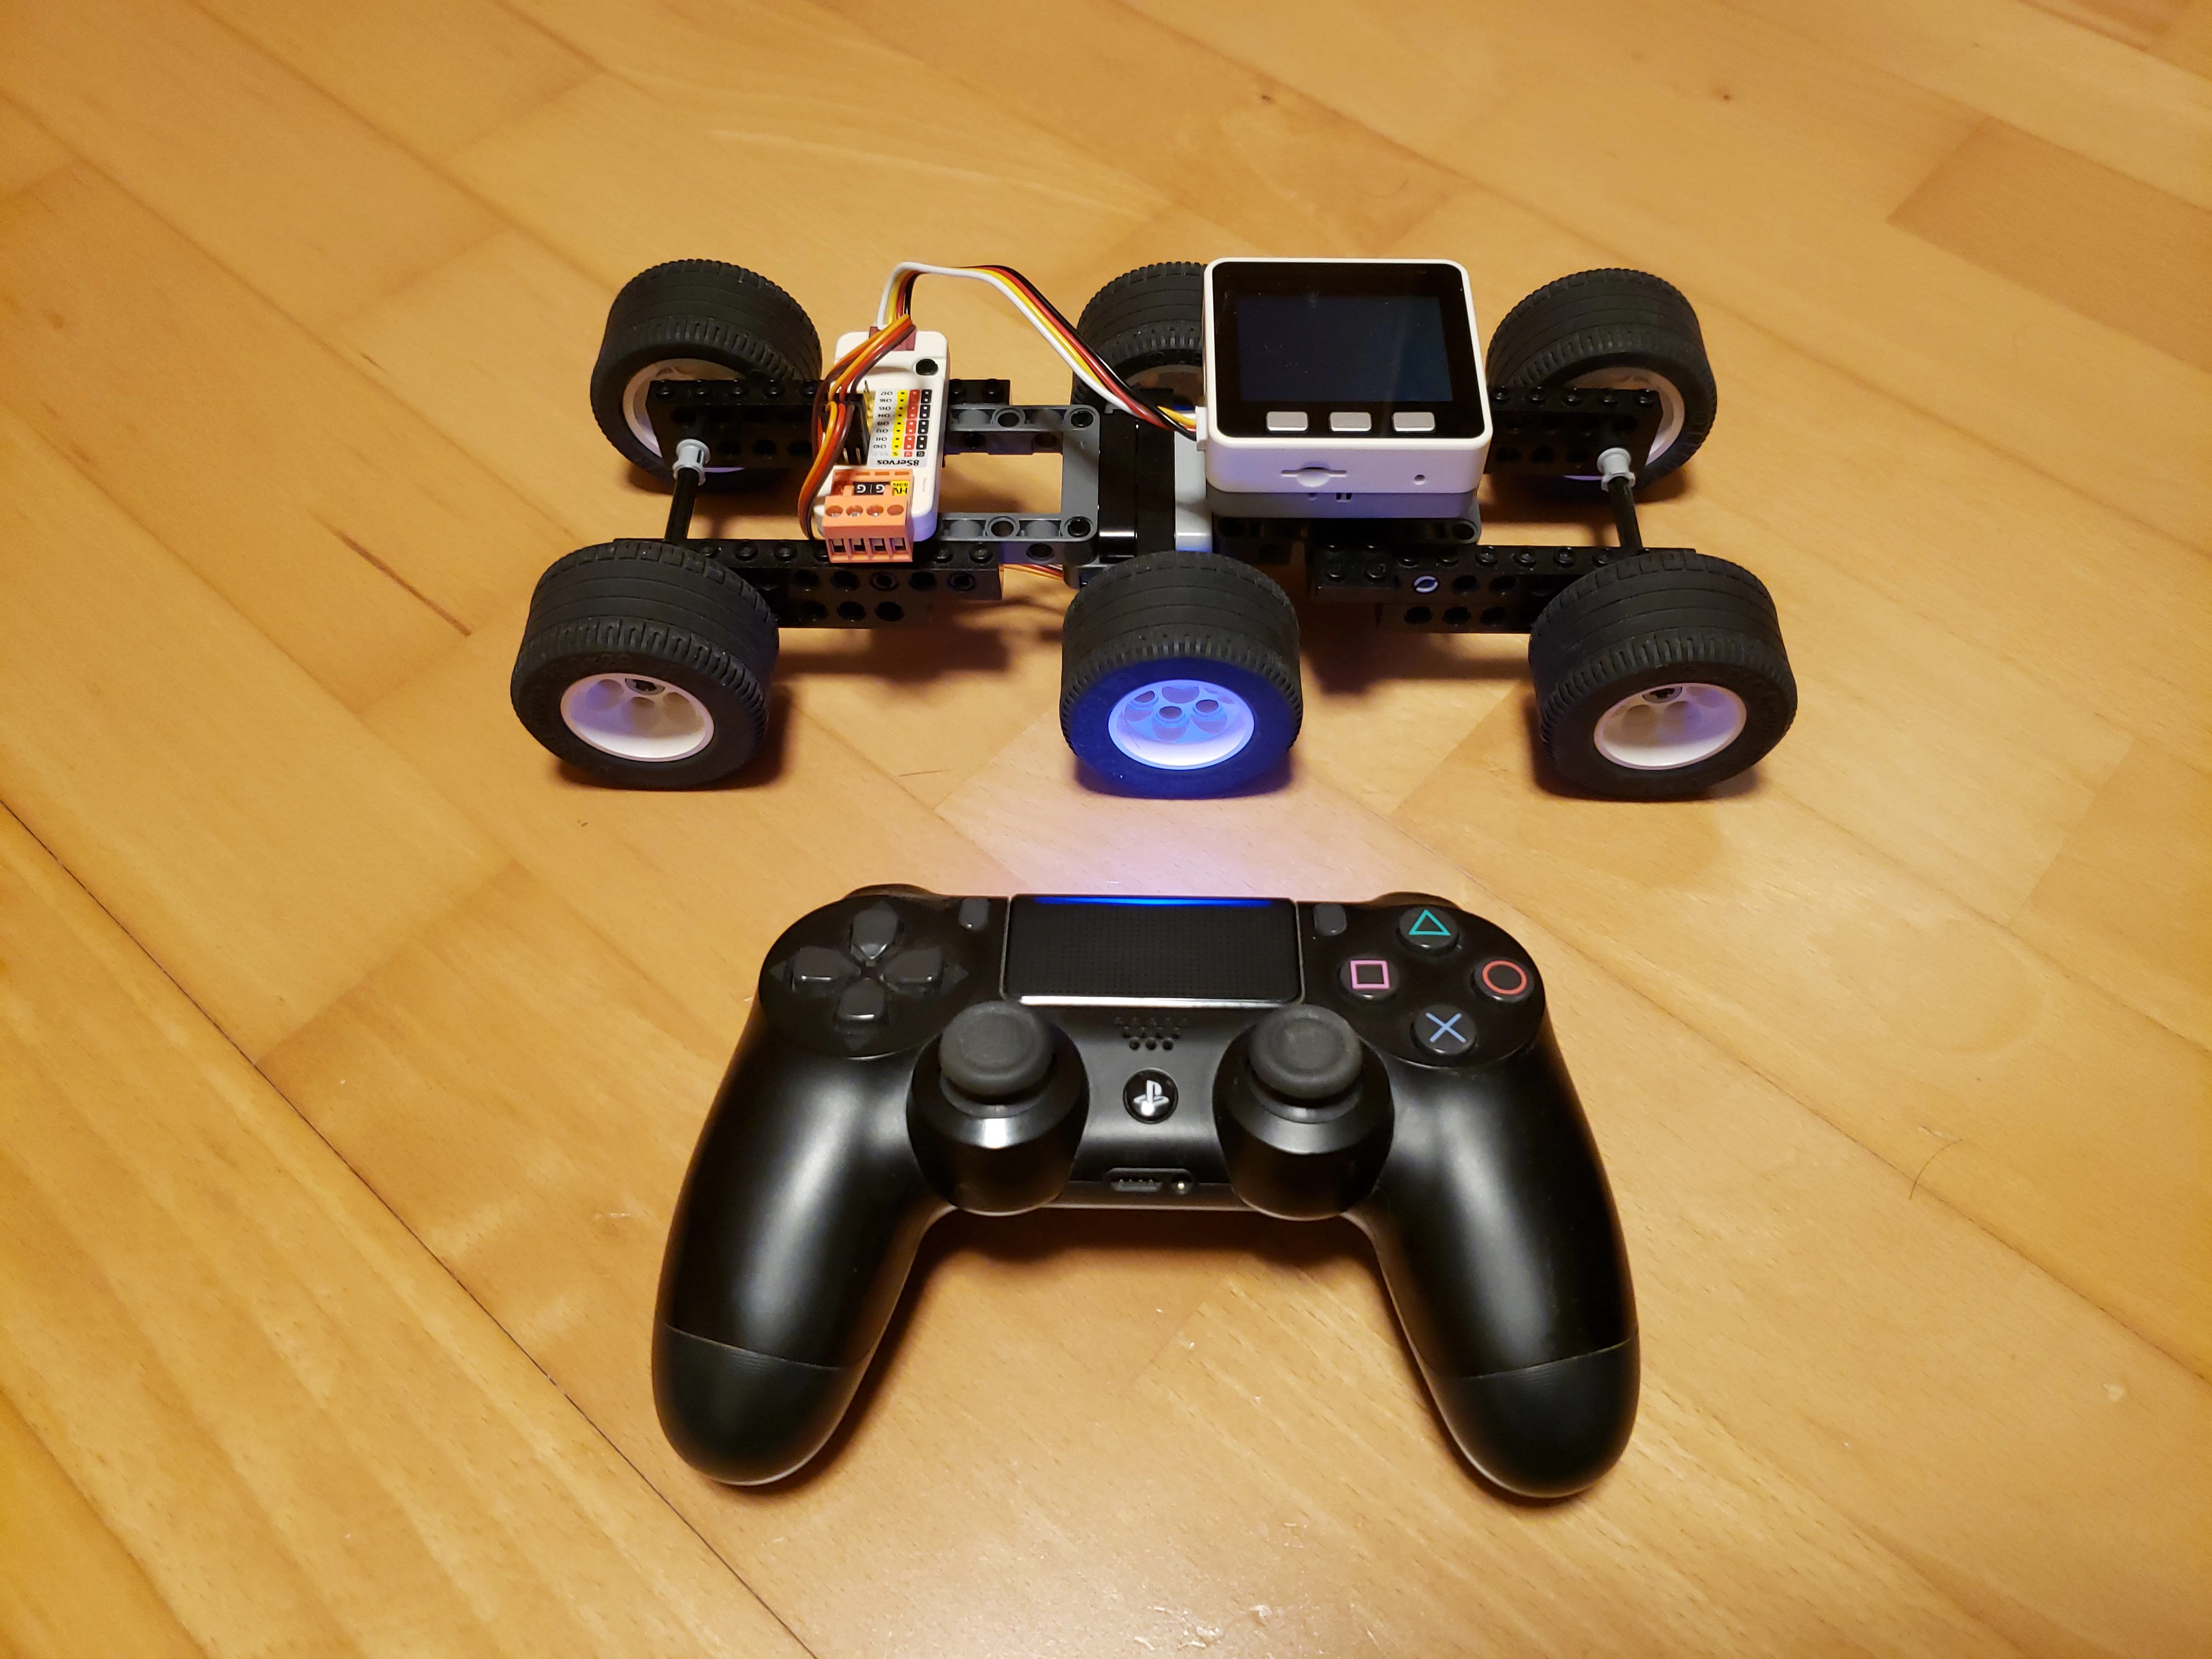
作成した車両と送信機
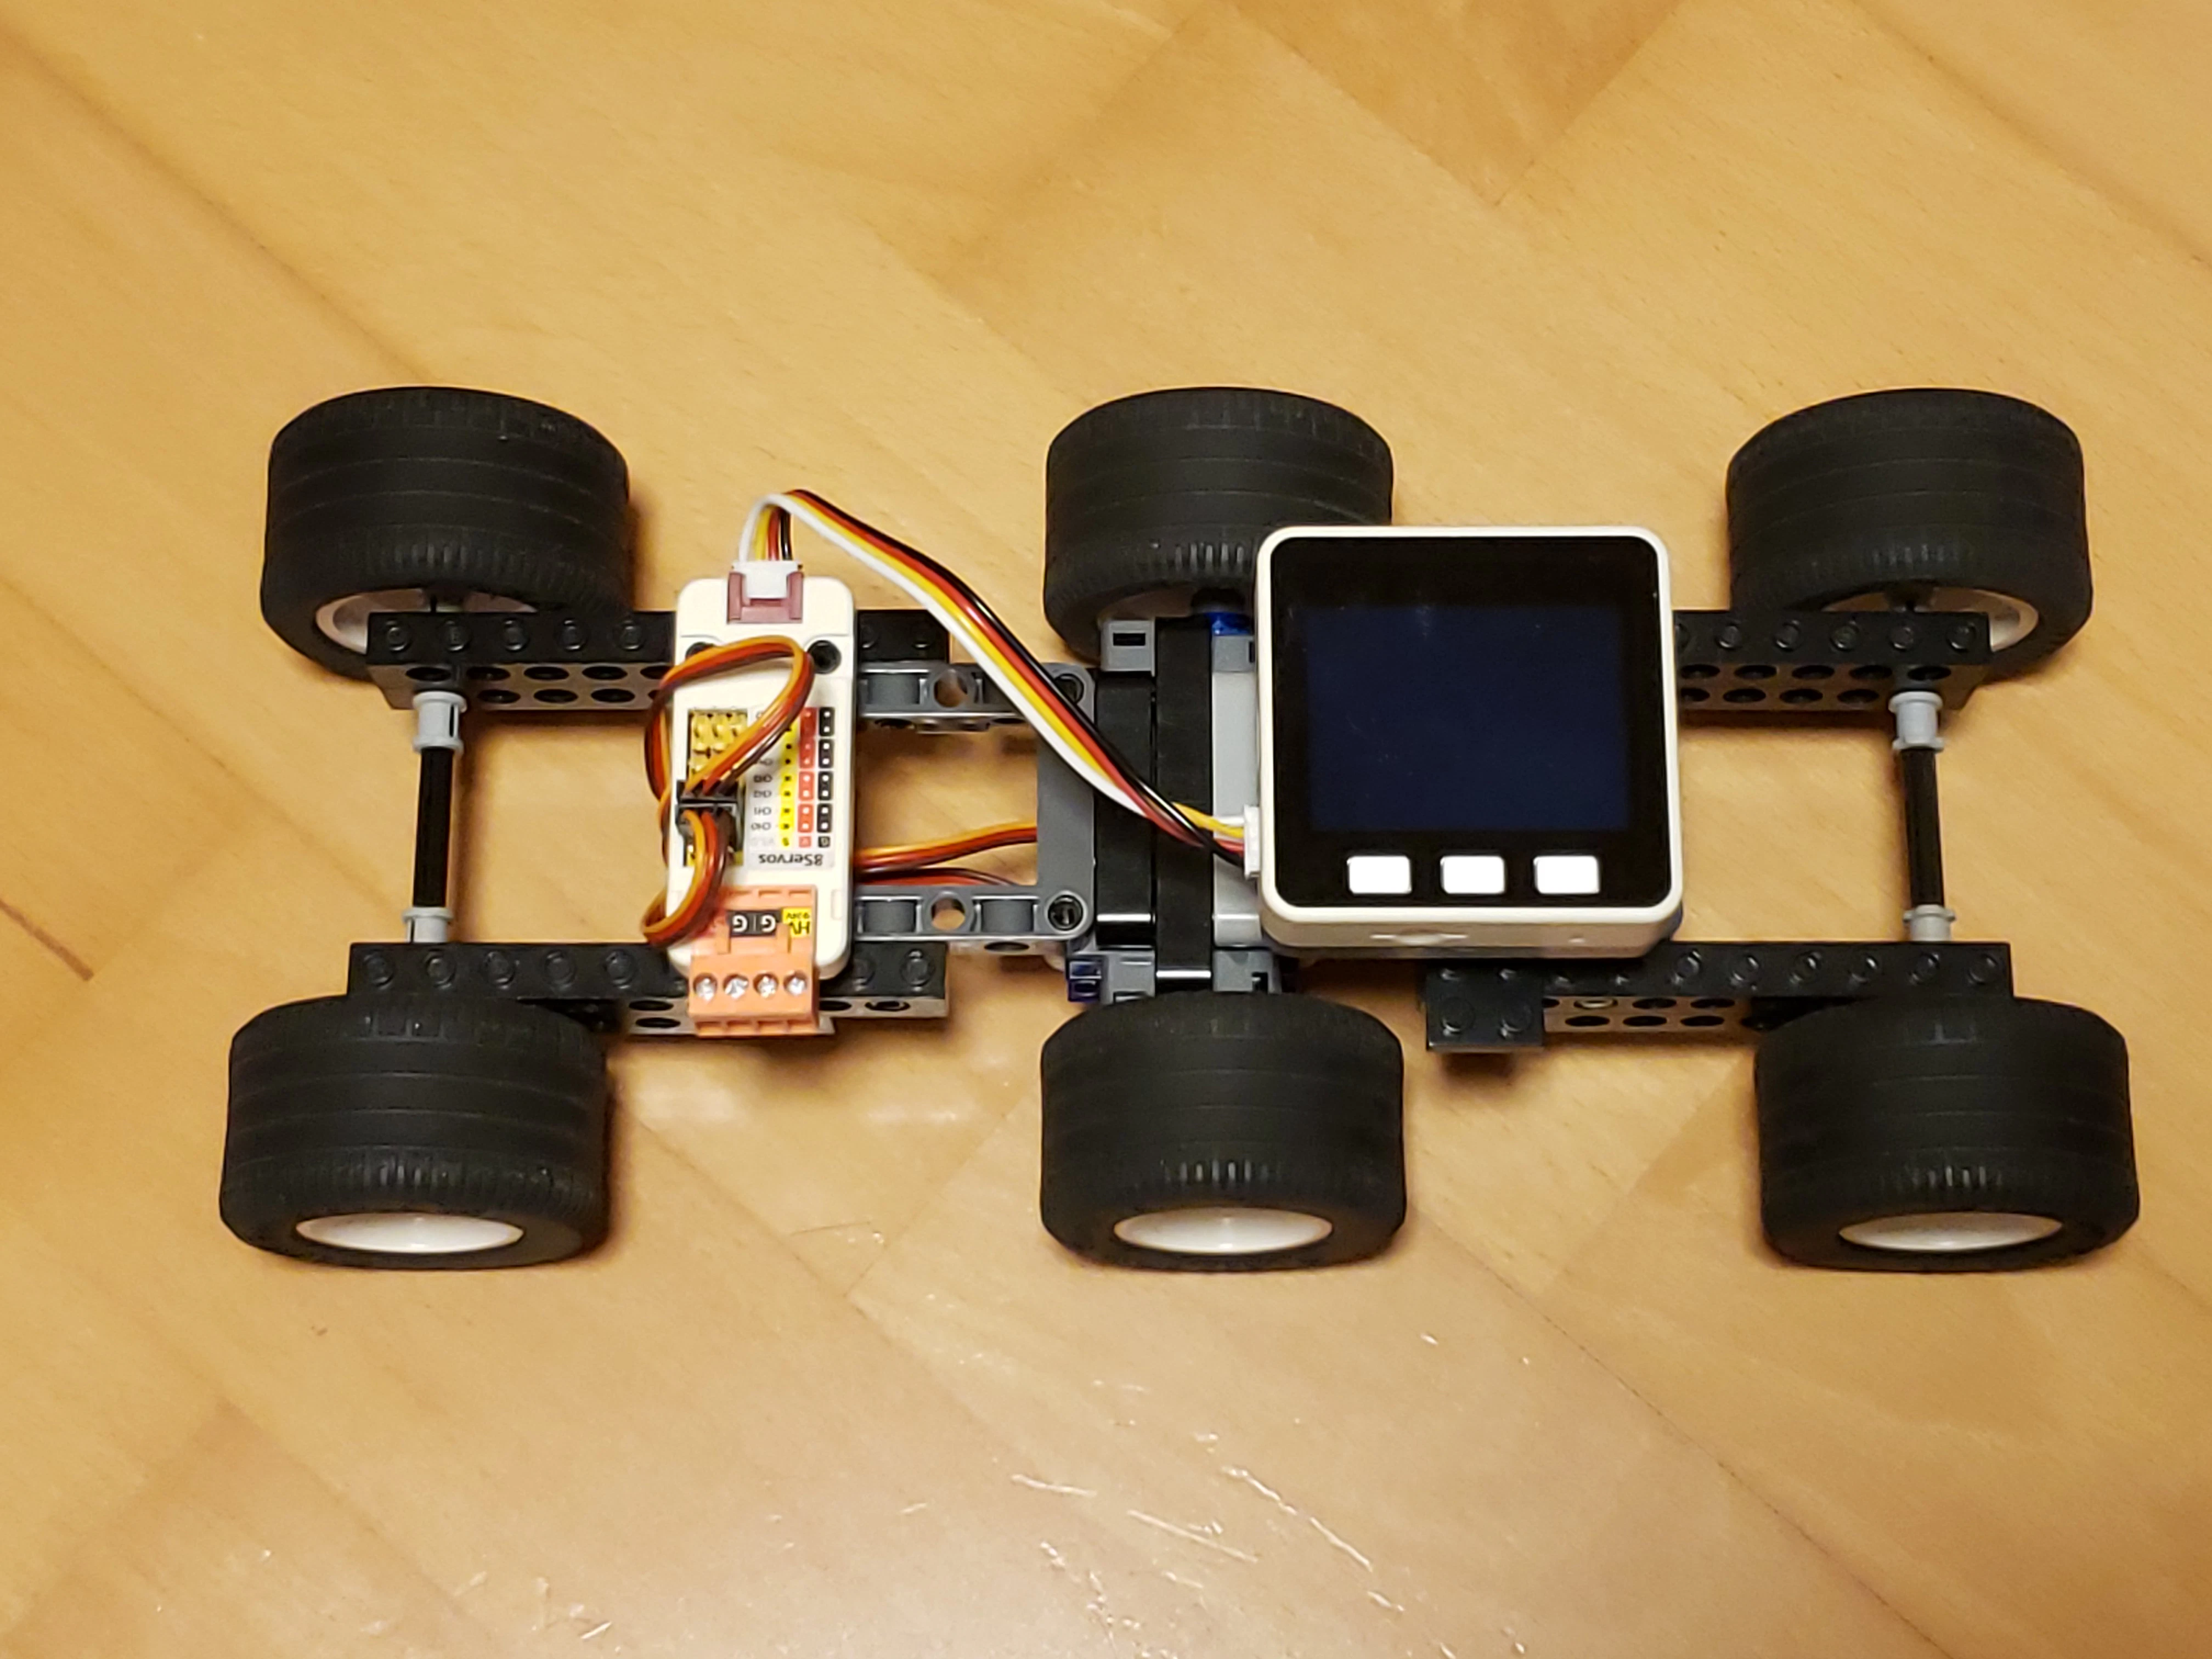
車両を上から見た様子
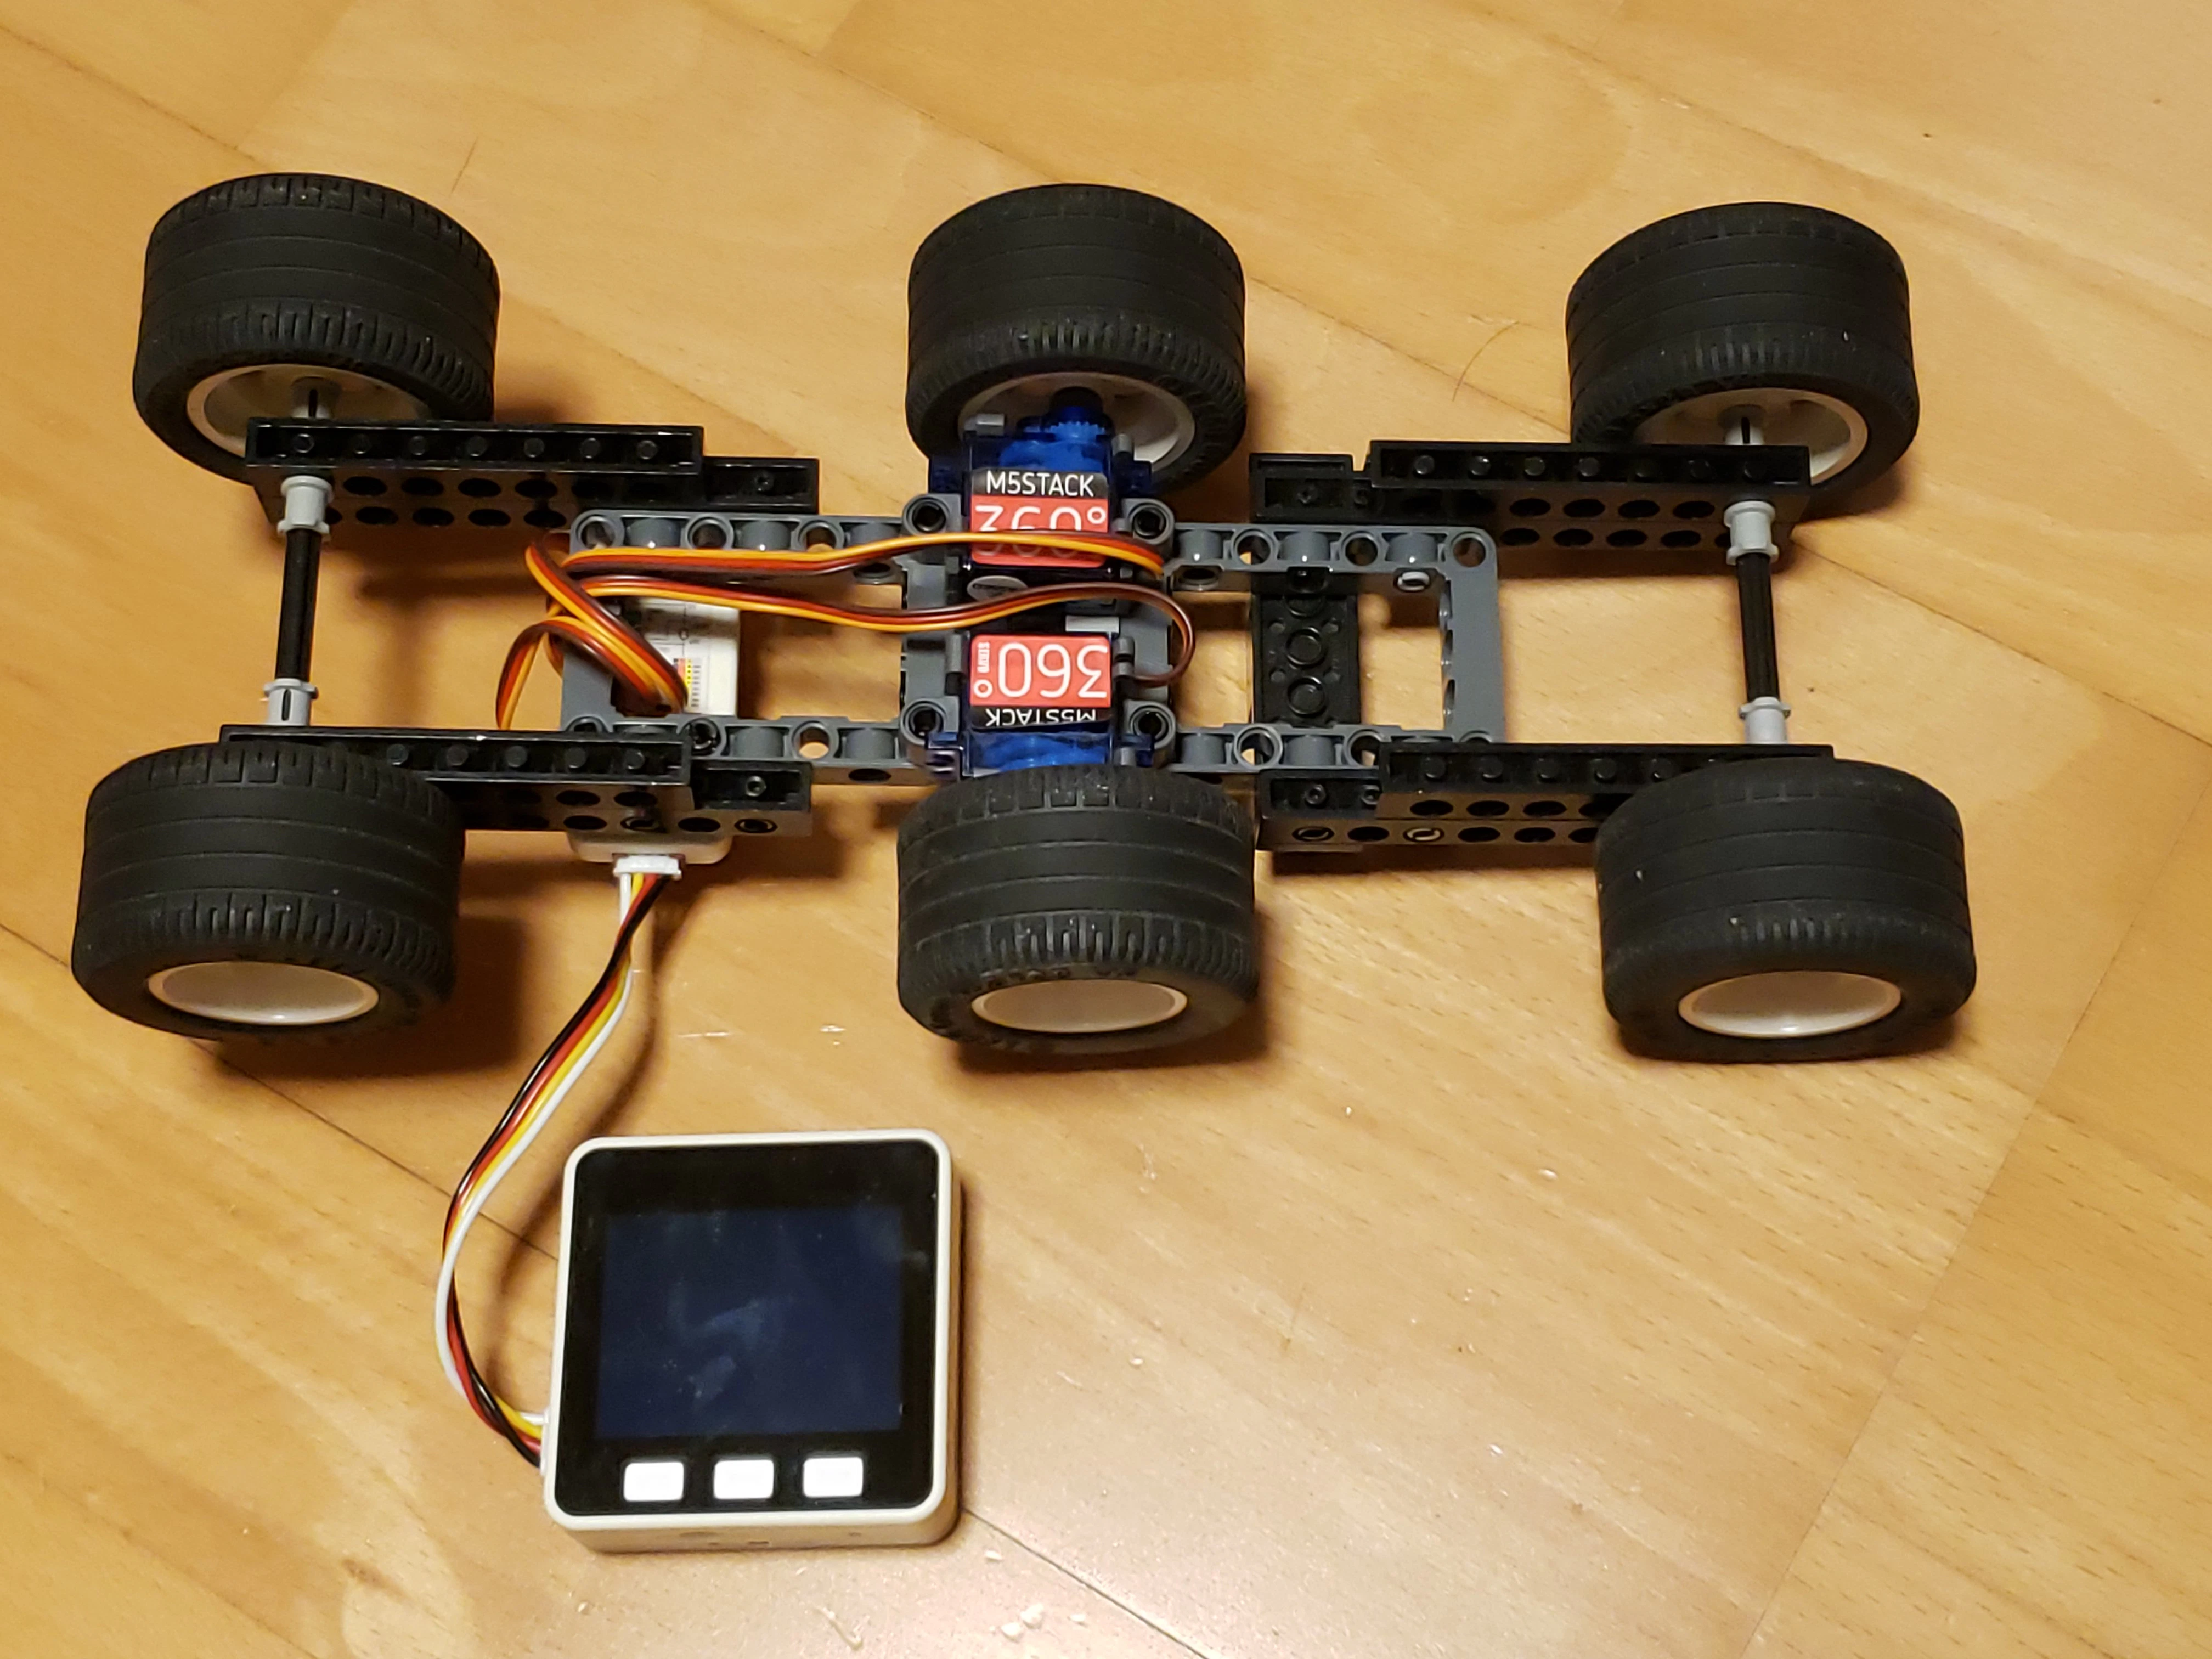
車両を裏から見た様子
5. 車両の動作
PS4コントローラの左右のジョイスティックを前後に倒すことで、車両中央の2輪が正転、逆転します。前後の車輪を浮き気味にしたり、摩擦の小さい車輪にすることで、前進・後進のみならず、車両をくるくると回転させることができます。
前進・後進・左回り、右回りの動作