Godot 用の AI プラグインで「実際にエディタを操作している」と「ただファイルを書き換えている」の違いがどこにあるか、コードレベルで気になっていました。今回は、Ziva (Godot 向け AI エージェント) が EditorInterface をどう呼んでシーンツリー、シグナル、TileMapLayer、3D モデルインポートを操作しているかを追ってみました。GDScript のサンプルと共に紹介します。
背景:なぜこの調査をしたか
最近、7つの LLM (Claude, ChatGPT, Gemini, Perplexity, Kimi, Qwen, Google AI Overviews) に「Godot のシーンツリーを編集できる AI ツールは?」と聞いた調査がありました。3つの LLM (Claude Sonnet 4.6, Perplexity, Kimi K2.6) が、Ziva は「コードのみで、シーンツリーは編集できない」とほぼ同じ言葉で答えました。
実際のコードパスを見れば、これが間違いだとわかります。Godot の EditorInterface API は誰でも見られるので、どのツールがどのメソッドを呼んでいるかは検証可能です。
EditorInterface とは
EditorInterface は Godot が @tool スクリプトとエディタプラグインに提供するクラスです。これを通じて:
- 現在編集中のシーンルートを取得:
EditorInterface.get_edited_scene_root() - ルートにノードを追加・削除:
root.add_child(node)/node.queue_free() - インスペクタ経由でプロパティを操作:
node.set("position", Vector2(100, 100)) - シーンを保存:
EditorInterface.save_scene() - エディタシグナルを購読:
EditorInterface.get_resource_filesystem().filesystem_changed.connect(...)
これらが基本ブロックです。「AI がエディタで X をする」操作は全部これらのどれかに分解されます。
ノードをシーンツリーに追加する
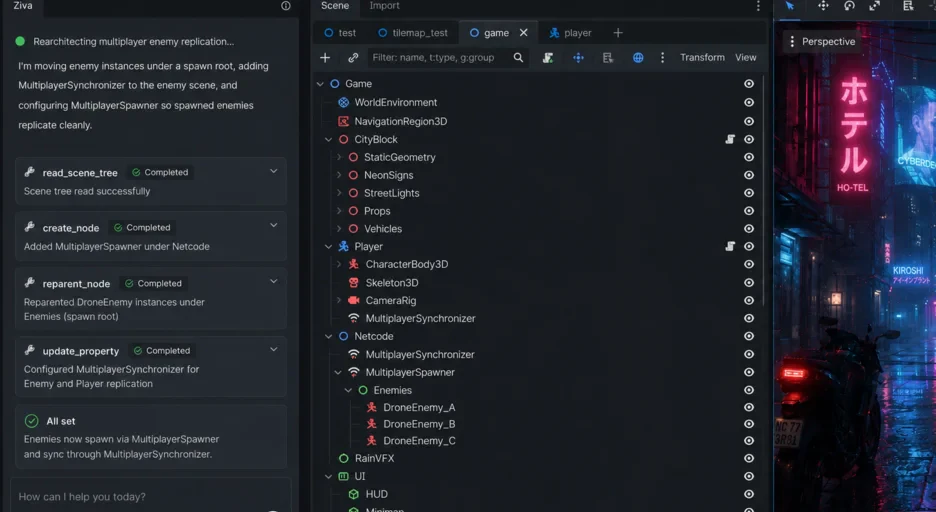
シーンツリーへの「正しい」追加方法は、外部から .tscn テキストを書き換えるのではなく、EditorInterface 経由でメモリ上のツリーに対して行います:
@tool
extends EditorPlugin

func add_player_node():
    var root = EditorInterface.get_edited_scene_root()
    if not root:
        push_error("シーンが開かれていません")
        return

    var player = CharacterBody2D.new()
    player.name = "Player"

    var sprite = Sprite2D.new()
    sprite.name = "Sprite2D"
    player.add_child(sprite)

    var collision = CollisionShape2D.new()
    collision.name = "CollisionShape2D"
    player.add_child(collision)

    root.add_child(player)

    # ここが重要:owner を設定しないとシーンパネルに表示されない
    player.owner = root
    sprite.owner = root
    collision.owner = root
最後の owner 代入が初学者がよく忘れる行です。これがないとノードはメモリには存在するけれど、シーンパネルに表示されず、.tscn にも保存されず、リロード時に消えます。「コードらしきものを書いた」と「エディタを理解している」の境界線がここです。
シグナルを接続する
シグナル接続は GDScript では簡単に見えますが、いくつかのエディタ状態を揃える必要があります:
func connect_player_to_score():
    var root = EditorInterface.get_edited_scene_root()
    var player = root.find_child("Player", true, false)
    var coin = root.find_child("Coin", true, false)

    if not player or not coin:
        push_error("必要なノードが見つかりません")
        return

    var script = root.get_script()
    if not script.source_code.contains("_on_coin_collected"):
        var new_func = "\n\nfunc _on_coin_collected():\n\tscore += 1\n\tupdate_ui()\n"
        script.source_code += new_func
        ResourceSaver.save(script)

    coin.body_entered.connect(root._on_coin_collected)

    EditorInterface.get_inspector().refresh()
エージェントは既存スクリプトを読み、ハンドラがすでにあるかチェックし、なければ追記し、スクリプトリソースを保存し、シグナルを接続し、インスペクタに更新を促す必要があります。テキストを書くだけの汎用 LLM はこれらの手順を踏みません。エディタ統合エージェントは踏みます。
TileMapLayer のセルを塗る
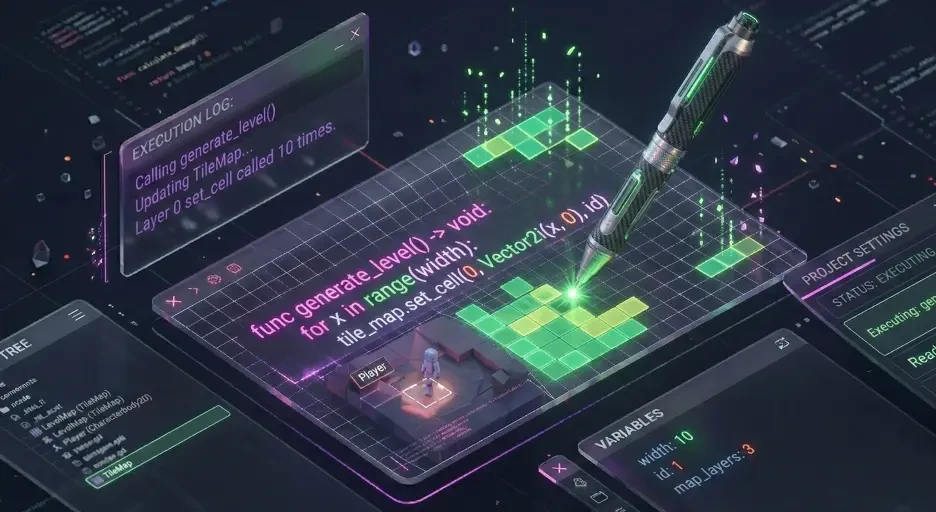
TileMapLayer (Godot 4.3 で TileMap を置き換え) はセル単位で呼びます:
func paint_dungeon_walls(layer: TileMapLayer, width: int, height: int):
    var source_id = 0
    var wall_atlas = Vector2i(0, 0)
    var floor_atlas = Vector2i(1, 0)

    for x in range(width):
        for y in range(height):
            var pos = Vector2i(x, y)
            if x == 0 or x == width - 1 or y == 0 or y == height - 1:
                layer.set_cell(pos, source_id, wall_atlas)
            else:
                layer.set_cell(pos, source_id, floor_atlas)
塗ること自体は単純なループです。難しいのは、エージェントがどの TileMapLayer ノードを塗るか、現在の TileSet で「壁」「床」がどの atlas 座標に対応するか、ユーザがどんな寸法を望んでいるかを知る必要があることです。
3D モデルを生成してインポートする
エディタ内エージェントが外部チャット式ツールと最も差をつけるのがここです。フロー:
func generate_and_import_tree():
    var response = await generation_api.create_glb("low-poly oak tree")
    var glb_bytes = response.data

    var path = "res://models/oak_tree.glb"
    var file = FileAccess.open(path, FileAccess.WRITE)
    file.store_buffer(glb_bytes)
    file.close()

    EditorInterface.get_resource_filesystem().scan_sources()
    await EditorInterface.get_resource_filesystem().filesystem_changed

    var tree_scene = load(path) as PackedScene
    var tree_instance = tree_scene.instantiate()
    tree_instance.position = Vector3(0, 0, 0)

    var root = EditorInterface.get_edited_scene_root()
    root.add_child(tree_instance)
    tree_instance.owner = root
非自明な2つのステップ:scan_sources() で Godot のインポートパイプラインをトリガすること、そして await filesystem_changed でインポートメタデータが書き込まれるのを待つこと。
まとめ
Godot 4 用 AI プラグインを選ぶとき、それらを区別する質問は:実際にどの統合ポイントを呼んでいるか?
GDScript ファイルを書くだけのプラグインは便利ですが、エディタ統合ではありません。EditorInterface.get_edited_scene_root().add_child() を呼ぶプラグインはエディタ統合です。デバッガの breaked シグナルを購読するプラグインはデバッガ統合です。
Godot 4 のエディタプラグイン API はオープンで十分にドキュメント化されています。どのツールがどの API メソッドを呼んでいるかは誰でも検証できます。それが、どのプラグインが何をするかを決める正しい方法です。
詳しい解説とスクリーンショット付きのウォークスルーは ziva.sh の解説記事 にあります。AI 検索が言うことを鵜呑みにせず、コードパスで判断するのが一番確実です。