第3章
第3章からは、Twitterみたいなアプリケーションをひたすら作っていく作業になる。
この章では、ほぼ静的ページを作ることが目標
(スピード感重視で進めるため、詳細な説明を飛ばす箇所があります)
セットアップ
セットアップの手順
①railsにてニューアプリを作成
$ rails _6.0.3_ new sample_app
②Gemfile設定
source 'https://rubygems.org'
git_source(:github) { |repo| "https://github.com/#{repo}.git" }

gem 'rails',      '6.0.3'
gem 'puma',       '4.3.6'
gem 'sass-rails', '5.1.0'
gem 'webpacker',  '4.0.7'
gem 'turbolinks', '5.2.0'
gem 'jbuilder',   '2.9.1'
gem 'bootsnap',   '1.4.5', require: false

group :development, :test do
  gem 'sqlite3', '1.4.1'
  gem 'byebug',  '11.0.1', platforms: [:mri, :mingw, :x64_mingw]
end

group :development do
  gem 'web-console',           '4.0.1'
  gem 'listen',                '3.1.5'
  gem 'spring',                '2.1.0'
  gem 'spring-watcher-listen', '2.0.1'
end

group :test do
  gem 'capybara',                 '3.28.0'
  gem 'selenium-webdriver',       '3.142.4'
  gem 'webdrivers',               '4.1.2'
  gem 'rails-controller-testing', '1.0.4'
  gem 'minitest',                 '5.11.3'
  gem 'minitest-reporters',       '1.3.8'
  gem 'guard',                    '2.16.2'
  gem 'guard-minitest',           '2.4.6'
end

group :production do
  gem 'pg', '1.1.4'
end

# Windows ではタイムゾーン情報用の tzinfo-data gem を含める必要があります
gem 'tzinfo-data', platforms: [:mingw, :mswin, :x64_mingw, :jruby]
③bundle install
$ bundle install --without production
ここまで出来れば基本設定終了
gitレポジトリを初期化
$ git init
$ git add -A
$ git commit -m "Initialize repository"
静的ページ
Q:静的ページとは?
A:サーバーからHTMLのページがそのままの内容が表示され、ユーザーが何か変更を加えない限りページが変わらないページのこと
まずは、ブランチを作る
$ git checkout -b static-pages
つぎに、静的ページ用のコントローラーを生成する
$ rails generate controller StaticPages home help
StaticPagesという形でキャメルケースで渡しているが、ファイル名はスネークケースで作られる。
static_pages_controller.rb ←スネークケースになっている。
generateコマンドには、短縮形があるが他にもいくつか短縮形がある。
| 完全なコマンド | 短縮形 |
|---|---|
| $ rails server | $ rails s |
| $ rails console | $ rails c |
| $ rails generate | $ rails g |
| $ rails test | $ rails t |
| $ bundle install | $ bundle |
| 基本的に頭文字を取っているだけなので分かりやすい。 |
作成するとき間違えた時の対処法
①コントローラーの削除
$ rails destroy controller コントローラー名 アクション名
②モデルの削除
rails destroy model モデル名
③マイグレーションを元に戻す。(1つ前の状態に戻す)
$ rails db:rollback
④最初の状態に戻したい時
$ rails db:migrate VERSION=0
rails generateコマンドで自動的に作られたルーティングを見てみる。
Rails.application.routes.draw do
  get  'static_pages/home'
  get  'static_pages/help'
  root 'application#hello'
end
get 'static_pages/home'を例に見ると、GETリクエストをstatic_pagesコントローラーのhomeアクションに出している。
rails serverを起動後、URL/static_pages/homeを貼り付けてアクセスすると...

表示されていることが確認できた。
railsにおけるHTTPリクエスト一覧
・GET →データ取得
・POST →データ作成
・PATCH →データ更新
・DELETE→データ削除
特にGETとPOSTは頻繁に使われる。
Railsの機能
class StaticPagesController < ApplicationController
  def home
  end

  def help
  end
end
static_pages_controller.rbは、StaticPagesControllerというクラスを定義しており、このようなクラスには**メソッド(関数)**をまとめたりする。
また、StaticPagesControllerがApplicationControllerを継承している。上記のコードのhomeアクションやhelpアクションは空になっており、純粋なRuby言語だったら、これらのメソッドは実行されない。しかし、Railsの機能のおかげで、StaticPagesControllerがApplicationControllerのクラスを継承しているおかげで、/static_pages/homeにアクセスすると、StaticPagesControllerのhomeアクションが実行され、対応するビューが表示される。
下記は対応するビュー
<h1>StaticPages#home</h1>
<p>Find me in app/views/static_pages/home.html.erb</p>
演習
1.Fooというコントローラを生成し、その中にbarとbazアクションを追加してみてください。
$ rails generate controller Foo bar baz
2.コラム 3.1で紹介したテクニックを駆使して、Fooコントローラとそれに関連するアクションを削除してみてください。
$ rails destroy controller Foo bar baz
テスト
ここでのテストは自動化テストを作成して、実装した機能が正しく動作しているかを確認するためのもの。テストを書くことで、きちんと動作しているかのセーフティネットにもなるし、バグの発見に余計な時間をかけずに済む。
テストはTDD駆動開発で行う。
1.最初に正しいコードがないと失敗するテストを書く
2.本編のコードを書き、そのテストがパスできるようにするという流れ
最初のテスト
最初の方でrails generate controllerを実行したおかげで、テストファイルがきちんと作成されている。
$ ls test/controllers/
static_pages_controller_test.rb
テスト内容の中身
require 'test_helper'

class StaticPagesControllerTest < ActionDispatch::IntegrationTest

  test "should get home" do
    get static_pages_home_url
    assert_response :success
  end

  test "should get help" do
    get static_pages_help_url
    assert_response :success
  end
end
ここではテストのブロックが二つある。それぞれのアクション(homeとhelp)にGETリクエストを送信して、assert_responseが:success成功(200に値)になったらOKというもの。
実際にrails testコマンドでテストした結果が下の内容
Finished in 5.373065s, 0.3722 runs/s, 0.3722 assertions/s.
2 runs, 2 assertions, 0 failures, 0 errors, 0 skips
テストが期待通り成功していることが分かる。後でテスト結果を見やすくするため色付けを行う。
テスト開発方法
テスト駆動開発のサイクルは、下記の順番で行う。
①RED(失敗するテストを書く)
②GREEN(コードを書いてテストを成功させる)
③REFACTOR(必要なリファクタリングをする)
上の例に倣って、まずは失敗するテストとして、Aboutページ用のテストコードを書く。
  test "should get about" do
    get static_pages_about_url
    assert_response :success
  end
テストを走らせてみると、期待通り失敗した。(1 errors)
$ rails test
Error:
StaticPagesControllerTest#test_should_get_about:
NameError: undefined local variable or method `static_pages_about_url' for #<StaticPagesControllerTest:0x000055a8dbb30f90>
    test/controllers/static_pages_controller_test.rb:15:in `block in <class:StaticPagesControllerTest>'
3 runs, 2 assertions, 0 failures, 1 errors, 0 skips
エラー内容を読み解いてみる。
NameError: undefined local variable or method `static_pages_about_url'
この一文によると、「aboutページのURLがない」というメッセージが出てる。
なので、ルーティングファイルを修正し、aboutページまでのルートを設定する。
ルーターにget 'static_pages/about'を追加し、テストすると
$ rails test
Error:
StaticPagesControllerTest#test_should_get_about:
AbstractController::ActionNotFound: The action 'about' could not be found for StaticPagesController
    test/controllers/static_pages_controller_test.rb:15:in `block in <class:StaticPagesControllerTest>'
再びエラーがでた。
エラー内容を読み解くと、「StaticPagesコントローラーにaboutアクションがないよ」というメッセージがある。なので、aboutアクションを追加する。
  def about
  end
追加したので、またまたテストする。
Error:
StaticPagesControllerTest#test_should_get_about:
ActionController::MissingExactTemplate: StaticPagesController#about is missing a template for request formats: text/html
    test/controllers/static_pages_controller_test.rb:15:in `block in <class:StaticPagesControllerTest>'
エラー内容からミッシングテンプレートとのことで、テンプレートが無いと言っている。アクションに対応するビューを作成しなければならない。
app/views/static_pages/にabout.html.erbのビューを作成する。1
ビューの中身は下記のコード。
<h1>About</h1>
<p>
  <a href="https://railstutorial.jp/">Ruby on Rails Tutorial</a>
  is a <a href="https://railstutorial.jp/#ebook">book</a> and
  <a href="https://railstutorial.jp/screencast">screencast</a>
  to teach web development with
  <a href="https://rubyonrails.org/">Ruby on Rails</a>.
  This is the sample application for the tutorial.
</p>
これで準備はそろったのでテストすると
$ rails test
3 runs, 3 assertions, 0 failures, 0 errors, 0 skips
テストが無事成功した。
ちょびっと動的ページ
いくつかの静的ページを作成したので、今度は動的要素を加えたページを作る。
今回行う動的要素は、ページ毎にタイトルを変更するというもの。
<title>タイトル</title>の中身を変える。これはSEOには必須。
勉強用にファイル名を変更
mv app/views/layouts/application.html.erb layout_file
assert_selectはhtmlにあるtitleタグを指定して、正しい文字列があるかどうかを確認するもの。テストは、下記のコードになる。(homeの部分はそのページのタイトルに変更する)
assert_select "title", "Home | Ruby on Rails Tutorial Sample App"
テストコードを追加したもの
require 'test_helper'

class StaticPagesControllerTest < ActionDispatch::IntegrationTest

  test "should get home" do
    get static_pages_home_url
    assert_response :success
    assert_select "title", "Home | Ruby on Rails Tutorial Sample App"
  end

  test "should get help" do
    get static_pages_help_url
    assert_response :success
    assert_select "title", "Help | Ruby on Rails Tutorial Sample App"
  end

  test "should get about" do
    get static_pages_about_url
    assert_response :success
    assert_select "title", "About | Ruby on Rails Tutorial Sample App"
  end
end
それぞれのタイトルページ名が入っていて、チェックしているテストコードが書かれている。
テストコードを追加したので、テストをしてみた。
$ rails test
3 tests, 6 assertions, 3 failures, 0 errors, 0 skips
この時点では失敗する。
なので、タイトルを各ページにhtmlを追加して、テストしてみた。
$ rails test
3 tests, 6 assertions, 0 failures, 0 errors, 0 skips
テストが成功した。
演習
1.StaticPagesコントローラのテスト(リスト 3.25)には、いくつか繰り返しがあったことにお気づきでしょうか? 特に「Ruby on Rails Tutorial Sample App」という基本タイトルは、各テストで毎回同じ内容を書いてしまっています。そこで、setupという特別なメソッド(各テストが実行される直前で実行されるメソッド)を使って、この問題を解決したいと思います。まずは、リスト 3.31のテストが green になることを確認してみてください(リスト 3.31では、2.2.2で少し触れたインスタンス変数や文字列の式展開というテクニックを使っています。それぞれ4.4.5と4.2.1で詳しく解説するので、今はわからなくても問題ありません)。
上の演習の通りなので、少し手を加える。
require 'test_helper'

class StaticPagesControllerTest < ActionDispatch::IntegrationTest

  def setup
    @base_title = "Ruby on Rails Tutorial Sample App"
  end

  test "should get home" do
    get static_pages_home_url
    assert_response :success
    assert_select "title", "Home | #{@base_title}"
  end

  test "should get help" do
    get static_pages_help_url
    assert_response :success
    assert_select "title", "Help | #{@base_title}"
  end

  test "should get about" do
    get static_pages_about_url
    assert_response :success
    assert_select "title", "About | #{@base_title}"
  end
end
リファクター
今回リファクターする理由として下記の3つがある。
①ページのタイトルがほぼ同じ。
②Ruby on Rails Tutorial Sample App」という文字が3つのタイトルで繰り返し使われている。
③HTMLの構造全体が各ページで重複している。
Rubyには「DRY」(Don’t Repeat Yourself: 繰り返すべからず)という原則がある。ということは、先ほどのコードはこの原則に反するものである。
重複を取り除く一つの方法としては、ビューで「埋め込みRuby」を使う事。
今回使うのはprovideメソッドを使い、ページ毎にタイトルを可変させる。
<% provide(:title, "Home") %>
<!DOCTYPE html>
<html>
  <head>
    <title><%= yield(:title) %> | Ruby on Rails Tutorial Sample App</title>
  </head>
一部コードを抜粋
<% provide(:title, "Home") %>には、provideメソッドを呼び出し、メソッド引数にはHomeという文字列と、:titleというラベルを関連付けている。
そして、<%= yield(:title) %>という書き方でRubyにあるyieldメソッドを使用している。ここで実際に文字が入る。
<% ... %>と<%= ... %>の違い
・<% ... %>単に中にあるコードの実行(出力はしない)
・<%= ... %>中のコードの実行結果を挿入し出力する。要はViewでも見れる。
Viewを書き換えたのでテスト
$ rails test
3 tests, 6 assertions, 0 failures, 0 errors, 0 skips
問題なかったので、helpとaboutページにも追加していく。
<% provide(:title, "Help") %>
<!DOCTYPE html>
<html>
  <head>
    <title><%= yield(:title) %> | Ruby on Rails Tutorial Sample App</title>
  </head>
<% provide(:title, "About") %>
<!DOCTYPE html>
<html>
  <head>
    <title><%= yield(:title) %> | Ruby on Rails Tutorial Sample App</title>
  </head>
今のところHome、Help、Aboutページは下のような構造になっている。
<% provide(:title, "The Title") %>
<!DOCTYPE html>
<html>
  <head>
    <title><%= yield(:title) %> | Ruby on Rails Tutorial Sample App</title>
  </head>
  <body>
    Contents
  </body>
</html>
タイトルの文言が違うだけは、構造は完全に同じことが分かる。(body内のコンテンツは変わってくるが)
先ほどのレイアウトファイルの名前を元に戻しておく。
$ mv layout_file app/views/layouts/application.html.erb
application.html.erbに下のコードを追記する。
<title><%= yield(:title) %> | Ruby on Rails Tutorial Sample App</title>
追記した結果のコード
<!DOCTYPE html>
<html>
  <head>
    <title><%= yield(:title) %> | Ruby on Rails Tutorial Sample App</title>
    <%= csrf_meta_tags %>
    <%= csp_meta_tag %>
    <%= stylesheet_link_tag    'application', media: 'all',
                               'data-turbolinks-track': 'reload' %>
    <%= javascript_pack_tag    'application',
                               'data-turbolinks-track': 'reload' %>
  </head>

  <body>
    <%= yield %>
  </body>
</html>
上記のコードに<%= yield %>という記法があるが、home.html.erb等の内容がHTMLに変換されて、<%= yield %>の位置に挿入される。
各ページにリファクタリングを行う。
<% provide(:title, "Home") %>
<h1>Sample App</h1>
<p>
  This is the home page for the
  <a href="https://railstutorial.jp/">Ruby on Rails Tutorial</a>
  sample application.
</p>
<% provide(:title, "Help") %>
<h1>Help</h1>
<p>
  Get help on the Ruby on Rails Tutorial at the
  <a href="https://railstutorial.jp/help">Rails Tutorial help page</a>.
  To get help on this sample app, see the
  <a href="https://railstutorial.jp/#ebook"><em>Ruby on Rails Tutorial</em>
  book</a>.
</p>
<% provide(:title, "About") %>
<h1>About</h1>
<p>
  <a href="https://railstutorial.jp/">Ruby on Rails Tutorial</a>
  is a <a href="https://railstutorial.jp/#ebook">book</a> and
  <a href="https://railstutorial.jp/screencast">screencast</a>
  to teach web development with
  <a href="https://rubyonrails.org/">Ruby on Rails</a>.
  This is the sample application for the tutorial.
</p>
だいぶスッキリした。コード量も減り可読性があがったと思う。
色々とコードを変更したので、テストする。
$ rails test
3 tests, 6 assertions, 0 failures, 0 errors, 0 skips
テストは成功した。
1.演習
Contact(問い合わせ先)ページを作成し、HomeページやHelpページと同様の内容を作る。
テストを追加
  test "should get contact" do
    get static_pages_contact_url
    assert_response :success
    assert_select "title", "Contact | #{@base_title}"
  end
あとは下の内容をやればOK
・ContactのViewページ作成
・ルーティングの追加
・controllerにcontactアクションを追加
$ rails test
4 runs, 8 assertions, 0 failures, 0 errors, 0 skips
テストが成功した。
ルーティングの設定
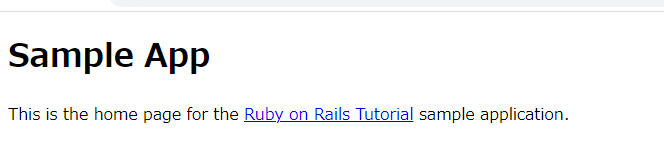
今のルーティング設定だと、開いた時のページがhello worldの画面になっているので、homeページに変更する。
・変更前
root 'application#hello'
・変更後
root 'static_pages#home'
rails serverを起動して、画面を表示した。
演習
1.
ルートURLのテスト追加
  test "should get root" do
    get root_url
    assert_response :success
  end
コメント化し、エラーがでることを確認。
# root 'static_pages#home'
Error:
StaticPagesControllerTest#test_should_get_root:
AbstractController::ActionNotFound: The action 'hello' could not be found for ApplicationController
    test/controllers/static_pages_controller_test.rb:10:in `block in <class:StaticPagesControllerTest>'
コメント化を戻して、テストする。
$ rails test
5 runs, 9 assertions, 0 failures, 0 errors, 0 skips
問題ない。
最後に
コミットして、GithubとHerokuにPushすれば完了。
第三章は、MVCをより詳しく勉強し、埋め込みruby、テストやリファクタリング等出てきた。これらは最後まで繰り返しするので、いつの間か覚えていると思う。