ミニゲームを作ってUnityを学ぶ![ひつじコレクション編]
第6回目: チェイサーの作成
前回はゴールエリアやスコアの概念を追加し、プレイヤーがフォロワーをゴールエリアに連れ帰ることでスコアが加算される仕組みを実装しました。
今回はそんなプレイヤーの目的を邪魔する敵キャラクターを3種類作成し、それぞれについて別の行動パターンを実装していきます。
尚、ひつじさんやウサギさんをフォロワーと呼んでいるのと同じく、プレイヤーを追いかけてくる敵キャラクターについても以後は「チェイサー」と呼称します。
アセットのインポート
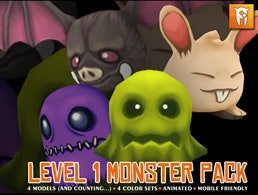
まずはチェイサーとして使用するアセットをストアからインポートします。
フォロワーの作成でインポートがすでに完了している場合はこの項目を飛ばしてください。
オブジェクトの作成
アセットに4種類含まれているクリーチャーのうち、スライム型を利用してチェイサーのオブジェクトを作成していきます。
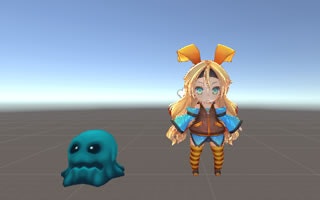
- Level_1_Monster_Pack/Prefabs/Slime/Slime_Blueをシーンに配置して名前を「ChaserBlue」に変更
- Transformを以下のように設定
Position: x=0, y=0, z=0
Rotation: x=0, y=0, z=0
Scale: x=25, y=25, z=25
- 新しくAnimatorControllerの「ChaserAnimController」を作成
- すでにアタッチされているAnimatorからcontrollerにChaserAnimControllerを設定
- 同じくAnimatorのApplyRootMotionのチェックを外す
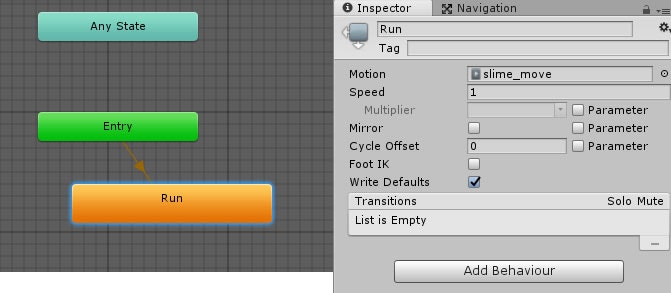
- Animatorビューを開き、Runステートを生成。
- Runステートに「Level 1 Monster Pack/Models/Slime_Level_1/slime_move」クリップを設定
- CapsuleColliderをアタッチして以下のように設定
Is Trigger: チェックを入れる
Center: x=0, y=0.01, z=0.001
Radius: 0.01
Height: 0.02
Direction Y-Axis
- NavMeshAgentをアタッチして以下のように設定
AngularSpeed: 360
Auto Braking: チェックを外す
Quality: None

その他項目: 初期値
- ChaserBlueオブジェクトをプレハブに書き出す
次に、新しいスクリプト「ChaserModel」を作成して上記のプレハブにアタッチします。
using System.Collections;
using System.Collections.Generic;
using UnityEngine;

    public class ChaserModel : MonoBehaviour
    {

        private float mSpeed; // 現在の速度
        private float mIncSpeed;
        public bool IsActive { get; set; }

        public void Init(float speed, float incSpeed)
        {
            mSpeed = speed;
            mIncSpeed = incSpeed;

            IsActive = true;
        }

        void Update()
        {
            if (!IsActive) return;
        }

    }
まだ行動AIの部分を実装していないため、移動速度に関するフィールドとbool型のIsActiveプロパティをもっただけの特に説明の必要もないシンプルなクラスになっています。
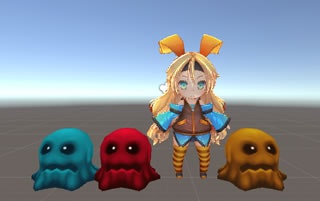
黄色と赤色のチェイサーも作成
このタイミングで残り2種類のチェイサーについてもプレハブを作ってしまいます。
下記アセットについて、上と全く同じ方法でそれぞれChaserYellowとChaserRedのプレハブを書き出してください。
アニメーションコントローラーとChaseModelスクリプトについては新しく用意するのではなく、ChaserBlueにアタッチしているモノを同じくアタッチします。
ChaserYellow = ~Slime/Slime_Yellow

ChaserRed = ~Slime/Slime_Red
ファイルから読み込む
それでは、StageConstructorに対応するコードを追加してファイルからチェイサーを読み込んでいきます。
- StageConstructorにコードを追加
        public void LoadStage(int stageId)
        {
            // 指定されたステージファイルを読み込んで1行ずつ処理
            string filePath = "stage_" + stageId;
            TextAsset textAsset = Resources.Load(filePath) as TextAsset;
            string text = textAsset.text;
            string line;
            using (TextReader reader = new StringReader(text)) // usingとは、処理終わりにstreamの解放を自動で行う構文(finally句でDisposeを実行するコードと同じ)
            {
                while ((line = reader.ReadLine()) != null)
                {
                    // ステージサイズ
                    if (line.StartsWith("@size"))
                    {
                        line = REGEX_WHITE.Replace(line, "");
                        string[] mapSize = line.Split(DELIMITER, System.StringSplitOptions.RemoveEmptyEntries);
                        mStageX = int.Parse(mapSize[1]);
                        mStageY = int.Parse(mapSize[2]);
                        mStageMap = new int[mStageY, mStageX];
                        InstantiateFloor();
                        continue;
                    }

                    // ステージ構造(ブッシュ)
                    if (line.StartsWith("@bush"))
                    {
                        // ステージ構造は16進数表記の文字列なため、10進数のint配列に変換
                        StringBuilder sbStage = new StringBuilder();
                        for (int y = 0; y < mStageY; y++)
                        {
                            sbStage.Append(reader.ReadLine());
                        }
                        int start = 0;
                        for (int y = 0; y < mStageY; y++)
                        {
                            for (int x = 0; x < mStageX; x++)
                            {
                                mStageMap[y, x] = Convert.ToInt32(sbStage.ToString(start, 2), 16);
                                start += 2;
                            }
                        }
                        // ステージ構造を元にブッシュを生成
                        InstantiateBushs();
                        continue;
                    }

                    // プレイヤー初期位置
                    if (line.StartsWith("@player"))
                    {
                        line = REGEX_WHITE.Replace(line, "");
                        string[] strPlayerPos = line.Split(DELIMITER, System.StringSplitOptions.RemoveEmptyEntries);
                        InstantiatePlayer(int.Parse(strPlayerPos[1]), int.Parse(strPlayerPos[2]));
                        continue;
                    }

                    // ポップアップポイント
                    if (line.StartsWith("@popup"))
                    {
                        line = REGEX_WHITE.Replace(line, "");
                        string[] strPopupPos = line.Split(DELIMITER, System.StringSplitOptions.RemoveEmptyEntries);
                        InstantiatePopup(int.Parse(strPopupPos[1]), int.Parse(strPopupPos[2]));
                    }

                    // ゴールエリア
                    if (line.StartsWith("@goal"))
                    {
                        line = REGEX_WHITE.Replace(line, "");
                        string[] goalData = line.Split(DELIMITER, System.StringSplitOptions.RemoveEmptyEntries);
                        InstantiateGoalArea(goalData);
                        continue;
                    }

以下、チェイサー読み込みを追加

                    // チェイサー配置
                    if (line.StartsWith("@chaser"))
                    {
                        line = REGEX_WHITE.Replace(line, "");
                        string[] chaserData = line.Split(DELIMITER, System.StringSplitOptions.RemoveEmptyEntries);
                        InstantiateChaser(chaserData);
                        continue;
                    }

ここまで:チェイサー読み込み

                }
            }
        }

        //-------------
        // チェイサー //
        //---------------------------------------------------------------------------------

        [SerializeField]
        private GameObject prefabChaserBlue;
        [SerializeField]
        private GameObject prefabChaserYellow;
        [SerializeField]
        private GameObject prefabChaserRed;

        private List<ChaserModel> mChaserList = new List<ChaserModel>();

        private void InstantiateChaser(string[] ChaserData)
        {
            int modelId = int.Parse(ChaserData[1]);
            float speed = float.Parse(ChaserData[2]);
            float incSpeed = float.Parse(ChaserData[3]);
            int posX = int.Parse(ChaserData[4]);
            int posY = int.Parse(ChaserData[5]);
            Vector3 pos = new Vector3(posX * BLOCK_SIZE + BLOCK_SIZE, 0.0f, posY * -BLOCK_SIZE - BLOCK_SIZE);
            GameObject obj = null;
            switch (modelId)
            {
                case 1:
                    obj = Instantiate(prefabChaserBlue, pos, Quaternion.identity);
                    break;
                case 2:
                    obj = Instantiate(prefabChaserYellow, pos, Quaternion.identity);
                    break;
                default:
                    obj = Instantiate(prefabChaserRed, pos, Quaternion.identity);
                    break;
            }
            ChaserModel chaser = obj.GetComponent<ChaserModel>();
            chaser.Init(speed, incSpeed);
            mChaserList.Add(chaser);
        }
*prefabChaser~プロパティにはインスペクタからそれぞれの色に対応したチェイサーのプレハブを設定。
InstantiateChaser()では識別子が@chaserの行から取得した「行動AIの種類・速度・位置」の情報をもとにチェイサーオブジェクトを生成した後、それぞれのChaserModelの参照をリストに保持しています。
これでファイルからチェイサーを生成できるようになりました。
続いて、行動Aiの実装を行っていきます。
行動AIを実装する(その前に)
それぞれの行動AIを実装していく前に、StageManagerを修正してPlayerオブジェクトとポップアップポイントの位置を取得できるようにしておきます。
- StageManagerにメソッドを追加
        //------------
        // ゲッター //
        //---------------------------------------------------------------------------------

        public GameObject GetPlayer()
        {
            return mConstructor.Player;
        }

        /// <summary>
        /// 全てのポップアップポイントのpositionをリストとして返す
        /// </summary>
        /// <returns></returns>
        public List<Vector3> GetPatrolPosList()
        {
            List<Vector3> result = new List<Vector3>();
            foreach (PopupPoint point in mConstructor.GetPopupList())
            {
                result.Add(point.transform.position);
            }
            return result;
        }
行動AIのベースを作成
異なる3種の行動AIについて今回はベースとなる抽象クラスを用意して、そのクラスを継承する形でそれぞれ独自の行動パターンを持つAIクラスを作成します。
- スクリプト「AiBase」を作成
using System.Collections;
using System.Collections.Generic;
using UnityEngine;
using UnityEngine.AI;

    public abstract class AiBase : MonoBehaviour
    {

        private Transform mTrans;
        protected NavMeshAgent mAgent;

        void Awake()
        {
            mTrans = GetComponent<Transform>();
            mAgent = GetComponent<NavMeshAgent>();
            Init();
        }

        /// <summary>
        /// 初期化処理
        /// </summary>
        protected abstract void Init();

        //----------------
        // NavMeshAgent //
        //---------------------------------------------------------------------------------

        /// <summary>
        /// NavMeshAgentが有効か判定
        /// </summary>
        /// <returns>有効な場合はtrueを返す</returns>
        protected bool IsNavMeshAgentEnable()
        {
            if (mAgent.pathStatus == NavMeshPathStatus.PathInvalid) return false;
            return true;
        }

        /// <summary>
        /// NavMeshAgentの目標地点を決定する
        /// </summary>
        /// <returns></returns>
        public abstract void SetDestination();

        /// <summary>
        /// NavMeshAgentの速度を設定する
        /// </summary>
        /// <param name="speed"></param>
        public void ApplySpeed(float speed)
        {
            mAgent.speed = speed;
        }

        //--------
        // 索敵 //
        //---------------------------------------------------------------------------------

        private readonly string TAG_PLAYER = "Player";

        [SerializeField]
        private LayerMask layerMaskPlayer;
        [SerializeField]
        private LayerMask layerMaskBush;
        [SerializeField]
        protected float mSearchRange;
        protected bool mIsExcited; // 活性状態(興奮状態)

        /// <summary>
        /// 周囲を索敵する
        /// </summary>
        /// <param name="rangeScale">索敵範囲についての係数</param>
        /// <returns>プレイヤーを発見した場合はtrueを返す</returns>
        protected bool SearchAround(float rangeScale)
        {
            if (Physics.CheckSphere(mTrans.position, mSearchRange * rangeScale, layerMaskPlayer)) return true;
            return false;
        }

        /// <summary>
        /// Playerを視認する
        /// BlockとPlayerに衝突するRayをPlayerに向かって飛ばし、Blockに衝突しなければ視認したと判定
        /// </summary>
        /// <returns>視認できた場合はtrueを返す</returns>
        protected bool CatchPlayer()
        {
            Vector3 direction = (GameController.Instance.StageManager.GetPlayer().transform.position - mTrans.position).normalized;
            Ray ray = new Ray(mTrans.position, direction);
            RaycastHit hit;
            int mask = layerMaskPlayer + layerMaskBush;
            if (Physics.Raycast(ray, out hit, mSearchRange, mask))
            {
                if (hit.collider.tag == TAG_PLAYER) return true;
            }
            return false;
        }

        /*
        private void OnDrawGizmos()
        {
            Vector3 direction = (GameController.Instance.StageManager.GetPlayer().transform.position - mTrans.position).normalized;
            Ray ray = new Ray(mTrans.position, direction);
            RaycastHit hit;
            int mask = layerMaskPlayer + layerMaskBush;
            if (Physics.Raycast(ray, out hit, mSearchRange, mask))
            {
                Debug.DrawRay(ray.origin, ray.direction * hit.distance, Color.black, 1.0f, false);
            }
        }
        */

    }
抽象クラスの意味は割愛させていただきますが、このAiBaseには初期化を行うInit()と目的地を設定するSetDestination()という2つの抽象メソッドが定義されています。
この**「初期化と目的地の設定」**をそれぞれの行動パターンに合わせてオーバーライドすることで複数のチェイサーにそれぞれのAIを実装していきます。
行動AIを実装する(Normal)
先ほど作成したAiBaseの具体例として、まずはAiNormalクラスを作成します。
- スクリプト「AiNormal」を作成
using System.Collections;
using System.Collections.Generic;
using UnityEngine;

    public class AiNormal : AiBase
    {

        override protected void Init() { }

        override public void SetDestination()
        {
            if (!IsNavMeshAgentEnable()) return;
            mAgent.SetDestination(GameController.Instance.StageManager.GetPlayer().transform.position);
        }

    }
AiNormalは常にプレイヤーを追ってくるシンプルな行動パターンです。
Init()では何も行わず、SetDestination()でNavMeshAgentの目的地にプレイヤーの現在位置を設定しています。
続いて、このAiNormalをチェイサーの行動パターンとして利用するためにChaserModelを修正します。
    public class ChaserModel : MonoBehaviour
    {

        private AiBase mAi;
        private float mSpeed; // 現在の速度
        private float mIncSpeed;
        public bool IsActive { get; set; }

        void Awake()
        {
            mAi = GetComponent<AiBase>();
        }

        public void Init(float speed, float incSpeed)
        {
            mSpeed = speed;
            mIncSpeed = incSpeed;
            mAi.ApplySpeed(mSpeed);

            IsActive = true;
        }

        void Update()
        {
            if (!IsActive) return;
            mAi.SetDestination();
        }

    }
Awake()で自身にアタッチされているAiBaseを継承したクラスを取得し、Update()のmAi.SetDestination()によってNavMeshAgentに新しい目的地を設定しています。
挙動を確認する
ここで一度、AiNormalの挙動を確認してみます。
青・赤・黄色のチェイサーそれぞれにAiNormalをアタッチしてからプロジェクトを実行してください。
正しく動作している場合、チェイサーは常にプレイヤーの現在位置に向かって移動してきます。
行動AIを実装する(Anticipater)
続いてAnticipater型のAIを作成します。
こちらは「予想する者」の名前の通り、プレイヤーの先回りをするように動く行動パターンです。
事前準備
このAIを作成するための準備として、Playerオブジェクトにタグの設定とプレイヤーの移動先を予想するための仕組みを導入します。
- デフォルトで存在するPlayerタグをPlayerオブジェクトのタグに設定
- 新しく「Bush」レイヤーを作成してBushの子、Cubeオブジェクトのレイヤーに設定
- Playerオブジェクトの子要素として空オブジェクト「RaycastPoint」を作成
- RaycastPointのTransformを以下のように設定
Position: x=0, y=0.15, z=0
Rotation: x=0, y=0, z=0
Scale: x=1, y=1, z=1
- スクリプト「PlayerRaycastPoint」を作成してPlayerオブジェクトにアタッチ
using System.Collections;
using System.Collections.Generic;
using UnityEngine;

    public class PlayerRaycastPoint : MonoBehaviour
    {

        [SerializeField]
1        private Transform mRaycastPoint;
        [SerializeField]
2        private LayerMask layerMaskBush;
        private Transform mTrans;

        void Awake()
        {
            mTrans = GetComponent<Transform>();
        }

        /// <summary>
        /// プレイヤーの進行方向にRayを飛ばし、ブロック(ブッシュ)に当たった場所から1ブロック手前のポジションを取得。
        /// </summary>
        /// <returns></returns>
        public Vector3? GetDestinationPoint()
        {
            Ray ray = new Ray(mRaycastPoint.position, mTrans.forward);
            RaycastHit hit;
            if (Physics.Raycast(ray, out hit, 20.0f, layerMaskBush))
            {
                Vector3 result = mTrans.position + ray.direction * (hit.distance - 0.5f);
                return result;
            }
            return null;
        }

        /*
        private void OnDrawGizmos()
        {
            Ray ray = new Ray(mRaycastPoint.position, mTrans.forward);
            RaycastHit hit;
            if (Physics.Raycast(ray, out hit, 20.0f, layerMaskBush))
            {
                Debug.DrawRay(ray.origin, ray.direction * (hit.distance - 0.5f), Color.red, 1.0f, false);
            }
        }
        */

    }
1: Player/RaycastPointを設定
2: Bushレイヤーを指定
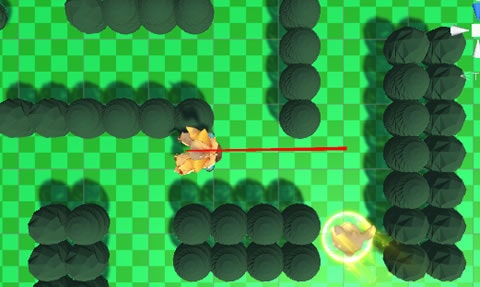
プレイヤーの進行方向に向かってRayを飛ばし、ブッシュに当たった場合はその手前の座標を返します。
少しわかりずらいですがコメントアウトしているOnDrawGizmos()を解放すると、上画像のようにRayの状態を確認することができます。
プレイヤーから伸びた赤いラインがBushオブジェクトの手前で終了していて、この終了部分をプレイヤーの向かっている座標と判断しています。
行動パターンに適用する
ちょっと雑ではありますがプレイヤーの移動先を予測することができましたので、この座標を材料にして行動パターンを作成していきます。
- スクリプト「AiAnticipater」を作成
using System.Collections;
using System.Collections.Generic;
using UnityEngine;

    public class AiAnticipater : AiBase
    {

        override protected void Init() { }

        override public void SetDestination()
        {
            if (!IsNavMeshAgentEnable()) return;

            // 活性・非活性の切り替え
            if (mIsExcited)
            {
                // プレイヤーが索敵できなくなった場合は非活性状態へ遷移
                if (!SearchAround(1.5f)) mIsExcited = false;
            }
            else
            {
                // 範囲内にプレイヤーが存在し、視認できる状態ならば活性状態へ遷移
                if (SearchAround(1.0f))
                {
                    if (CatchPlayer()) mIsExcited = true;
                }
            }

            //---------------
            // 目的地を設定 //
            //---------------

            GameObject player = GameController.Instance.StageManager.GetPlayer();

            if (mIsExcited)
            {
                // 活性状態の場合はプレイヤーを追従
                mAgent.SetDestination(player.transform.position);
            }
            else
            {
                // 非活性状態の場合はプレイヤー進行方向へ先回り
                Vector3? temp = player.GetComponent<PlayerRaycastPoint>().GetDestinationPoint();
                if (temp == null)
                {
                    mAgent.SetDestination(player.transform.position);
                }
                else
                {
                    mAgent.SetDestination((Vector3)temp);
                }
            }
        }

    }
Aiticipater型のチェイサーはAiBaseで定義されているbool型のmIsExcitedによって行動パターンが変化します。
mIsExcited == false: プレイヤーの視線の先を目指して移動
mIsExcited == true: プレイヤーを目指して移動
ゲーム開始時にはプレイヤーの視線の先に向かって移動しますが、プレイヤーが近くにいてBushに遮られることなく視認できる状態になると今度はプレイヤーに向かって移動を開始します。
その後、プレイヤーとの距離が一定以上開くとゲーム開始時と同じ移動方法に戻ります。
AIを入れ替える
出来上がったAiticipater型の行動パターンは黄色いチェイサーに実装します。
- ChaserYellowにアタッチされているAiNormalを取り除く
- 代わりにAiAnticipaterをアタッチしてプロパティを以下のように設定
これで2つめの行動パターンを実装できました。
行動AIを実装する(Wander)
続いてAiWanderを実装します。
Wander型はステージ上のポップアップポイントを巡回していて、その道中でプレイヤーを見つけた場合にプレイヤーを追いかける行動に切り替わるAIです。
- スクリプト「AiWander」を作成
using System.Collections;
using System.Collections.Generic;
using UnityEngine;

    public class AiWander : AiBase
    {

        private List<Vector3> mPatrolPosList;
        private int mPatrolCount;
        private int mPatrolIndex;

        override protected void Init()
        {
            // リストをシャッフルすれば巡回するポイントの順番をランダムに決定可能
            mPatrolPosList = GameController.Instance.StageManager.GetPatrolPosList();
            mPatrolCount = mPatrolPosList.Count;
            mPatrolIndex = -1;
        }

        private bool newTarget;

        override public void SetDestination()
        {
            if (!IsNavMeshAgentEnable()) return;

            // 活性・非活性の切り替え
            if (mIsExcited)
            {
                // プレイヤーが索敵できなくなった場合は非活性状態へ遷移
                if (!SearchAround(2.0f)) mIsExcited = false;
            }
            else
            {
                // 範囲内にプレイヤーが存在し、視認できる状態ならば活性状態へ遷移
                if (SearchAround(1.0f))
                {
                    if (CatchPlayer()) mIsExcited = true;
                }
            }

            //---------------
            // 目的地を設定 //
            //---------------

            GameObject player = GameController.Instance.StageManager.GetPlayer();
            if (mIsExcited)
            {
                // 活性状態の場合はプレイヤーを追従
                mAgent.SetDestination(player.transform.position);
            }
            else
            {
                // 非活性状態の場合はポップアップポイントを巡回
                if (mPatrolIndex < 0)
                {
                    // 初回は目標地点がないためプレイヤー座標を仮に設定する
                    mPatrolIndex = 0;
                    mAgent.SetDestination(player.transform.position);
                }
                else
                {
                    if (newTarget)
                    {
                        // 新しい目標が決定した直後は3.0f離れるまで到達判定を行わない
                        // これをしないと前回の目標地点が到達判定で使用されて次の目標地点が飛ばされる場合がある
                        if (mAgent.remainingDistance >= 3.0f) newTarget = false;
                    }
                    else
                    {
                        // 目標としているポイントに接近した場合は次のポイントを新しい目標地点に設定する
                        if (mAgent.remainingDistance <= 0.1f)
                        {
                            mPatrolIndex++;
                            if (mPatrolIndex >= mPatrolCount) mPatrolIndex = 0;
                            newTarget = true;
                        }
                    }
                    mAgent.SetDestination(mPatrolPosList[mPatrolIndex]);
                }
            }
        }

    }
Init()でステージ上に存在する全てのポップアップポイントの座標を保持し、mIsExcitedによってポイントを巡回するかプレイヤーを追いかけるか分岐しています。
AIを入れ替える
このWander型の行動パターンは赤色のチェイサーに実装します。
- ChaserRedにアタッチされているAiNormalを取り除く
- 代わりにAiWanderをアタッチしてプロパティを以下のように設定
これで3つめの行動パターンを実装することができました。
まだチェイサーに対しての当たり判定はありませんが、プロジェクトを実行してフォロワーを4匹同時にゴールエリアに連れ帰ってみてください。

この作品はユニティちゃんライセンス条項の元に提供されています
