AWS EC2 インスタンスの準備
AWS コンソールにアクセスする
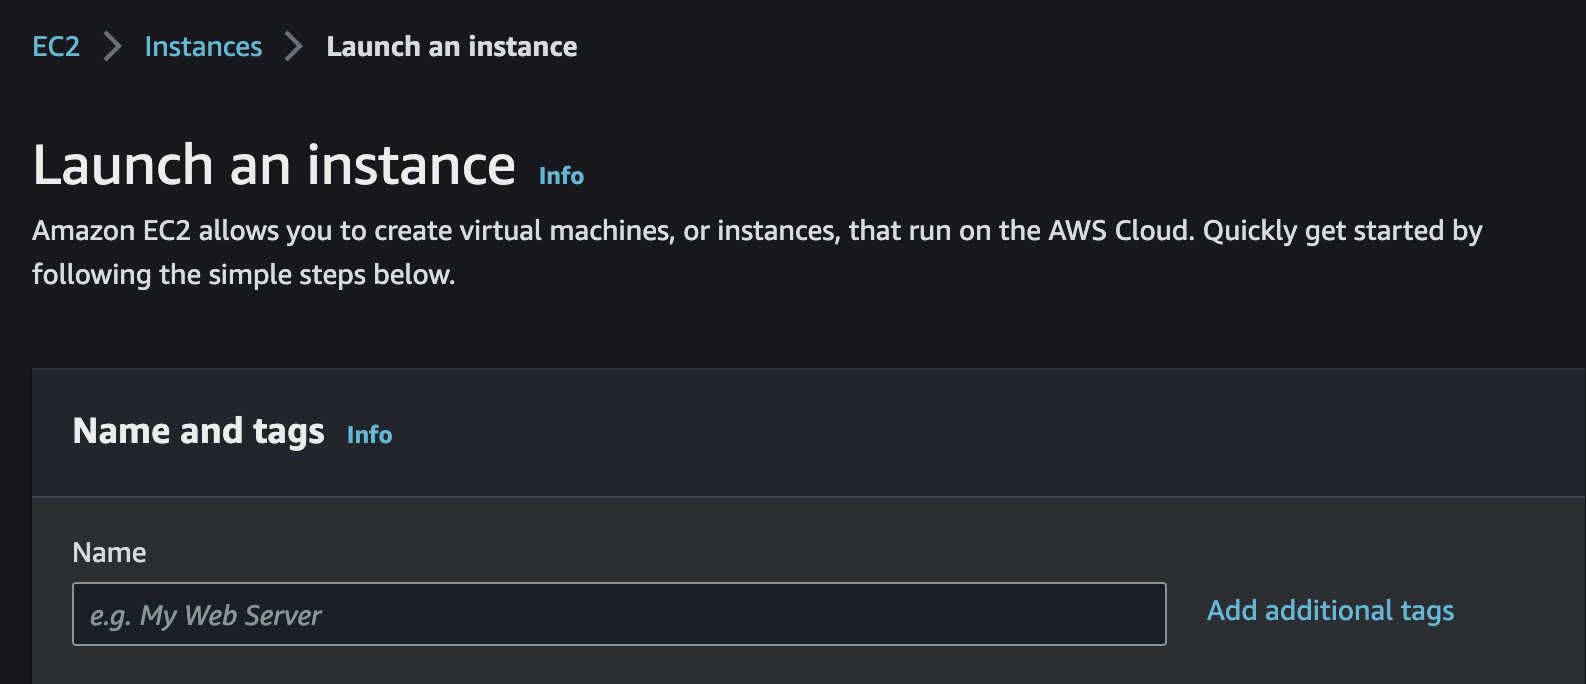
「Launch Instance」をクリックする
Step 1: Enter nand and tags
インスタンス名とタグを入力する
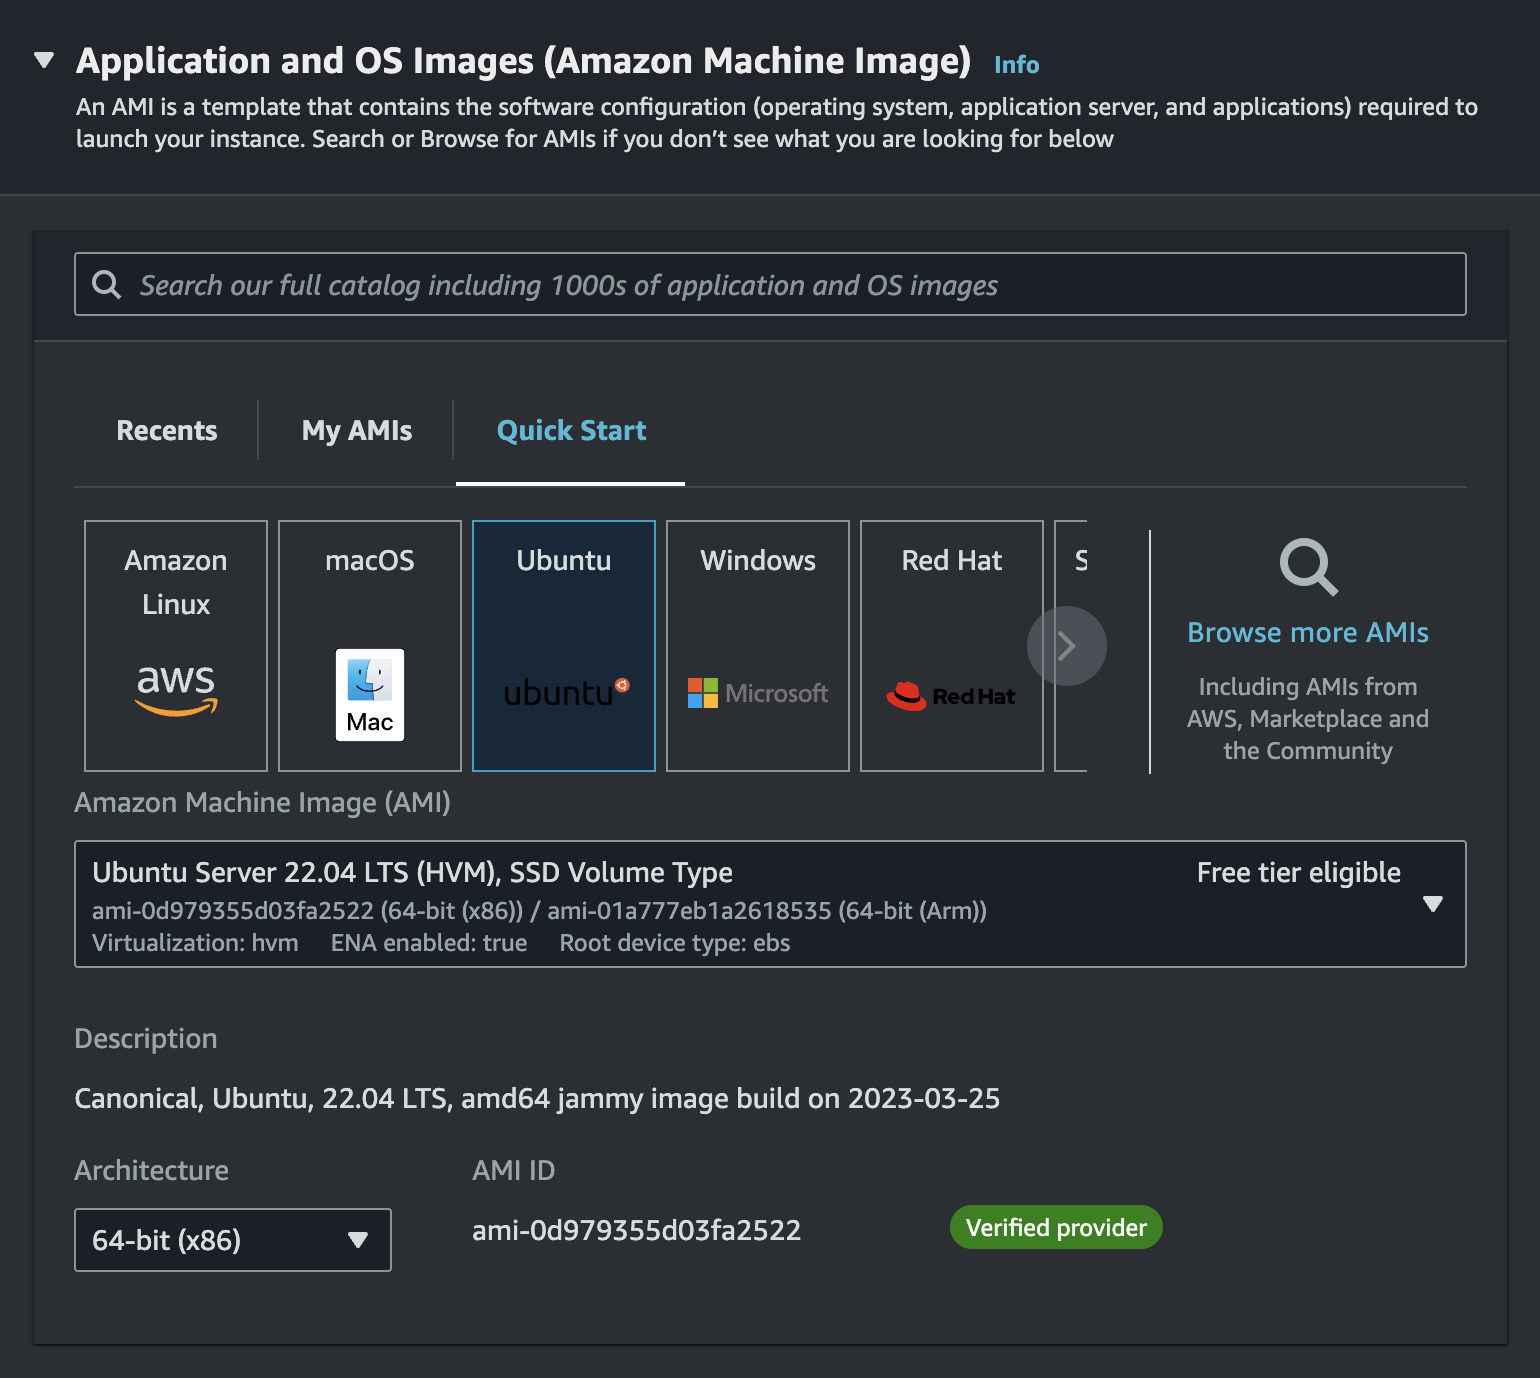
Step 2: Choose an Amazon Machine Image (AMI)
「Ubuntu Server 22.04 LTS (HVM), SSD Volume Type 64bit (x86」を選択する
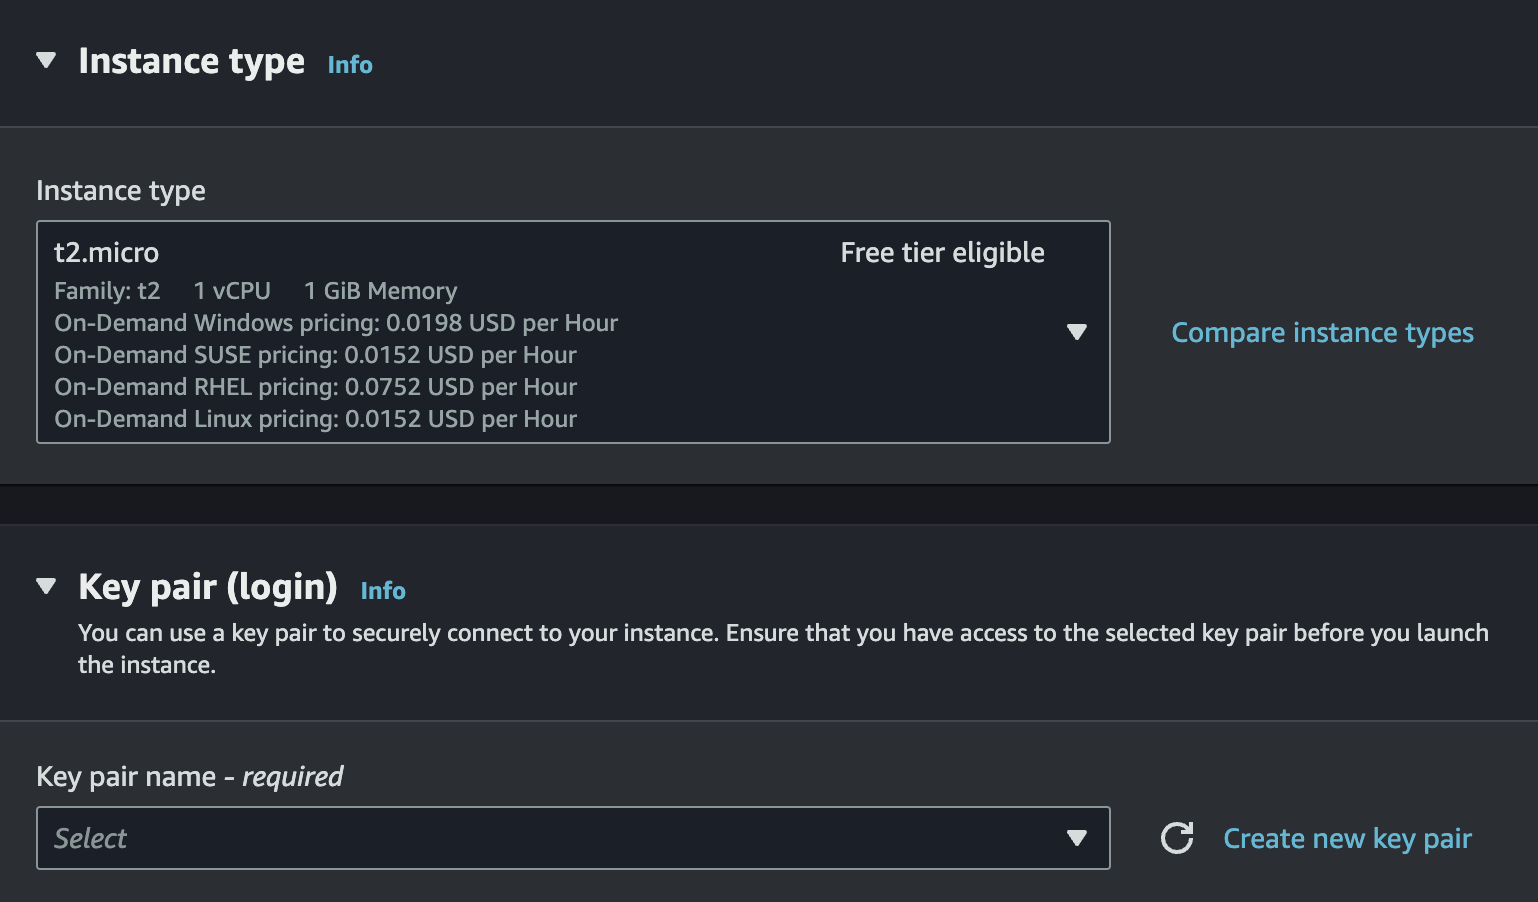
Step 3: Choose an Instance Type and Key pair
インスタンスタイプは「t2.micro」とSSH用のキーペアを選択する
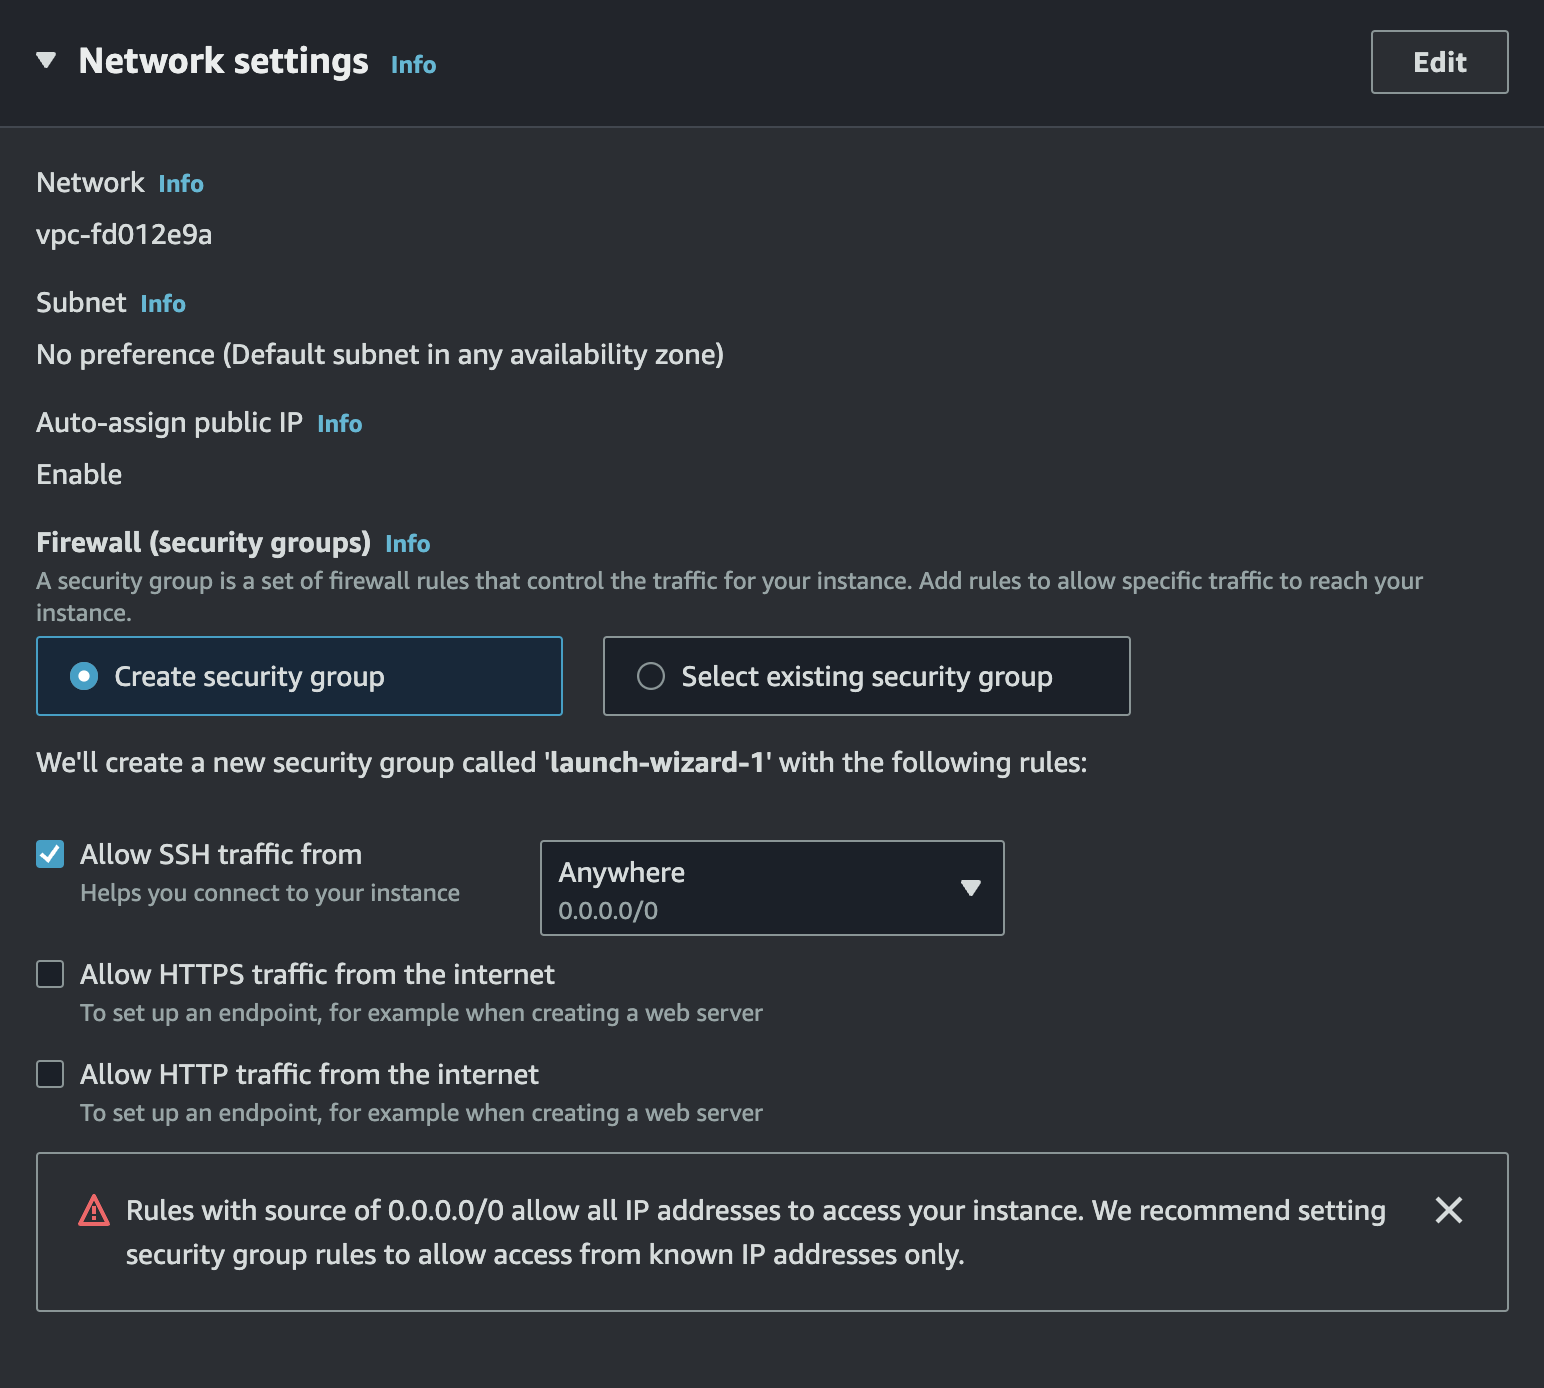
Step 4: Network settings
バブネットやセキュリティグループなどを選択する
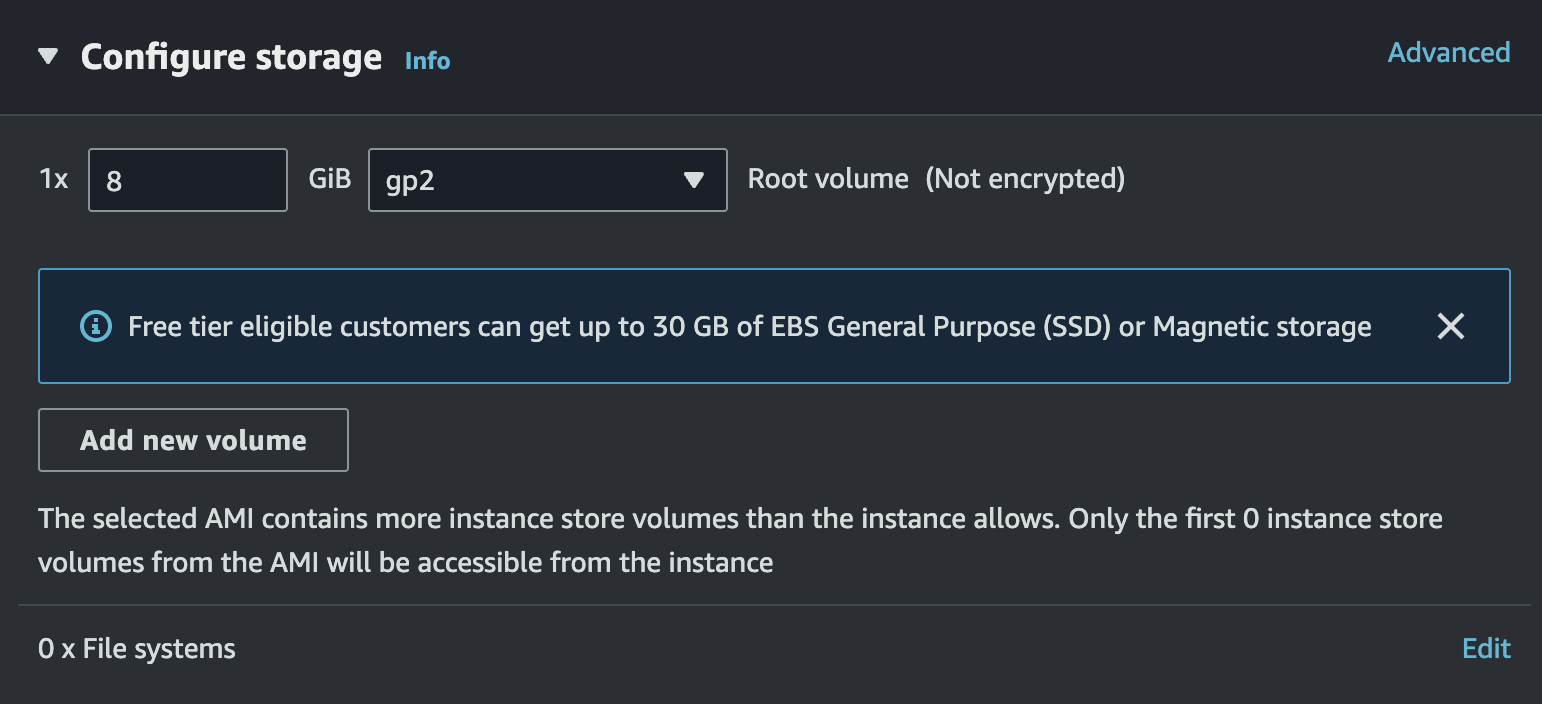
Step 5: Configure storage
無料利用枠だと最大30GBまで利用できる
そして、「Launch instance」をクリックしてインスタンスを立てる
インスタンスへアクセス
先ほどダウンロードしたキーペアを.ssh/key.pemとします。
権限を与える
sudo chmod 400 .ssh/key.pem
サーバーにアクセス
ssh -i .ssh/key.pem ubuntu@xx.xx.xxx.xxx
xx.xx.xxx.xxxは先作成したインスタンスのIPv4 Public IPです。
デプロイ用のユーザーを作成
「deploy」というユーザー名とすると
sudo adduser deploy
ユーザーの権限を与える
%deploy ALL=(ALL) NOPASSWD:ALL
deployユーザーに切り替える
sudo su - deploy
authorized_keysを追加
mkdir .ssh
sudo chmod 700 .ssh
touch ~/.ssh/authorized_keys
sudo chmod 600 ~/.ssh/authorized_keys
<ローカル環境で「cat ~/.ssh/id_rsa.pub」の内容>
もしまだなければ「ssh-keygen -t rsa -C」で作成する
これからローカル環境でssh deploy@xx.xx.xxx.xxxでインスタンスにアクセスできます。
サーバーで環境を準備
デプロイ用フォルダとファイルを作成
例えばアプリ名はmyappとすると:
sudo mkdir /deploy
sudo mkdir /deploy/apps
sudo mkdir /deploy/apps/myapp
sudo mkdir /deploy/apps/myapp/shared
sudo mkdir /deploy/apps/myapp/shared/config

sudo touch /deploy/apps/myapp/shared/config/application.yml
sudo touch /deploy/apps/myapp/shared/config/database.yml

sudo chown -R deploy:deploy /deploy/apps/
Ruby、Rails、Gitなどをインストール
- rbenv
- ruby
- rails
- libmysqlclient-dev / libpq-dev
- git
- bundler
Dockerをインストール
Dockerをインストールする方法は以下のリンクにあります。ベトナム語ですが、簡単なコマンドをコピーするだけでインストールできます。
Ubuntu 22.04でDockerをインストールする方法
dockerをビルド
cd /deploy/apps/myapp/shared/config
Dockerfileとdocker-compose.ymlをこちらにペースト
以下はmysqlとredisを使うdocker-compose.ymlの例:
services:
  myapp_mysql:
    container_name: myapp_mysql
    image: mysql:8.3
    command: mysqld --character-set-server=utf8mb4 --collation-server=utf8mb4_unicode_ci
    restart: always
    volumes:
      - myapp_mysql:/var/lib/mysql
    environment:
      MYSQL_DATABASE: myapp_production
      MYSQL_ROOT_PASSWORD: admin
      TZ: 'Asia/Tokyo'
    ports:
      - '3306:3306'

  myapp_redis:
    container_name: myapp_redis
    image: redis:latest
    restart: always
    volumes:
      - myapp_redis:/data
    ports:
      - '6379:6379'

volumes:
  myapp_mysql:
    external: true
  myapp_redis:
    external: true
そして、ビルド!
docker-compose build
起動する
docker-compose up -d
データベース設定
production:
  adapter: mysql2
  encoding: utf8mb4
  pool: <%= ENV.fetch("RAILS_MAX_THREADS") { 5 } %>
  database: myapp_production
  username: admin
  password: admin
  host: "127.0.0.1"
秘密キー設定
ローカル環境で秘密キーを取得してから、サーバーのapplication.ymlに貼ります。
RAILS_ENV=production rails secret
SECRET_KEY_BASE: '<secret_key>'
ENV定数管理Gemをインストール
figaro を使うと application.yml が使えます。
gem "figaro"
figaro install
Capistrano設定
Capistrano gemを追加
group :development do
  gem 'capistrano'
  gem 'capistrano3-puma'
  gem 'capistrano-rails'
  gem 'capistrano-rails-collection' # rails:rake:db:migrate などを使いたい場合
  gem 'capistrano-rails-console' # cap production rails:c でコンソールにアクセスしたい場合
  gem 'capistrano-rake' # cap production invoke:rake TASK=paperclip:refresh などを使いたい場合
  gem 'capistrano-rbenv'
end
Capistranoインストール
cap install
Capfile設定
require 'capistrano/rails'
require 'capistrano/rails/collection'
require 'capistrano/rails/console'
require 'capistrano/rake'
require 'capistrano/rbenv'
require 'capistrano/puma'
require 'capistrano/sidekiq'

# Install puma plugins
install_plugin Capistrano::Puma
install_plugin Capistrano::Puma::Systemd
デプロイファイル設定
lock '~> 3.18' # Specifies the Capistrano version to use

set :application, 'myapp' # Sets the application name
set :repo_url, 'git@github.com:xxxxxxxxxxxxx.git' # Sets the repository URL
set :deploy_to, '/deploy/apps/myapp' # Sets the deployment directory
set :pty, true # Enables pseudo-terminal
set :init_system, :systemd # Sets the initialization system to systemd
set :keep_releases, 3 # Keeps the last 3 releases

# rbenv
set :rbenv_type, :user # Specifies the rbenv type (user or system)
set :rbenv_ruby, File.read('.ruby-version').strip # Sets the Ruby version from the .ruby-version file
set :rbenv_custom_path, '/home/deploy/.anyenv/envs/rbenv' # Sets a custom path for rbenv when using anyenv
set :rbenv_prefix,
    "RBENV_ROOT=#{fetch(:rbenv_path)} RBENV_VERSION=#{fetch(:rbenv_ruby)} #{fetch(:rbenv_path)}/bin/rbenv exec" # Sets the rbenv prefix
set :rbenv_map_bins, fetch(:rbenv_map_bins).to_a.concat(%w[rake gem bundle ruby rails puma pumactl]) # Maps binaries to rbenv
set :rbenv_roles, :all # Applies rbenv to all roles

# bundle
set :bundle_flags, '--deployment' # Specifies bundle install flags (log gem installation process)

# puma
set :puma_init_active_record, true # Initializes Active Record with Puma

append :linked_files, 'config/database.yml', 'config/application.yml' # Links shared files
append :linked_dirs, 'log', 'tmp/pids', 'tmp/cache', 'tmp/sockets', 'public/system', 'node_modules' # Links shared directories
set :stage, :production # Sets the deployment stage to production
set :rails_env, :production # Sets the Rails environment to production
set :branch, 'main' # Sets the Git branch to deploy from
server 'xxx.xx.xx.xxx', user: 'deploy', roles: %w[web app db] # Specifies the server details

# nginx
set :nginx_config_name, 'myapp.com' # The domain of the application

# If setting up SSL
set :nginx_server_name, "localhost #{fetch(:nginx_config_name)}" # Sets the server name for nginx
set :nginx_ssl_certificate, "/etc/letsencrypt/live/#{fetch(:nginx_config_name)}/fullchain.pem" # Path to the SSL certificate
set :nginx_ssl_certificate_key, "/etc/letsencrypt/live/#{fetch(:nginx_config_name)}/privkey.pem" # Path to the SSL certificate key
set :nginx_use_ssl, true # Enables SSL for nginx
Puma設定
Puma設定ファイルを自動でアップロードする場合
cap production puma:config
cap production puma:systemd:config
それから、サーバーでPuma設定ファイルを修正する
ExecStart=/home/deploy/.rbenv/shims/bundle exec --keep-file-descriptors puma -C /deploy/apps/ityogo/shared/puma.rb
Puma設定ファイルを手動で作成する場合
puma.rbファイルを作成
以下のような内容を/deploy/apps/myapp/shared/puma.rbに入れます。
#!/usr/bin/env puma

directory '/deploy/apps/myapp/current'
rackup "/deploy/apps/myapp/current/config.ru"
environment 'production'

tag ''

pidfile "/deploy/apps/myapp/shared/tmp/pids/puma.pid"
state_path "/deploy/apps/myapp/shared/tmp/pids/puma.state"
stdout_redirect '/deploy/apps/myapp/shared/log/puma_access.log', '/deploy/apps/myapp/shared/log/puma_error.log', true

threads 0,16

bind 'unix:///deploy/apps/myapp/shared/tmp/sockets/puma.sock'

workers 0

restart_command 'bundle exec puma'

prune_bundler

on_restart do
  puts 'Refreshing Gemfile'
  ENV["BUNDLE_GEMFILE"] = ""
end
puma serviceファイルを作成
サーバーの/etc/systemd/systemに遷移して、sudo vi puma_myapp_production.serviceで以下のような内容を保存する
[Unit]
Description=Puma HTTP Server for myapp (production)
After=network.target

[Service]
Type=simple
User=deploy
WorkingDirectory=/deploy/apps/myapp/current
# Support older bundler versions where file descriptors weren't kept
# See https://github.com/rubygems/rubygems/issues/3254
# When using anyenv: "/home/deploy/.anyenv/envs/rbenv/shims/bundle"
ExecStart=/home/deploy/.rbenv/shims/bundle exec --keep-file-descriptors puma -C /deploy/apps/myapp/shared/puma.rb
ExecReload=/bin/kill -USR1 $MAINPID
StandardOutput=append:/deploy/apps/myapp/shared/log/puma_access.log
StandardError=append:/deploy/apps/myapp/shared/log/puma_error.log

Restart=always
RestartSec=1

SyslogIdentifier=puma

[Install]
WantedBy=multi-user.target
それから作成したファイルを起動する
sudo systemctl enable puma_myapp_production.service
nginx設定
nginxをインストール
sudo apt-get install nginx
因みに、nginxを完全に削除するコマンドは:
sudo apt-get purge nginx nginx-common
sudo apt-get autoremove
nginx設定ファイルを自動でアップロードする場合
Capfileに以下を追加する
install_plugin Capistrano::Puma::Nginx
それから以下のコマンドを実行して、自動でnginx設定ファイルを作成され、サーバーにアップロードされる
cap production puma:nginx_config
nginx設定ファイルを手動で作成する場合
サーバーの/etc/nginx/sites-availableに遷移する
例えばサイト名はmyapp.comであれば、sudo vi myapp.comコマンドで以下のような内容を保存する
upstream puma_myapp.com {
  server unix:/deploy/apps/myapp/shared/tmp/sockets/puma.sock fail_timeout=0;
}

server {
  listen 80;
  server_name localhost myapp.com;
  return 301 https://$host$1$request_uri;
}

server {
  listen 443 ssl http2;
  ssl_certificate /etc/letsencrypt/live/myapp.com/fullchain.pem;
  ssl_certificate_key /etc/letsencrypt/live/myapp.com/privkey.pem;
  server_name localhost myapp.com;
  root /deploy/apps/myapp/current/public;
  try_files $uri/index.html $uri @puma_myapp.com;

  client_max_body_size 4G;
  keepalive_timeout 10;

  error_page 500 502 504 /500.html;
  error_page 503 @503;

  location @puma_myapp.com {
    proxy_http_version 1.1;
    proxy_set_header X-Forwarded-For $proxy_add_x_forwarded_for;
    proxy_set_header X-Forwarded-Proto $scheme;
    proxy_set_header Host $host;
    proxy_redirect off;
    proxy_set_header Upgrade $http_upgrade;
    proxy_set_header Connection "Upgrade";
    proxy_set_header X-Forwarded-Proto https;
    proxy_pass http://puma_myapp.com;
    # limit_req zone=one;
    access_log /deploy/apps/myapp/shared/log/nginx.access.log;
    error_log /deploy/apps/myapp/shared/log/nginx.error.log;
  }

  location ^~ /assets/ {
    gzip_static on;
    expires max;
    add_header Cache-Control public;
  }

  location = /50x.html {
    root html;
  }

  location = /404.html {
    root html;
  }

  location @503 {
    error_page 405 = /system/maintenance.html;
    if (-f $document_root/system/maintenance.html) {
      rewrite ^(.*)$ /system/maintenance.html break;
    }
    rewrite ^(.*)$ /503.html break;
  }

  if ($request_method !~ ^(GET|HEAD|PUT|PATCH|POST|DELETE|OPTIONS)$ ){
    return 405;
  }

  if (-f $document_root/system/maintenance.html) {
    return 503;
  }
}
ssl_certificateとssl_certificate_keyの設定はSSL証明書の設定で、以下の記事を参考にするとSSL証明書が発行できます。
UbuntuでLet's Encryptを使用してSSL証明書を作成する方法
それからシンボリックリンクを作成する
sudo ln -s /etc/nginx/sites-available/myapp.com /etc/nginx/sites-enabled/myapp.com
デプロイ!
cap production deploy
capistrano コマンド一覧
cap --tasks
NotImplementedError: OpenSSH keys only supported if ED25519 is availableのエラーが発生した場合
(Backtrace restricted to imported tasks)
cap aborted!
NotImplementedError: OpenSSH keys only supported if ED25519 is available
net-ssh requires the following gems for ed25519 support:
 * ed25519 (>= 1.2, < 2.0)
 * bcrypt_pbkdf (>= 1.0, < 2.0)
See https://github.com/net-ssh/net-ssh/issues/565 for more information
Gem::LoadError : "ed25519 is not part of the bundle. Add it to your Gemfile."
必要なGemを追加大丈夫だと思います。
group :development do
  gem 'ed25519'
  gem 'bcrypt_pbkdf'
end
platforms ["x86_64-darwin-20"] のエラーが発生する場合
remote:        Your bundle only supports platforms ["x86_64-darwin-20"] but your local platform
remote:        is x86_64-linux. Add the current platform to the lockfile with `bundle lock
remote:        --add-platform x86_64-linux` and try again.
以下のコマンドを実行すれば解決
bundle lock --add-platform x86_64-linux
assets precompile が失敗した場合
メモリが不足するかもしれないので、以下の記事を参考にしてください。
カスタムRakeタスク
assetsをローカルでコンパイルする
デプロイする時、assetsをコンパイルするのに凄く時間がかかる為、ローカルでコンパイルしておいてからサーバーにアップロードするのがおすすめです。
Viteの場合
# frozen_string_literal: true

namespace :deploy do
  namespace :assets do
    Rake::Task['deploy:assets:precompile'].clear_actions

    desc 'Precompile assets locally and upload to servers'
    task :precompile do
      on roles(fetch(:assets_roles)) do
        # Local assets precompile
        run_locally do
          with rails_env: fetch(:rails_env) do
            execute 'rm -rf public/assets'
            execute 'rm -rf public/vite'
            execute 'rails assets:precompile RAILS_ENV=production'
          end
        end

        # Upload to server
        within release_path do
          with rails_env: fetch(:rails_env) do
            execute "rm -rf #{shared_path}/public/assets"
            upload!('./public/assets/', "#{shared_path}/public/", recursive: true)
            upload!('./public/vite/', "#{release_path}/public/", recursive: true)
          end
        end
      end
    end
  end
end
Webpackの場合
# frozen_string_literal: true

namespace :deploy do
  namespace :assets do
    Rake::Task['deploy:assets:precompile'].clear_actions

    desc 'Precompile assets locally and upload to servers'
    task :precompile do
      on roles(fetch(:assets_roles)) do
        # Local assets precompile
        run_locally do
          with rails_env: fetch(:rails_env) do
            execute 'rails assets:clobber'
            execute 'rails assets:precompile'
            execute 'bin/webpack'
          end
        end

        # Upload to server
        within release_path do
          with rails_env: fetch(:rails_env) do
            execute "rm -rf #{shared_path}/public/assets"
            upload!('./public/assets/', "#{shared_path}/public/", recursive: true)
            upload!('./public/packs/', "#{release_path}/public/", recursive: true)
          end
        end
      end
    end
  end
end
デプロイの前に自動Gitプッシュ
デプロイの前に毎回Gitにプッシュするのが面倒なので、タスクを作ります。
desc 'Push source code to Github'
task :github_push do
  run_locally do
    execute "git push origin #{fetch(:branch)}"
  end
end

before 'deploy:starting', :github_push