はじめに
いままでVBA屋さんのぬるま湯(?)から危機感を持ってdjangoを使ったWebアプリを作れるようになった。結果的にVPSサーバーを借りてLinux(CentOS)を使えるようになったりかなりの経験値を得た(スタンドアローン屋がWeb屋になるためにかなりの時間と辛酸をなめたような気もするが...)ってことはこれで データベースがある前提におけるWebシステム が作れるようになったわけだ。基本的なhtml+css+javascriptに加えて Ajaxをつかった「いいね!」機能 の実装も覚えたのでこのへんでいいだろう。となると次の僕の興味は端末(Android)の操作だ。こりゃまた領域が違うだろう、だがWebの知識が少しは助けてくれるだろうとも思う。これができればGPSからの計算処理とかができるわけだ!
Android Studio のインストール
どこかのWebページを参考にしてインストールしたんだけど細かいステップは忘れてしまった...
https://developer.android.com/studio/install?hl=ja
でもこの辺を見るとそんなに迷うようなインストールではなさそうだ
[Android] Android Studio をインストールする手順(Windows)
参考にするyoutube
Android Uber Clone - Part 1 : Sign Up / Sign In
約45分の動画なんだけどfull英語です!(死)
qiitaに似たような記事あるんじゃないの?って思って探してみたけどないんだよね...
そこ大事だろみたいなところでシュンッて画面変わったりするからFu●K![]() 。一時停止!
。一時停止!![]() 一時停止!
一時停止!![]() 一時停止の鬼!
一時停止の鬼!![]()
![]()
![]() まぁ英語の勉強の意味もあるしじっくりやるつもりだけど、終始無音でchat形式で進んでいくのでわかりやすいっちゃわかりやすい。
まぁ英語の勉強の意味もあるしじっくりやるつもりだけど、終始無音でchat形式で進んでいくのでわかりやすいっちゃわかりやすい。
眠れない夜のための焚き火映像8時間
ラジオだと気が散るし静かすぎるとこれまた気が散る
0:00-
Hello everybody !
To day i will show you how to create app like Uber, ofcourse, similar uber, not professional like Uber :D
Because I'm just a man, Uber is big company :D So i can't do anything like them
In this tutorial, we will try to create features : SIGN UP / SIGN IN for our app
今日は、Uberのようなプロフェッショナルではなく、もちろんUberのようなアプリを作成する方法を紹介します:D
ただ僕はひとりだし、Uber自体はデカい会社だ:D とてもじゃないけど彼らのすべての真似をすることはできない。そこでチュートリアルではまずはサインアップ/サインインを作ろう
起動して新規
Okay! Now just create your new project
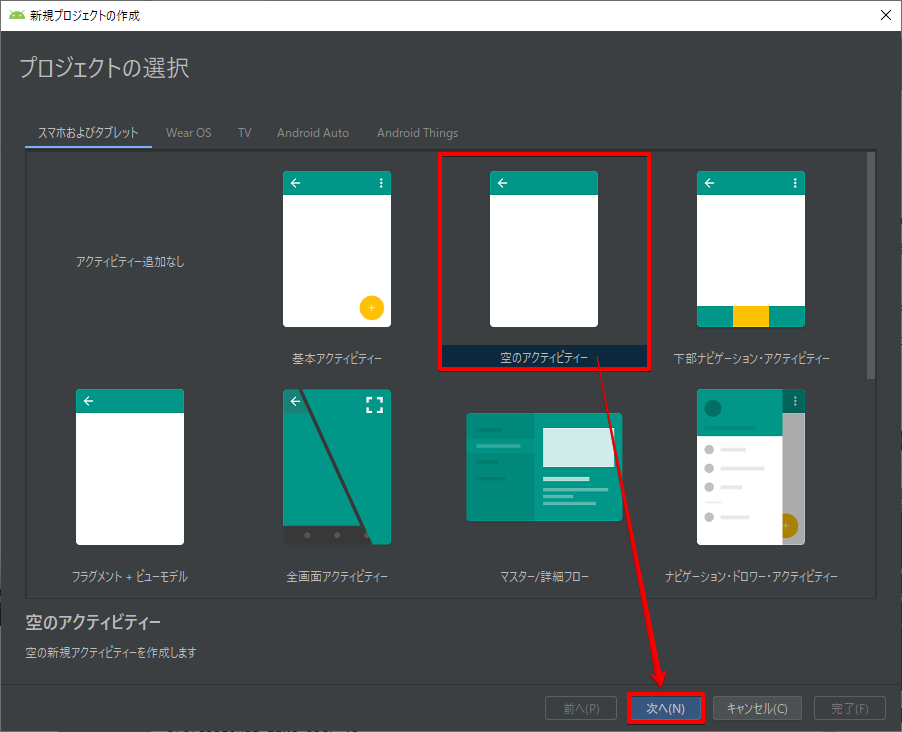
空のアクティビティーを選ぶ
コンソールアプリじゃなくて最低限のページ遷移の仕組みを持つテンプレートって感じかな?しらんけど
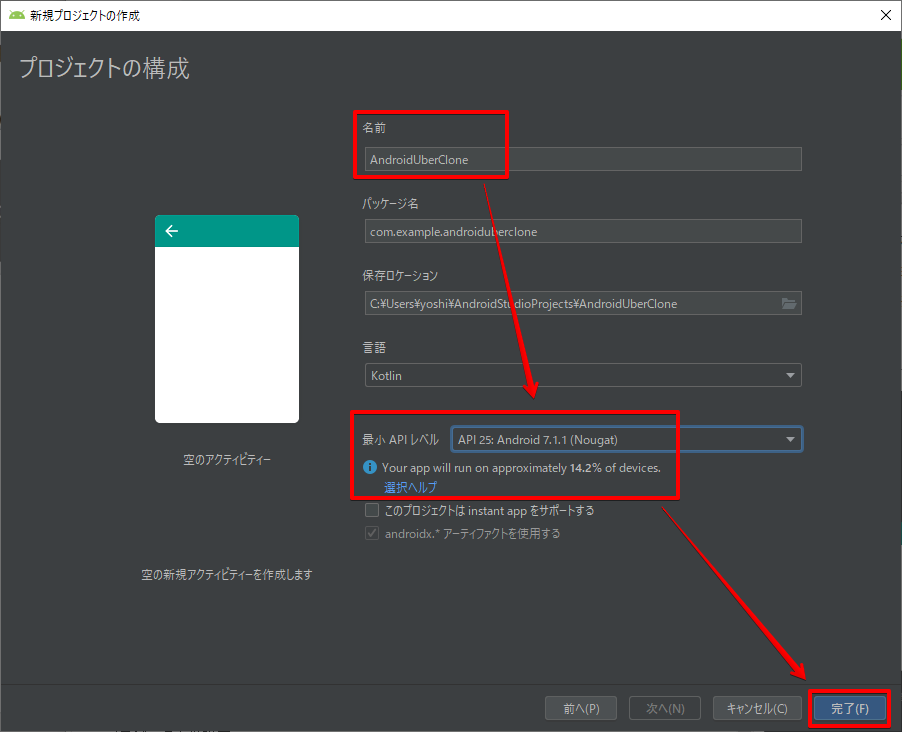
プロジェクトの構成
名前: AndroidUberClone
最小APIレベル: API 16+
最小APIレベルはいわゆるandroidのバージョンのことを示しているけど、2020年2月時点でandroidのバージョンは10ぐらいまで行っている(普段使いの僕のandroidは7.1.1[API25])から、ある程度あげちゃっていいし、なんならAPI15って指定しちゃうと16以上にしろコラ!とかコンパイル時に弾かれて初心者は原因不明になって昼寝するはめになる![]()
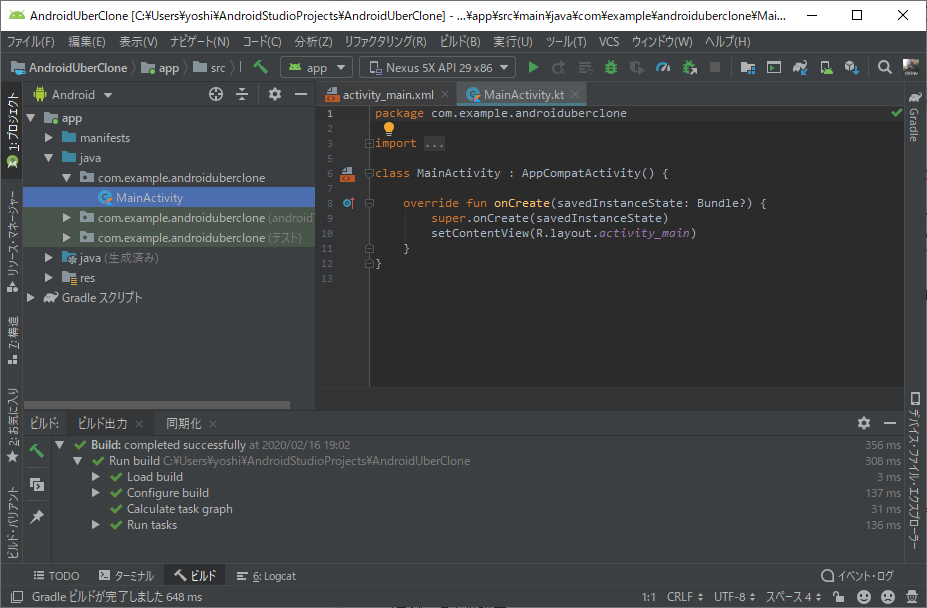
この画面になる
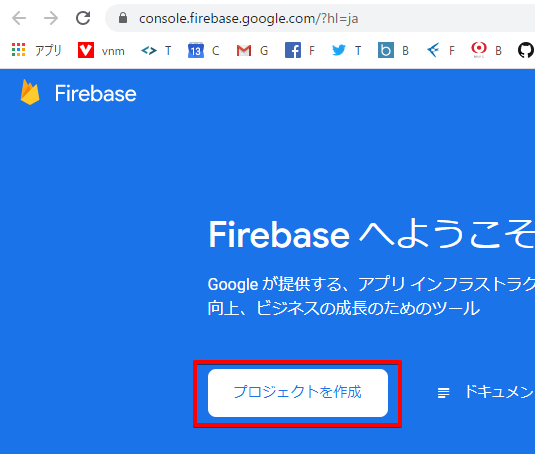
Firebaseと接続する
このあたりになってくるとサーバレス!サーバレス!みたいな言葉が出てくるんだけど、なんてことはない、AWSのコントロールパネルいじれますか?みたいな意味ですよ。
https://console.firebase.google.com/?hl=ja
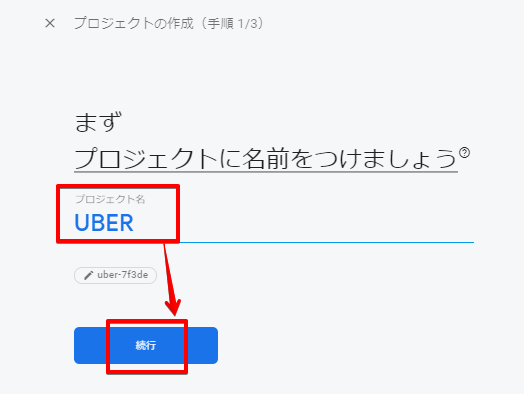
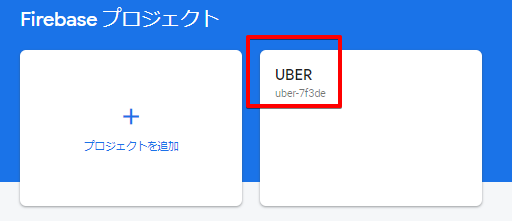
プロジェクト名: UBER
すぐ下に書かれている「uber-7f3de」みたいなのはグーグルマップをAPIで使うときも出てくるけど、グーグルのサーバー上に保存するために一意に物理名をつけた、と思えば良い。
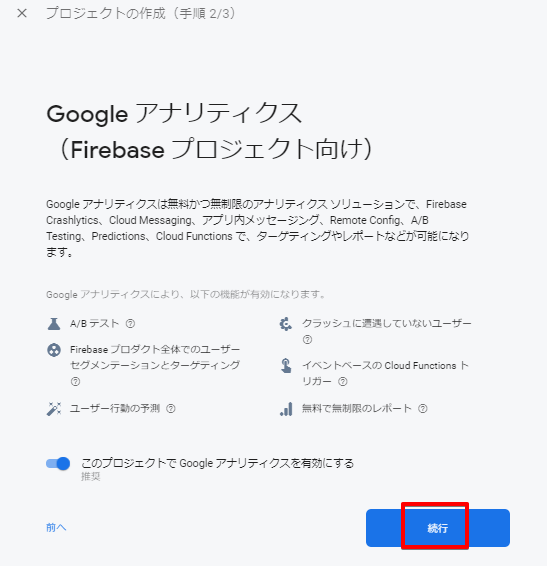
googleアナリティクス使う?
まぁ普通に使うよね。たまたまアカウントは持ってたのでそれを指定する。
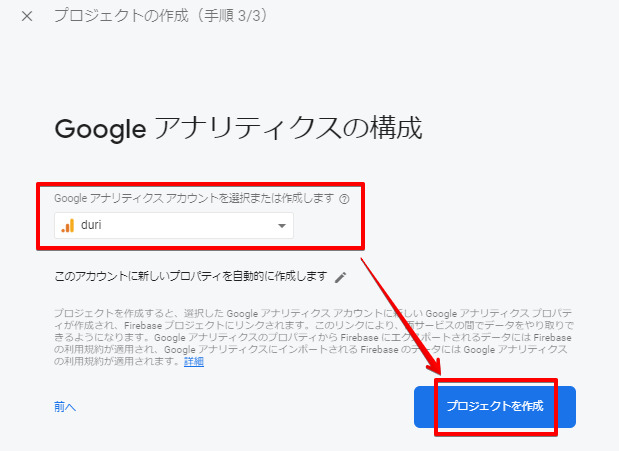
増えた
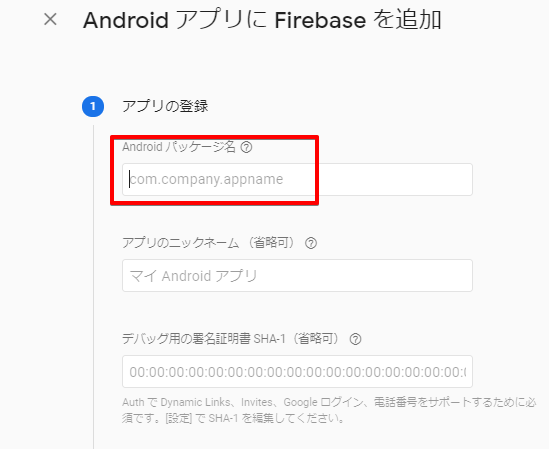
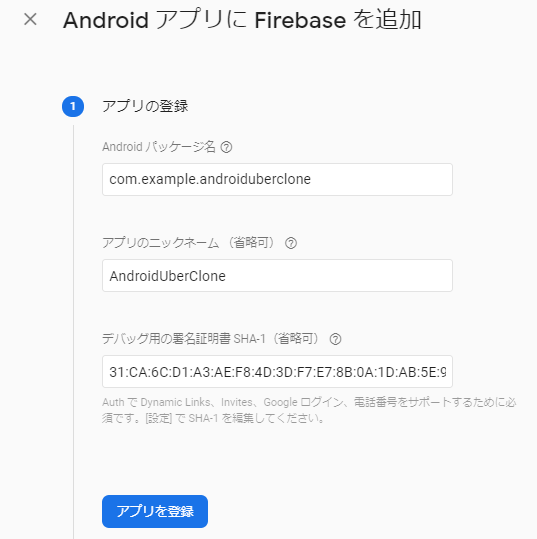
アプリケーションにFirebaseを追加するための設定
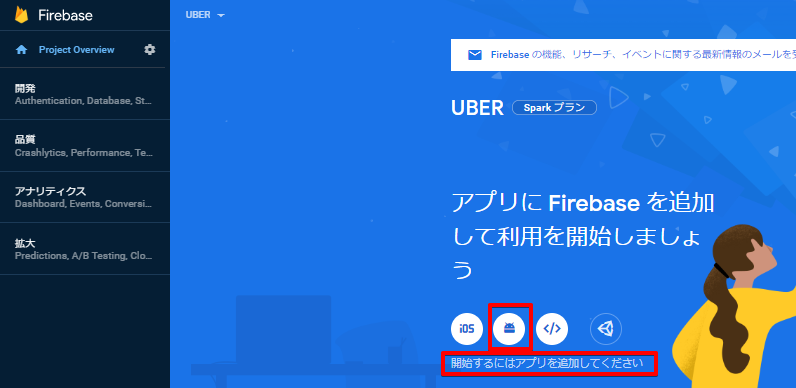
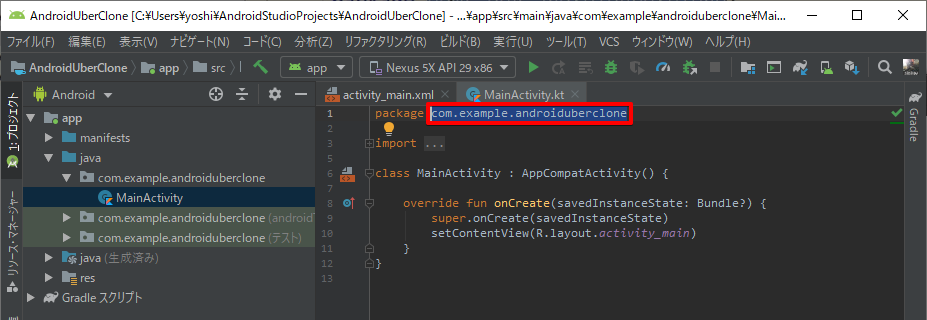
Androidパッケージ名
androidstudioで新規プロジェクトを作成したあとの最初の画面「MainActivity」という画面の最初に「com.example.androiduberclone」という文字があるのでそれをコピー
ここな↓
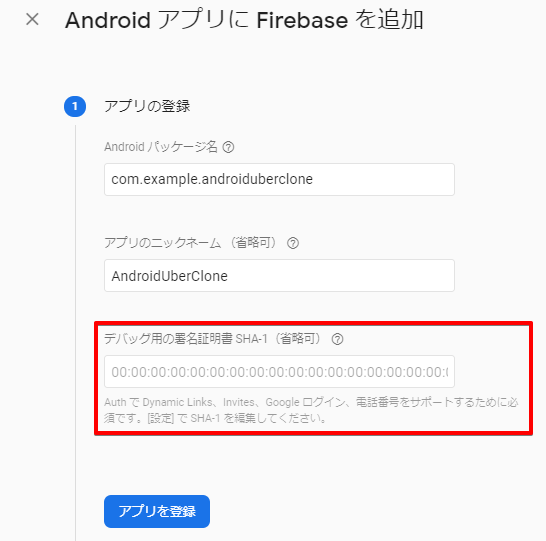
アプリのニックネーム
「AndroidUberClone」を入力(何でもいいと思う)
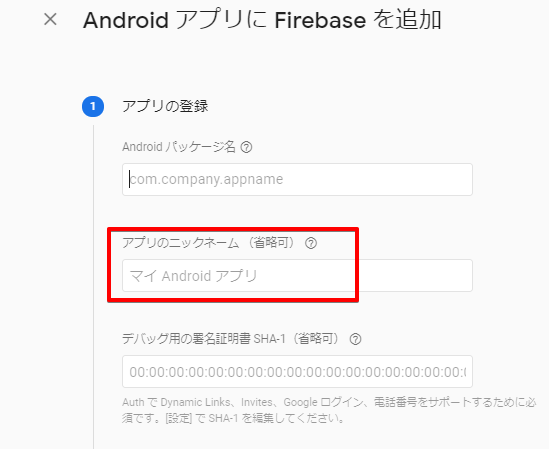
署名証明書
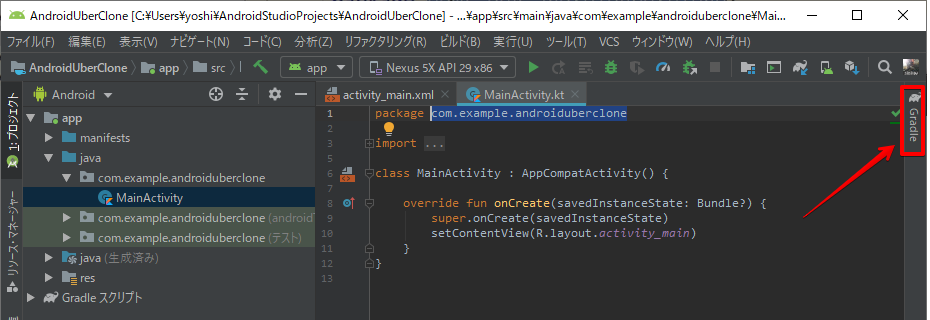
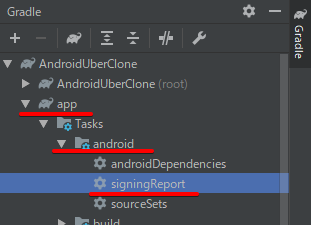
Gradle
Gradleとはビルド自動化システムなんだそうだ。githubが差分まわりをいろいろ面倒見てくれるように、おそらくはビルドして配置するってあたりの面倒を見てくれるんだろう。しらんけど
ちょっと小さいけどandroidstudioの右端にGradleというマークがあるのでクリックする。
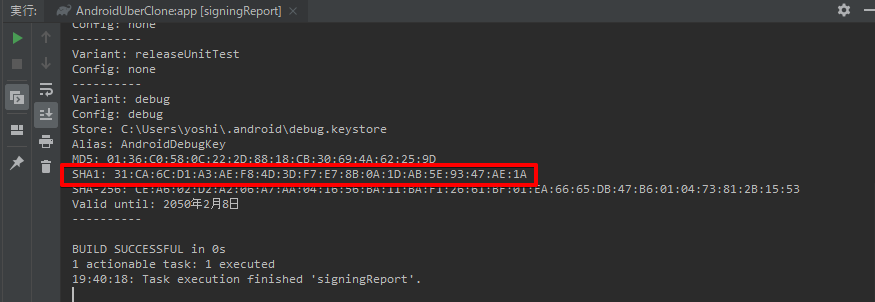
署名情報の出力
階層を下ってsigningReportをダブルクリック(signingが署名という意味らしい)
まぁ、このアプリケーションのMACアドレスみたいなもんかな
31:CA:6C:D1:A3:AE:F8:4D:3D:F7:E7:8B:0A:1D:AB:5E:93:47:AE:1A をコピー
アプリを登録ボタンを押す
設定ファイルのダウンロード
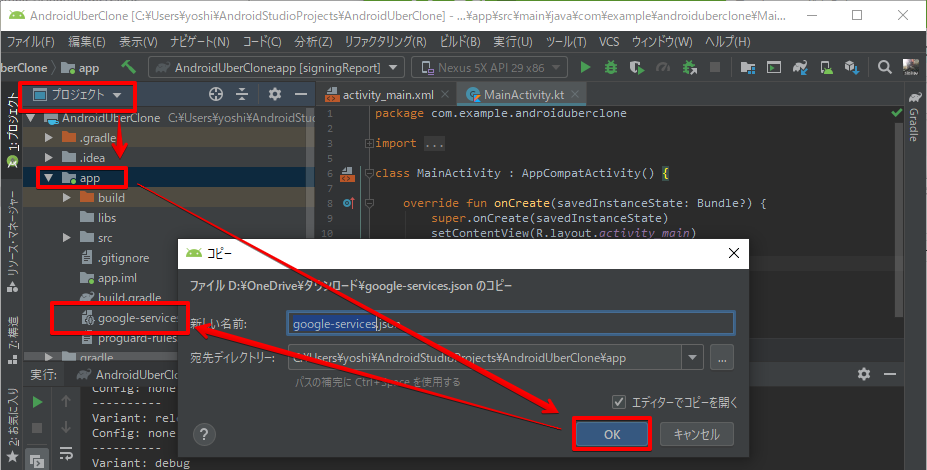
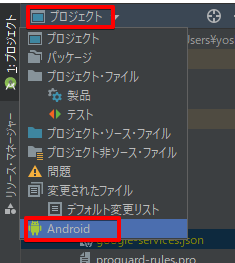
google-services.json をダウンロードのボタンを押すと、設定ファイルがダウンロードされるので、エクスプローラの「ダウンロード」フォルダ上で「Ctrl+C」でコピーしたあと
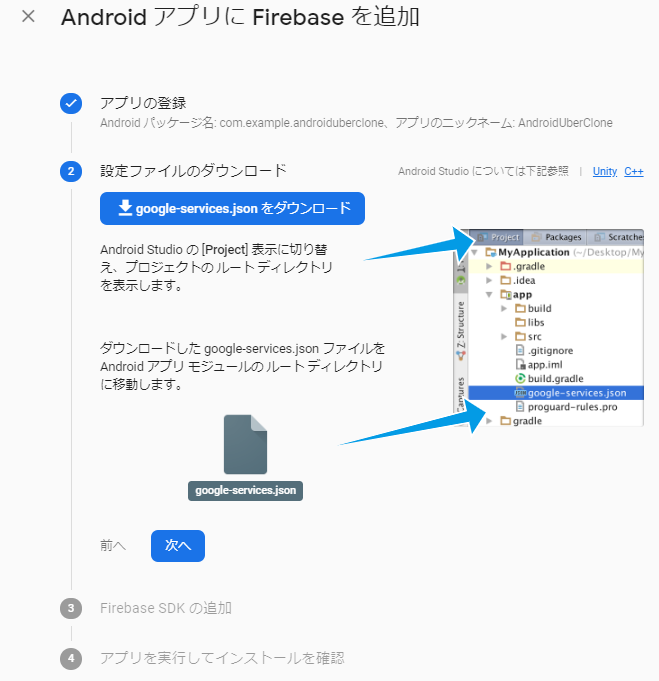
androidstudio上の「プロジェクト」配下にある「app」フォルダをクリックした状態で「Ctrl+V」すると貼り付けされる。google-services.jsonファイルが出現することも確認してください。
Firebase SDK の追加
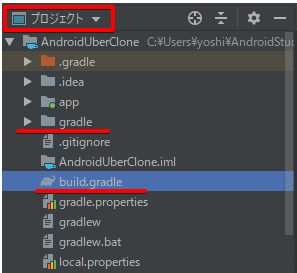
プロジェクト レベルの build.gradle(/build.gradle)を開く
1.Check that you have the following line (if not, add it)
buildscript/repositories のカッコのなかに「google()」があることを確認してください。必ず書かれているはずだけど書かれてなければ追加してください
2.Add this line
dependencies のカッコの中に「classpath 'com.google.gms:google-services:4.3.3'」をコピペしてください
3.Check that you have the following line (if not, add it)
allprojects/repositories のカッコのなかに「google()」があることを確認してください
buildscript {
  repositories {
    // Check that you have the following line (if not, add it):
    google()  // Google's Maven repository
  }
  dependencies {
    ...
    // Add this line
    classpath 'com.google.gms:google-services:4.3.3'
  }
}

allprojects {
  ...
  repositories {
    // Check that you have the following line (if not, add it):
    google()  // Google's Maven repository
    ...
  }
}
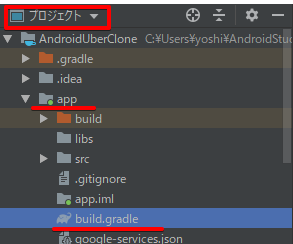
アプリレベルの build.gradle(//build.gradle)を開く
1.Add this line
2行目に「apply plugin: 'com.google.gms.google-services'」をコピペ
2.add the Firebase SDK for Google Analytics
dependencies のカッコのなかに「implementation 'com.google.firebase:firebase-analytics:17.2.2'」をコピペ
apply plugin: 'com.android.application'
// Add this line
apply plugin: 'com.google.gms.google-services'

dependencies {
  // add the Firebase SDK for Google Analytics
  implementation 'com.google.firebase:firebase-analytics:17.2.2'
  // add SDKs for any other desired Firebase products
  // https://firebase.google.com/docs/android/setup#available-libraries
}
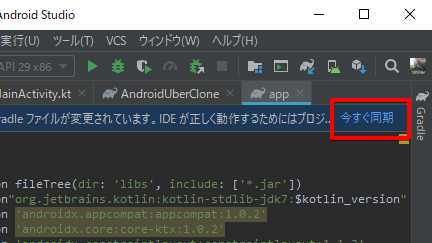
同期
設定を変更すると同期してくれ!と出てくるので同期させる
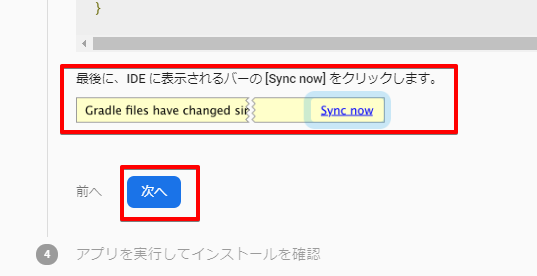
なにやら待機になるので、ここで設定は完了し、androidアプリを初めて実行する必要がある(ここで実行環境のandroidバージョンが低すぎたりすると沼にハマって昼寝するはめになるのでプロジェクト作成時にandroidバージョンを確認する)

動作確認
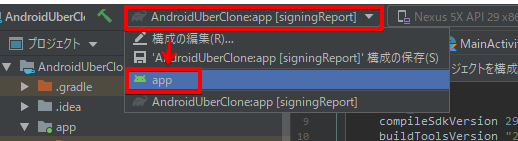
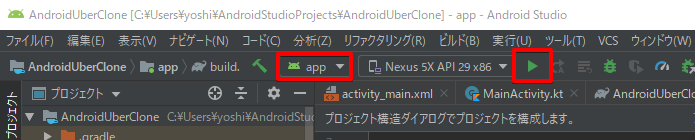
署名情報を出力するタイミングで「実行」フォーカスが「signingReport」にあたっているので「app」にセットし、実行ボタンを押す。
キターーー!
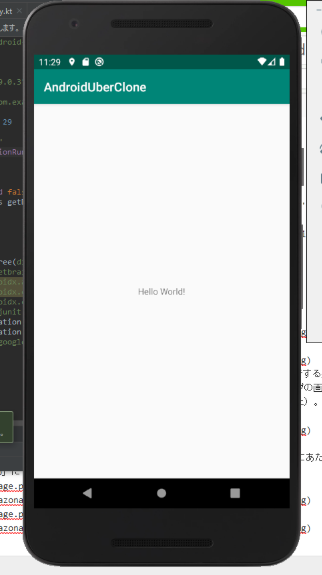

firebaseにも通信が成功したようだ

Github連携
Android StudioとGitHubを連携する方法
プロジェクト単位ごとに git 設定が必要(というより勝手にプロジェクト単位でリポジトリを作りに行ってしまう)
google-services.json を .gitignore しないと gitguardian.com(githubにAPIキーなどのセンシティブ情報をアップすると危ないよって促すgithub警察![]()
![]() )からメールがくるかもね
)からメールがくるかもね
4:46-
Maven
Now, we need add maven url to our root gradle file
Maven を使うようにガイドされるけど特に使わなくても動くことがわかったのでパス
Add libraries to use
これから2つのライブラリをインポートする
- Firebase Authentication (For use e-mail and password, phone verification if you want)
- Firebase database (For store data)
dependencies {
    ...
    // ココカラ
    // Add library
    implementation 'com.google.firebase:firebase-auth:19.2.0'
    implementation 'com.google.firebase:firebase-database:19.2.1'
    // ココマデ
}
なお、動画では「compile」というキーワードを使って入力していくように書いてあるがandroidstudioが「implementation」を使え!と言ってくる。キーワード自体がなくなったようだ。さすがに3年前だとそうなるか。
動作確認
8:30-
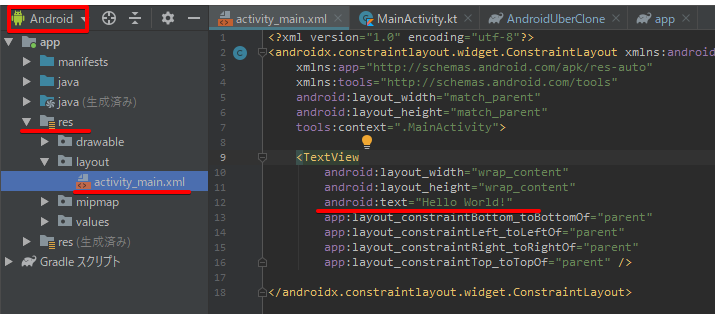
helloworldのデザイン部に移動する
Okay! Now import drawables and design your main layout
Hello Worldのデザインっぽいとこが出てきたな
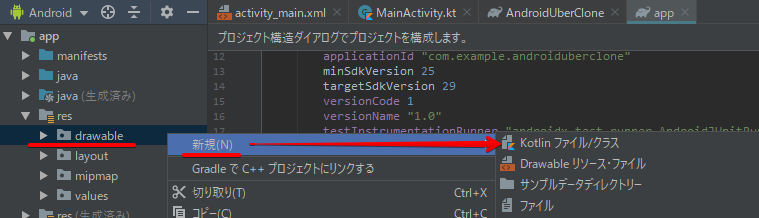
Sign Up / Sign In用の画像を取り込む
右クリメニューに「Batch Drawable Import」がねーよ!って思ってたら機能拡張なんだ...。それさぁ、早く言ってよ~
機能拡張: Android Drawable Importer
AndroidStudioのオススメ拡張機能 9選
Android Drawable Importer
アイコンや画像などをプロジェクトに追加するのが楽になるプラグイン。
プラグインをインストールすると以下の4機能が使えるようになります。
- AndroidIcons and Material Icons Drawable Import
- Batch Drawable Import 画像を選択してサイズを指定してインポートできる
- Multisource-Drawable
- Vector Drawable Importer
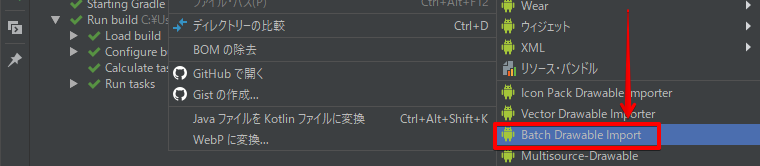
機能拡張の仕方
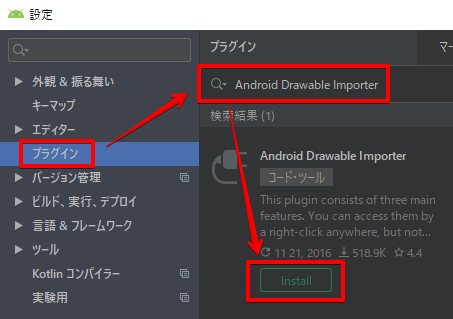
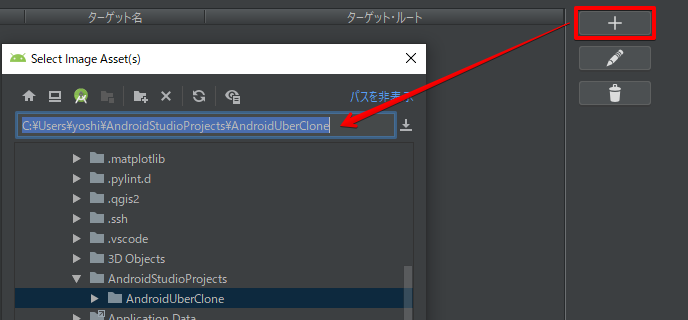
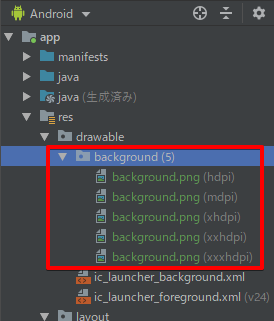
Batch Drawable Import
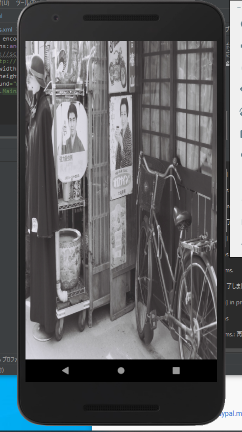
top画面用の画像を取り込むわけだが、動画ではあろうことかデスクトップから画像を取り込む(ちょっと待って?)
しょうがないので昭和っぽい写真でも用意する
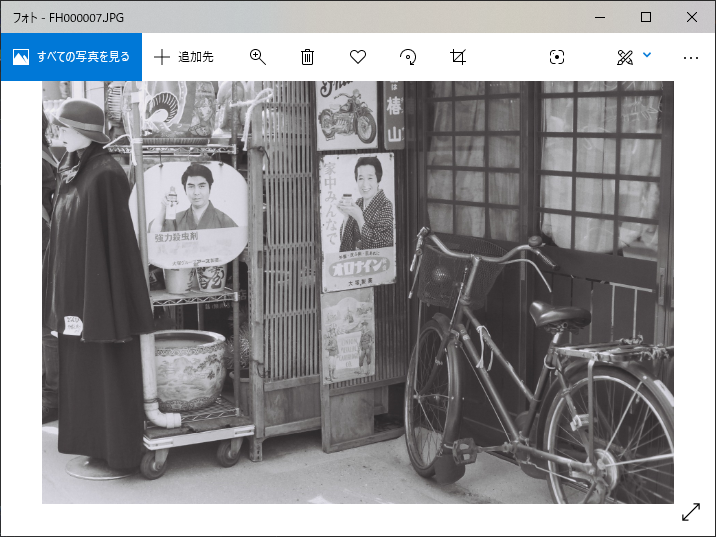
取り込まれたようだ(取り込み時のターゲット名は「background」)大小のスマホ用に自動的にサイジングされている?
デザインを開いてXML画面に移動
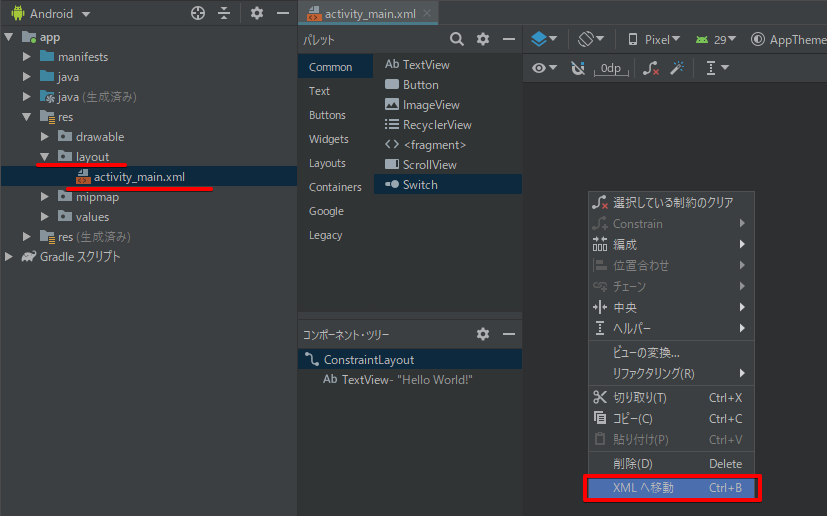
背景を指定すると即座にプレビューに背景が反映される
hello world のあたりは削除する
<?xml version="1.0" encoding="utf-8"?>
- <androidx.constraintlayout.widget.ConstraintLayout xmlns:android="http://schemas.android.com/apk/res/android"
+ <RelativeLayout xmlns:android="http://schemas.android.com/apk/res/android"
-    xmlns:app="http://schemas.android.com/apk/res-auto"
    xmlns:tools="http://schemas.android.com/tools"
    android:layout_width="match_parent"
    android:layout_height="match_parent"
+    android:background="@drawable/background"
    tools:context=".MainActivity">

-    <TextView
-        android:layout_width="wrap_content"
-        android:layout_height="wrap_content"
-        android:text="Hello World!"
-        app:layout_constraintBottom_toBottomOf="parent"
-        app:layout_constraintLeft_toLeftOf="parent"
-        app:layout_constraintRight_toRightOf="parent"
-        app:layout_constraintTop_toTopOf="parent" />

</RelativeLayout>
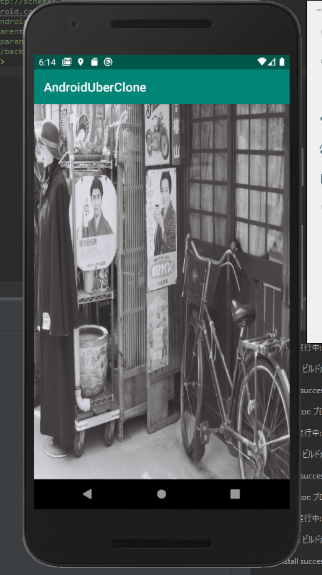
動作確認
背景は適用された。おそらく RelativeLayout の影響だろう。Relativeは相対的の意味。cssにもよく出てくる単語だ。なぜ RelativeLayout にするのかといったあたりの納得感はないけどいまはしゃあない。
今さら聞けないRelativeLayoutの話
styleのxmlをいじる
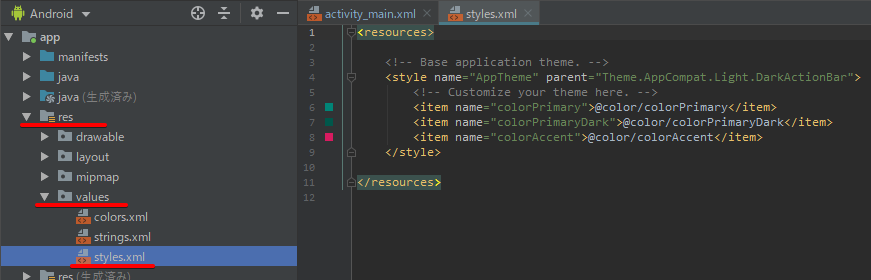
<resources>

    <!-- Base application theme. -->
-    <style name="AppTheme" parent="Theme.AppCompat.Light.DarkActionBar">
+    <style name="AppTheme" parent="Theme.AppCompat.Light.NoActionBar">
        <!-- Customize your theme here. -->
        <item name="colorPrimary">@color/colorPrimary</item>
        <item name="colorPrimaryDark">@color/colorPrimaryDark</item>
        <item name="colorAccent">@color/colorAccent</item>
+       <item name="android:windowFullscreen">true</item>
    </style>

</resources>
動作確認
一番上のバーがなくなって、フルスクリーンになったってとこかな?
9:50-
テキストを置き、カラーを追加する
Okay! Just design your main Layout
<?xml version="1.0" encoding="utf-8"?>
<RelativeLayout xmlns:android="http://schemas.android.com/apk/res/android"
    xmlns:tools="http://schemas.android.com/tools"
    android:layout_width="match_parent"
    android:layout_height="match_parent"
    android:background="@drawable/background"
    tools:context=".MainActivity">

+    <LinearLayout
+        android:orientation="vertical"
+        android:layout_marginTop="30dp"
+        android:layout_centerHorizontal="true"
+        android:gravity="center_horizontal"
+        android:layout_width="wrap_content"
+        android:layout_height="wrap_content">
+        <TextView
+            android:text="U B E R"
+            android:textSize="36sp"
+            android:textAlignment="center"
+            android:textColor="@android:color/white"
+            android:layout_width="wrap_content"
+            android:layout_height="wrap_content" />
+        <TextView
+            android:text="partner"
+            android:layout_marginTop="20dp"
+            android:textSize="16sp"
+            android:textAlignment="center"
+            android:textColor="@android:color/white"
+            android:layout_width="wrap_content"
+            android:layout_height="wrap_content" />
+    </LinearLayout>
+    <TextView
+        android:id="@+id/txt_rider_app"
+        android:layout_alignParentBottom="true"
+        android:layout_centerHorizontal="true"
+        android:layout_marginBottom="20dp"
+        android:layout_marginTop="20dp"
+        android:text="LOOKING FOR THE RIDER APP?"
+        android:textSize="12sp"
+        android:textAlignment="center"
+        android:textColor="@color/bottomText"
+        android:layout_width="wrap_content"
+        android:layout_height="wrap_content" />
+        <Button
+            android:id="@+id/btnSignIn"
+            android:textColor="@android:color/white"
+            android:text="SIGN IN"
+            android:layout_marginRight="6dp"
+            android:layout_width="0dp"
+            android:layout_height="wrap_content" />

</RelativeLayout>
<?xml version="1.0" encoding="utf-8"?>
<resources>
    <color name="colorPrimary">#008577</color>
    <color name="colorPrimaryDark">#00574B</color>
    <color name="colorAccent">#D81B60</color>

+    <color name="bottomText">#6b6b76</color>
+    <color name="rippleEffectColor">#f816a463</color>
+    <color name="btnSignIn">#1fbad6</color>
+    <color name="btnRegister">#83838c</color>
</resources>
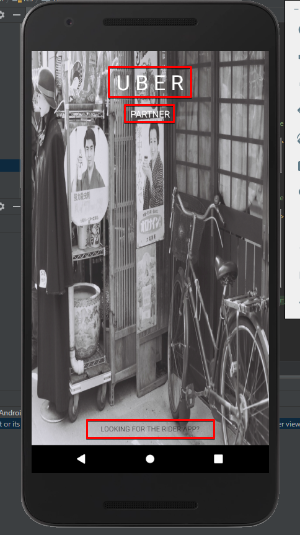
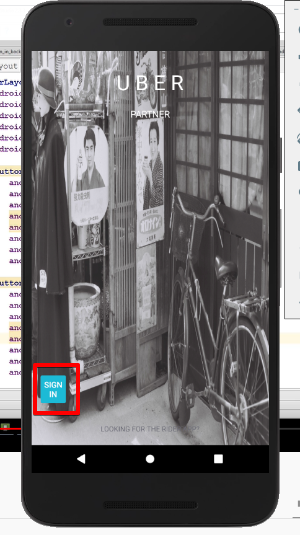
動作確認
UBERの文字が入った。なんか飛脚でも来そうな画面だなw
Rippleエフェクト
なんかRippleってテキトーな名前つけてんのか仮想通貨かよとか思ってたらRippleエフェクトってのがあるのね。bootstrapみたいなもんか。ちなみにrippleって「さざなみ、小波」って意味があるのか、と知ってから動作確認のタップ時の動作を見ると、あぁ確かに小波だわ...って感じする
Androidでタッチフィードバックと言ったらRipple
RippleDrawable(公式)
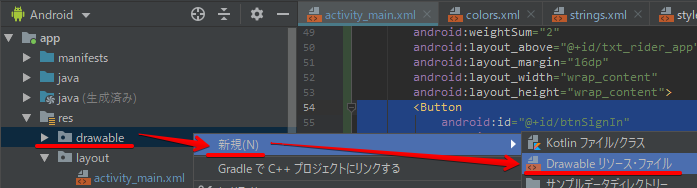
Sign In ボタン用のxmlを追加する
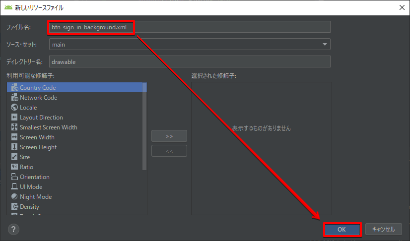
新規のDrawableリソース・ファイルを作る
ファイル名:btn_sign_in_background
<?xml version="1.0" encoding="utf-8"?>
<ripple xmlns:android="http://schemas.android.com/apk/res/android"
    android:color="@color/rippleEffectColor"
    >
    <item>
        <shape android:shape="rectangle">
            <solid android:color="@color/btnSignIn"></solid>
            <stroke android:color="@color/btnSignIn" android:width="2dp"></stroke>
            <corners android:radius="2dp"></corners>
        </shape>
    </item>
</ripple>
        ...
        <Button
            android:id="@+id/btnSignIn"
+            android:background="@drawable/btn_sign_in_background"
            android:textColor="@android:color/white"
            android:text="SIGN IN"
            android:layout_marginRight="6dp"
            android:layout_width="0dp"
+            android:layout_weight="1"
            android:layout_height="wrap_content" />
動作確認
REGISTER ボタン用のxmlを追加する
新規のDrawableリソース・ファイルを作る
ファイル名:btn_register_background
<?xml version="1.0" encoding="utf-8"?>
<ripple xmlns:android="http://schemas.android.com/apk/res/android"
    android:color="@color/rippleEffectColor"
    >
    <item>
        <shape android:shape="rectangle">
            <solid android:color="@color/btnSignIn"></solid>
            <stroke android:color="@color/btnSignIn" android:width="2dp"></stroke>
            <corners android:radius="2dp"></corners>
        </shape>
    </item>
</ripple>
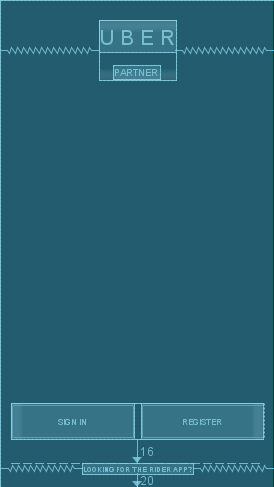
いったん整理
-
android:weightSum="2"は、子が領域を二等分するという意味。子がandroid:layout_weightのプロパティを持っていることが前提条件になってそうだ。合計すると2になってそれぞれの重みが1ということは横幅いっぱいを1:1の均等割で左右配置するといった意味か
レイアウト(5)-layout_weight属性とweightSum属性 親ウィジェットの残りのスペースを分け合って使う -
android:layout_above="@+id/txt_rider_app" とすることで、一番下のテキストの上といった指定になってそうだ
(プレビューのブループリントってやつでCSSレイアウトっぽいのが見れる)
    <LinearLayout
        android:orientation="horizontal"
        android:weightSum="2"
        android:layout_above="@+id/txt_rider_app"
        android:layout_margin="16dp"
-        android:layout_width="wrap_content"
+        android:layout_width="match_parent"
        android:layout_height="wrap_content">
        <Button
            android:id="@+id/btnSignIn"
            android:background="@drawable/btn_sign_in_background"
            android:textColor="@android:color/white"
            android:text="SIGN IN"
-            android:layout_marginRight="6dp"
+            android:layout_marginEnd="6dp"
            android:layout_width="0dp"
            android:layout_weight="1"
            android:layout_height="wrap_content"
+           style="?android:attr/buttonBarButtonStyle" />
+        <Button
+            android:id="@+id/btnRegister"
+            android:background="@drawable/btn_register_background"
+            android:textColor="@color/btnRegister"
+            android:text="REGISTER"
+            android:layout_marginStart="6dp"
+            android:layout_width="0dp"
+            android:layout_weight="1"
+            android:layout_height="wrap_content"
+            style="?android:attr/buttonBarButtonStyle" />
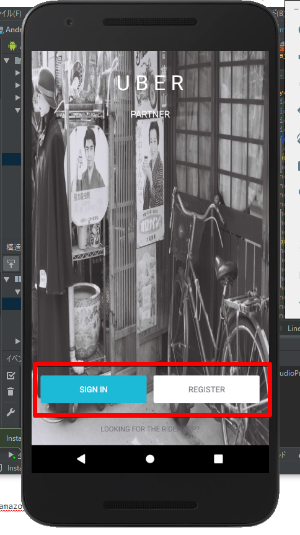
動作確認
ボタン2つの横幅を親に合わせて~ってあたりはCSSをちゃんと鍛えておかないと手間取るかもなぁ
18:00-
フォントを手に入れる
calligraphy library を使うようにガイドされるけど、androidxで使えないらしい(英語でstackoverflowに投稿してみたら30分ぐらいで解決したわ)
https://stackoverflow.com/questions/60371748/override-function-attachbasecontext-is-not-working
youtubeが古すぎてギブアップ
ちょっと駄目だな。いよいよyoutubeの内容とandroidstudioの操作感が違う。こっちに移ります。Googleの提供しているガイド付きチュートリアルらしい。
https://codelabs.developers.google.com/