はじめに
IBM DataPower Gateway V10 には以下のエディションが用意されています。
| エディション | 提供形態 |
|---|---|
| DataPower Gateway | ハードウェア・アプライアンス |
| DataPower Gateway for Docker | Docker イメージ |
| DataPower Gateway for Linux | RPM パッケージ |
| DataPower Gateway for VMware | OVA / OVF ファイル |
Docker イメージを除いた提供形態では、IBM Docs に記載の手順 に従うだけで製品機能による設定のみで簡単に WebGUI のユーザー・インターフェースにアクセスすることができました。
しかし、Docker 版に関してはコンテナー製品の特徴としてコンテナーにアクセスするためのエンドポイントを外部公開する設定が追加で必要になります。
DataPower Gateway for Docker は、コンテナー・オーケストレーションのランタイムでは Kubernetes または OpenShift Container Platform (OCP) 上で稼働することができます。
本記事では、OCP 版の WebGUI へのアクセス設定方法について記載します。
Kubernetes 版の設定方法については、こちらの記事が参考になります。
- Enabling the WebUI in DataPower in Kubernetes for APIConnect 2018
- How to expose IBM DataPower Gateway Web interface in API Connect 2018 and v10?
確認環境
以下の IBM DataPower Gateway V10 for Docker OCP 版で動作確認をしています。
|コンポーネント|バージョン|
|:--|--:|:--:|
|OpenShift Container Platform|4.6.16|
|IBM DataPower Gateway|10.0.1.2-ifix2-100-eus|
また、Gateway は 3 Pod によるクラスター構成としています。
OCP 版 WebGUI 設定方法
前提
- OCP Route によるアクセスが可能になっていること (DNS や LB が設定済みでコンテナー・プラットフォームとしての準備ができていること)
- DataPower Gateway のインストールが完了していること
設定のながれ
- DataPower の
ConfigMapで Web 管理コンソールを有効化する - OCP の
Serviceオブジェクトを作成する - OCP の
Routeオブジェクトを作成する - WebGUI への接続確認をおこなう
設定手順
1. DataPower の ConfigMap で Web 管理コンソールを有効化する
1.1. 以下の oc コマンドを実行し、DataPower の ConfigMap の存在確認をします。
oc get cm gateway-default-domain-config
NAME                            DATA   AGE
gateway-default-domain-config   2      205d
1.2. 以下の oc コマンドを実行し、ConfigMap を編集します。ミスした際にリカバリーできるように、oc get cm gateway-default-domain-config -o yaml > gateway-default-domain-config_20210830.yaml などのコマンドで ConfigMap のバックアップを取得しておくことをおすすめします。
oc edit cm gateway-default-domain-config
# Please edit the object below. Lines beginning with a '#' will be ignored,
# and an empty file will abort the edit. If an error occurs while saving this file will be
# reopened with the relevant failures.
#
apiVersion: v1
data:
  auto-startup.cfg: |
    top; configure terminal;
    %if% available "include-config"

    include-config "auto-user-cfg"
      config-url "config:///auto-user.cfg"
      auto-execute
      no interface-detection
    exit

    exec "config:///auto-user.cfg"

    %endif%
..
data.auto-startup.cfg のセクションに、以下の定義を追加して ConfigMap を保存します。
port 番号は任意の値を設定できます。明示的に記載しない場合は、デフォルトの 9090 ポートがアクティブになります。
web-mgmt
  admin-state enabled
  port 9090
exit
設定例
# Please edit the object below. Lines beginning with a '#' will be ignored,
# and an empty file will abort the edit. If an error occurs while saving this file will be
# reopened with the relevant failures.
#
apiVersion: v1
data:
  auto-startup.cfg: |
    top; configure terminal;
    %if% available "include-config"

    include-config "auto-user-cfg"
      config-url "config:///auto-user.cfg"
      auto-execute
      no interface-detection
    exit

    exec "config:///auto-user.cfg"

    %endif%

    # Web Management enabled
    web-mgmt
      admin-state enabled
      port 9090
    exit
..
1.3. DataPower の pod を再起動し、ConfigMap の設定を適用します。
oc delete pod gateway-0 gateway-1 gateway-2
# oc get pod -l app.kubernetes.io/instance=apic-gateway
NAME        READY   STATUS    RESTARTS   AGE
gateway-0   1/1     Running   0          12s
gateway-1   1/1     Running   0          5m24s
gateway-2   1/1     Running   0          7m59s
2. OCP の Service オブジェクトを作成する
以下のような Service オブジェクトの yaml を作成し、gateway pod と同じネームスペース上にリソースを適用します。
apiVersion: v1
kind: Service
metadata:
  labels:
    app: gateway-svc-web-mgmt
  name: gateway-0-svc-web-mgmt
  namespace: apic
spec:
  selector:
    statefulset.kubernetes.io/pod-name: gateway-0
  ports:
  - port: 9090
    protocol: TCP
    targetPort: 9090
  type: ClusterIP
oc create -f gateway-0-svc-web-mgmt.yaml
以上のステップを、DataPower pod 3 台分繰り返し作成、適用します。
-
metadata.nameは、Service オブジェクトの一意の名前を付けます。例えば、以下のようにします。- gateway-0 pod :
gateway-0-svc-web-mgmt - gateway-1 pod :
gateway-1-svc-web-mgmt - gateway-2 pod :
gateway-2-svc-web-mgmt
- gateway-0 pod :
-
metadata.namespaceは、DataPower pod が稼働しているネームスペースを設定します。 -
spec.selectorは、作成した Service オブジェクトに紐付く DataPower Pod 名を設定します。 -
spec.ports.portは、OCP クラスター外部に公開するポートを指定します。 -
spec.ports.targetPortは、手順1. で設定した DataPower pod がリッスンしているポートを指定します。
以下のようなコマンドを実行し、作成した Service オブジェクトの確認をします。
-l は、Service オブジェクト作成時にラベリングした名前を指定して検索範囲を絞っています。
oc get svc -l app=gateway-svc-web-mgmt
NAME                     TYPE        CLUSTER-IP     EXTERNAL-IP   PORT(S)    AGE
gateway-0-svc-web-mgmt   ClusterIP   172.30.94.29   <none>        9090/TCP   16m
gateway-1-svc-web-mgmt   ClusterIP   172.30.49.164   <none>        9090/TCP   16m
gateway-2-svc-web-mgmt   ClusterIP   172.30.233.209   <none>        9090/TCP   16m
3. OCP の Route オブジェクトを作成する
以下のような Route オブジェクトの yaml を作成し、gateway pod と同じネームスペース上にリソースを適用します。
apiVersion: route.openshift.io/v1
kind: Route
metadata:
  labels:
    app: gateway-route-web-mgmt
  name: gateway-0-web-mgmt
  namespace: apic
spec:
  host: gateway-0.apps.example.com
  port:
    targetPort: 9090
  tls:
    insecureEdgeTerminationPolicy: None
    termination: passthrough
  to:
    kind: Service
    name: gateway-0-svc-web-mgmt
oc create -f gateway-0-web-mgmt.yaml
以上のステップを、DataPower pod 3 台分繰り返し作成、適用します。
-
metadata.nameは、Route オブジェクトの一意の名前を付けます。例えば、以下のようにします。- gateway-0 pod :
gateway-0-web-mgmt - gateway-1 pod :
gateway-1-web-mgmt - gateway-2 pod :
gateway-2-web-mgmt
- gateway-0 pod :
-
metadata.namespaceは、DataPower pod が稼働しているネームスペースを設定します。 -
spec.hostは、OCP Route で名前解決可能な (本記事では *.apps.example.com のワイルドカードドメインを使用) 一意のホスト FQDN を設定します。 -
spec.port.targetPortは、手順1. で設定した DataPower pod がリッスンしているポートを指定します。 -
spec.tlsは、ここでは例のとおり指定しています。より詳しくは OCP の Secured Routes を参照ください。 -
spec.toは、kind: Service,name: 手順2.で作成した Service オブジェクト名を指定します。
以下のようなコマンドを実行し、作成した Route オブジェクトの確認をします。
-l は、Route オブジェクト作成時にラベリングした名前を指定して検索範囲を絞っています。
oc get svc -l app=gateway-route-web-mgmt
NAME                      HOST/PORT                    PATH   SERVICES                 PORT   TERMINATION          WILDCARD
gateway-0-web-mgmt        gateway-0.apps.example.com          gateway-0-svc-web-mgmt   9090   passthrough/None     None
gateway-1-web-mgmt        gateway-1.apps.example.com          gateway-1-svc-web-mgmt   9090   passthrough/None     None
gateway-2-web-mgmt        gateway-2.apps.example.com          gateway-2-svc-web-mgmt   9090   passthrough/None     None
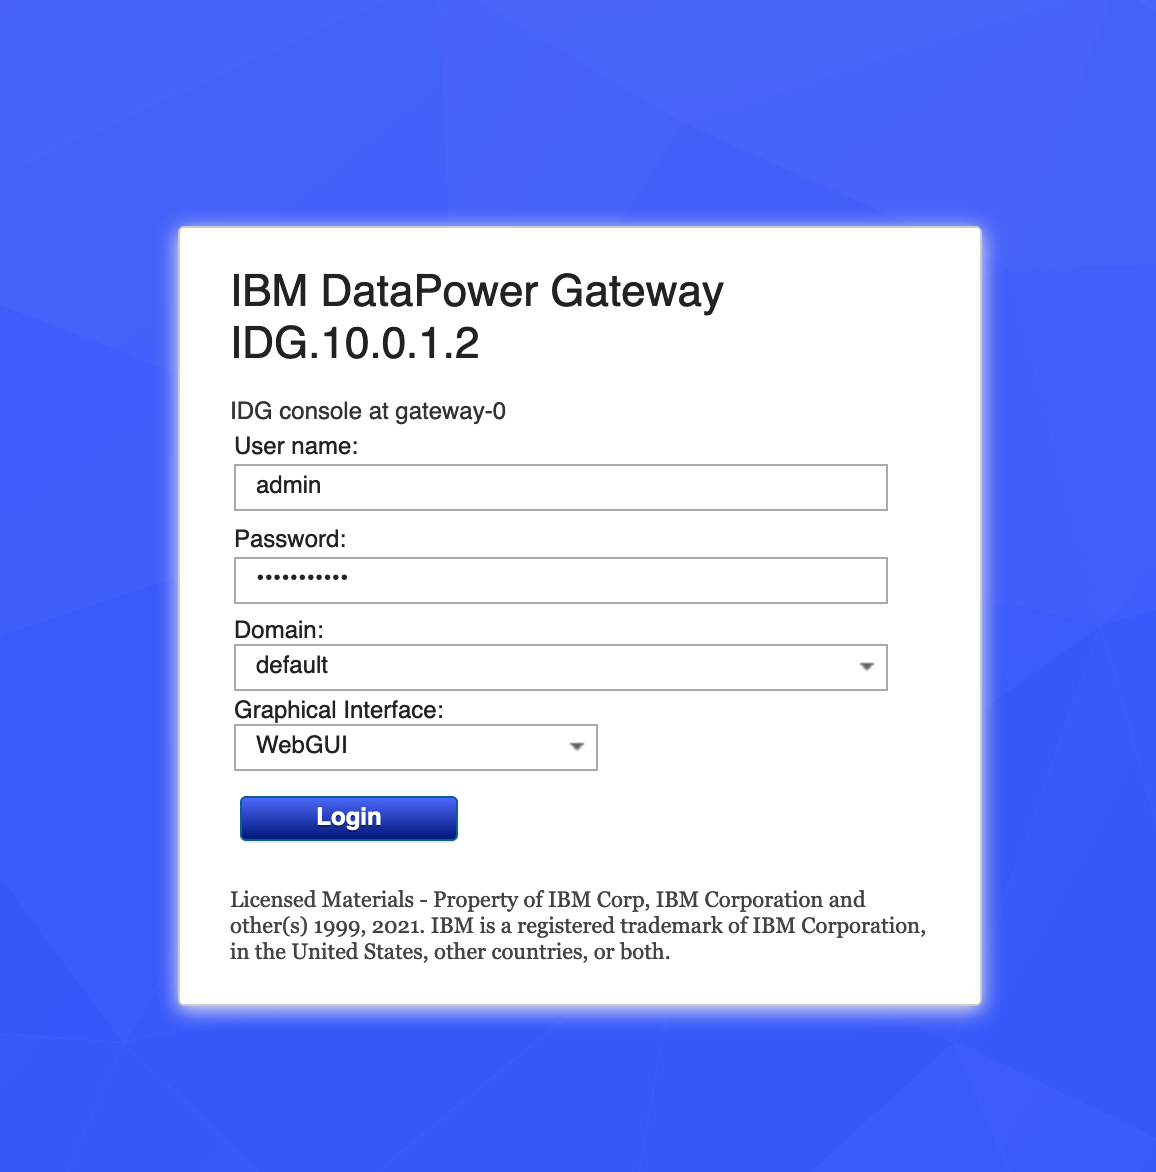
4. WebGUI への接続確認をおこなう
Web ブラウザを開き、アドレスバーに https://ホストFQDN:targetPort/login.xml を入力します。
https://gateway-0.example.com:9090/login.xml
おわりに
DataPower コンテナーの OCP 版における、WebGUI のアクセス設定手順について記載しました。
ハードウェア・アプライアンス版や VMware 版とは違い、コンテナー・プラットフォームは複数リソースの設定や作成が必要なことがわかりました。
参照
DataPower Gateways - Deliverables
DataPower Gateways - Accessing the GUI
Enabling the WebUI in DataPower in Kubernetes for APIConnect 2018
How to expose IBM DataPower Gateway Web interface in API Connect 2018 and v10?
Red Hat OpenShift - Secured Routes
