1.はじめに
2.Purge機能を使ってみよう
3.cssnano使ってみよう
4.開発環境を構築しよう
1. はじめに
前回の投稿でTailwind CSSのインスールはできたので、今回はTailwind CSSを最適化していきます。前回の投稿の続きとなります。前回作成したdist.cssですが、まだ最適化されていないので、18万行位あります。そこで、使っているTailwind CSSを最適化していきます。
2. Purge機能を使ってみよう
Tailwind CSSを最適化するために、tailwind.config.jsのpurgeの箇所にTailwind CSSを使用しているファイルの場所を書きます。今回はindex.htmlで使用しているので["./index.html"]と書きます。
module.exports = {
  purge: ["./index.html"], //←変更した
  darkMode: false, // or 'media' or 'class'
  theme: {
    extend: {},
  },
  variants: {
    extend: {},
  },
  plugins: [],
}
package.jsonには、本番環境用はPurgeして小さくしたいので、buildコマンドの箇所にNODE_ENV=productionを追記します。
{
  "name": "tailwindcss",
  "version": "1.0.0",
  "description": "",
  "main": "index.js",
  "scripts": {
    "test": "echo \"Error: no test specified\" && exit 1",
    "build": "NODE_ENV=production postcss styles.css -o dist.css" ←変更した
  },
  "keywords": [],
  "author": "",
  "license": "ISC",
  "devDependencies": {
    "autoprefixer": "^10.3.1",
    "postcss": "^8.3.6",
    "postcss-cli": "^8.3.1",
    "tailwindcss": "^2.2.7"
  }
}
設定は完了したので、もう一度buildしてみます。
$ npm run build
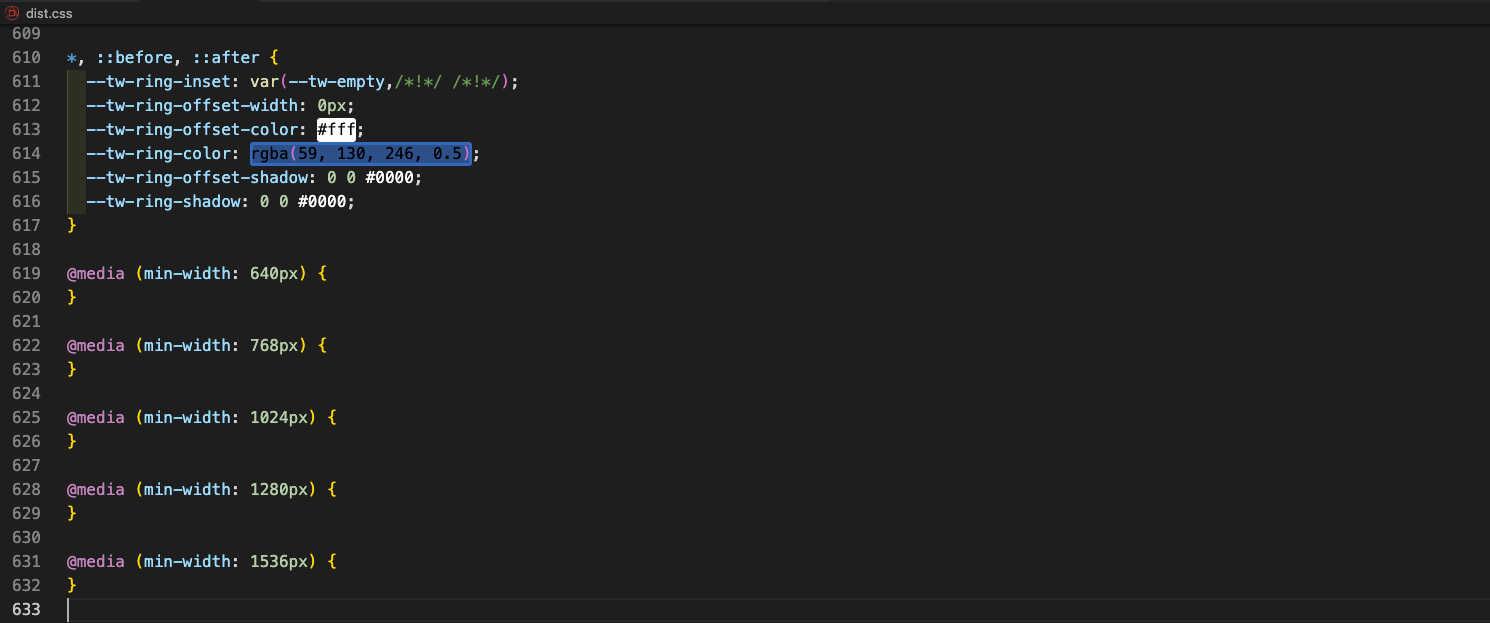
確認のためにdist.cssを確認すると、633行まで小さくできました。purgeの箇所は正規表現も使えるのでTailwind CSSを使っている場所を書くと良いです。
3. cssnanoを使ってみよう
もっと小さくできるcssnanoを使ってみましょう。まずは下記のコマンドでインスールします。
$ npm i -D cssnano
postcss.config.jsに今インストールしたcssnanoを記載します。
module.exports = {
  plugins: {
    tailwindcss: {},
    autoprefixer: {},//どのブラウザでも動くようにしてくれる
    cssnano:{}// ←追加した
  },
}
設定は完了したので、もう一度buildしてみます。
$ npm run build
確認のためにdist.cssを確認すると、圧縮されていることがわかります。
4. 開発環境を構築しよう
cssnanoとPurge機能を使うと最適化されますが、開発するときに逐一buildするのが面倒なので、開発はcssnanoとPurge機能を使わないようにコマンドを用意します。今回はdevというコマンドを用意しました。devコマンドでは、NODE_ENV=productionを抜きます。
{
{
  "name": "tailwindcss",
  "version": "1.0.0",
  "description": "",
  "main": "index.js",
  "scripts": {
    "test": "echo \"Error: no test specified\" && exit 1",
    "build": "NODE_ENV=production postcss styles.css -o dist.css",
    "dev": "postcss styles.css -o dist.css"
  },
  "keywords": [],
  "author": "",
  "license": "ISC",
  "devDependencies": {
    "autoprefixer": "^10.3.1",
    "cssnano": "^5.0.8",
    "postcss": "^8.3.6",
    "postcss-cli": "^8.3.1",
    "tailwindcss": "^2.2.7"
  }
}
次にpostcss.config.jsに環境をcontextで受け取ってcssnanoを使用するか、使用しないかを三項演算子で書きます。
module.exports = (ctx) => {
  return {
    plugins: {
      tailwindcss: {},
      autoprefixer: {}, //どのブラウザでも動くようにしてくれる
      cssnano: ctx.env === "production" ? {} : false,
    },
  };
};
最後にdevコマンドで、ビルドします。
$ npm run dev
確認のためにdist.cssを確認すると、cssnanoとPurge機能が使われていないことがわかります。
開発は、$ npm run devで、商用環境では、$ npm run buildを使うと良いです。
Tailwind CSSを小さくできるので軽くなって便利ですね!


