はじめに
かつて、Node.jsのプロジェクトでES Modules (ESM) と CommonJS (CJS) の互換性の問題に悩まされた経験はありませんか?
筆者は1年ほど前、NestJS (CJSベース) のプロジェクトで react-pdf (ESMベース) を利用しようとし、この問題に直面して断念した経験があります。
しかし、Node.jsのバージョンアップに伴い、これらのモジュールシステムの相互運用性は大きく改善されました。
本記事では、最新のLTSである Node.js v22 環境と、TypeScriptの module: "nodenext" 設定を使い、NestJSプロジェクトで react-pdf を動作させる検証を行います。
検証したコードはこちらのリポジトリで確認できます。
要点 (TL;DR)
- Node.js v22 を使用し
tsconfig.jsonのcompilerOptionsでmodule: "nodenext"を設定することで、NestJS (CJS) 環境からreact-pdf(ESM) を正常に呼び出すことができました。 - これにより、サーバーサイドで動的にPDFを生成する機能を、Reactコンポーネントの知識を活かして実装できます。
検証環境
今回の検証は、以下の環境で行いました。
$ npx envinfo --system --binaries --markdown \
  --npmPackages '{@nestjs/*,@react-pdf/*,typescript}'

## System:
 - OS: macOS 15.4.1
 - CPU: (8) arm64 Apple M2
 - Memory: 137.88 MB / 8.00 GB
 - Shell: 5.9 - /bin/zsh
## Binaries:
 - Node: 22.18.0 - ~/.volta/tools/image/node/22.18.0/bin/node
 - npm: 10.9.3 - ~/.volta/tools/image/node/22.18.0/bin/npm
## npmPackages:
 - @nestjs/cli: ^11.0.0 => 11.0.10
 - @nestjs/common: ^11.0.1 => 11.1.6
 - @nestjs/core: ^11.0.1 => 11.1.6
 - @nestjs/platform-express: ^11.0.1 => 11.1.6
 - @nestjs/schematics: ^11.0.0 => 11.0.7
 - @nestjs/testing: ^11.0.1 => 11.1.6
 - @react-pdf/renderer: ^4.3.0 => 4.3.0
 - typescript: ^5.7.3 => 5.9.2
検証手順
1. NestJSプロジェクトの作成
まず、NestJSのCLIを使って新しいプロジェクトを作成します。
package manager は npm を選択しました。
$ npm i -g @nestjs/cli
$ nest -v
11.0.10

$ nest new react-pdf-with-nest
$ cd react-pdf-with-nest
2. Node.jsのバージョンを指定
今回は最新LTSであるv22系を使用します。volta を使ってプロジェクトのNode.jsバージョンを固定します。
$ volta pin node@lts
success: pinned node@22.18.0 (with npm@10.9.3) in package.json
3. パッケージのインストール
PDF生成に必要なパッケージをインストールします。@react-pdf/renderer と、TypeScriptの型定義として @types/react を追加します。
npm i @react-pdf/renderer
npm i -D @types/react
4. tsconfig.json の設定
今回の検証の鍵となる tsconfig.json を設定します。compilerOptions の module を nodenext に設定します。( @nestjs/cli@11.0.10 だと最初から nodenext に設定されています。)これにより、TypeScriptがNode.jsのモジュール解決戦略に追従し、ESMとCJSの相互運用がスムーズになります。
加えて、jsxを扱えるように jsx も設定します。
{
  "compilerOptions": {
    "module": "nodenext", // これを設定
    "jsx": "react-jsx", // これを追加
    // 以下略
  }
}
5. PDF生成ロジックの実装
react-pdf を使ってPDFドキュメントを定義するReactコンポーネントを作成します。日本語を表示するために、今回は日頃からお世話になっている 白源 (HackGen) フォントを使用させていただきます🙏
まず、プロジェクトルートに fonts ディレクトリを作成し、HackGen35-Regular.ttf と HackGen35-Bold.ttf を配置します。
import {
  Page,
  Text,
  View,
  Document,
  StyleSheet,
  Font,
} from '@react-pdf/renderer';
import ReactPDF from '@react-pdf/renderer';
import { FC } from 'react';

// 日本語フォントの登録
Font.register({
  family: 'HackGen35',
  fonts: [
    {
      src: 'fonts/HackGen35-Regular.ttf',
      fontStyle: 'normal',
      fontWeight: 'normal',
    },
    {
      src: 'fonts/HackGen35-Bold.ttf',
      fontStyle: 'normal',
      fontWeight: 'bold',
    },
  ],
});

// スタイルの定義
export const styles = StyleSheet.create({
  page: {
    fontFamily: 'HackGen35',
    flexDirection: 'row',
    backgroundColor: '#E4E4E4',
  },
  section: {
    margin: 10,
    padding: 10,
    flexGrow: 1,
  },
  boldText: {
    fontWeight: 'bold',
  },
});

// PDFドキュメントのコンポーネント
export const PDFDocument: FC = () => (
  <Document>
    <Page size="A4" style={styles.page}>
      <View style={styles.section}>
        <Text>Section #1</Text>
        <Text>こんにちは</Text>
      </View>
      <View style={styles.section}>
        <Text>Section #2</Text>
        <Text style={styles.boldText}>太字です</Text>
      </View>
    </Page>
  </Document>
);

// ファイルとして保存する関数
export const toFile = (filePath: string) =>
  ReactPDF.renderToFile(<PDFDocument />, filePath);

// ストリームとして取得する関数
export const toStream = () => ReactPDF.renderToStream(<PDFDocument />);
6. コントローラーの実装
作成したPDF生成ロジックを呼び出すAPIエンドポイントを PdfController に実装します。
PDFをファイルとして一時保存してからレスポンスする /file と、ストリームで直接レスポンスする /stream の2つのエンドポイントを用意します。
import { Controller, Get, Res } from '@nestjs/common';
import type { Response } from 'express';
import * as path from 'node:path';
import { toFile, toStream } from './PDFDocument';

@Controller('pdf')
export class PdfController {
  @Get('file')
  async makeFile(@Res() res: Response) {
    const filePath = path.join(__dirname, 'sample.pdf');
    await toFile(filePath);
    res.sendFile(filePath);
  }

  @Get('stream')
  async generatePdf(@Res() res: Response) {
    const stream = await toStream();
    stream
      .pipe(res)
      .on('error', (err) => console.error('Error!', err))
      .on('close', () => console.info('Finished!'));
  }
}
AppModule に PdfController を登録するのを忘れないようにしましょう。
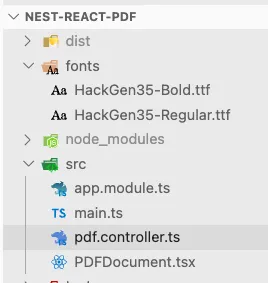
7. フォルダ構成
ここまでの手順で、src ディレクトリの構成は以下のようになります。
動作確認
アプリケーションを起動し、APIにアクセスしてみましょう。
npm run start:dev
以下のURLにブラウザでアクセスすると、どちらも同じ内容のPDFが表示されるはずです。

以前はアプリケーションの起動すらできなかったので、大きな進歩です!
おわりに
多くのコントリビュータの方々のご尽力でモジュールシステムの相互運用性が改善されたのだと思います。いつもその恩恵を受けてます。ありがとうございます🫶
なぜ動くようになったのか についても今度調べてみようと思います👍
参考
- Documentation | NestJS - A progressive Node.js framework
- TSConfig Reference - Docs on every TSConfig option
- Node.js 22の--experimental-require-moduleで、NestJSからESM Onlyライブラリを使ってみる
- Next.js (Pages Router) で react-pdf を動かしてみた #React - Qiita
追記
なぜ動くようになったのか?
import statements
An
importstatement can reference an ES module or a CommonJS module.importstatements are permitted only in ES modules, but dynamic import() expressions are supported in CommonJS for loading ES modules.(途中略)
require
The CommonJS module
requirecurrently only supports loading synchronous ES modules (that is, ES modules that do not use top-levelawait).Modules: ECMAScript modules | Node.js v22.18.0 Documentation より引用
Node.jsのドキュメントによると、ECMAScriptのモジュール仕様は以下のようになっていると記載されています。
-
import文(ESMでのみ記述できる)はESMもCJSもどちらも参照することができる - CJSの
requireは top-level await を使用していないESMを読み込むことができる
The node16, node18, node20, and nodenext modes integrate with Node’s native ECMAScript Module support.
https://www.typescriptlang.org/tsconfig/#module より引用
tsconfigで nodenext を設定したことにより、ECMAScriptの仕様に従ってモジュールが解決されるようになります。
そのため、CJSで動いているNestJSからでも、ESMパッケージである @react-pdf/renderer を読み込むことができたということだと思います。
トランスパイルされたjsコードを見ると、 require(ESM) を行っています👍
const renderer_1 = require("@react-pdf/renderer");
Storybook の導入
$ npm create storybook@latest
✔ New to Storybook? › No: Skip onboarding & don't ask again
✔ What configuration should we install? › Recommended: Component dev, docs, test
✔ Do you want to manually choose a Storybook project type to install? … yes
✔ Please choose a project type from the following list: › react
✔ We were not able to detect the right builder for your project. Please select one: › Vite
こちらのURLでstorybook導入のコミットを参照できます。
Jest設定
AIいわく、Jestもv28以降はESM対応されているらしいのですが、TypeScript+Jest+外部ESMパッケージの組み合わせはトラブルも多いらしく......
動かせるように設定するのは難しそうでした。時間の都合で諦めましたが、Vitestをテストランナーとして使用するように変更するか、自動テストではない別手法で品質担保することを考えても良いかもしれません。