json-server 便利ですよね。
よく知らないですがほぼexpressらしく、柔軟に色々設定もできるとか。
だからやり方はたくさんあるんでしょうけど、全く設定せずにダミーデータ入りのサーバを建てられたらそれはそれで便利じゃないですか。
json-server の READMEにある方法 に倣うのが一番シンプルだと思います。
準備
yarn init -y
yarn add faker json-server
寄り道ですが、ここで db.json を作成 すればサーバを立ち上げられます。
{
  "posts": [
    { "id": 1, "title": "json-server", "author": "typicode" }
  ],
  "comments": [
    { "id": 1, "body": "some comment", "postId": 1 }
  ],
  "profile": { "name": "typicode" }
}
yarn json-server db.json
この時点で http://localhost:3000/ にアクセスすればいい感じに案内してくれます。
でも違いますよね。本当は faker 使いたいんですよね。
json-server に js ファイルを指定する
js ファイルを json-server に読ませれば良いです。
一応繰り返しときますが、基本的には 公式 README のやり方 に倣ってます。
以下ちょっと長くなっちゃいましたけど、 js オブジェクトを返す関数をエクスポートしてるだけです。
あと、 faker の API は このリンク先参照。
const faker = require('faker');

// レコード数を決めておく
const NUM_OF_USERS = 10;
const NUM_OF_POSTS = 50;

module.exports = () => {
  const data = { users: [], posts: [] };

  // Create users
  for (let i = 0; i < NUM_OF_USERS; i++) {
    data.users.push({
      id: i,
      name: faker.name.findName()
    });
  }

  // Create posts
  for (let i = 0; i < NUM_OF_POSTS; i++) {
    data.posts.push({
      id: i,
      text: faker.lorem.text(),
      // userIdの書き方で指定すればuserと関連づけてくれる
      // 今回はユーザIDの範囲内 (0 .. (numOfUsers - 1)) でランダム
      userId: Math.floor(Math.random() * Math.floor(NUM_OF_USERS))
    });
  }

  return data;
};
あとは実行してやるだけ!
yarn json-server fakedb.js
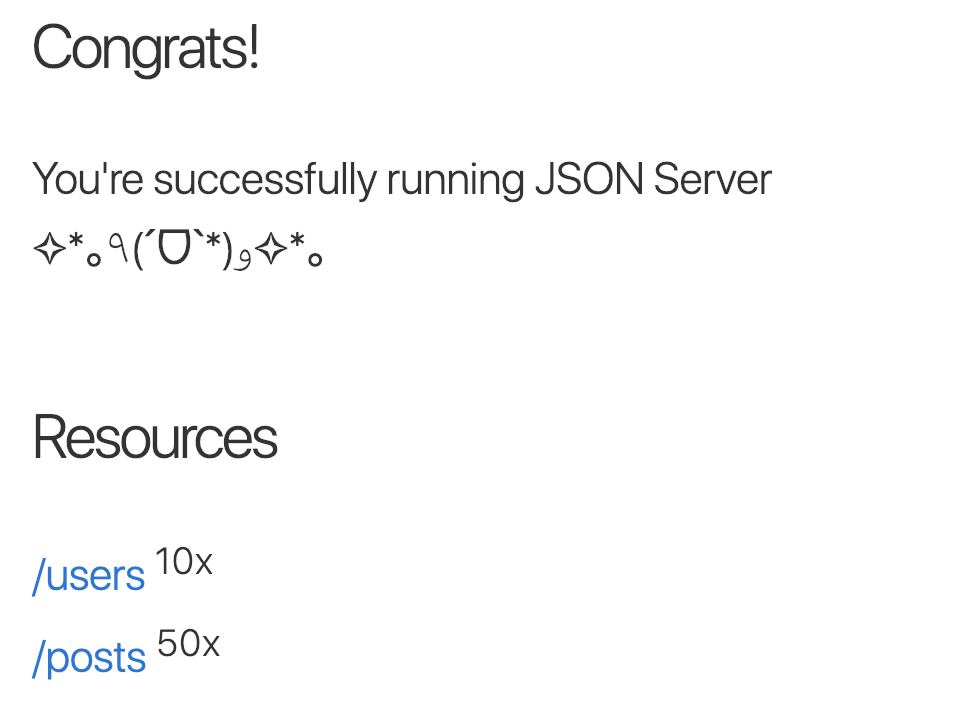
たくさんできました!(控えめ)
関連付けもできてます。
http://localhost:3000/users/2/posts
[
  {
    "id": 20,
    "text": "Autem aperiam sed.",
    "userId": 2
  },
  {
    "id": 22,
    "text": "voluptatum",
    "userId": 2
  },
  {
    "id": 23,
    "text": "placeat quam temporibus",
    "userId": 2
  },
  {
    "id": 37,
    "text": "Ratione veritatis commodi et.\nSit voluptas quo harum minima atque dignissimos.\nCum voluptatum consequatur unde officia cupiditate.\nSoluta nulla expedita harum blanditiis.\nQuibusdam alias eveniet deserunt eum assumenda qui commodi dolor.",
    "userId": 2
  },
  {
    "id": 43,
    "text": "Non architecto ut.",
    "userId": 2
  }
]
snapshotをとる
でも、json を DB にできた方が便利なこともありますよね。
大丈夫です! サーバを立ち上げた時のメッセージを見てください!
Type s + enter at any time to create a snapshot of the database
そういうことです。
s[enter押下]
# => Saved snapshot to db-1547814382537.json
現在のDBの内容が json ファイルとして保存されました。
今度はそのファイルを指定して json-server を起動できます。
わかりやすいファイル名に変更しても良いですが、今回はそのままコピー&ペーストを活用して
yarn json-server db-1547814382537.json
これで POST も PATCH もこのファイルに反映されるようになりました。
ファイルを直接編集することもできます。